The network type could still be easily changed under Windows 7. However, starting with Windows 8, this process became more and more complicated. In Windows 10, there is no longer an easy way to change the network type. Instead, you have to click your way through various settings or even change something in the registry. We'll show you how to do it.
What is the network type?
What is the network type actually? There are two different types : a public network and a private network. The difference is simple: If it is a private network , your computer is displayed in this network and data can be exchanged. This type should be used for the home network or in a company network. Data exchange refers to the fact that files can be easily moved back and forth between different computers in a home network.
A public network is any other network, for example the WLAN in the train. Your device is not shown as "on the network" here. In addition to access to the Internet, there is no data exchange in a public network for security reasons.
Change network type in Windows 10 via the settings
Note: If the following instructions do not work for you, for example because some of the options mentioned are missing, you can try our second instruction to change the network type in the registry..
You can usually change the network type via the settings. To do this, call them up and open the " Network and Internet " area. In the " Status " tab you can click on " Change connection properties ".
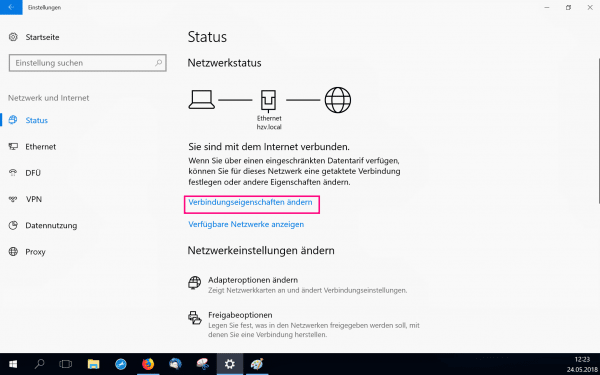
Here you only have to switch the slider for " This PC should be found ". If this is set to " On ", the network is viewed as a private network. If the control is set to " Off ", the network is considered public.
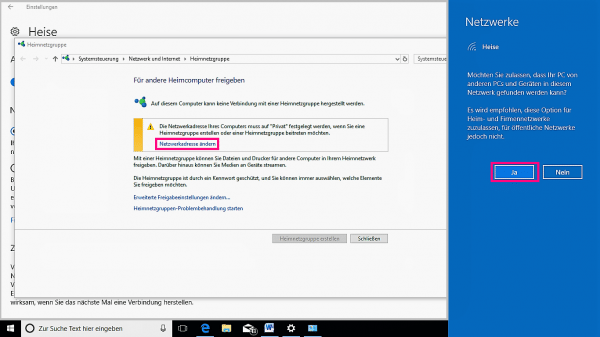
If this option is not available to you, you can also try to change the network type via the settings of the homegroup . Go back to the " Status " page in the network settings. Then click on " Homegroup ". If you select the option " Change network address ", a pop-up will appear. Here you have to click " Yes "click to select the network type " Private "setting. Click" No "your network type is called" Public specified "..
Change network type in Windows 10 via the registry
Another way to change the network type is through the registry. You can use this especially if the first method does not work because some options are not displayed. Follow our step-by-step instructions or take a look at the brief instructions .
1st step:
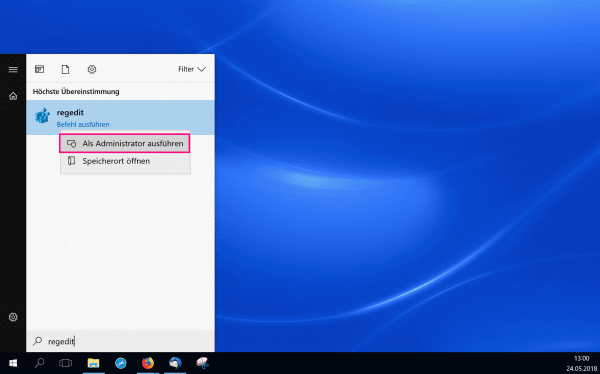 Enter " regedit " in the Windows start menu . Right-click on the appropriate tile. Then click on "Run as administrator ".
 2nd step:
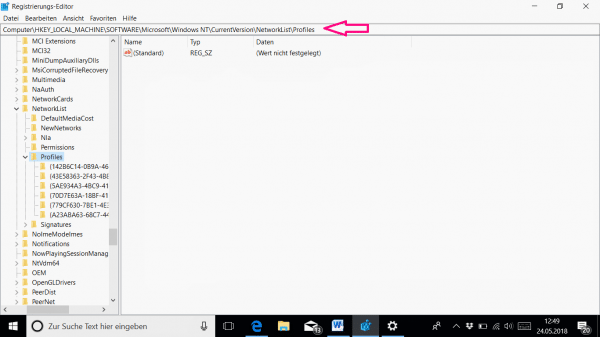 Enter the path below in the line: HKEY_LOCAL_MACHINE \ SOFTWARE \ Microsoft \ Windows NT \ CurrentVersion \ Networklist \ Profiles
 3rd step:
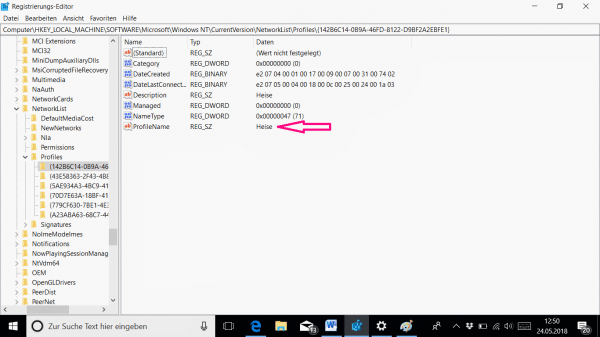 Now you have to choose the right profile on the left. To do this, you have to click on each profile once and look at the name under " ProfileName " below . In this way you can select the correct network profile.
 4th step:
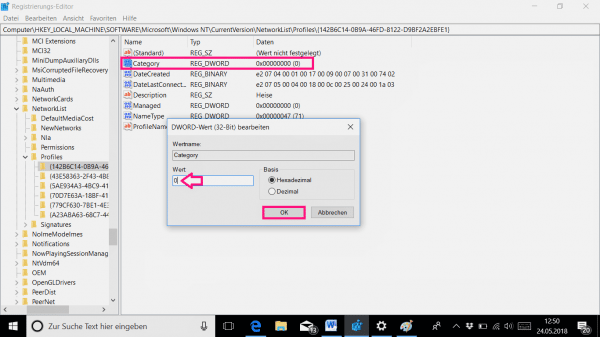 If you are in the correct profile, double click on " Category ". Then change the value in the pop-up. The value 0 stands for a public network. If you change the value to 1 , you convert the network type to a private network. Change the value as you wish and then click on " OK ". Now your network type has been successfully changed.
 Brief instructions: Change the network type in Windows 10 via the registry
- Open the start menu and then type in " regedit ".
- Right-click the regedit tile and select Run as administrator .
- Enter the path
HKEY_LOCAL_MACHINE\SOFTWARE\Microsoft\Windows NT\CurrentVersion\Networklist\Profiles . - Then select your profile . If there are multiple profiles, you will need to go through them one by one.
Tip: At the bottom of every profile there is the " ProfileName " category . This tells you which network it is. - Now double click on " Category ".
- You can now change the value in the new window . If this is set to 0, it means that this is a public network. If the value is set to 1 , the network is considered a private network or a home network. Adjust the value accordingly and click " OK ". Now you have successfully changed your network type.