Kodi has been considered the ultimate in playback software for fans of well-kept media collections for years. No wonder: Not only is the open source tool available almost everywhere from Windows PCs to Android smartphones and Raspberry Pi, it also offers unlimited expansion options thanks to countless plug-ins. Kodi can do a lot ex works, such as setting up a film and series database. We show you how it works.
Kodi: Installation and Basic Setup
The first steps in Kodi are done quickly, but a little fine-tuning of the surface and the settings is still necessary. We will demonstrate the setup based on Kodi for macOS. The instructions can in fact be transferred one-to-one to all other versions of Kodi, e.g. Kodi for Windows, Linux or Android.
1st step:
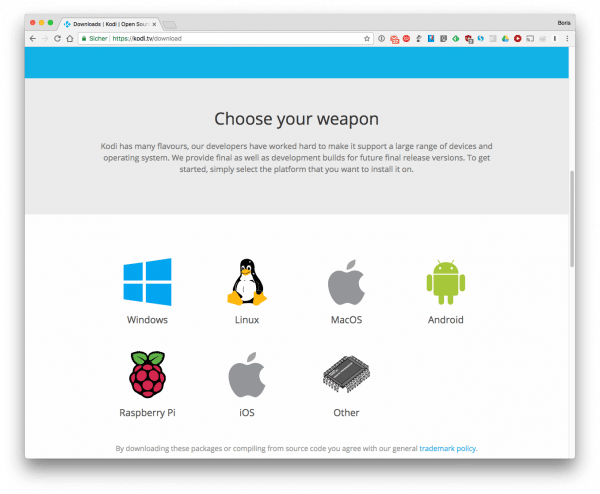 You can find the latest version of the Mediacenter under the link https://kodi.tv/download . Download, install, and run the appropriate version for your operating system .
 2nd step:
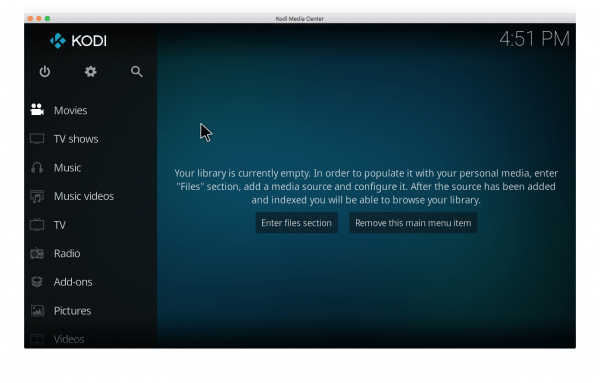 After the first start, Kodi appears in English and with the standard user interface. You can either use the mouse or the keyboard to navigate through the menus . A right click or the [ESC] key brings you back one menu level up.
 3rd step:
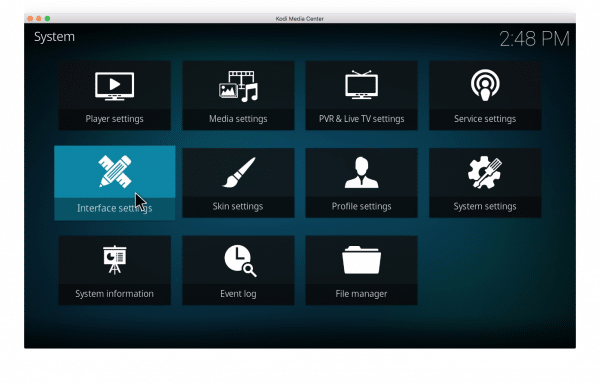 First, open Kodi's settings . To do this, click on the gear wheel above and switch to the “ Interface settings ” area in the next menu .
 4th step:
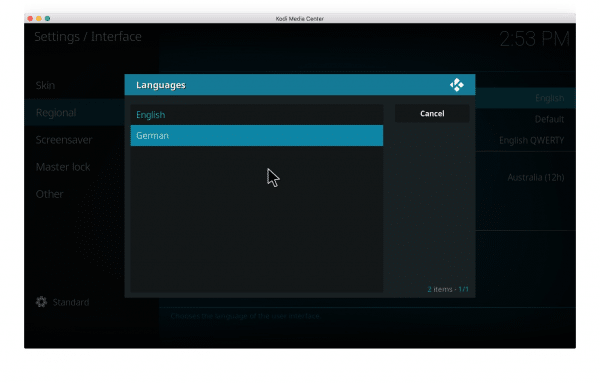 Navigate to " Regional " in the left menu area . Then switch Kodi to “ German ” via “ Language ” . Do the same under " Keyboard layouts " and, if necessary, under " Standard format for the region ". Now you can use Kodi in German and with a German keyboard layout. Of course, you can also configure the media center in another language of your choice.
 5th step:
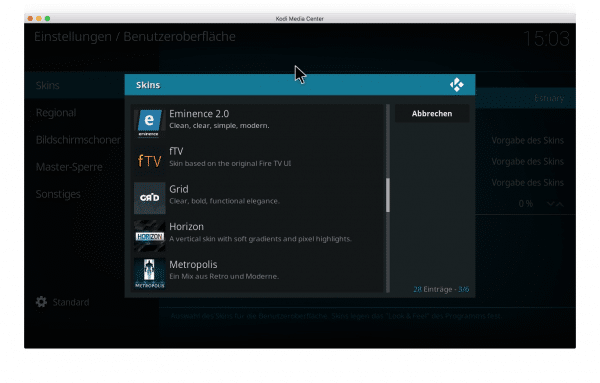 In addition to the language, you can of course customize countless other aspects of Kodi. In order not to go beyond the scope, let's concentrate on the appearance of the program. To do this, switch to the “ Skins ” area on the left . Here you can download countless optics for Kodi by clicking on the menu item of the same name . You can find this by clicking on " More ... ". Just try out a few Kodi skins and see which one suits you. You can then make further fine optical adjustments in the skins settings .
 In this post, we are going to tell you how to add add-ons to Kodi..
Add media sources for Kodi
The basic settings of Kodi are done - now all you have to do is tell the media center where your media files are. Kodi creates its own databases for films, music and photos, which you can access from the main menu. For example, if you've ripped your DVD movie collection onto your hard drive, all you have to do is guide Kodi to the appropriate folder. We'll show you how to integrate a folder with series in Kodi. The procedure for music or films is basically the same.
1st step:
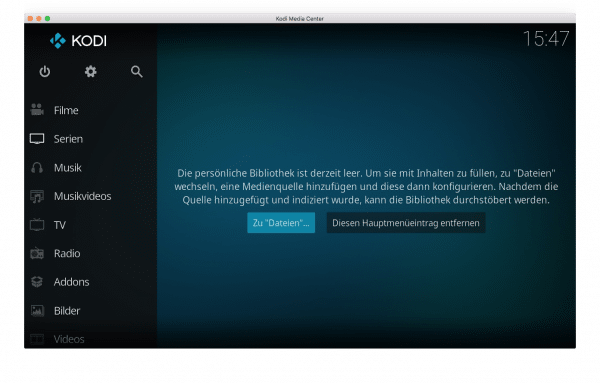 First navigate on the Kodi homepage to the area where you want to add media - in the example " Series ". Since the library is currently empty, click on " To files ... ".
 2nd step:
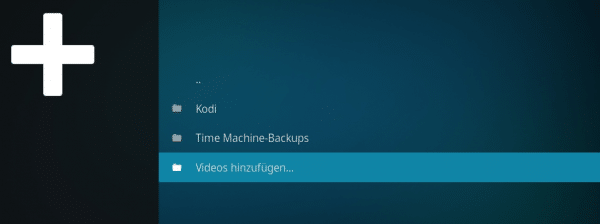 In the next step you can navigate through the folders you have set up. Since there is not much to see here with a fresh installation, click on " Add videos " and then on " Browse ".
 3rd step:
 In this menu, Kodi shows the folders on your hard drive and - if available - on your network. Now navigate to the folder with the media files and open it. Click on " Ok " to add the current folder to the Kodi library. Kodi automatically takes over all sub-folders and allows navigation. It is advisable to create a separate folder for each category - i.e. films, series, music, etc. - in order to keep an overview in Kodi. You can of course also add different folders (e.g. on different hard drives) to the same library.
 4th step:
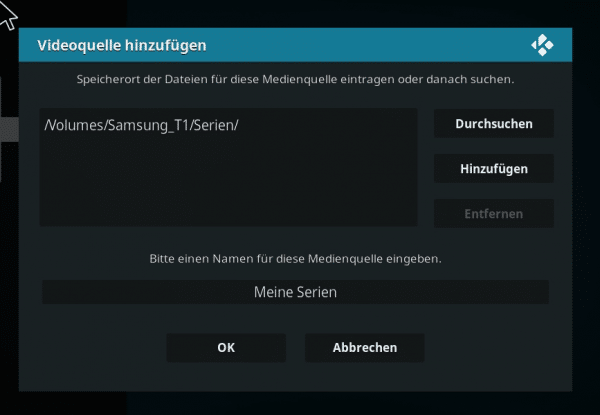 In the next step, assign a name under which the media source should appear in Kodi. By default, Kodi just uses the folder name to do this . If you don't want that, you can change the name to suit your needs.
 5th step:
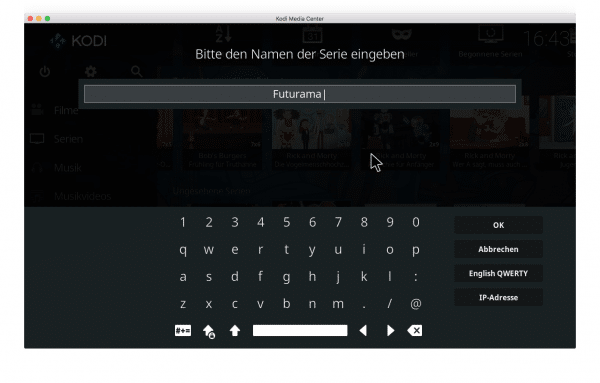
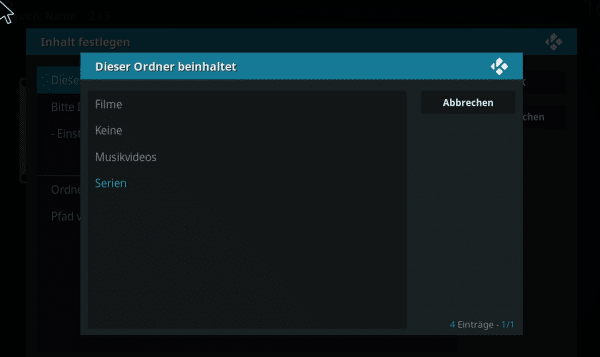 In order to prepare the Kodi library elegantly, you can tell the media center in the next step which contents are in the folder. Kodi then uses the so-called scraper (more on this in the next section) to create a media database . If necessary , change the default setting “None” to the desired content for “ This folder contains ” (in the example “Series”).
 6th step:
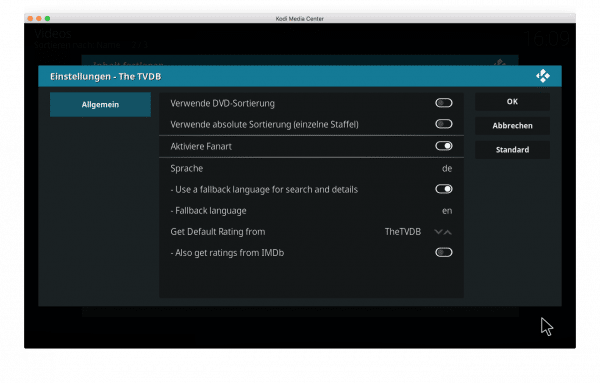 If you have decided on a media scraper, you can now make further details about the content via " Settings ". It is recommended, for example, to change the language from “en” (English) to “de” (German). In this case, Kodi displays the name of the series, the individual episodes and the contents in German. Of course, you can leave the settings in the original if you prefer films and series in the original sound.
 7th step:
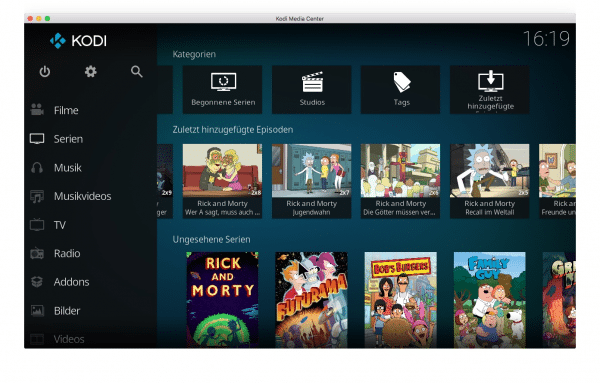 Confirm all changes with " Ok ". If you have configured a scraper, Kodi first searches the online sources and builds a database. You can then browse and play your media under the respective entry on the home page (here "Series"). Do you want to access the classic file structure instead of the database? Then navigate to the main menu item “ Videos ” (or “ Photos ” / “ Music ”). Here Kodi lists the added sources and also offers quick access to the respective folders via " Files " . You can comfortably access all of your media.
 Kodi scraper: the basis for the perfect Kodi library
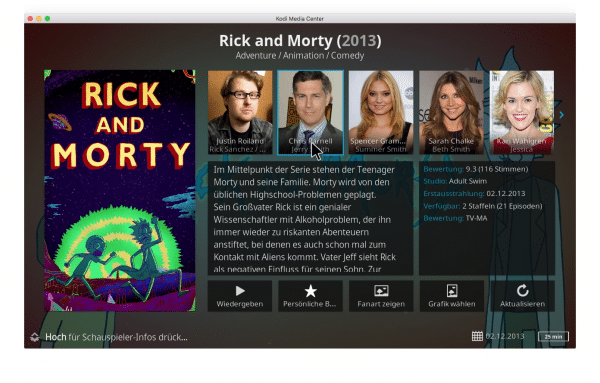
As shown in the previous section, adding folders in Kodi allows you to have the Mediacenter analyze your media files and build a library. Once set up, you can sort your media not only by file name, but also by extended data such as film title, year of release, genre or even the actors involved . The basis for this are the so-called scrapers . The integrated Kodi extensions compare your media files with large online databases such as the TVDB for series or the Internet Movie Database (IMDB) for films..
 The Kodi scrapers collect extensive data from the Internet on all content and allow convenient navigation through your content.
 From the requested data , Kodi automatically creates a database with titles, pictures, contents and more. Large media collections in particular can be easily searched and organized with it. Kodi's scrapers work amazingly well in practice. However, you will achieve the best results if you already sort your media properly on the hard drive . For example, films should ideally be stored in folders with the film title. In the case of series, it is advisable to create separate sub-folders for each season. If possible, the episodes should have the season and episode number in the title, for example according to the scheme "Series name S03E13". With such data, Kodi can very reliably make the appropriate assignment.
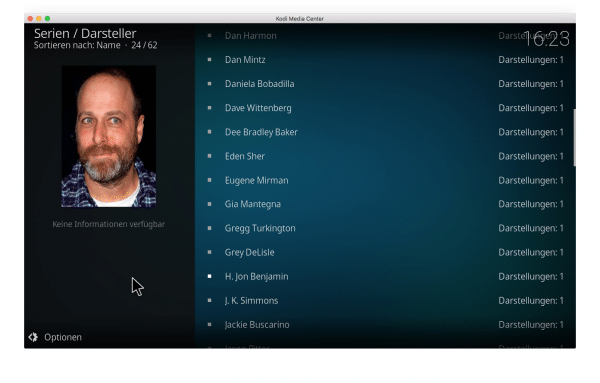 Do you want to display all available films and series from your favorite actors? Thanks to Kodi scrapers and the automatic database creation, no problem!
If a scraper is wrong and gives the wrong film or follow-up title, that's no problem either. Just highlight the incorrect entry in the sorted Kodi database and click it with the right mouse button to (on the keyboard, press the [c] key). In the context menu that appears, select the entry " Information " and then " Update " at the bottom right . Kodi will now search the selected scraper source again and suggest alternatives for the title. Still wrong? Then click on “ Manual ” in this window and enter the appropriate title. That way, with a little fine tuning, you can build a perfect media database in Kodi.
 If the Kodi scrapers are wrong, you can easily correct incorrect database entries.