With Flickr now tasked with importing batches of images, you're probably considering upgrading to a service like Google Photos, Smugmug, or 500PX . In this feature, we'll show you how to move your photos from Flickr to a new home..
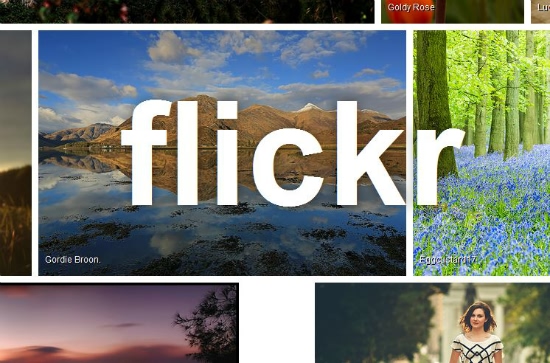
Flickr recently made some changes to their free account, making it more difficult for users to download image collections unless they are upgraded to a Pro membership. If that lets you jump to another photo service, like Google Photos or Smugmug, there are a few to choose from. In this feature we will show you how to move photos from Flickr and find them a new home.
Flickr recently announced that its Very Useful Upload feature, which allows you to back up entire photo libraries from Dropbox, iPhoto, local hard drives, and other services, would no longer be available for free accounts. You can of course upload images to the site, but this will now be done manually rather than in the conveniently automated manner that Upload has allowed..
Before you worry about moving all of your photos, it's worth noting that Flickr continues to offer 1TB of free storage for your images, and any photos you take on your mobile devices will automatically download if you have the rotated feature. on.
The Pro account is hardly a scam, as it offers Download, Ads-Free Ads, Advanced Stats for Your Photo Views, plus a twenty percent reduction in the cost of Adobe's Creative Cloud Suite, all for around £ 4 per month..
If you were a Lightroom user, you will be able to continue using the free account with little noticeable difference as the Lightroom uploader can upload collections to Flickr without the need for a Pro account.
How to move photos from Flickr: which services can I move to
Enthusiastic photographers
If you want a backup for mobile images, the two closest rivals to Flickr in terms of community and tools are Smugmug and 500PX. Of these two only 500PX has a free tier, but this is limited to twenty downloads per week. It is heavily put on licensing photos through the 500PX Marketplace so that you can make money from your designs. Judging by the high quality of the examples on display, this is certainly a place occupied by those who are serious about photography.
Upgrading to the 500PX Plus account costs around £ 1.40 per month, although you have to pay the first year up front. This allows you to have unlimited downloads and advanced stats, which is a very reasonable deal. The best part is that for the first 14 days of your account you have access to all premium features including unlimited downloads. So if you plan it right, you can move your entire library and have access to it after the trial period ends and you revert back to a free account.
Smugmug is very similar, but instead of a free tier you get a 14 day free trial instead. Then you can go for the Basic package which offers unlimited storage, a dedicated and customizable website, and various sharing options, all for a slightly more expensive price of £ 28 per year. Smugmug and 500PX are cheaper than the Flickr Pro account, which works out to around £ 35 for the year. So it's worth thinking about where you want your aspiring photography career to reside.
If all you're looking for is a place to save your photos, maybe from your smart phone or if you take occasional shots when you're on vacation, Flickr is always a profitable choice. Remember, the free account keeps its 1TB of storage, plus the autoload feature on your phone or tablet will continue to work.
For those who don't constantly take hundreds of shots, manually uploading images to Flickr shouldn't be a chore. Especially if you don't want to deal with the inconvenience of switching platforms. It might even give you the impetus to be more selective about the images you save, improving your portfolio along the way.
Of course, if you want to upgrade to a free service, the most obvious platform around right now is Google Photos. This makes it possible to download libraries, plus if you are taking photos with a point and a shot or mobile device you should have unlimited storage. Those who prefer a DSLR or really high-quality images will use the storage assigned to their Google Drive account (which is free to start at 15GB).
In fact, any cloud storage service will provide a place to store your collection, and with some offering several GB of free storage, we recommend using a few in order to have more than one backup of your images. Check out our guide to the best online storage services for more details.
How to move photos from Flickr: Move to Google Photos
Step 1: Upload your Flickr library
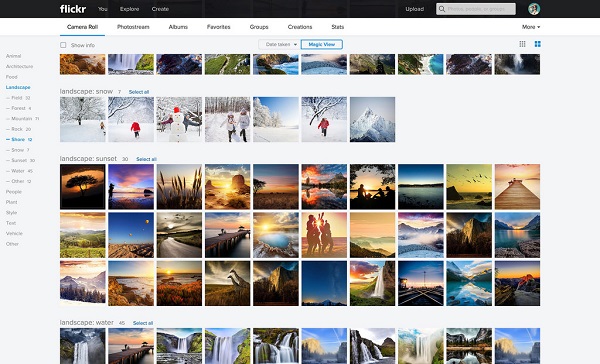
First, go upload your images from Flickr. It's pretty straightforward: just navigate to the Albums section on your Flickr page, hover your mouse over an album, and you'll see an arrow icon appear in the lower right corner. Click this button to download the content. Repeat these steps until all of your photos are on your hard drive.
Step 2: Get the Google Photos Backup app
Go to photos.google.com/apps and you will see a button that will download the Dekstop Download for Google Photos. Click this button and when the .exe file has downloaded, double click to install the program.
Step 3: Select the photos to backup
Once the program is installed and you have entered your Google account details, you will receive a window asking you to choose your backup sources. The initial settings will automatically include images from any connected camera or storage device, such as an SD card, desktop, and the My Pictures folder. To include specific destinations, simply click on the Add button and navigate to the relevant folder. If you haven't already unzipped the Flickr albums you downloaded, do so now and then select the folder.
Step 4: select the image quality
Below the destinations box you will see the Photo Size section. In this case, you can choose between quality (usually smart phone or point camera and shooting level) or original (larger files generated by DSLR cameras). If you choose High Quality, then the storage is free, while the original will rely on your Google Drive storage.
Step 5: Back up your photos
Once you've set the image settings and destinations, click the Start Backup button at the bottom of the page and your images will start going to their new Google flavored home.
Step 6: Browse your photos
Now whenever you want to upload new images or view your existing library, go to the taskbar at the bottom of your screen, click the up arrow in the right corner, and then click the Google Photos icon to see the options available to you. Remember, you can also head to photos.google.com to view your library in any web browser, and you can install the Google Photos app on your iPhone or Android - it will back up your photos and videos ( making it a Better iCloud alternative for many iPhone users).
That's all you are done. Your photos have a new home and it's time to get out there and take some more. Good shot.