Windows Media Player is a free integrated tool from Microsoft designed especially for your audio and video needs. In other words, it can play audio and video files from your computer and media connected to it..
Even though multimedia can be connected, it seems that Windows Media Player (opens new window) would sometimes have difficulty playing the files contained in a DVD. It can be quite complicated to troubleshoot Windows Media Player issues when they arise on an older version of Windows, such as Windows 8, as some features have already been subscribed; but don't worry, there are some solutions that can help you:
Read also:
- How to play DVDs for free on Windows 10? (opens new window)
- How to fix VLC DVD playback issue on Windows 10? (opens new window)
# The best Windows Media Player alternative to convert DVD videos
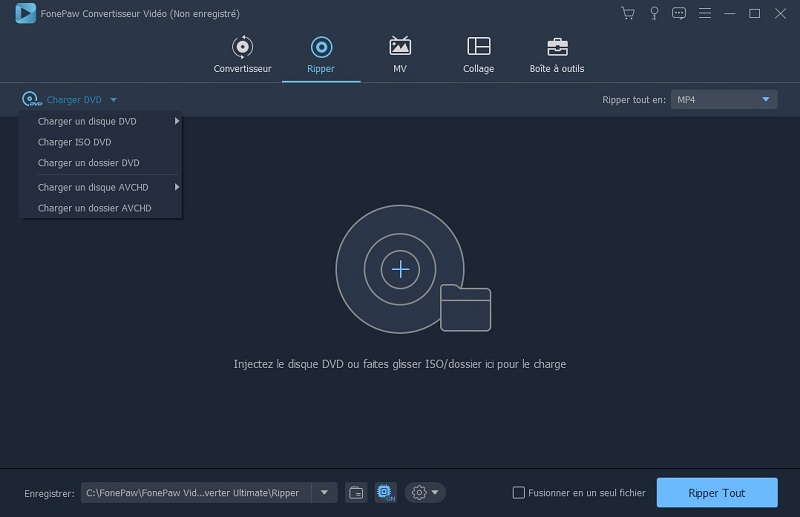
If you want to watch DVDs on more devices without format limits, then you can use FonePaw Video Converter (opens new window) . This program can rip DVDs to formats compatible with iPhone, iPod and many other devices. Download and install its free trial version, start the program and follow the steps below:
# Step 1. Start the software and add the videos from DVD
Insert the DVD to convert into your computer's disc drive. Download, install and start FonePaw Video Converter Box on your PC. In the main interface of the software, select the "Ripper" section. Then open the add files drop-down menu and choose the DVD disc drive.
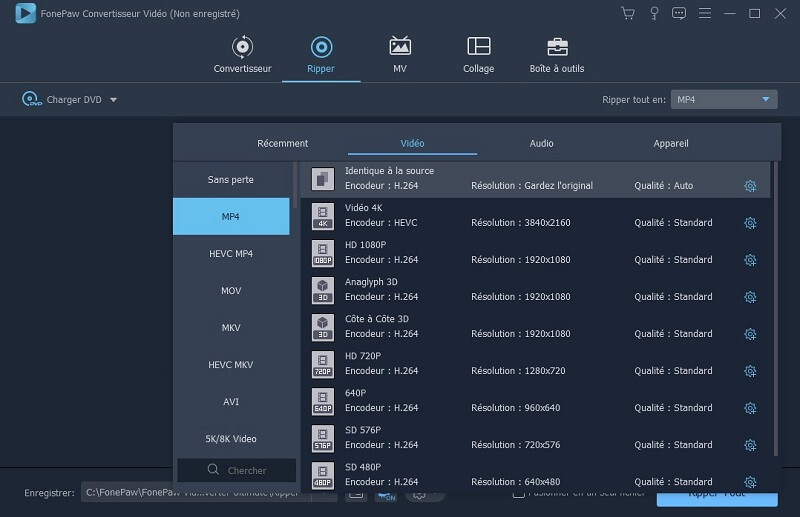
# Step 2. Choose the format to output DVD
Scroll through the list of output format options that can be found in the top right corner of the screen. From the list of videos, choose the output file format you want to get. Also select the resolution of the files..
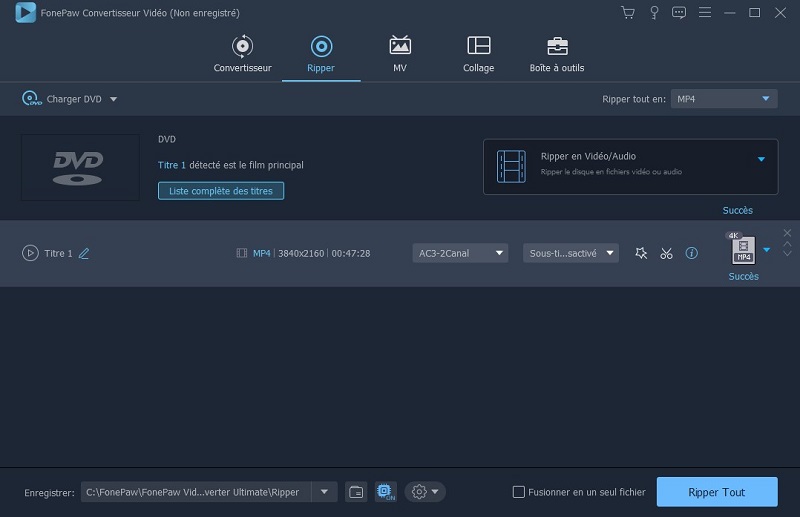
# Step 3. Convert DVD to Video
In the File location section, browse to and select the output location where the converted files will be saved. Then click the "Convert All" button to start the process of converting DVD to files playable by Windows Media Player.
# Preparation: Uninstall recently installed suspicious tools
If you recently installed a new DVD audio-video editing tool or something like that, or if any updates were installed on your computer without your knowing it, then it will be helpful for you to remove them to see if this is the cause of the problem encountered..
1. To get started, make sure you are logged in to the administrator account. Note that you will not be able to uninstall programs from the computer from another account.
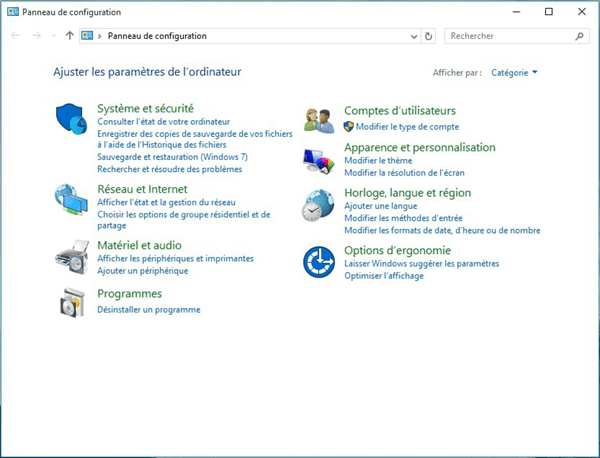
2. Click on the “Start” menu and search for “Control Panel” to open it. On Windows 10, you can click the cog icon to open “Settings”.
3. In the “Control Panel”, select the “View by: Category” option which is located in the upper right corner of the screen. Then click on the "Uninstall a program" option in the "Programs" section.
4. If you are using “Settings”, then click on “Applications” which will directly display a list of programs installed on your computer.
5. Select the view changes button and configure it to see more details. All you have to do is click on the “Installed” tab to classify the programs on your computer by date of installation.
6. Look for any programs that might then be related to the DVDs, audio files, videos, or any other files that might be suspicious. You could probably find Stoik Media Converter or some other similar tool.
7. Select the tool and click the “Uninstall” button to get rid of it. A message will appear on the screen to confirm your action.
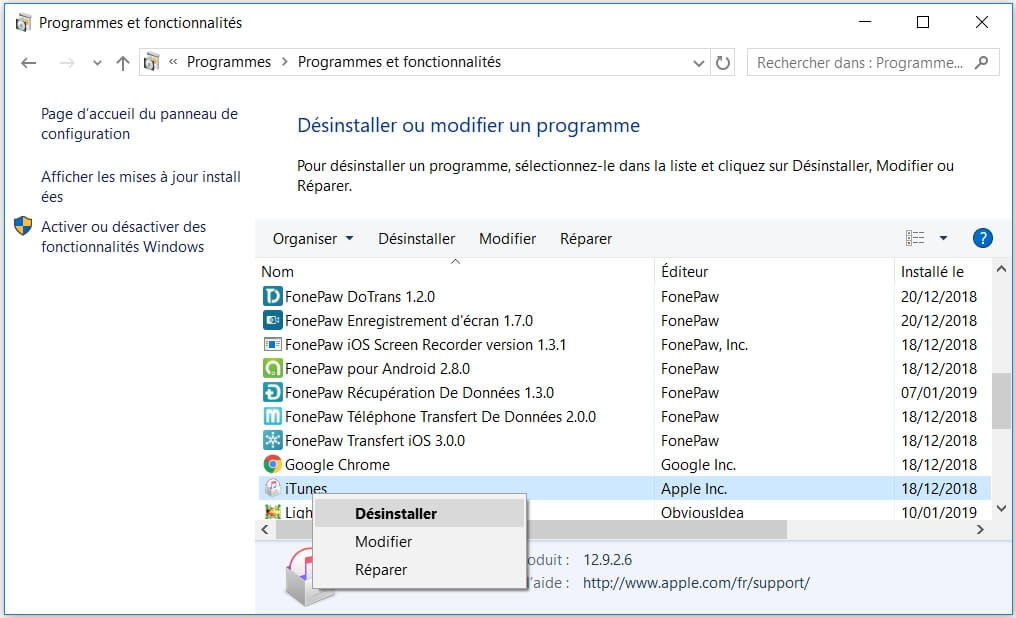
8. Finally, click on the "Done" button to finish the uninstallation process, restart your computer and check whether the problem has finally been resolved or not.
# Solution 1: Repair Windows Media Encoder
Unfortunately, this application could only apply on older versions of Windows, like Windows 7, as the Windows Media Encoder entry is only available on these versions. If you are still on Windows 7 or an older version, then you can use this solution.
1. Make sure you are logged in to your administrator account. You will not be able to repair anything on the computer if you are using a different account.
2. Click on the “Start” menu, find “Control Panel” and open it. In the "Control Panel", select the "View by: Category" option which is located in the top right corner of the screen. Then click on the "Uninstall a program" option in the "Programs" section.
3. Find the Windows Media Encoder entry in the list and click on it. Then click on the "Repair" button at the bottom of the list and confirm the action. After that, follow the instructions that will appear on the screen to repair Windows Media Encoder and restart your computer. Then check whether Windows Media Player can finally play DVDs or not.
# Solution 2: Update audio and video drivers
This is the best of traditional methods. Obviously, updating drivers can fix most Windows problems, especially those that seem to come out of nowhere.
Programs and operating systems evolve, and your devices also need to evolve with drivers that keep updating, even for older devices. Follow the instructions below to update the audio and video drivers on your computer.
1. Click the “Start” button, type “Device Manager” and select the first result from the list that will appear. Alternatively, you can use the key combination "Start" + "R", then type "devmgmt.msc" in the "Run" window and click on the "OK" button.
2. Expand the audio-video categories to find the device to update, then right-click (or press and hold) on it and select “Update driver”. There are many sections that you will need to check, such as: "Audio inputs and outputs", Graphics cards "," CD-ROM / DVD-ROM drives "and" Audio, video and game controllers ". The process might take a while, but it's really important that you update your drivers.
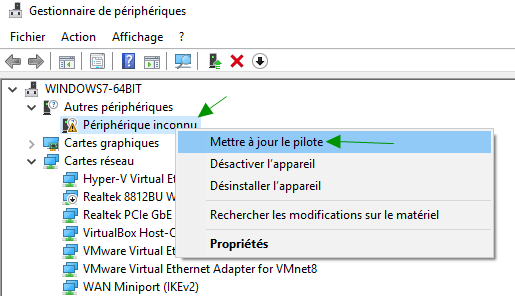
3. Select the option to automatically check for driver updates. If Windows does not find new drivers, then you can go to the official website of the device manufacturer and then follow the given instructions. You should be able to look up the name of your desktop or laptop computer.
Note: If you are using Windows 10 then it should be noted that the most recent drivers are usually installed along with the updates, so it is important to keep the operating system of the computer up to date. Windows Update may work automatically on Windows 10, but you can also choose to check for new updates yourself by following the instructions below.
1. Use the key combination "Start" + "I" to open the "Settings" of your Windows computer. Alternatively, you can find the "Settings" using the search bar in the taskbar or click on the cog icon which will appear on the screen once you have clicked on the "Start" button.
2. Find and then open the "Updates & Security" section in the "Settings". Go to the "Windows Update" tab and click the "Check for updates" button to check whether or not there are any updates available for your Windows.
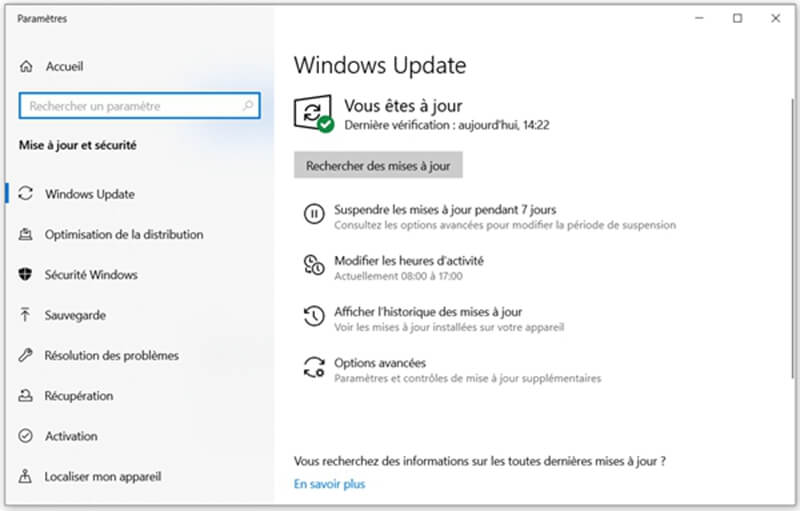
3. If there are any, then Windows will download them automatically. Please wait while the updates are installed. When this is done, you can check whether Windows Media Player can finally work properly or not.
# Solution 3: Reinstall Windows Media Player
Reinstalling a program is usually a more logical solution for those who are having trouble with a program. However, many users have used this method and then ended up in failure. However, other users have been successful in applying this solution, especially those who had previously been able to play DVDs on their Windows computer until the day the problem occurred.
To get started, you will need to do this setting through the command prompt, which may resolve the problem on its own. Please check if the problem could be solved after the execution of the command:
- Search for "Command Prompt", right-click on it, and select the "Run as administrator" option. Then copy and paste the command below into Command Prompt and hit the "Enter" key.
net localgroup “Administrators” “NT Authority \ Local Service” / add
1. On your keyboard, use the key combination "Start" + "R" to open the "Run" window. You can also choose to search for it directly from the "Start" menu, if of course your Windows operating system supports it.
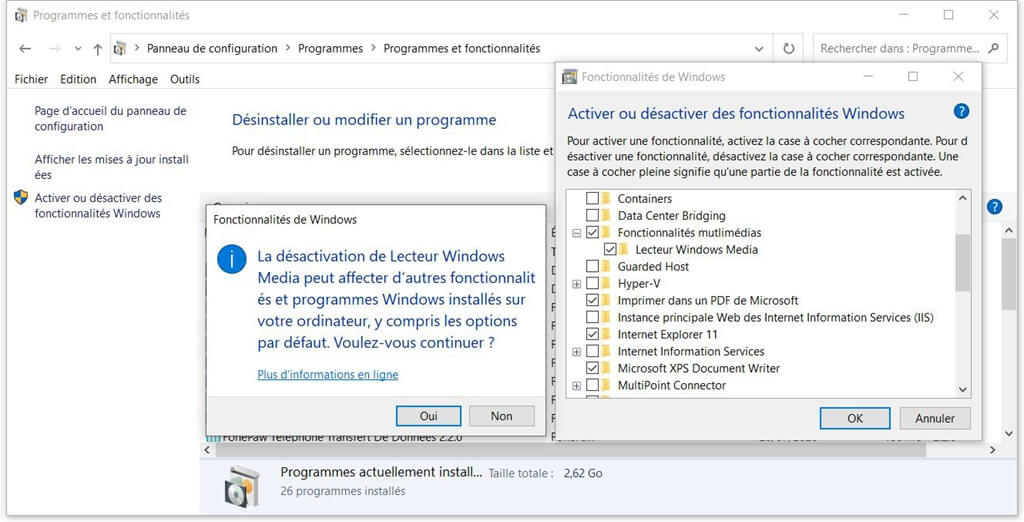
2. Type “Control Panel” and click “OK” button to open it. Don't forget to change the "Control Panel" view to "View by: Category". Then click on the "Uninstall a program" option in the "Programs" section.
3. In the left sidebar menu of the screen, click the “Turn Windows features on or off” option, and find the “Multimedia features” section. Expand the list and search for "Windows Media Player". Uncheck the box next to it, then confirm the action. Finally restart your computer before going to the next step.
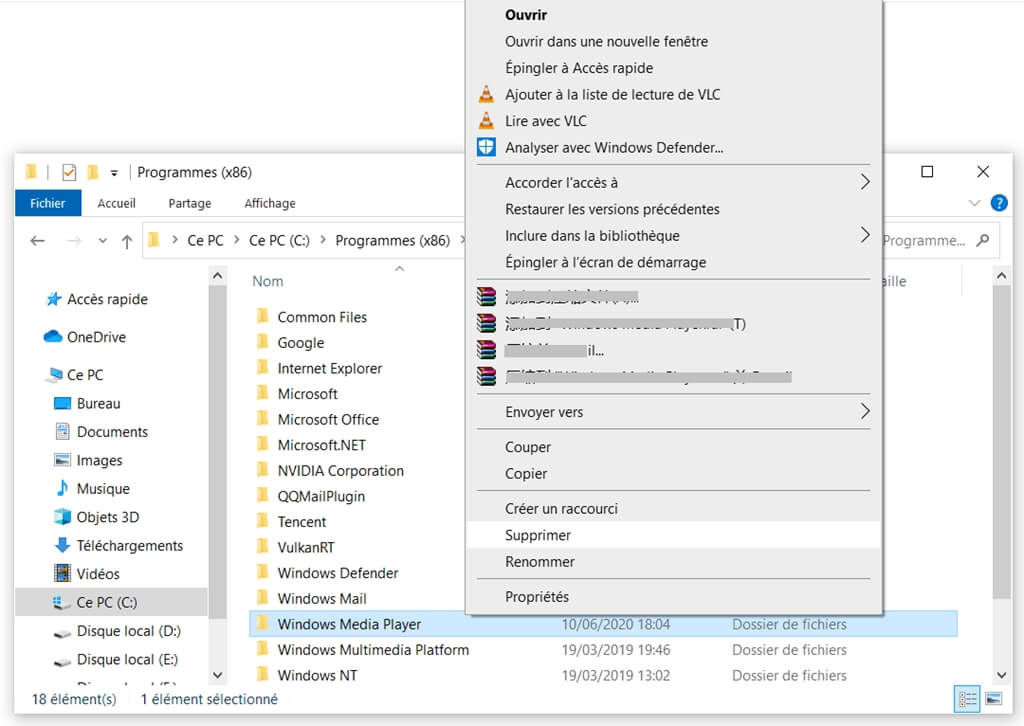
4. After that, go to the partition you are using and open the “Program Files” or “Program Files (x86)” folder (it will depend on your computer architecture), then delete the “Windows Media Player” folder ( in general you will have to go to ": C"> "Program Files"> "Windows Media Player").
5. You can now go back to the "Windows Media Player" entry in the "Turn Windows features on or off" option, then check the box next to reinstall the process. Restart your computer after completing the installation and check if the problem can finally be solved.