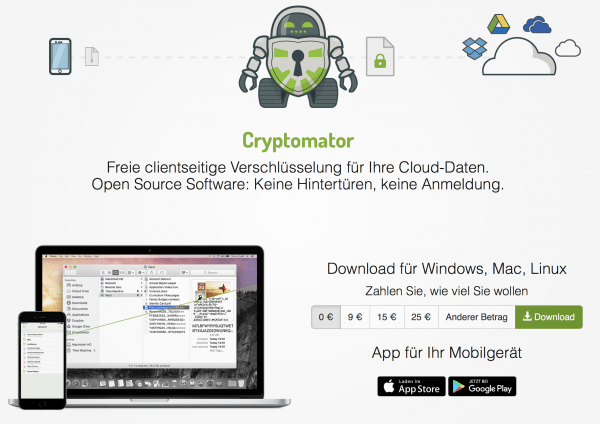
The following humorous saying has been circulating on the internet for some time: “There is no cloud - it's just someone elses computer.” (“There is no cloud - it's just someone else's computer”). There is a lot of truth in it, because data in the cloud are of course not sitting like little angels on the cloud waiting to be used, but are on the servers of some companies such as Apple, Microsoft, Google or Dropbox. These companies are also often based abroad, where the strict German data protection law does not apply.
The NSA scandal clearly showed that secret services - and not only in the USA - like to access cloud data pro forma in order to check the background of the users. It is therefore all the more important to additionally secure very personal data such as password lists or very private photos in the cloud. This works best with a cloud encryption solution like the free Cryptomator.
How to encrypt your cloud data
1. Download
Cryptomator Cryptomator is free and works with all cloud services . In addition, Cryptomator is available for all major operating systems. Download Cryptomator for your system. The manufacturer asks for a donation, which you are welcome to do - but the tool is basically free..
 Cryptomator asks for a donation.
2.
Install Cryptomator Now install the program in the usual way for your operating system. There is an installer under Windows, under macOS the program file simply has to be copied into the Applications folder.
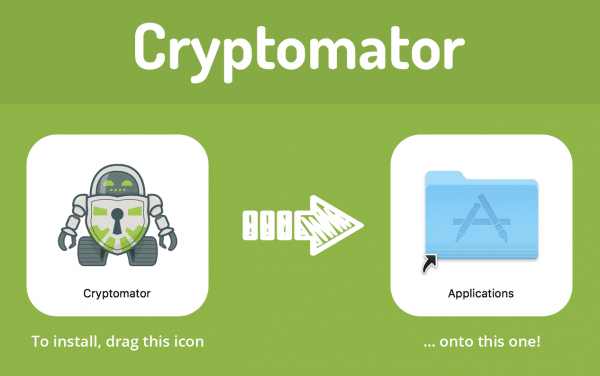 Installation is a breeze.
 3. Create safe
You can now see the program interface. Here you have the option of creating a so-called " safe ". This is an encrypted folder into which you can then copy all the data that you want to protect from prying eyes in the cloud. Click on " Create vault ", select a name and a storage location (ideally your cloud folder directly ) and save the vault..
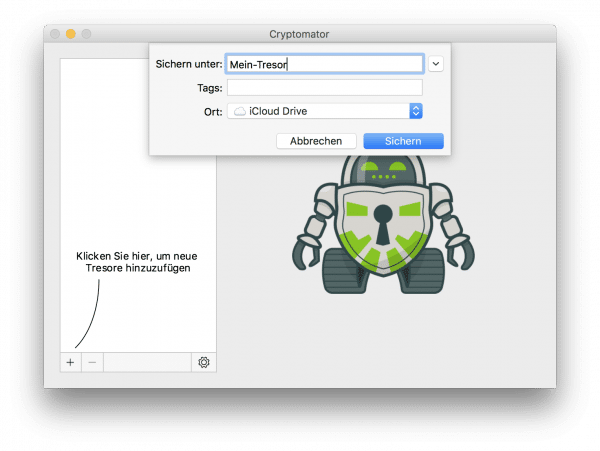 Create a safe ...
 4. Assigning a password
The next step is to assign a password for the safe . At the same time, Cryptomator shows whether the password meets certain security criteria. Passwords are safe if they contain many different characters and ideally no "real" words. Here we explain how to find a secure password. The safe is only created with " Create safe ".
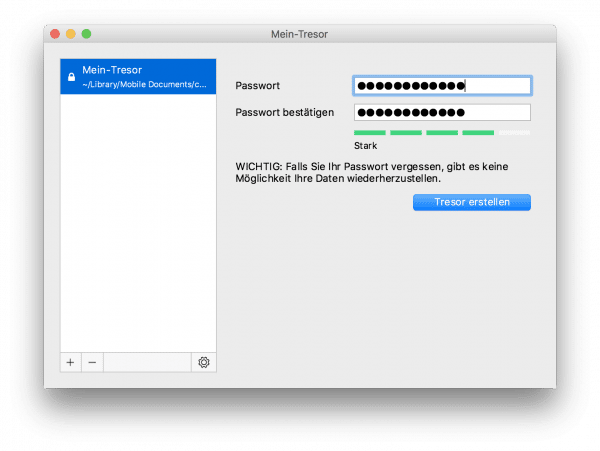 Cryptomator checks how secure the password is.
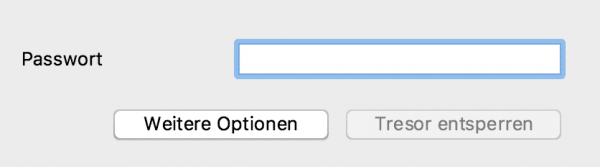
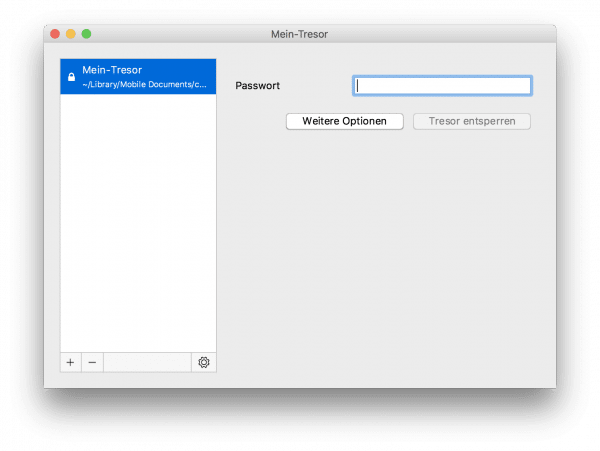
5. Enter the password
The safe must first be unlocked: Enter the password that you assigned in step 4. This procedure is used for security: Users can only save data in safes if they really know the password. In this way no data can be lost. Then click on “ Unlock Vault ”.
 The safe must first be unlocked.
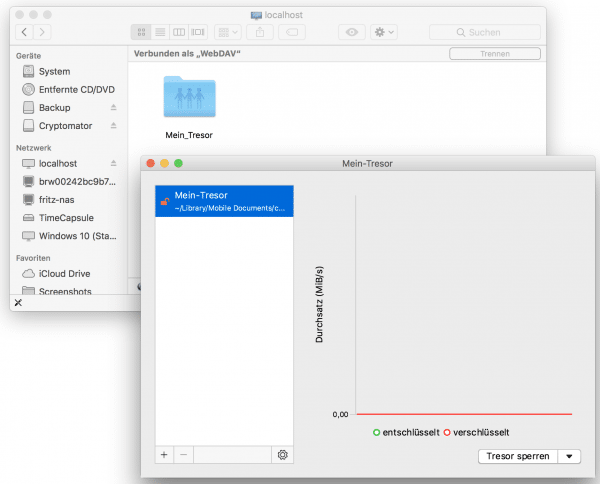
 6. Find the safe in the system
Cryptomator now integrates the safe as a WebDAV drive. This is useful in that the encrypted folder behaves like a network drive: If it is unlocked, you can copy files there or bring them back to your PC or Mac. Under Windows, the share has the name of the vault file , under macOS a folder with this name is located in the “ localhost ” drive .
 The encrypted drive is integrated in the Finder or Explorer.
 7. Copy files to the encrypted cloud storage
The rest is simple file pushing , as you know it from USB sticks or external hard drives: Select the files that you want to encrypt in the cloud and copy them to the Cryptomator network drive .
 Everything you want to encrypt can be stored in the vault in the cloud.
 8. Lock safe again
When you have copied all files, you can protect the safe again by clicking on " Lock safe " in the Cryptomator window. The safe is then closed and can no longer be viewed by third parties. The vault folder is in the cloud storage and only shows encrypted information there when you click on it. Even the cloud provider cannot do anything with that. It is logical that you should not delete anything from the vault now , otherwise the encrypted files will be lost.
 The vault folder is visible, but locked does not show what is in it, as the contents are encrypted.
 9. Reopen the vault
The further procedure is as simple as it is efficient: Open the vault file by calling up Cryptomator and double- clicking the vault . Enter the password . The vault is then visible again as a WebDAV drive in the Finder or Explorer and you can access the files it contains.
 You can easily unlock the safe again.
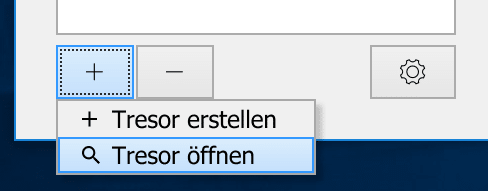
 10. Using the safe with several computers
The point behind every cloud service is of course to exchange data. With Cryptomator this is not a problem, you can of course use the same vault from several systems . For example, if you want to access the vault file with a second computer, you simply have to install Cryptomator on this computer as well. Then select “ Open safe ” using the “ Plus ” symbol .
 Safes can also be opened by other systems.
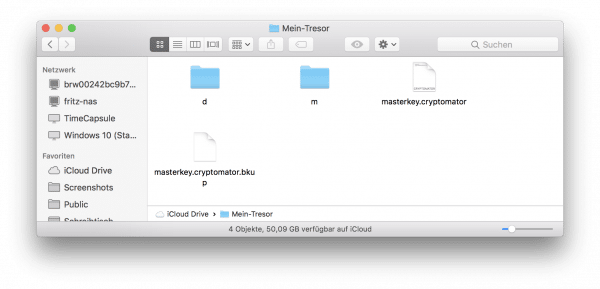
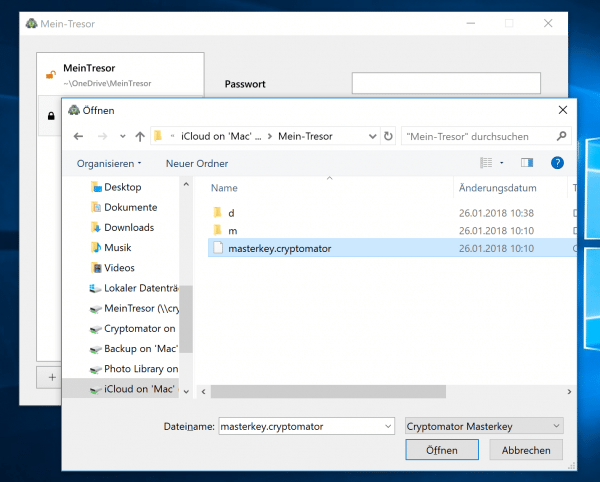
 11. Open
the vault Then select the vault folder on the cloud drive: This contains a file called " masterkey.cryptomator ", in which the password information is also stored in encrypted form. When you open this, the vault is added to your vault list and can be opened and mounted with the associated password. You can then exchange files with the other computer here.
 Once integrated, administration is easy.
 12. Use safes in apps
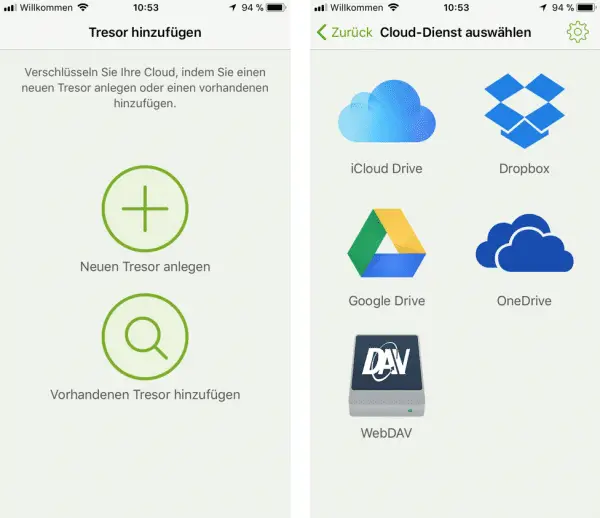
Cryptomator is also available for iOS ( itunes.apple.com/de/app/cryptomator/ ) and Android ( play.google.com/store/apps/details?id=org.cryptomator ). Here, however, the app is chargeable . Install the app on your smartphone or tablet, select " Open vault " and navigate to the cloud storage on which the vault is located. You can then unlock the folder with the associated password. Caution : When saving in the iCloud, the folder must be in the “Cryptomator” subfolder, otherwise it will not work.
 The encrypted data can also be used via the app.