The Google Calendar is a great way to organize your personal agenda. Above all, the interaction between web service and Android smartphone works like a single piece in practice: If you add an appointment on the smartphone, it is seamlessly displayed on the web interface and vice versa.
When using Google Calendar on Android, you can choose from a large number of compatible apps. In this guide, we will focus on the official Google app , which runs on all smartphones with Android version 4.1 or newer. If it is not already installed on your Android, install the Google Calendar via the Google Play Store.
The main functions of the Google Calendar for Android
After starting, the Google Calendar greets you with the appointment overview . Here you can see all upcoming appointments in a list view. Tap the menu in the top left to reveal the options.
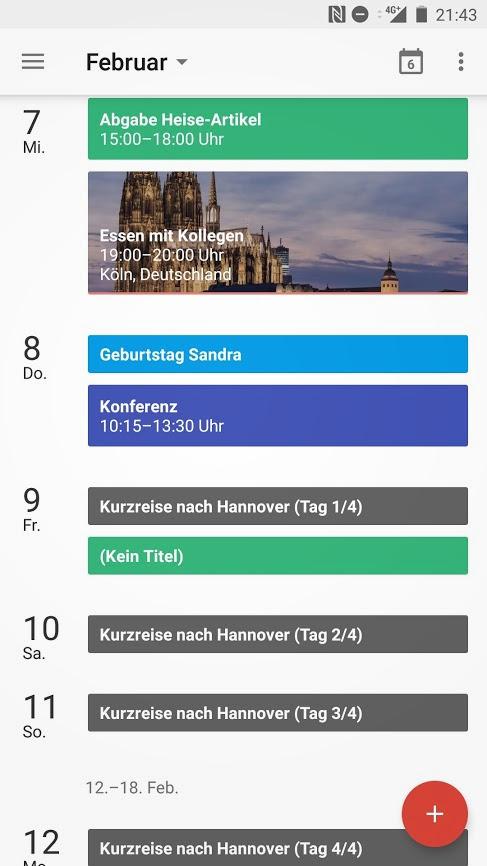 You can visualize your appointments in different views.
Here you can switch between different views . The 3-day and week views are particularly practical. Here the Google Calendar clearly lists all upcoming appointments together with the start and end times. Helpful: You can easily move the appointments in these views . To do this, simply press and hold the relevant entries and move them to the new position.
In the settings (to be reached via the link at the bottom left) you can adjust the functions of the Google Calendar further to your needs. Here you determine, for example, with which day the week view begins, set the standard length for new appointments or display calendar weeks..
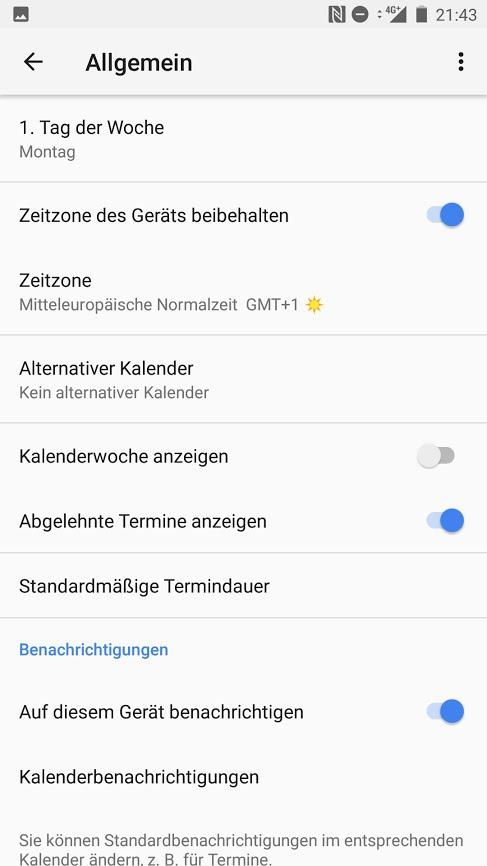 In the settings you specify exactly how the Google Calendar should act.
 Create appointments in Google Calendar
It only takes a few steps to create a new appointment in your Google Calendar:
1st step:
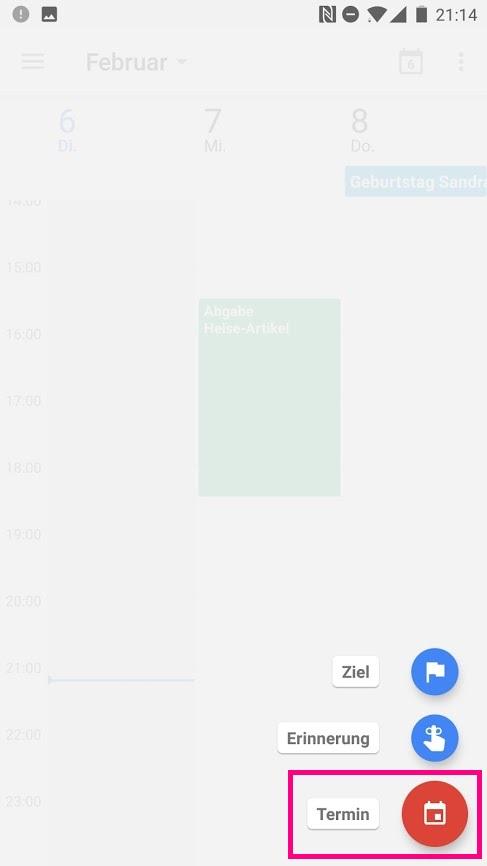 Tap the plus symbol in the lower right corner . Alternatively, you can also tap on a time in the calendar in the agenda view and tap on the displayed plus. Select the " Appointment " command in the menu that appears .
 2nd step:
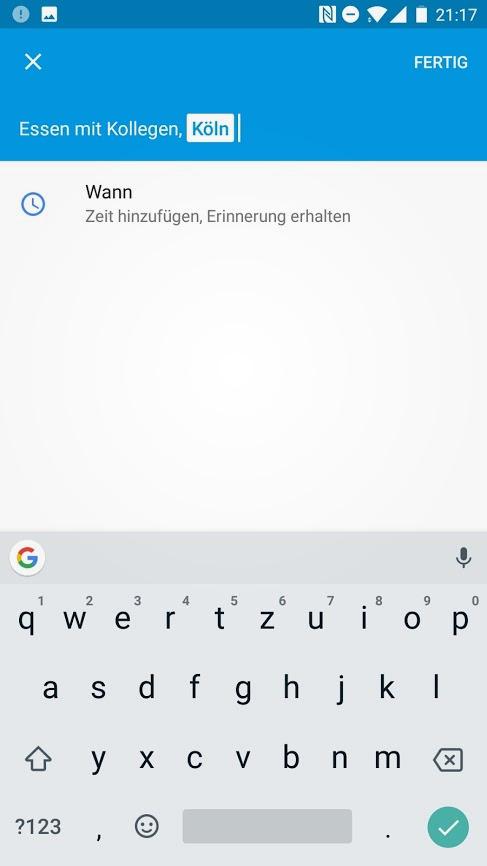 Assign a title for the appointment in the appointment editor . You also have the option of entering a contact or a location . The calendar automatically suggests contacts from your address book.
 3rd step:
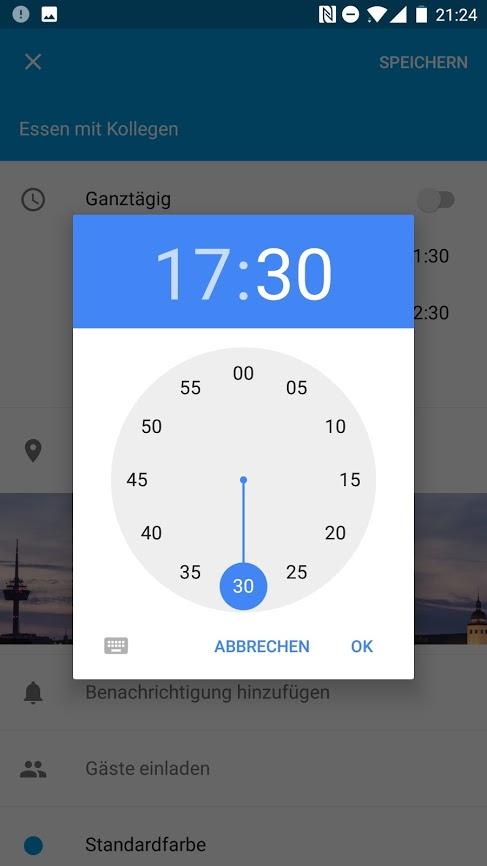 Then tap on the top date line to set the date and time for the appointment. You can optionally specify the end of the appointment afterwards . This is particularly useful in the day or week view of the calendar. If the appointment lasts the entire day, flip the “ All day ” switch.
 4th step:
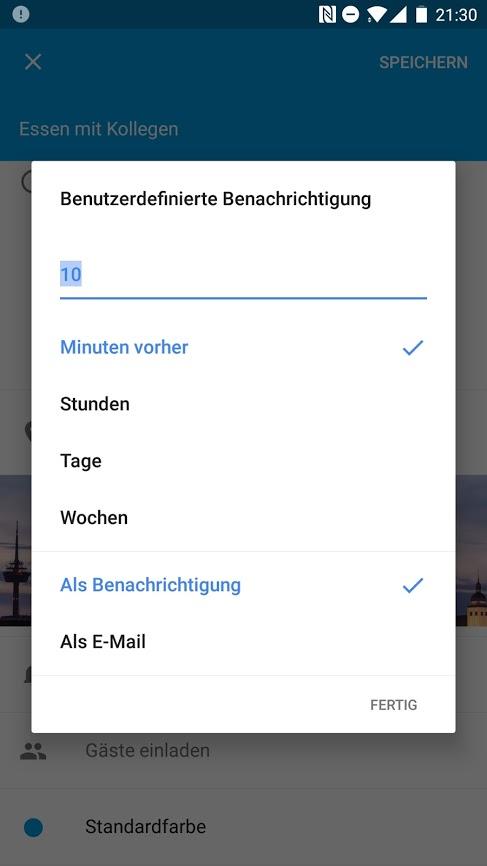 Reminders are one of the most practical functions of the calendar. Tap “ Notifications ” to set when and how you want Google Calendar to remind you of upcoming appointments . By default, the smartphone vibrates ten minutes before the appointment. Tap “ Add Notification ” to change this. You can choose to insert a different time or additional notifications. In addition to the smartphone message, the calendar can also send an email to your Google address.
 5th step:
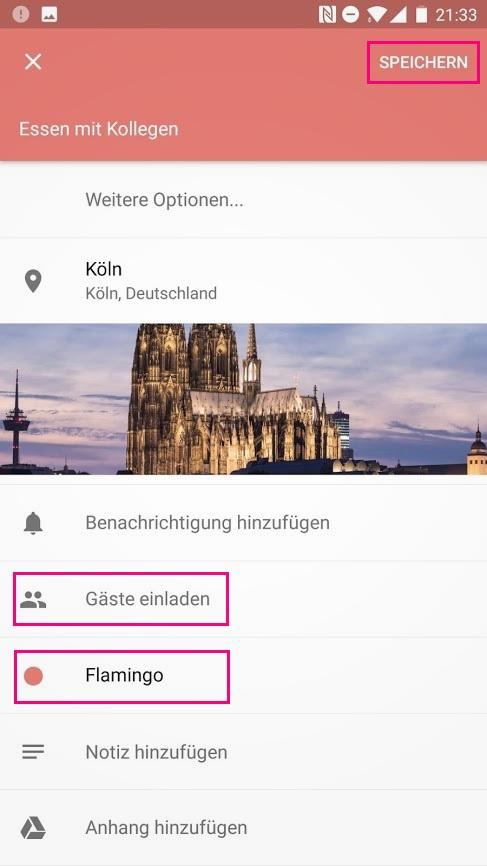 In addition to the basic functions, you can now specify other options, such as the color in which the appointment should appear in the overview. You also have the option of inviting contacts to the appointment . These are automatically informed by email. Everything fits? Then tap “ Save ” in the upper right corner .
 6th step:
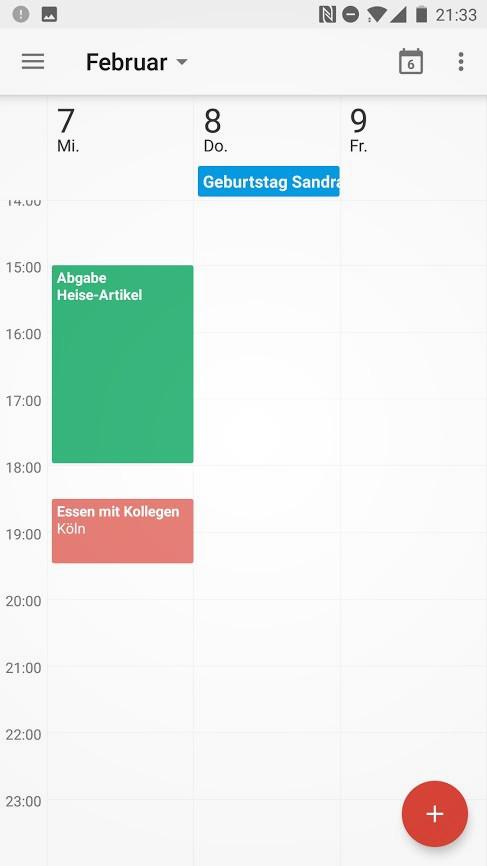 The appointment will now appear in your calendar. If you would like to change it again later, simply tap it and tap the “pencil” symbol .