Everyone knows the problem: Forgetting the USB stick at university or at work or even leaving a hard drive on the train - and having a sleepless night because strangers can possibly get the confidential or important data that is on it . The loss of the hardware is far less serious than the risk that important information could fall into the wrong hands. This is exactly why such mobile media - or important data in the cloud - should always be encrypted. The only thing is that each operating system has its own function for this: Windows, the BitLocker software, macOS FileVault - and both are not even close to being compatible with one another! This is exactly where VeraCrypt comes in, an encryption solution for drives that can be used on Windows systems,as well as under macOS and Linux.
Encrypt USB stick with VeraCrypt: Here's how
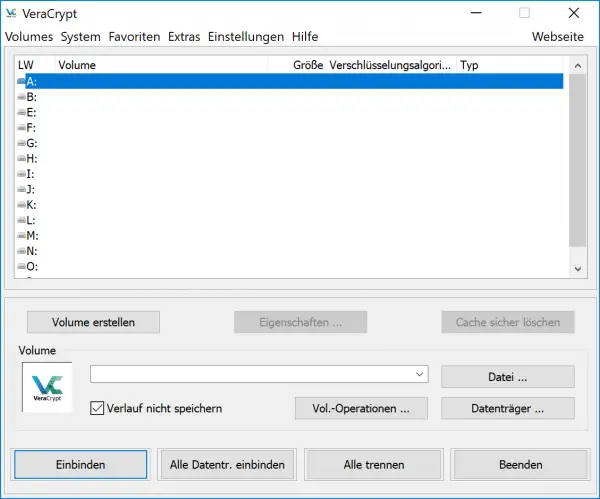
VeraCrypt encrypts data in the form of a virtual, encrypted drive ("container"), which in turn is located on a so-called "physical" drive - a hard drive, a USB stick, a memory card or NAS. The VeraCrypt software can integrate these virtual drives into the system after entering the password so that they behave like hard drives. So far, so easy. The encryption procedure is child's play:
1st step:
 Install VeraCrypt on your Windows, Mac or Linux system. The program is installed like any other tool. You can download VeraCrypt here: https://www.heise.de/download/product/veracrypt-95747
Then start the app and you will see a very cryptic interface.
2nd step:
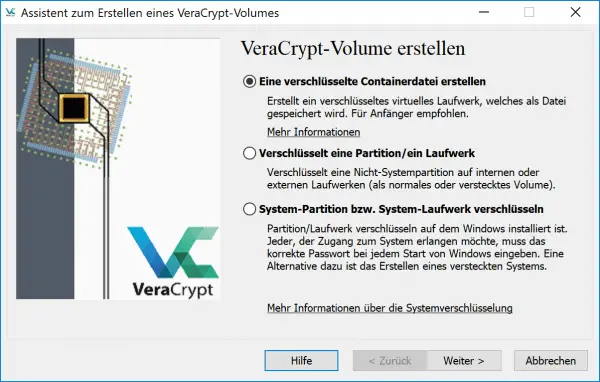 You must now first set up an " encrypted volume ": This is the virtual, encrypted drive in which you want to securely store your data. Click on one of the slots and select “ Create Volume ”: VeraCrypt opens the drive creation wizard. Select “ Create an encrypted container file ” and click “ Next ”.
3rd step:
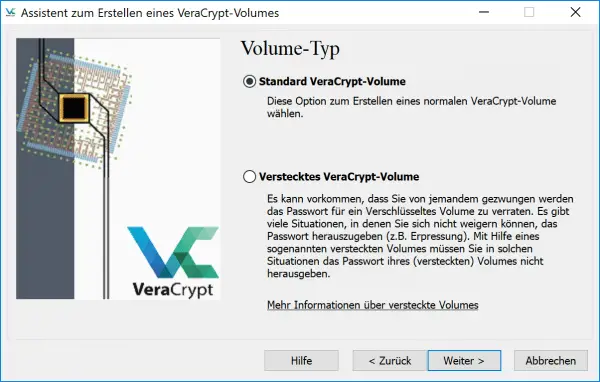 Now select the " Standard VeraCrypt Volume ". The hidden volume should only be used by users who are already familiar with VeraCrypt. Don't worry, you can create as many encrypted volumes as you want. Click on “ Next ”.
4th step:
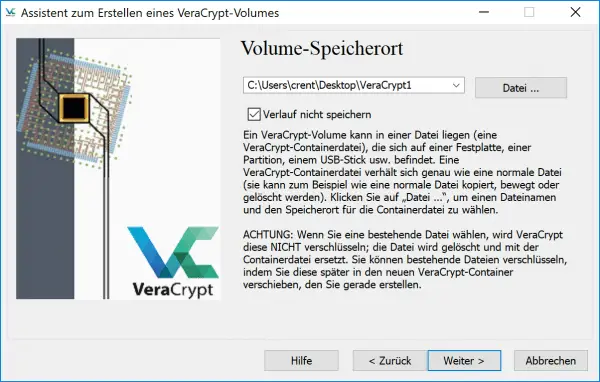 In the next window, VeraCrypt asks you for the location of the encrypted container. This can initially be on your internal hard drive, but you can also create it directly on a USB stick or another data carrier. To do this, click on " File ", select a storage location and enter a file name . Then click on “ Next ”.
5th step:
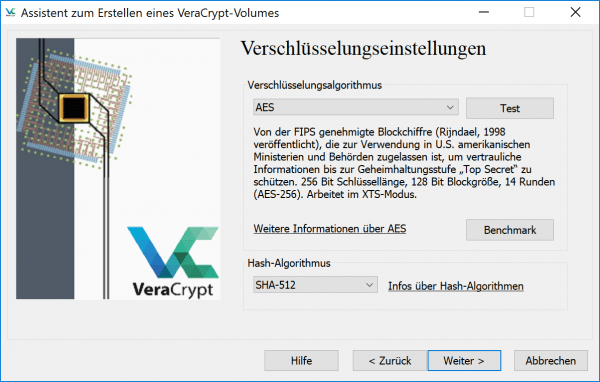 VeraCrypt now asks you about the encryption algorithm: " AES " is preselected here, which also makes sense as a method. You can also keep the preset “ hash algorithm ”. Click on “ Next ” again.
6th step:
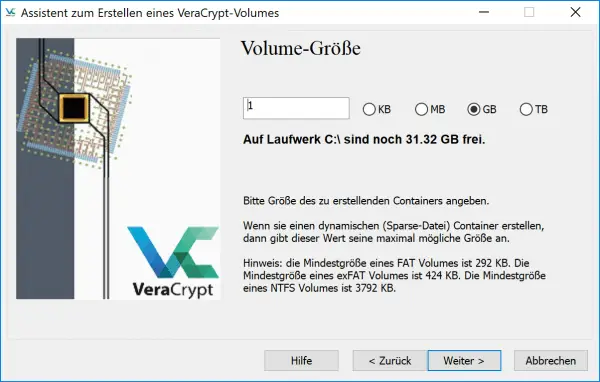 Now you come to an important point: You have to define the “ volume size ”, ie the storage space of the container. This should be as small as possible and as large as necessary - that depends on where you want to store the file later and what you want to save in it. A good value for the first steps is one gigabyte : there is enough space in there for now, while the container can also be found on every memory card, hard drive and USB stick.
7th step:
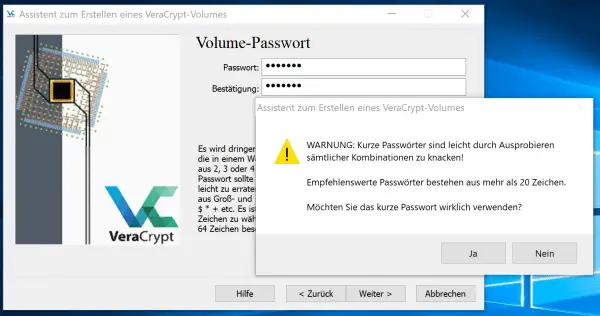 Next you need to set the password for the container. The usual rules of password security apply here . So choose a difficult password that you can easily remember, enter it twice and click on “ Next ”. If the password is too short, VeraCrypt warns you again - you can click away this message with " Yes ".
8th step:
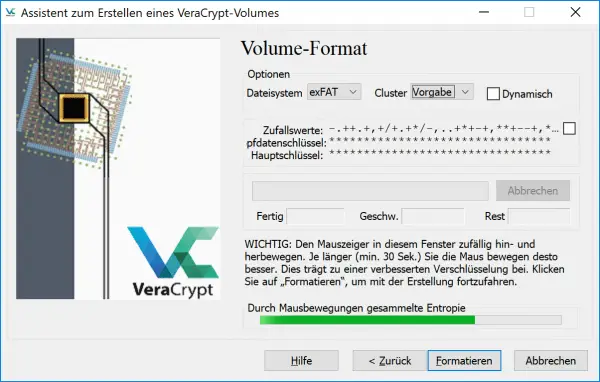 Now comes another important menu: you have to define the file system and increase the “ entropy ”, i.e. clutter, by moving the mouse around the screen . Select " exFAT " for best reliability and compatibility and move the mouse chaotically around the screen for about 30 seconds until the bar appears green . Then click on " Format ".
9th step:
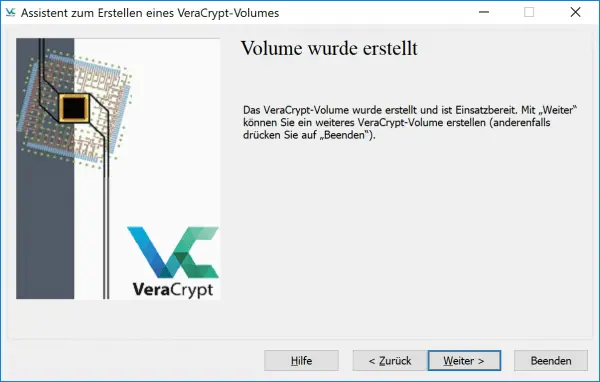 VeraCrypt will now format the encrypted virtual drive and place it in the location specified in step 6. Now select " Finish " in the assistant . The virtual drive in the form of a file is created.
10th step:
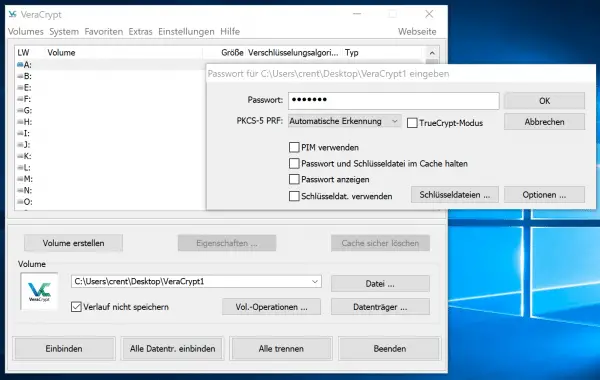 You can now mount the container as a drive by opening the container file in VeraCrypt with a click on " File ". Then you have to enter the password .
11th step:
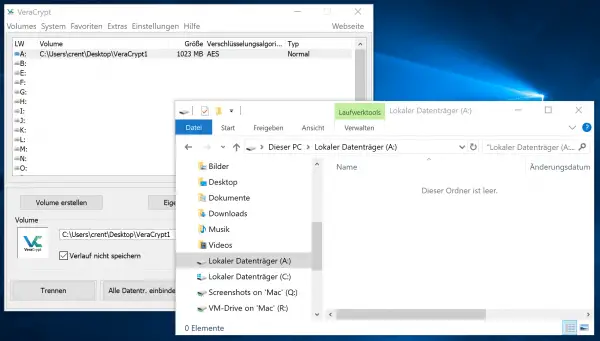 VeraCrypt now mounts the encrypted virtual volume with a drive letter - for example "A:" - in the system. The file can now be loaded with data like a USB stick.
12th step:
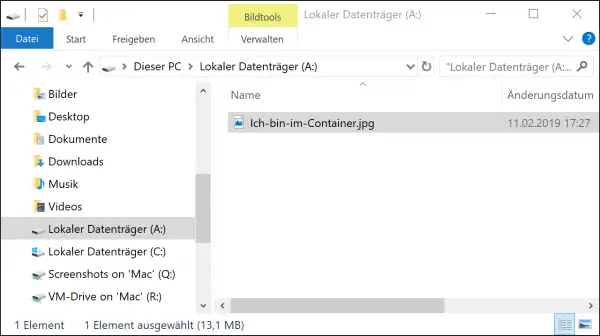 The encrypted container itself can be used like a file : you can, for example, copy it to the cloud or a USB stick and, if necessary, open it on another computer running VeraCrypt.
13th step:
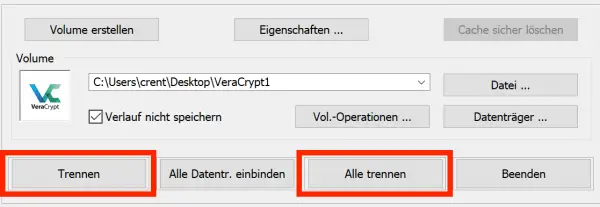 Don't forget to eject the container when you have finished. To do this, click on “ Disconnect ”: VeraCrypt then closes the virtual drive again and you can remove the stick or the external hard drive from your computer.
Note: In the VeraCrypt settings under Windows, the check mark in front of "Receive change times for container files" must be removed, otherwise the container will not be updated during the backup.
What else VeraCrypt can do
With the encrypted container, you can work with VeraCrypt very elegantly and without much effort: If necessary, the virtual disk is simply mounted in the Windows, macOS or Linux system and thus integrated as a drive. It behaves like a normal hard drive, only that it is located on a different hard drive and contains data securely.
But VeraCrypt can do even more: You can also use the software to encrypt entire drives , such as USB sticks, which then have to be unlocked after being plugged into the computer. Under Windows it is even possible to encrypt the entire system hard drive - However, we only recommend this measure to users who are familiar with VeraCrypt and the idea behind encryption. Practical: VeraCrypt works almost instantly, you as a user do not notice much of the encryption and decryption, which takes place continuously on a corresponding drive, except that the processor load may increase a little..
Use VeraCrypt consciously
However, it doesn't make sense to use VeraCrypt for all files. The most sensible scenario is still an encrypted USB stick that contains, for example, backup copies of the most important data. If it is carried around on a bunch of keys, it is automatically a safe off-site backup: if the apartment burns down, including computers and hard drives, the most important data is still available on this stick in case of doubt.