How to create a table of figures in Word 1st step 2nd step 3rd step 4th step 5th step quick start Guide
Word offers many useful functions for creating directories automatically. The list of figures is the standard for scientific work and texts. It consists of the tabular overview at the beginning of your document and the captions of your images. All images, graphics, tables and formulas used must be noted here. For future readers it is a navigation aid with which you can jump directly to the desired image. We will show you in five simple steps how to insert a table of figures into your scientific essay.
How to create a table of figures in Word
What you should consider before creating: Give each figure an individual heading. Since the list of figures creates direct links, you can avoid errors. Pay attention to a chronological order of your representations. Finally, you should also include the page numbers in the list of figures so that the figures can be found quickly in the document.
Follow our step-by-step instructions or take a look at the brief instructions .
1st step
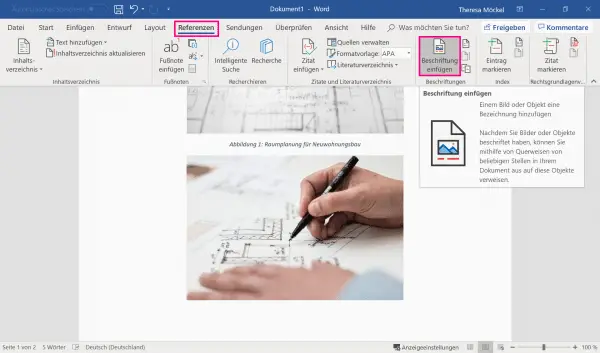 Before you can create the directory, you should first add captions to your images . To position a label under a figure, click below the relevant figure and then select the option " Insert label " under " References ".
2nd step
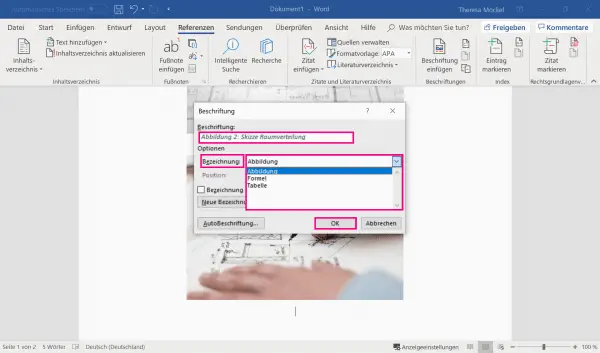 In the window that opens, you can give the figure a unique title and in the " Description " field specify whether the figure is, for example, an image (figure) or a table. Finally, click " OK " to add the caption.
3rd step
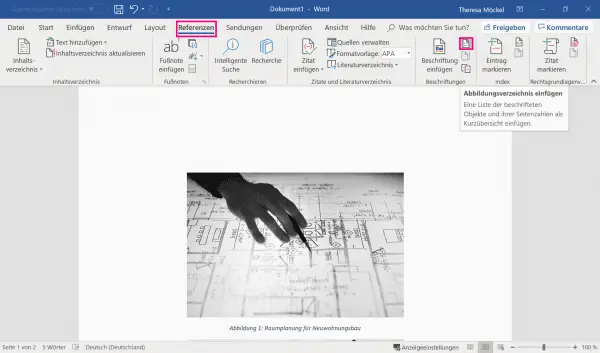 Click in your Word document where you want the directory to be inserted. In scientific texts, it is common to list the list of figures after the table of contents or after the list of references . Switch to the " References " tab and click on " Insert table of figures ".
Attention: Up to version Word 2016, the functions can be found in the " References " tab.
4th step
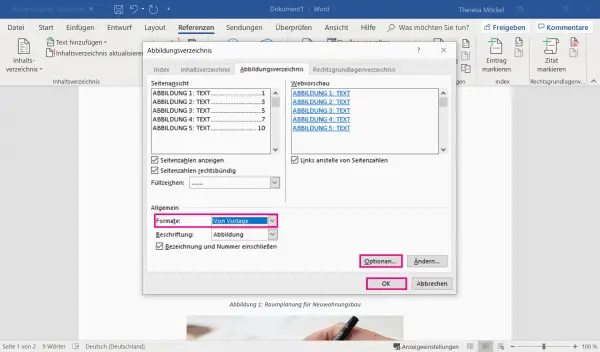 You can in the new window size and other options for your table of figures set . End the process with " OK ". For later changes you can adjust the format options again via "Insert table of figures ".
5th step
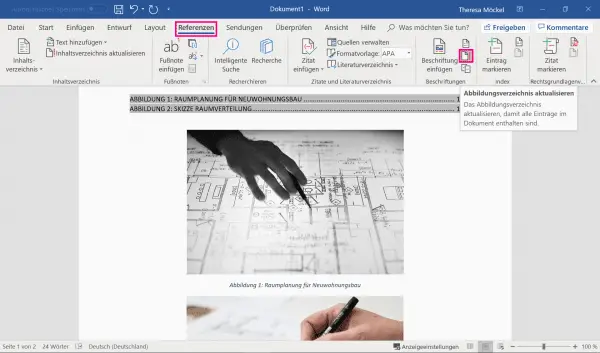 If you should add further representations later, you can update your list of figures by clicking on " Update list of figures " under the " References " tab .
quick start Guide
1. Create a label for all images in your document using " References " and " Insert label " . 2. Give your picture a unique title and determine the type of picture . (eg table) 3. Select the position where your directory should be created. Then go to " Insert table of figures " in the " References " tab . 4. Set the required format and other options in the newly opened window and then click " OK ".
5. If additional figures are added later, you can update your directory via " References " and "Update figure directory "..