A virtual machine gives you many options. For example, you can run Ubuntu on it without deviating from your normal operating system. Follow our guide.
Create a virtual machine
If you are new to virtual machines, here is a brief background: A VM simulates a real computer using software in which normal operating systems can be installed . Once this is up and running, there is almost no difference in operation to a real hardware PC. The VM receives some resources from the real computer, for example RAM, CPU cores and graphics performance. You determine how many resources you have.
The hard disks are also very important: VMs naturally use virtual hard disks that are stored in the form of "images"; very similar to the ISO images that you are probably familiar with from operating systems. The special thing about it: These hard disk files can grow. For example, if you create a 50 gigabyte virtual hard drive and then install Ubuntu on it, the image file will only be a few gigabytes in size. If you then work in the VM in the guest system and create files, it will grow to a maximum of 50 gigabytes. This function is called " Dynamic Allocation " and is a good way of not wasting more space than necessary and of having additional buffers. You will see exactly how this works in a moment.
 The result: a complete Ubuntu in the window on the Windows desktop.
 First, you need to install VirtualBox and get an Ubuntu image in the form of an ISO file . Then start VirtualBox and get started..
- Create a VM using the " New " button - an assistant will start.
- Preferably choose a name with " Ubuntu " - then the values for the operating system type and version will be corrected automatically.
- Determine the amount of memory : 1 GB is enough, 2 to 4 GB would be better . (This memory is then no longer available on the host.)
- In the next step, select " Create hard disk " to create a new disk.
- In the next window, leave the file type at " VDI ", VirtualBox's own format.
- For the following storage type, leave the above-mentioned default value " dynamically allocated " in order to get a growing image file.
- Next, assign a name to the hard disk and select the maximum final size. (Also pay attention to the storage location - hard drive images can get very large!)
- Click " Create " to complete the creation.
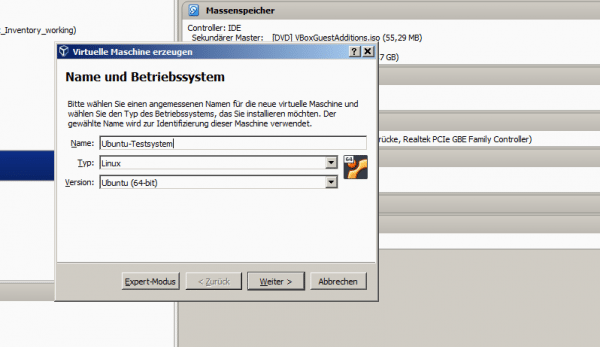 The wizard guides you through the installation - and even recognizes the system by its name.
In the main window you can now see your basically finished VM on the left. If you click on it, you will see the configuration on the right - and there are a few more important points that you should edit first. Call up the settings via the " Change " button at the top left.
- Switch to the " System " area and there to the " Processor " tab .
- By default, only one CPU core is assigned. Depending on the number of cores you have, you should increase this value to at least two cores .
- Go to the " Display " area. If necessary, activate " 3D acceleration " here and increase the graphics memory.
- Navigate to the " Network " and select the " Connected to " the entry " Network Bridge ". This means that the virtual computer can later be seen in your network with its own IP address.
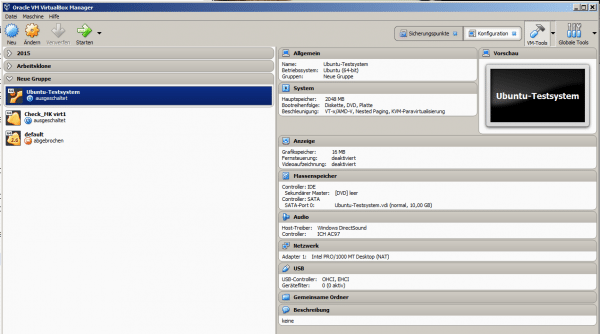 You can access the settings directly via the headings on the right-hand side of the window.
 This means that the most important basic settings are on a good level, but one area from the settings is still missing: Under " Mass storage " you now determine which " CD in the CD drive " of the VM is, i.e. which image is to be booted from.
In the middle you can see the mass storage connections of the VM: One controller for IDE devices, one for SATA devices. Under the IDE controller there is a CD symbol with the entry " empty " - there is no CD / no image in the drive. Click on this entry and then on the far right of the window on the small CD symbol next to " Optical drive: Secondary master ". From the menu that opens, select the item " Select file for optical media ... "and then the downloaded Ubuntu ISO file ..
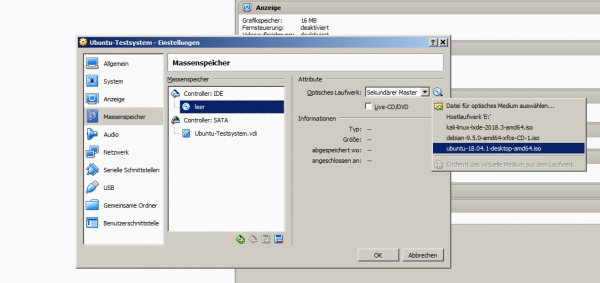 The button for inserting an image is a little hidden.
 Install Ubuntu
The VM is ready, Ubuntu is inserted, time to start - by double-clicking or using the " Start " button. What comes next shouldn't surprise you if you've already installed Ubuntu, namely the normal Ubuntu installation routine.
But there are still a few things that you should do after the installation in order to be able to work comfortably with the VM: First you should install the " Guest Additions ". These are VirtualBox tools that are set up in the guest Ubuntu to work better with the host system. To do this, click on " Devices " in the menu bar and then on " Insert guest additions" ". A virtual CD-ROM is inserted and you only have to confirm the autostart . The installation may produce an error, but after a restart the guest additions should work enough to allow easy data transfer between guest and host.
 The guest additions bring significantly more comfort.
After the restart, open the " Devices " menu again: Here you will find the entries " Shared clipboard " and " Drag'n'Drop ". With both you can activate the value " bidirectional " in order to copy files and texts via drag & drop or the clipboard between VM and host. There is also the option of setting up a shared folder, but experience has shown that this regularly causes problems.
Working with the VM Ubuntu
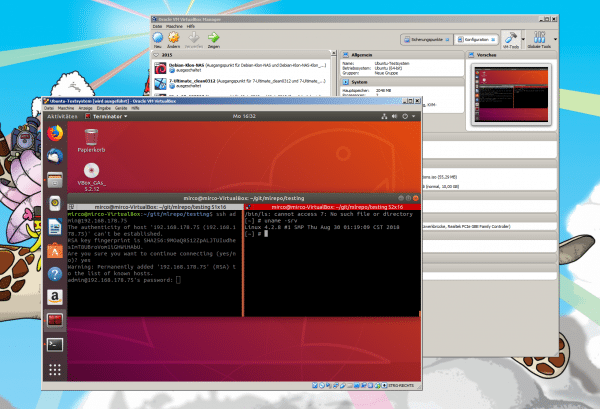
There are practical tips here and there when working with VMs. For example, file transfer: The simplest way of copying files is simply the Ubuntu file manager. The menu item " Other locations " takes you directly to all your network devices and can directly access shared folders on Windows, the NAS or any other device.
You don't have to shut down VMs after each session . Simply close the window with the guest Ubuntu as usual using the "X" in the top right corner of the window - VirtualBox will then ask you whether you want to switch off the machine or save its state. In the saved state, the VM starts the next time exactly as you left it. With all open programs, windows and files.
In the main window of VirtualBox you can also save states permanently as a snapshot . This is useful if, for example, you are testing software or a system setting and then something does not work. You can return to the previous state immediately with a snapshot. To do this, click on " Safepoints " in the upper right corner of " VM Tools "Menu. Right-click on" Current State "to create a snapshot.
By the way: VMs are also transportable. You can simply copy the folder with the configuration and the virtual hard disk to a USB stick . The VM then starts on every computer running VirtualBox directly from the stick.