NAS or "Network Attached Storages" are hard drives that you can address via your network. You and other users can use it to save and access data, for example to carry out backups in the network or to distribute media. In practice, even simple NAS drives can do more than “just” back up data. For example, you can host server applications on a NAS, set up an in-house alternative to cloud storage such as Dropbox or provide a full-fledged media server for films, photos and music. Of course, for all of this to work, you'll need to set up your NAS first. Don't worry: Despite working on the network, installing the NAS is not particularly difficult. We'll show you how the setup works using an ASUSTOR NAS system.The first steps in particular can be transferred practically one-to-one to NAS systems from other manufacturers, such as Synology, QNAP or Western Digital.
NAS drives: RAID levels and hard drives
There are countless models to choose from when buying a NAS drive. The most important decision is: How many hard drives do you want to install? The most common are 2-bay NAS, i.e. NAS enclosures with slots for two hard drives. NAS systems with four or more disks are also used, especially in professional environments. The hard drives also determine the available RAID levels at which the NAS can be operated. Put simply, this is the way in which the hard drives work together (you can find out more about the different RAID levels here). For most users, buying a 2-bay NAS that operates in RAID 1 mode is recommended. The NAS stores all data twice on the two hard drives. The reason for this:If one disk fails sooner or later, the data is still available on the other hard disk. If you replace the defective hard disk, the NAS will reconstruct the data on the replacement disk and you can continue working without data loss. Of course, in the worst case it can happen that both hard disks fail at the same time (therefore it is advisable to always create an additional backup despite RAID), but the probability of this is significantly lower than with individual operation.Always create an additional backup despite RAID), but the probability of this is significantly lower than with stand-alone operation.Always create an additional backup despite RAID), but the probability of this is significantly lower than with stand-alone operation.
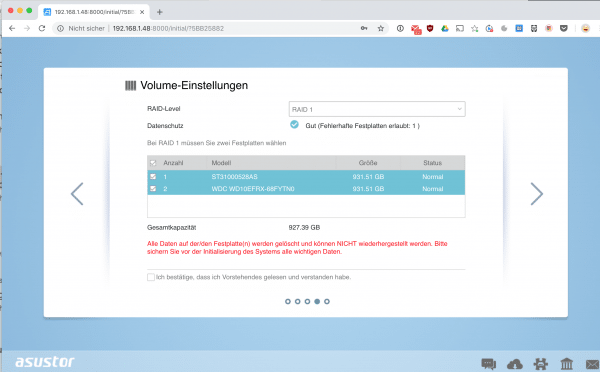 RAID 1 (here at ASUSTOR) is particularly recommended for a typical 2-bay NAS. The system offers data security even if a hard drive fails.
 The downside of RAID 1: Due to the redundant data storage, only half the hard drive capacity is available in practice. For example, if you install two 4 terabytes of hard drives in your NAS, you will not have eight, but only four TB of storage. The gain in protection for the stored data usually outweighs this limitation without any problems..
To set up a NAS on your network:
1st step:
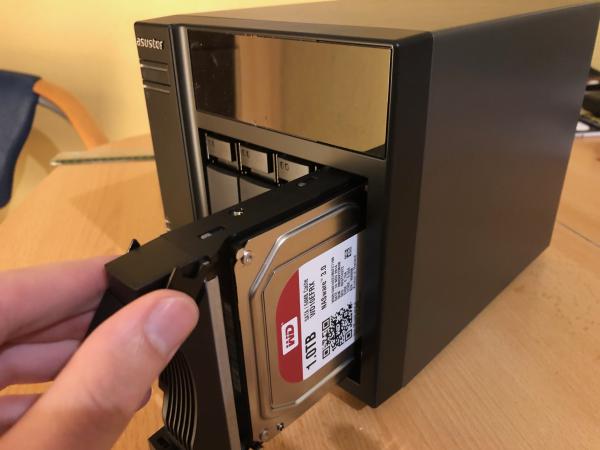 The first step in setting up a NAS for the first time is practically always installing the hard drives . How this works, of course, depends on the NAS model. However, it is usually not too complex: Many NAS enclosures now even offer the option of installing the hard drives without tools. Otherwise you have to attach the hard disks to the corresponding brackets with screws. Note that most NAS devices are designed to use 3.5-inch hard drives. If you would like to set up a fast RAID system based on SSDs, you may therefore need suitable installation frames for the 2.5-inch hard drives.
 2nd step:
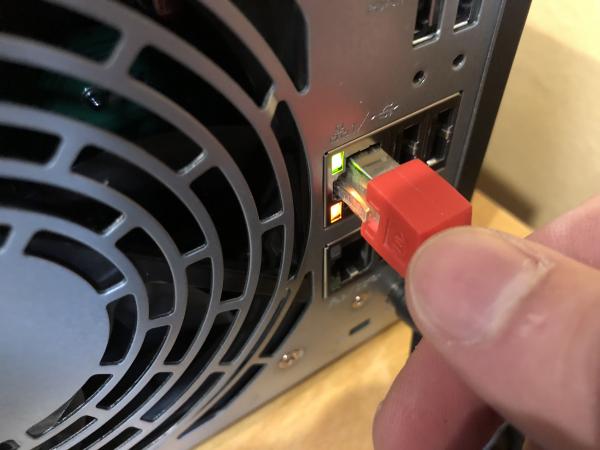 Once the hard drives are in the housing, you have to wire everything up. In addition to the power connection , the network connection is of course of particular interest. Even if your NAS is WLAN-capable, a cable connection to the router is almost always necessary, at least for the initial installation. So connect the Ethernet interface to your router.
 3rd step:
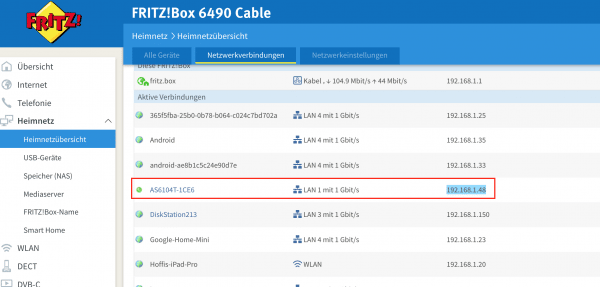 Now you can continue on your PC or Mac. You now have to call up the start page of the NAS system , which is usually done via the IP address of the device . Your router will assign these automatically - all you have to do is find out. There are two ways of doing this: Most NAS manufacturers offer tools in the download area that can track down the drives in the network. The alternative is to find out the IP address through your router. Log into the router backend and open the network overview (In the Fritzbox, for example, it can be found under “Home network overview - network connections”. Try to identify the device here by name. Usually, either the manufacturer or the model name appears in the device list, so that identification is very easy.
 4th step:
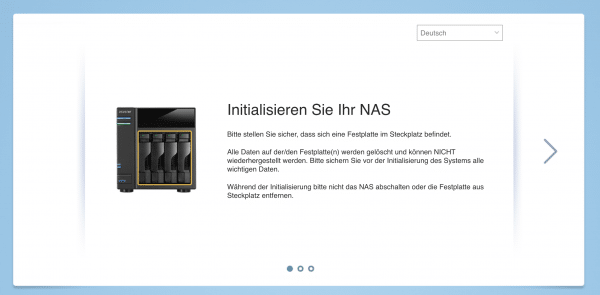 You now know the IP address of your NAS system . Copy this and enter it into the browser to go to the NAS home page . During the initial setup, you will be met by a setup wizard across all devices . This takes over the initialization of the hard disks, installs the NAS operating system and carries out the first steps. The NAS system then restarts.
 5th step:
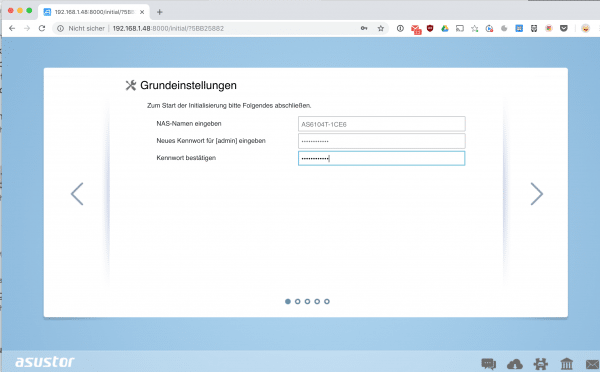 From here on, the NAS setup depends on the manufacturer. As a rule, however, the wizard now continues with setting up users, passwords for access to the NAS or selecting the RAID level. Just follow the steps in the wizard to get your NAS ready to use.
 6th step:
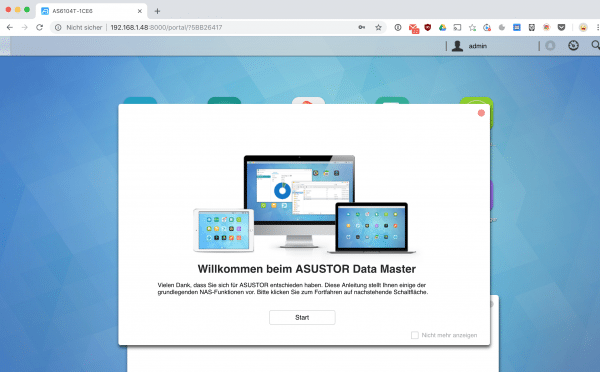 You can now reach your NAS in the network. For example, you can use Windows Explorer or the Mac Finder to save data on the network hard drive. You can log into the NAS operating system at any time using the IP address. Here you can start the device-specific applications, activate new services or set up several user accounts. The possibilities that a NAS offers are gigantic - we hope you enjoy trying it out!