Most Linux distributions offer built-in tools for screenshots - but these are often only sufficient for the bare essentials. Separate programs offer better options. In the following, we will show you how you can take screenshots with standard tools and external programs.
Screenshots with standard tools
Pretty much every Linux distribution should have at least two options for "photographing" the screen or parts of it, i.e. taking screenshots. The classic is the good old print key : Click on [ Print ] on the keyboard and - as a rule - a screenshot of the entire screen will be taken. This either ends up in the clipboard without any further information or a dialog for saving the image opens. In the first case, you have to open an image editor such as Gimp, create a new, blank document and then paste the image from the clipboard . To record only the current window , use the key combination [ALT] + [Print] .
A little more comfortable it is with most also existing graphical tools: In the Start menu by your distribution " screenshot " or " screenshot ". If we take Linux Mint as an example, a simple dialog appears with options for capturing the entire desktop, individual windows or a manually drawn area. A delay can also be activated; this is useful if you want to screenshot an open menu, for example - otherwise it would close as soon as you open the screenshot tool.
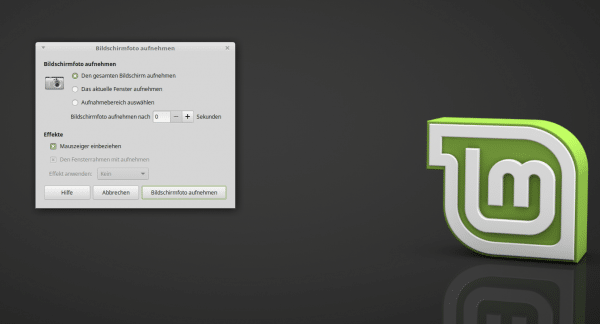 The standard Mint tool is sufficient for most cases.
 The disadvantage of this solution as well: On the one hand there are no options and on the other hand the program closes automatically after a screenshot - if you want to create 20 images, that's more than just annoying..
Screenshots with a special tool
A wonderful solution for those who have a few more requirements is the Shutter program , which you can simply install via the software center or the command " sudo apt-get install shutter ". Shutter has the same features as the Mint standard tool already presented. But it can do a lot more: It remains - of course - in the foreground even after a shot, can capture individual windows directly from the program interface, take pictures of other (virtual) desktops and shows all created images itself in tabs There is a small magnifying glass window for a screenshot of a self-selected area, which you can use to target edges and corners with pixel-perfect precision.
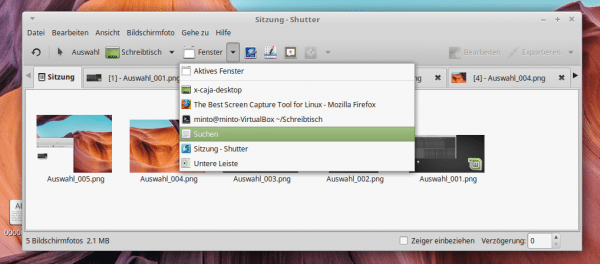 Shutter offers many more features than the Distri standards.
 In addition, images can be provided with a few useful filters directly in Shutter : To do this, open the menu item " Start an extension ... " from the " Screenshot " menu . Filters for things like drop shadows, frames or watermarks are then available here. When you are done with the shotting and editing, you can also save the images in almost any format, including PDF, send them by e-mail or export them to services such as Dropbox or Imgur.
If you just need a single screenshot every jubilee, you will get a long way with the push button, but Shutter is strongly recommended to all regular users. By the way: Of course there is still A number of other tools and many desktop environments have their own screenshot tool variants - but Shutter is a good solution that is available everywhere and that also meets professional requirements..