If you've accidentally formatted the wrong hard drive or deleted partitions, the shock is usually great - but unnecessary. We will show you how to recover files from formatted partitions and deleted partitions.
Partitions and formatting
First of all, a few terms need to be clear. We always talk about formatted hard drives, but hard drives are actually partitioned and partitions are formatted. So there are two possible sources of problems here. Formatting a partition is usually done under Windows with a right click on the drive and the option "Format" from the context menu - you can quickly find yourself wrong if there are many hard disks and partitions in the system. In order to delete a partition, you have to go through a partition manager or the depths of the Windows Control Panel - but that too can happen. A partition manager does not necessarily look clear, especially for laypeople.
 Partition managers manage the partitioning of hard drives.
 In most cases, deleted partitions can be restored. The status is then as before - the partition is, for example, drive "D:" in the system and the files and folders are there again. After formatting a partition, most files can also be restored - but not always with the correct file names and folder structures. So your rescued photos may simply be named 000001.jpg, 000002.jpg and so on.
There are many tools that can do these things - and we suggest one without a graphical interface. Strictly speaking, there are actually two tools that come together: TestDisk and PhotoRec. Don't put too much emphasis on the name, TestDisk will restore partitions and PhotoRec will restore pretty much any data you could want. Both tools run in the terminal, i.e. the Windows command prompt, are menu-driven, very simple but above all extremely reliable. PhotoRec now even has a small GUI. As I said, there are also "more modern" programs with fancier graphical interfaces, but experience has shown that you always end up with these two tools if you have problems. You can also get to know the right tools right away.
Nevertheless: You can also carry out a first attempt with the freeware Recuva from Piriform (known for the Ccleaner): Start the program and simply use the assistant or enter the drive in the main window and click on "Scan" - often enough that already and you can save yourself further effort..
 Recuva makes file recovery easy and often successful.
 Recover files after formatting
The more common case is recovering files after formatting. Most of the time you will use the " quick format " provided by Windows - this makes rescuing files quick and easy. If you uncheck the box, the rescue attempt will take hours - and will usually be unsuccessful. With old 32-bit operating systems up to Windows Vista it looked even better. First download the two programs:
- TestDisk
- PhotoRec
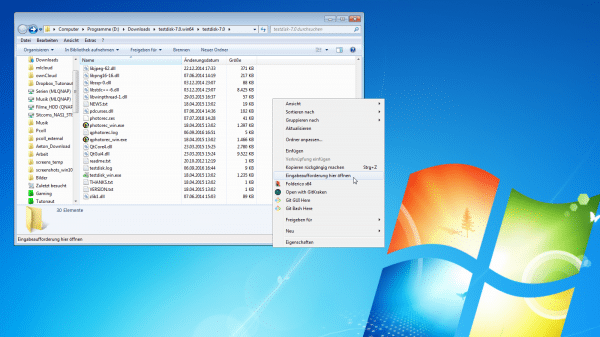
Unzip the archive and change to the folder.
You can start the graphical version of PhotoRec via " gphotorec_win.exe ": Simply select the desired drive , a folder for the rescued files (PhotoRec never writes to the data carrier from which it is rescued!) and start the search .
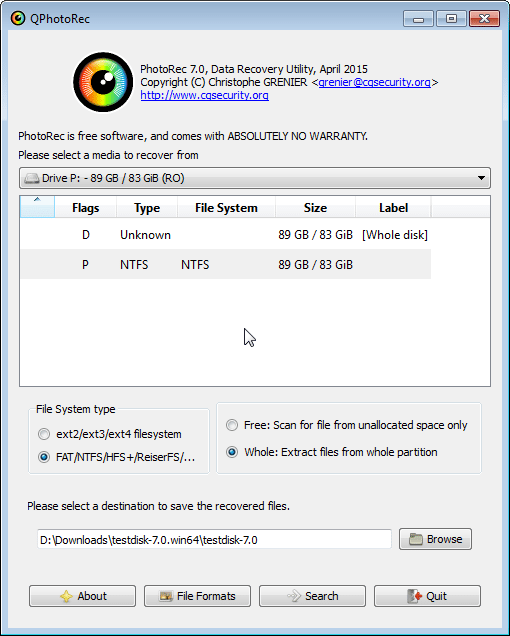 If Windows is working correctly, PhotoRec will also work with a GUI.
 Unfortunately, file recovery is something that happens again and again when the system no longer runs properly, or the Windows logon may even fail completely. Then you might end up in Microsoft's rescue console or even have to use live Linux. Therefore, in the following, the rescue on the command line step by step:
1st step:
 Open the context menu with [Shift] + [right-click] and start the command prompt .
 2nd step:
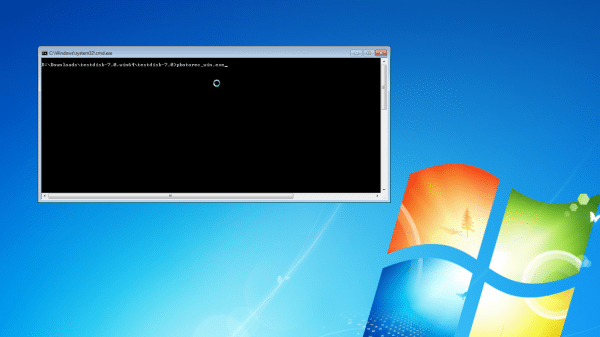 Start PhotoRec with " photorec_win.exe ".
 3rd step:
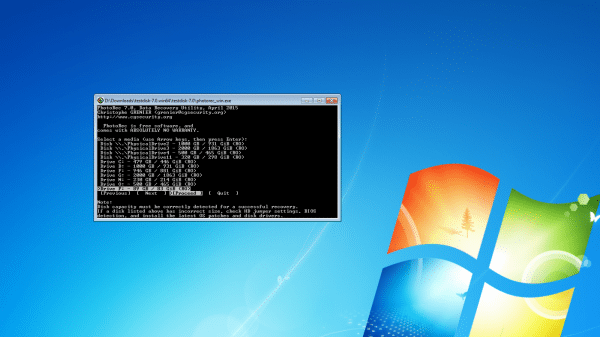 Select the accidentally formatted partition (Drive) or an entire hard disk (Disk). Navigate with the arrow keys and confirm with [ Enter ].
 4th step:
 Choose whether to analyze the formatted area (with letters) or the entire plate.
 5th step:
 Determine the original file system - if it was not a Linux system, always " Other ".
 6th step:
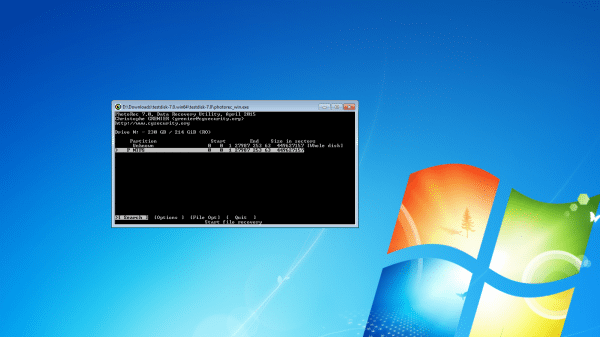
 Select " Whole " to rescue all files from the whole partition.
 7th step:
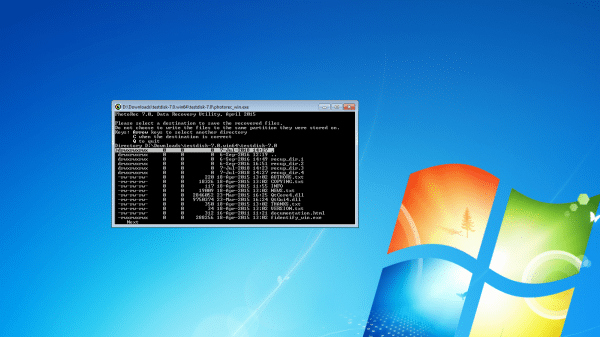 Determine an output directory for the rescued files.
 8th step:
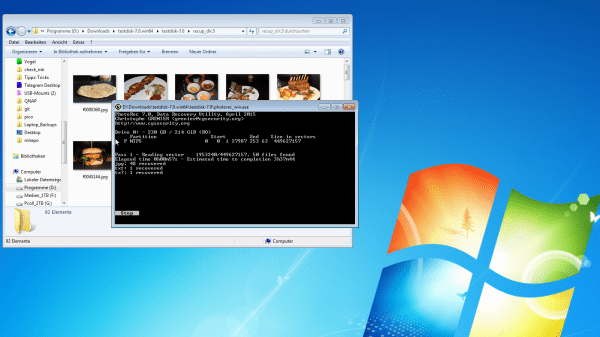 The files are automatically restored to the specified folder - the process can take a long time, but the first files should appear immediately. If the hard drive was formatted without the standard "quick format" option, the process takes several hours at just 90 gigabytes - and it will probably not find any files.
 Recover deleted partitions
Basically, TestDisk works in exactly the same way as PhotoRec: Call up the command prompt here too and start the program with " testdisk_win.exe ". In the first screen, confirm the given option " Create " to start a new analysis. In the second screen you have to get "creative" once, namely select the hard drive you want . If you are not sure which one is the right one, you might want to take a look at the Windows "Computer Management": Under " Disk Management " all drives are listed with their names, drive letters and the disk numbers used by TestDisk..
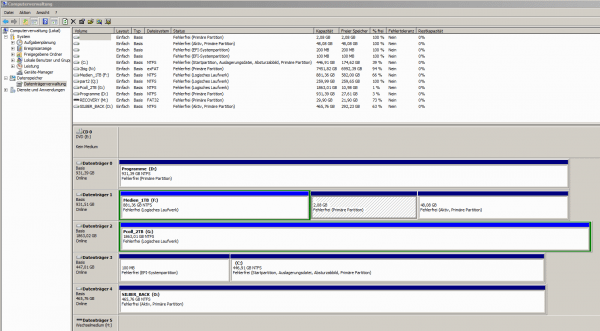 Windows Disk Management also shows the disk numbers.
You simply confirm the next three menus: the type of partition (Intel), the type of job (analysis) and, ultimately, the search is started using the " Quick Search " option . The actual search then takes some time again. If the search is unsuccessful, you can use the " Deeper Search " option to search for an even more thorough one. If everything goes well, you will eventually end up with a list of partitions - and you can then have this structure restored. Admittedly, none of this is particularly intuitive or pretty, but TestDisk has been used successfully for ages and is also available under Linux.
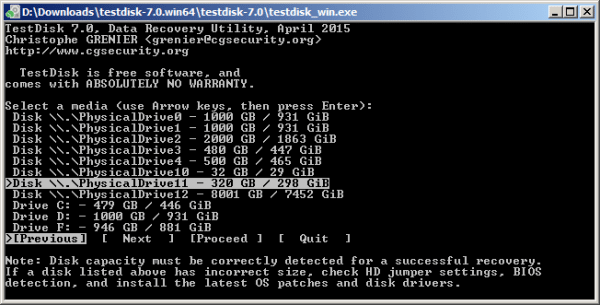 With TestDisk the "creativity" is limited to the selection of the hard drive - the rest is simply "further".
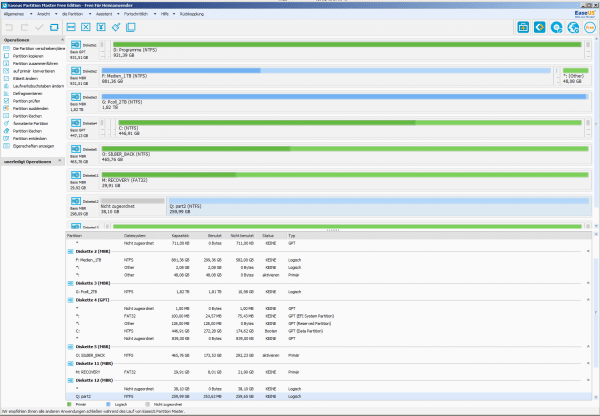
 If you really want to try it graphically: The EasUS Partition Master Free offers the function " Restore partition " directly via the context menu of unallocated areas. And here, too, there is a quick search and an exact sector-by-sector search ("Complete"). However, the otherwise very good partitioning tool has not been able to restore anything here in the test.
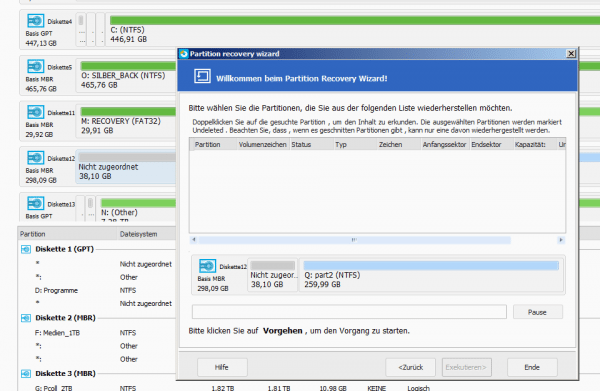 EasUS makes the rescue attempt very easy in any case.
 Whether partitions and entire partitions of hard disks can be found and restored, regardless of the program used, also depends on which program was originally used for partitioning and what exactly was written where - unfortunately there is no guarantee of success.