CMYK stands for the three color components cyan, magenta and yellow and the black component K (abbreviation for key). This color profile is the standard in the printing sector. However, if you would like to edit an image on your PC or tablet, we recommend RGB colors - i.e. red, green and blue. We tell you here how to convert the color model in GIMP from CMYK to RGB.
Installation of Separate Plus and ICC color profiles
Before you can use the add-on in GIMP, it must be downloaded and installed in the correct folder. Follow our step-by-step instructions or take a look at the brief instructions .
1st step:
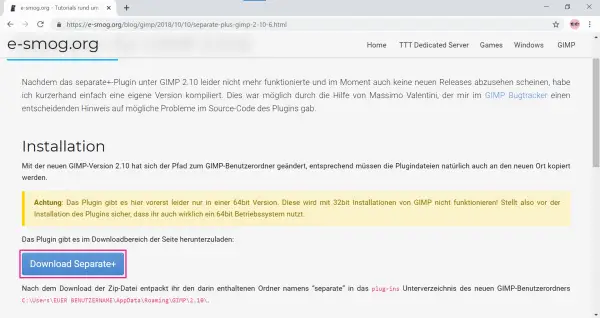 First download the tool from e-smog.org . A user recompiled Seperate + for current GIMP versions. Unfortunately, the tool on the official download page no longer works for GIMP 2.10+ - so this solution is currently the only way. Simply click on " Download seperate + " on the page .
 2nd step:
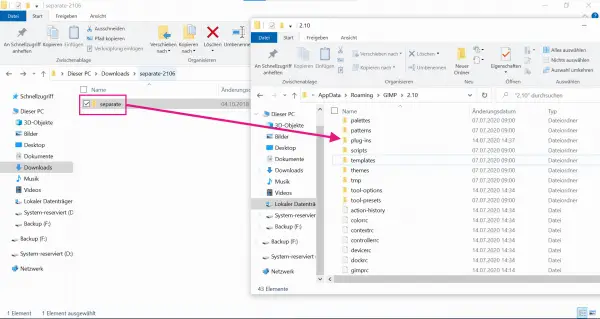 After the download, unzip the ZIP file and move the " seperate " folder to C: \ Users \ USERNAME \ AppData \ Roaming \ GIMP \ 2.10 \ plug-ins . When restarting the GIMP , the add-on will now be loaded automatically.
 3rd step:
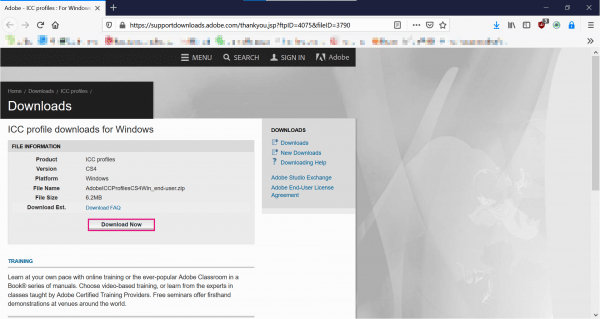 The ICC color profiles are also required so that the conversion to the RGB color space also works without problems. You can find this for free download on the Adobe website.
 4th step:
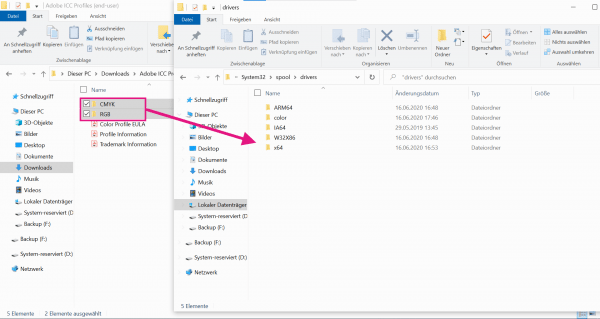 Unzip the ZIP file again. You now have to move the " CMYK " and " RGB " folders to C: / Windows / System32 / spool / drivers / color .
 Converting colors from CMYK to RGB using GIMP
Follow our step-by-step instructions or take a look at the brief instructions ..
Note: We use GIMP 2.10.20 in our instructions.
1st step:
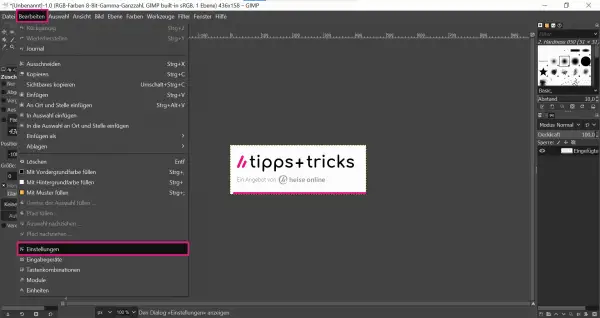 First, start GIMP. Via " Edit " go to " Settings ".
 2nd step:
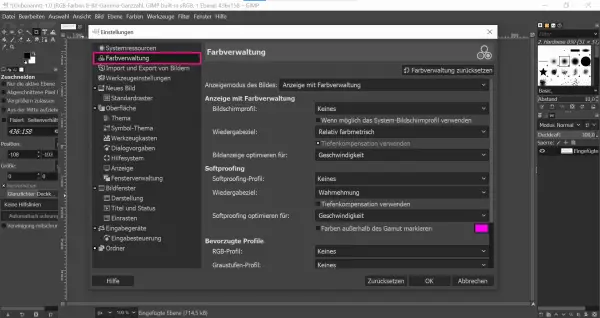 There you click on " Color Management ".
 3rd step:
 Then select the option " Select color profile from hard disk " in the drop-down menu under " RGB profile " .
 4th step:
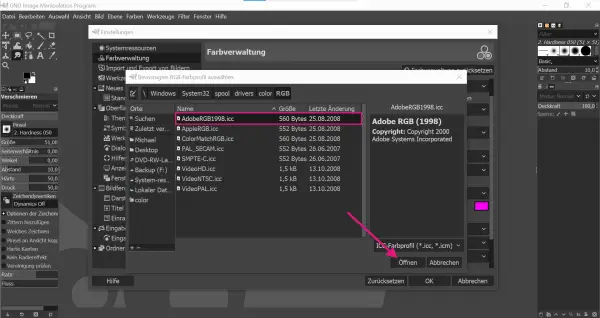 Here you navigate to the folder in which "CMYK" and "RGB" were previously saved - C: / Windows / System32 / spool / drivers / color . Now select the color profile " AdobeRGB1998.icc " in the " RGB " folder . Confirm the process with " Open ".
 5th step:
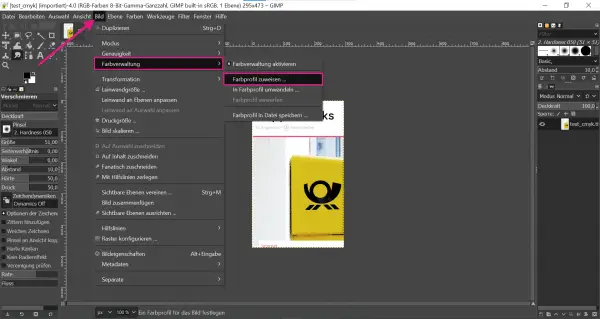 Now you can open the image with CMYK colors in GIMP. Then click on " Image "> " Color Management " and then " Color Profile Assign ".
 6th step:
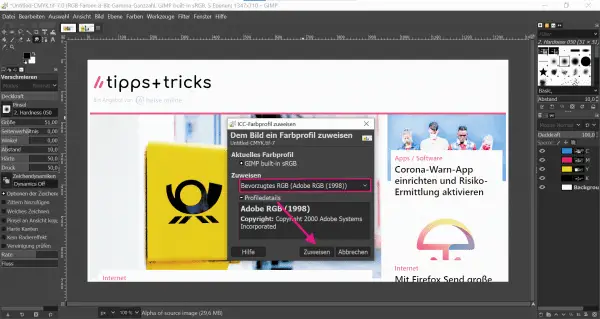 Under " Assign " set the color profile to " Adobe RGB (1998) " and then click on " Assign ". The CMYK image is now converted. You can then export and save your image.
 Brief instructions: Install separate Plus and ICC color profiles
- Download Separate + from e-smorg.org . To do this, click on " Download Seperate + " on the page .
- Unzip the zip file.
- Now move the "separate" folder to C: \ Users \ USERNAME \ AppData \ Roaming \ GIMP \ 2.10 \ plug-ins .
- The ICC color profiles are also required from the official Adobe website.
- Unzip the downloaded ZIP file again and move its " RGB " and " CMYK " folders to C: / Windows / System32 / spool / drivers / color .
Quick guide: Converting CMYK to RGB with GIMP
- First start GIMP and go to " Edit " and then " Preferences " in the menu .
- Via " Color Management " go to the selection menu under " RGB Profile " and select the option " Select color profile from hard disk ".
- Here you navigate to the folder in which "CMYK" and "RGB" were previously saved - C: / Windows / System32 / spool / drivers / color .
- Now select the color profile " AdobeRGB1998.icc " in the " RGB " folder . Confirm the process with " Open ".
- Now open the desired image in the GIMP and then navigate via the menu to " Image "> " Color management "> " Assign color profile ".
- Under " Assign " set the color profile to " Adobe RGB (1998) ".
- Then click on " Assign " and export or save the converted image.