The Raspberry Pi is bursting with versatility: whether as a media player with Kodi, a game computer for old consoles or as a full-fledged Linux computer, the Pi can do almost everything. With the right combination of storage media and operating system, the Raspi can even function as Networked Attached Storage, or NAS for short. Due to the hardware, the Pi is not as flexible as a dedicated NAS from QNAPS, Synology and Co., but it is definitely sufficient as a simple network hard drive for backups and file storage.
Raspi as NAS: you need that
If you want to use a Raspberry Pi as a NAS, you have to pay attention to a few things. Of course, the most important thing is the Pi itself: We recommend using a newer model such as the Pi 3B, 3B + or even the latest Pi 4. The NAS software used also tends to run on the Raspberry Pi 2, but the performance is less good here . The solution does not work on the original Pi or the smaller Pi Zero and Pi Zero W models.
In order for the Pi to act as a network hard drive, you of course need adequate storage space. Ideally, you should connect one or more external hard drives with their own power supply to the Raspberry Pi. Of course, you can also use 2.5-inch hard drives or USB sticks as storage on the Pi. But here you have to make sure that the Raspberry Pi power supply also provides sufficient power. Regardless of this, you of course also need a microSD card on which the NAS operating system OpenMediaVault is installed..
Install OpenMediaVault up to version 4 on Raspberry Pi
The basic setup of the Pi-NAS is comparable to the installation of Kodi or Raspbian. We use the NAS distribution OpenMediaVault for this. The free system is available in a version adapted for the Raspberry Pi, which you can download from this link:
https://www.heise.de/download/product/openmediavault-95352
After the download you have to transfer the image to an SD Transfer card. This works, for example, with the free balena Etcher program that you can download for Windows, macOS and Linux here:
https://www.balena.io/etcher/
Start Etcher and select the downloaded image file with " Select image " from OpenMediaVault . Then click on " Select drive "and select the SD card. Make sure that Etcher has formatted the card completely, so be sure to select the correct drive. Then use" Flash "to transfer OpenMediaVault to the SD card.
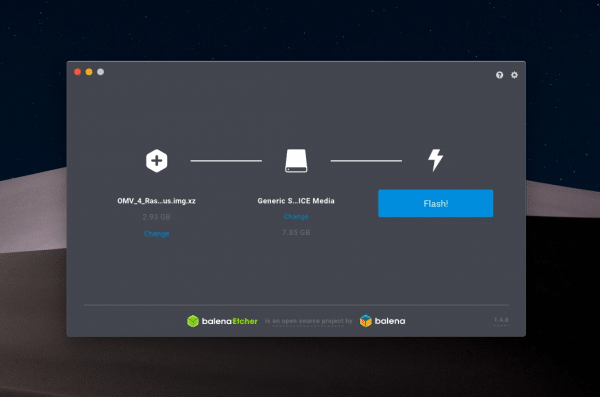 Installing OpenMediaVault is a breeze with Etcher.
Then pack the SD card into the Raspberry Pi and connect it. Also, connect the hard drive (s) that you will later use as NAS storage..
Install OpenMediaVault version 5 or higher on Raspberry Pi
With version 5, the installation of OpenMediaVault (OMW) for the Raspberry Pi has changed. Up until now, the image could be transferred directly to the microSD card. From the current version onwards, you must first install the official Raspbian operating system. You can then install OpenMediaVault via the installation script. The installation of OMW is carried out automatically and keeps the installation process clear for you.
1st step:
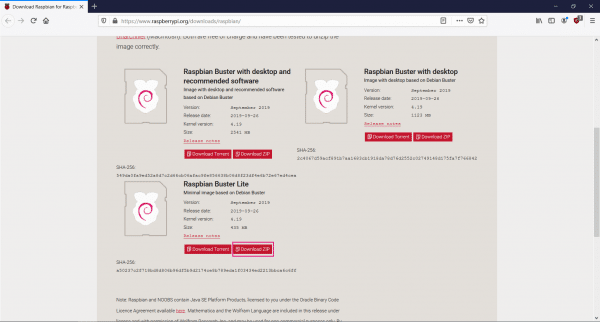 Navigate to the download page from raspberrypi.org and download the current Raspbian Lite image. On the page, click " Download ZIP ". The administration of OpenMediaVault is possible via an external computer. For this reason, you do not have to install Raspbian with a graphical user interface. The current version of Raspbian Lite is sufficient here . The advantage is obvious: the lack of a graphical user interface also reduces resource consumption.
 2nd step:
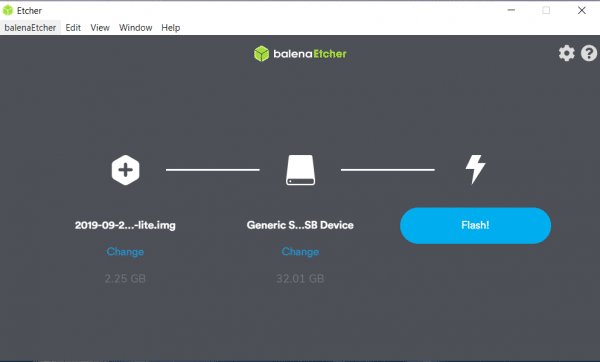 You then need to transfer the image to the microSD card. The free Etcher tool is ideal for this purpose. Install the program and then start the .exe file. Etcher starts automatically after a short installation. You now have to select the Raspbian Lite image you just downloaded via " Select image ". The connected microSD card can then be selected using the " Select target " button . The image is written to the storage medium by clicking on " Flash ". The installation and validation of the image may take a moment.
 3rd step:
 When the writing process is complete, you can insert the microSD card into the Raspberry Pi and connect the single-board PC to the power. The operating system is ready for use out of the box. You now have two options: Connect the RasPi to the monitor and keyboard or control it conveniently via another computer. To do this, you need to set up SSH on the Raspberry Pi. We choose the second method and connect to the Raspberry Pi via SSH. After the boot process, you have to enter the standard username and password: Username: pi , Password: raspberry . After logging in, you should still perform an update using the following command: sudo apt update && sudo apt upgrade Now the RPi is up to date and you restart the system once via: sudo reboot Note: If the login fails, you may have set the English keyboard layout. So Y and Z are swapped.
 4th step:
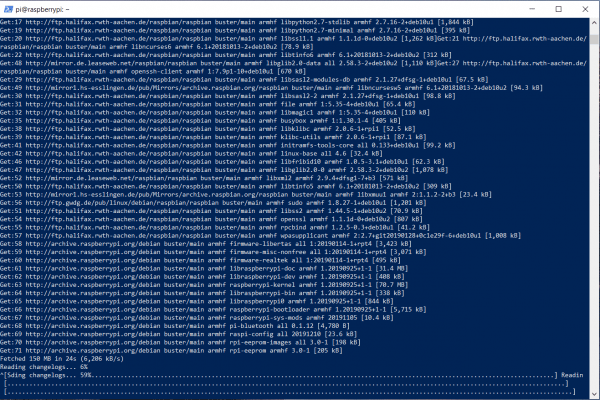
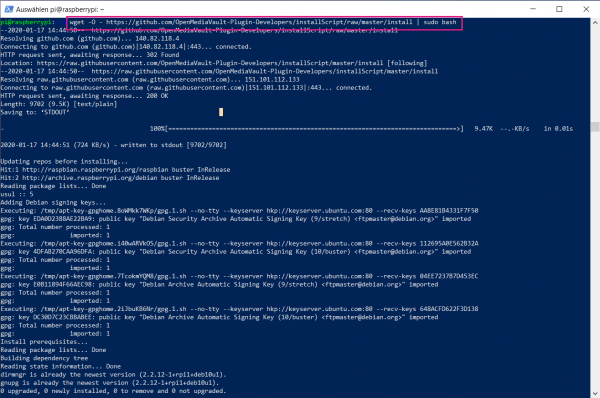 After the reboot, log in again. You now have to install OpenMediaVault 5 on the Raspberry Pi using the installation script. This works very easily with the following entry in the command line: wget -O - https://github.com/OpenMediaVault-Plugin-Developers/installScript/raw/master/install | sudo bash The script automatically installs the latest OMV version from the GitHub repository. The installation time may vary depending on the Raspberry generation. Then that was it with the installation of OMV. Restart the RasPi again and then continue with the section " OpenMediaVault: The first steps ".
 OpenMediaVault: Getting Started
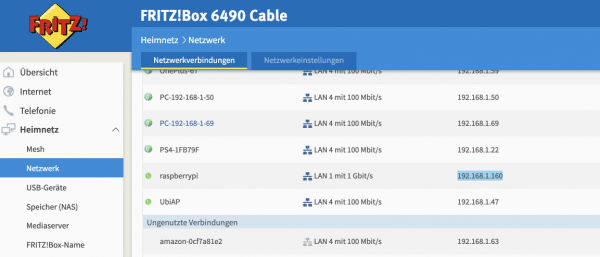
The first start of OpenMediaVault on the Pi takes a few minutes. The NAS system makes the most important basic settings and downloads additional components. The actual setup can then be carried out conveniently from another computer via the web interface. To do this, you must first find out the IP address of the Pis . OpenMediaVault displays this on the start screen. If the Pi is not connected to a monitor, you can find out the IP address via your router. With the Fritzbox, for example, you can find the information under "Home Network"> "Network"..
 Log into the OpenMediaVAult user interface using the Pi's IP address.
Open the browser of your choice, enter the IP address and log in to the OMV homepage . As user name you use this " admin " password "is open media vault ". You should first change this under " General Settings "> " Web Administrator Password ". Assign a new password and apply it with " Save ".
Next, we'll set up the hard drives. To do this, go to the " Data storage "> " Drives " section ". Select the external hard drive or a connected USB stick (the medium is usually called" sda ") and click on" Delete ". Select " Fast " as the method .
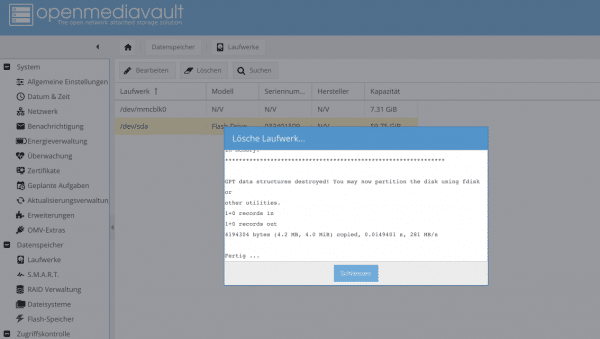 Before you can store data on the drive, it must be deleted.
 On the drive prepared in this way, we now create a file system under " Data storage "> " File systems ". Click on " Create ", select the medium you have just formatted under "Drive" and assign a name if you wish. In " file system " to accept the default " EXT4 ". After a few minutes, the hard drive or stick appears as "Online" in the "Status" column. Now click on " Mount " and then " Apply " so that the Raspi NAS can write to the disk.
Set users, shares, and more
As it should be for a good NAS system, OpenMediaVault supports the creation of various user accounts. For example, you can easily create your own user directories for everyone in the household. To do this, go to "Access Control "> " Users " and tap " Add ". Assign a user name and password and save the new user. Now, if necessary, add as many users as you need.
Now we have to create a share . In a sense, these are folders that you can later access in the network. To do this, switch to the " Access Control " area ">" Shared folders ". Here click on" Add ". Enter a name , select the hard drive you have just prepared under" Drive ". In the" Access rights "field, you can specify who is allowed to access the share. In our If this is the case, we will use the standard setting and save the share. Now click on it and select " Privileges ". Here you can now specify which users can access the shares. You can choose between " Read and write ", " Read only " and " No access The admin account can basically access all shares. Save the changes and click on " Apply " in the bar at the top .
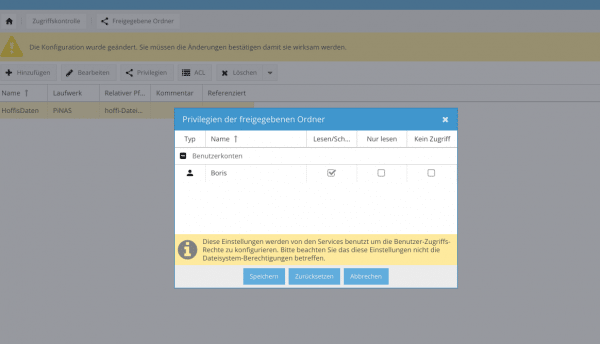 With the releases you determine who is allowed to save which data.
 The last step is to configure the network protocols under " Services ". If you work primarily under Windows, it is best to activate the " SMB / CIFS " option . In addition, you must specify for each network protocol that the corresponding shares are displayed. To do this, select the shared folder in the " Shares "> " Add " tab . If you wish, you can now specify various options before you save and apply the changes.
You can now save and read files on the OpenmediaVault NAS from a PC or Mac via the network. To do this, you simply have to connect to the Pi using the network search in Windows Explorer, Mac Finder or the Linux equivalent. Then just log in with the username to back up files and folders on the NAS. The basic setup of OpenMediaVault is now complete. The system offers countless other configuration options - it is worth exploring the options.
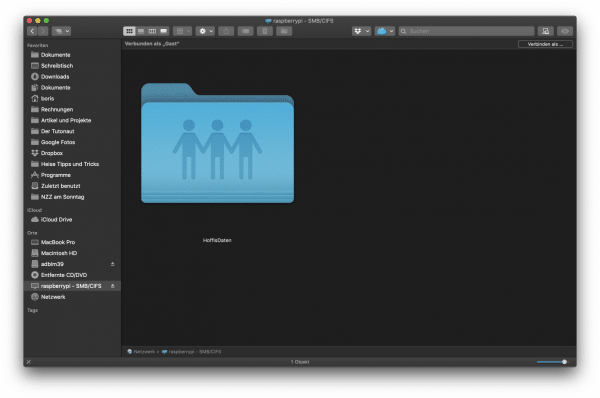 If everything works, you can access the Raspberry Pi NAS via the network.