If you email a lot of personal or confidential information, you probably don't want your messages to be intercepted and read. To prevent this, there are various encryption methods that secure your e-mails against hackers. One of the most common is S / MIME, which is based on a certificate system. Thanks to these certificates, your contacts also know that e-mails are actually from you. This article explains how to obtain such a certificate and how to set up encryption in Microsoft Outlook.
How to encrypt email in Outlook
So that the e-mail traffic can be encrypted and the recipients can ensure that the message actually came from you, you first need an S / MIME certificate. You can create this yourself, but in many cases a certificate from an external provider is worthwhile. Then the validity is often limited in time and you have to pay money for the issue, but your contacts do not have to save these certificates separately in their e-mail programs via an exception rule..
Apply for a certificate and store it in Outlook
This section explains how to apply for an S / MIME certificate from Outlook and then save it. In the event that you already have such a certificate, you can skip to step 5 in this part.
1st step
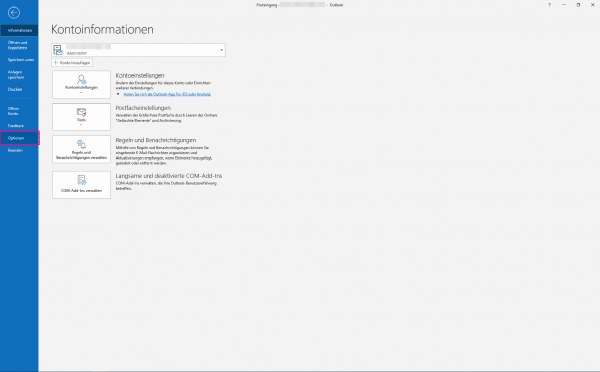 In Outlook, click on the " File " tab and then on " Options ".
 2nd step
 Click on " Trust Center " on the left , then on " Settings for the Trust Center ... ".
 3rd step
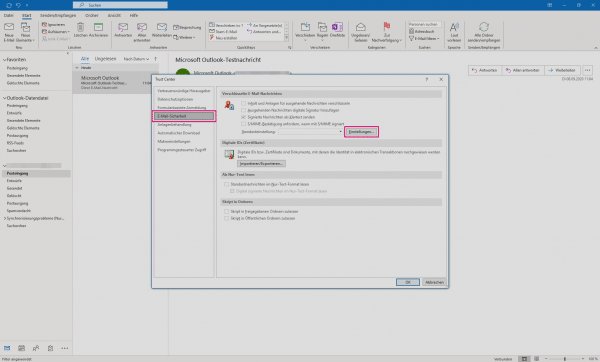 In the new window click on " E-Mail Security " on the left and in this area on " Settings ... ".
 4th step
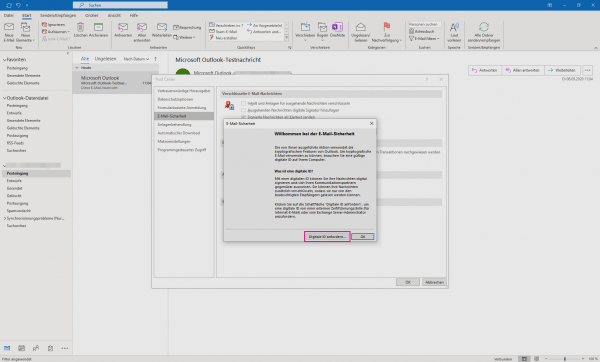 Another window then appears in which you can click on " Request digital ID ... ". You will then be redirected to a Microsoft page with links to certificate providers. Alternatively, you can look for other providers yourself and purchase a certificate there.
 5th step
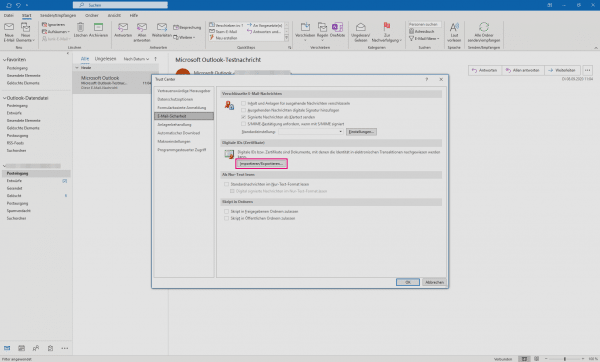 If you have a certificate, you can save it in the window from step 3 in the " Digital IDs " area by clicking on " Import / Export ... ".
 Share certificate
So that other people can read your encrypted e-mail, they need your certificate. To do this, you need to send an unencrypted signed email to each relevant contact:
6th step
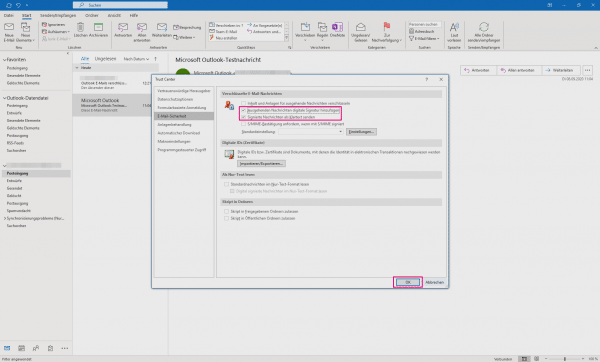 As in the first part of these instructions, go to " File "> " Options "> " Trust Center "> " Settings for the Trust Center ... "> " E-Mail Security " to the area " Encrypted E-Mail Messages " . Check the box next to " Add digital signature to outgoing messages " and " Send signed messages as clear text " in case the encryption has not yet been set up for other people. Click on " OK ".
 7th step
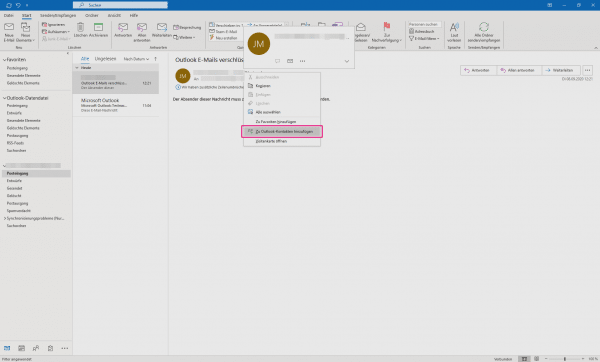 Send them a simple email. Outlook will automatically attach your certificate to the message. The recipient can then right-click on the sender and then click on " Add to Outlook Contacts " to save your email address including the certificate.
Encrypt emails
Finally, you can activate the encryption and signature of your emails. These can either be activated permanently for all e-mails or only for individual messages..
8th step
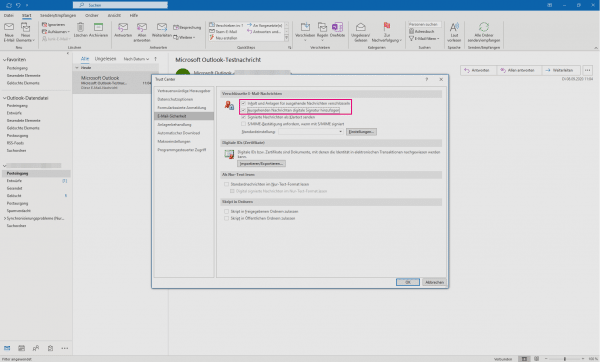 If you want to encrypt all outgoing e-mails, proceed as follows: Proceed as in the first part of the instructions via " File "> " Options "> " Trust Center " - " Settings for the Trust Center ... "> " Email Security " to the " Encrypted Email Messages " section. Check the box next to " Encrypt content and attachments for outgoing messages " to encrypt all of your outgoing e-mails. Here, too, you can check " Add a digital signature to outgoing messages "to attach your signature to all e-mails. Then click " OK " in the" Trust Center "and" Outlook Options " windows .
 9th step
 If you only want to encrypt selected emails, compose a new email first. Click on the " File " tab and under the menu item " Information " on " Properties ".
 10th step
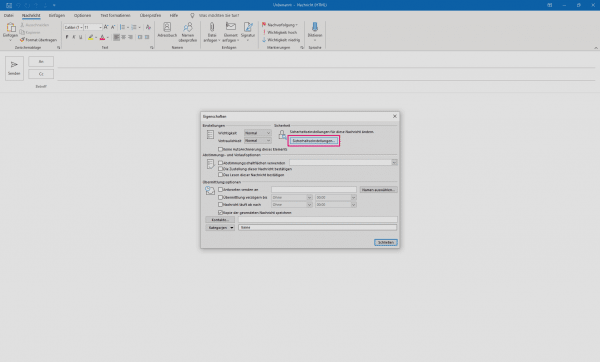 A window then appears in which you click on the " Security Settings ... " button.
 11th step
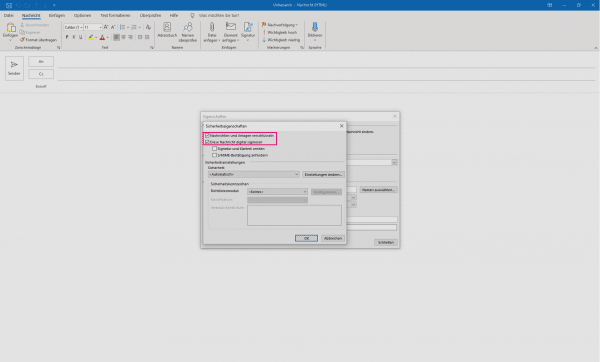 In the " Security Properties " window that appears, check the box next to " Encrypt messages and attachments ". If you also want to add your signature, check the box next to " Digitally sign this message ". Then click OK . This means that your email is encrypted and sent with a signature.
 quick start Guide
- Purchase an S / MIME certificate and save it under " File " - " Options " - " Trust Center " - " Settings for the Trust Center ... " - " E-Mail Security " by clicking on " Import " Click / Export "and enter your access data.
- In order for your contacts to be able to assign your signature, you must send them a signed email. To do this, tick " Add digital signature to outgoing messages " and " Send signed messages as clear text " in the window from step 1 . Send a simple email to all relevant people. Your contacts have to save your certificate by right-clicking on the sender and selecting " Add to Outlook Contacts ".
- Activate the encryption permanently by ticking the box " Encrypt content and attachments for outgoing messages " in the window from step 1 .
- If you only ever want to encrypt individual e-mails, skip step 3. Compose the e-mail and select " Properties " under the " File " tab under " Information " . In the window that appears, click on " Security Settings ... ", which will open another window. In this check box " Encrypt messages and attachments " and, if necessary, also " Digitally sign this message ".