Read here how to install Windows 10 on a Raspberry Pi: From downloading the required files to the finished MicroSD card. The effort is manageable, but the whole process takes around five hours.
Windows on the Raspi
Before you get started, a little "warning:" Windows 10 and the Raspberry Pi are not exactly made for each other. On the one hand, this means that the whole thing can go wrong and after five hours nothing works. On the other hand: As of today, the procedure works absolutely smoothly - with exactly the right Windows version! And on the other hand: In the end, the construct is not really suitable as a productive system, the Raspi is simply not powerful enough for a full-fledged desktop Windows. There may still be opportunities to use the combination sensibly, but above all it's a nice gimmick!
As a Raspberry, you should urgently use a current device model 3 B (+) or even the Raspi 4 and a microSD card as fast as possible. For the following instructions you also have to work under Windows 10 (Windows 8 could work, Windows 7 definitely not).
Get a Windows 10 image
First you need the Windows files to install. This is only possible in a roundabout way: First you download a kind of downloader, then you run a script that in turn downloads files and provides an ISO image, and finally you copy a file from this ISO. But step by step:
1st step:
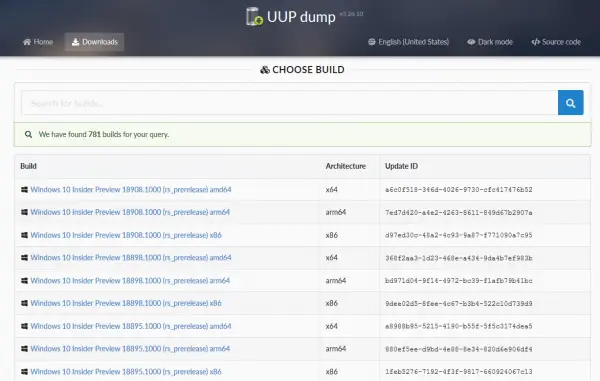 First, visit the UUUdump.ml page . On the start page click on " Browse the list of known builds " and look for the version "17134 for arm64". The current version does not work!
2nd step:
 Then set the language you want and the Windows version (Home or Pro) one after the other .
3rd step:
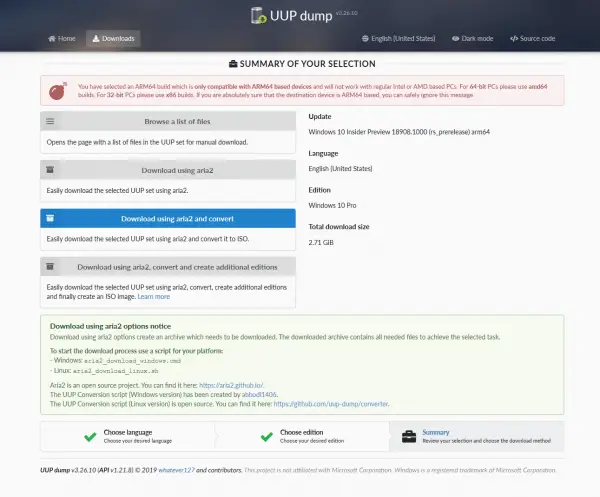 In the last window you will see the summary again and start the download via " Download using aria2 and convert ".
4th step:
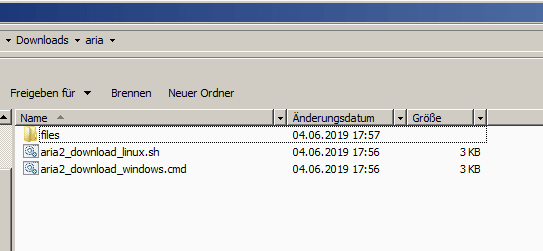 Now unzip the downloaded ZIP archive and start the " aria2_download_windows.cmd " file .
5th step:
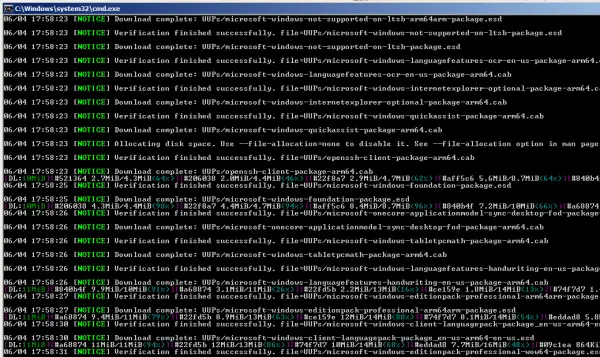 The script then continues to run independently for a while and loads files.
6th step:
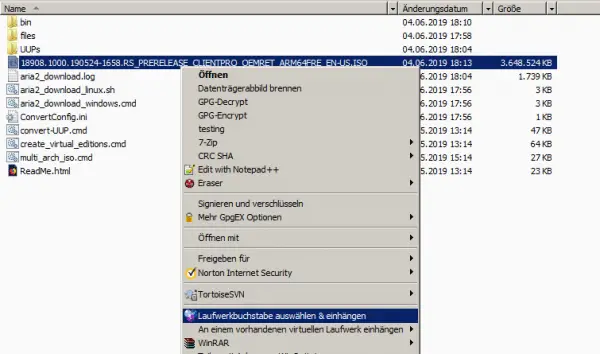 As soon as the script is finished, you will find an ISO file in the folder , which you can mount as a drive by double-clicking or using the context menu .
Open the mounted drive and copy the " install.wim " file from the " sources " folder somewhere on your hard drive, for example in the Downloads directory. The preparations are now complete.
Install Windows 10
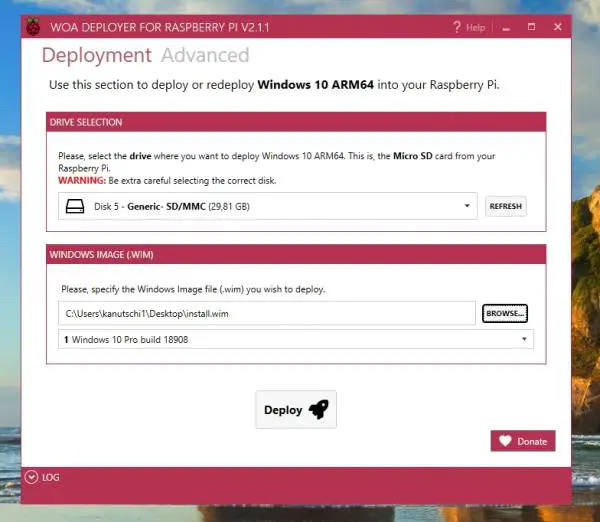
Now it goes to the actual installation with the WOA Deployer For Raspberry Pi . Insert the microSD card and start the WOA Deployer . Select your MicroSD card under " Drive Selection " - and make sure you choose the right one! Then specify the copied file " install.wim " from the ISO image under " Windows Image (WIM) " .
Then start via " Deploy " and confirm the warning message : Everything on the card will be deleted!
 Make sure you have the correct SD card - everything on it will be overwritten!
Shortly after starting the tool you have to accept a license agreement for a USB driver - if you want to continue..
During the installation, a Windows dialog could suddenly pop up, reporting a new drive that would have to be formatted before use. Here it happened twice: First, a drive "I" that could not be formatted - but an abort allows the deployer to continue running. Shortly afterwards an "H" drive was reported - this now had to be formatted with the specified settings in order to continue the deployer. The whole behavior seems inconsistent and poorly documented - if in doubt, try to format, if it doesn't work, cancel. Probably WOA will then continue to run.
After a few minutes you should see the status " Deploying Windows ... " - and it could stay that way for an hour. Then there are two or three minutes until the final action is " Injecting Drivers ". A confirmation window follows with instructions that will be covered in the next step. Remove the microSD card and insert it into the Raspi..
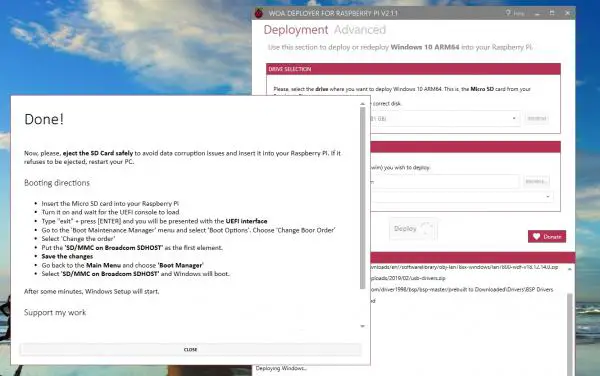 After just an hour or a little later, the success message appears.
 Boot into Windows 10
Now connect the Raspberry Pi and boot. After a short time a command prompt appears. You still need to configure a little:
- Type here " exit " and confirm with [ ENTER ].
- You land in the UEFI and open " Boot Maintenance Manager / Boot Options / Change Boot Order ".
- Choose " Change the order ".
- Set " SD / MMC on Broadcom SDHOST " as the first entry; via +/- on the numpad - the keyboard layout is English.
- Save with [ F10 ].
- Go back to the main menu with [ ESC ].
- Open the " Boot Manager " entry .
- Select " SD / MMC on Broadcom SDHOST " - and Windows will boot.
After a short time, the familiar Windows logo should appear - and it should again demand your patience. To be more precise, to strain immensely. Hours can go by before the first login ... When you boot in the future, Windows will of course start automatically and a little faster, but there is always time for a cup of coffee.
From here on, Windows continues as normal, just a little slower than usual. And here, too, more precisely: Calling up a context menu can take 10 seconds, calling up a browser several minutes. Pretty much every action brings CPU, RAM and drive utilization to 100 percent immediately. It's just a nice feasibility study - but a real, usable desktop Windows for single-board computers would be something very nice!