If you want to partition external hard drives or the internal hard drive of your Mac, for example to install a macOS beta, you can easily do this with the disk utility. There you can add, enlarge or delete partitions or APFS volumes. In this guide you will learn exactly what the difference between these variants is and how they are created in each case.
Attention: Before you set up a partition or an APFS volume on your internal hard drive, you should always create a backup to protect your data. Also back up the data that is stored on a partition or an APFS volume before you permanently delete it. Here's how to do a Time Machine backup on Mac.
Difference between partitions and APFS volumes
macOS offers two options for partitioning hard disks: the classic division into partitions or the creation of several APFS volumes.
The difference between the two versions lies in the compatibility and the speed:
The classic division into partitions is slower and more cumbersome. The "Mac OS journaled" file system is compatible with all Macs up to 1998 and the "FAT" file system is also compatible with Windows devices.
With macOS 10.13, Apple has the " Apple File System " ( APFS for short ) as an alternative that allows you to divide hard drives into volumes. These are then only compatible with Macs with macOS 10.13 or later, but faster and easier to use. The APFS has been optimized for use with SSDs, but also works with classic hard drives.
If the internal hard drive of a newer Mac is partitioned, APFS is ideal, as it is much easier to set up and use, and since in this case the compatibility with other Macs is less important.
Before you start dividing your hard drive, you need to decide on a system. You can then follow our instructions for the respective options..
Add partitions
1st step
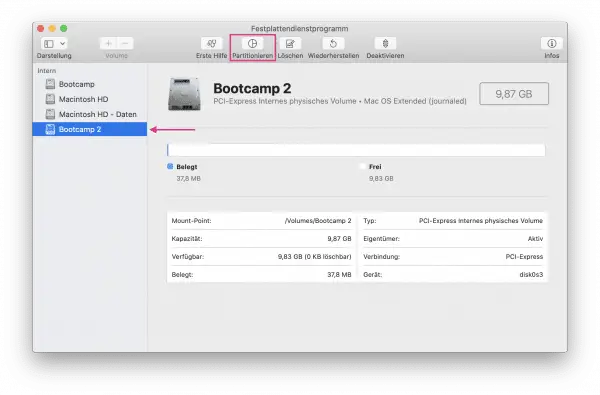
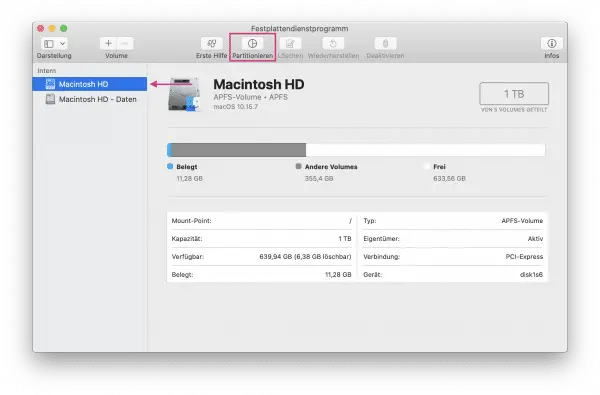 Open the Disk Utility via the folder " Programs "> " Utilities " and select the hard drive you want to partition, in the sidebar. Click on the “ Partition ” button .
 2nd step
 Select " Partitioning " here.
 3rd step
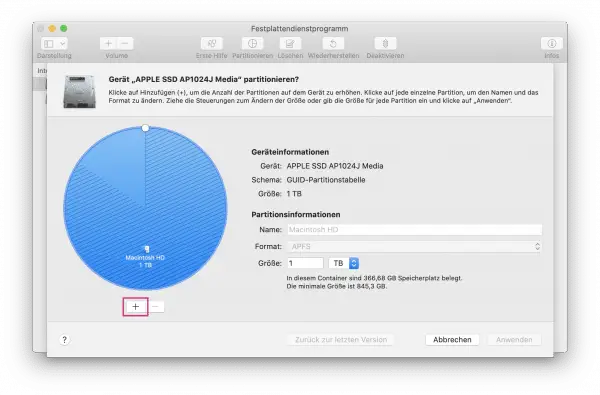 Then click on the " + " symbol.
 4th step
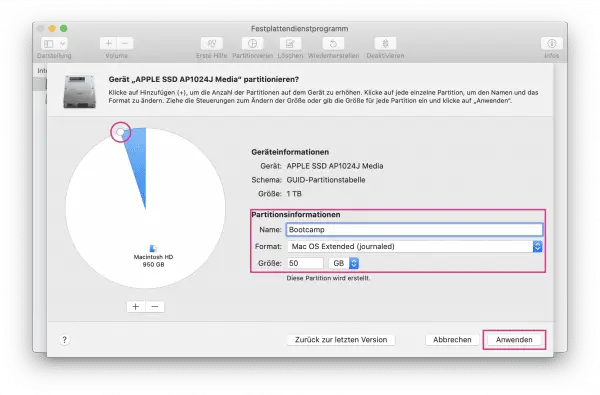 With the white dots you can change the size of the partition. On the right next to " Name " you can specify the name of the partition. Next to " Format ", select one of the " Mac OS Extended " formats (usually simple "journaled" is sufficient here) or " MS-DOS file system (FAT) ". If you want to adjust the size exactly, you can do this next to " Size " and specify the unit for it in the drop-down menu . If you only see your current hard drive, click on the white area in the circle to configure the new partition. Click on “ Apply ”.
 5th step
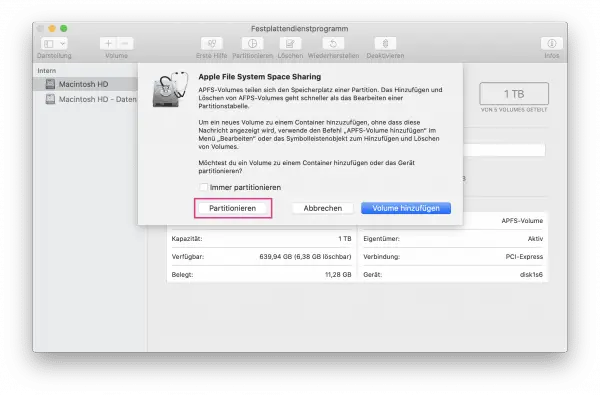
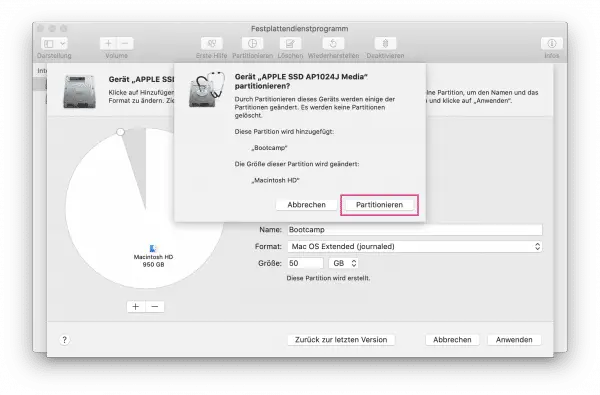 Confirm the next window with " Partitioning ".
 6th step
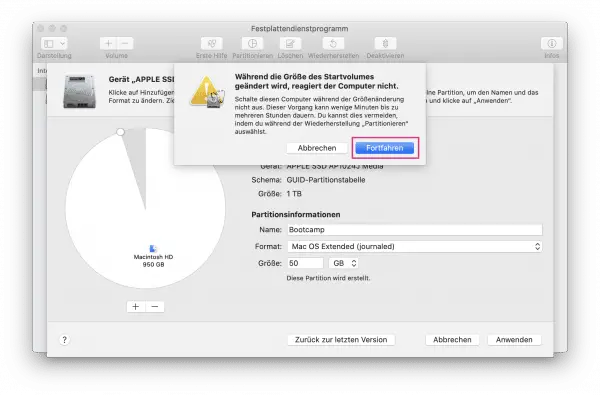 Click “ Continue ” to start partitioning.
 7th step
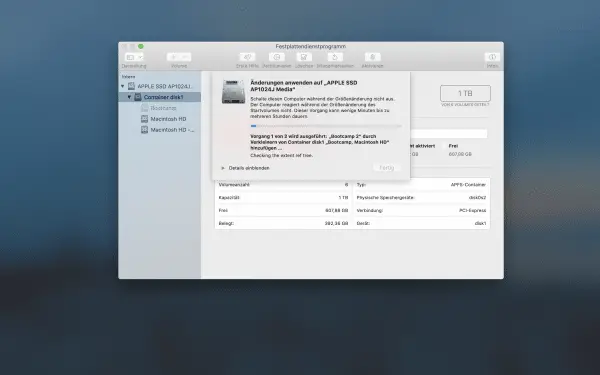 This process can take a while. When partitioning internal hard drives, the Mac no longer reacts as shown in the picture and it can happen that nothing happens for a certain period of time. Do not turn off your Mac during this time. If an error message then appears, check whether a new partition is still displayed in the disk utility. If so, the partition is probably not in the correct format. Delete this partition by following our guide to do it, then partition your hard drive again. This often eliminates the error.
 Enlarge partitions
To enlarge a partition created in classic Mac OS journaled or FAT format, you must first delete it and then recreate it .
If you want to work around this problem in the future, you can create an APFS volume instead of the new partition , which will automatically get larger and smaller as needed.
Delete partitions
You can delete partitions using the same view as you create them:
1st step
 To do this, open the hard disk utility again via “ Applications ”> “ Utility ”. Select the partition you want to delete in the sidebar and click on the " Partition " button .
 2nd step
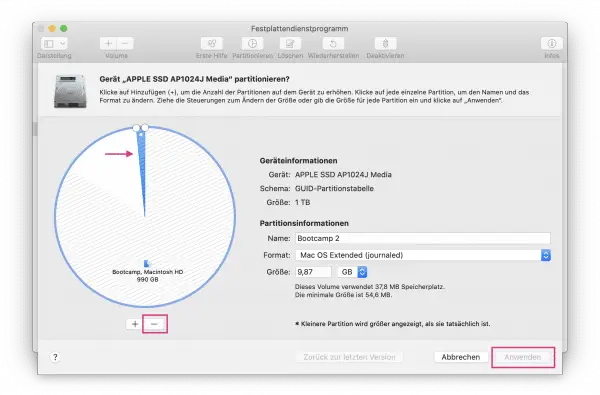 Select your partition in the circle on the left and click on the " - " symbol. Then select " Apply ".
 3rd step
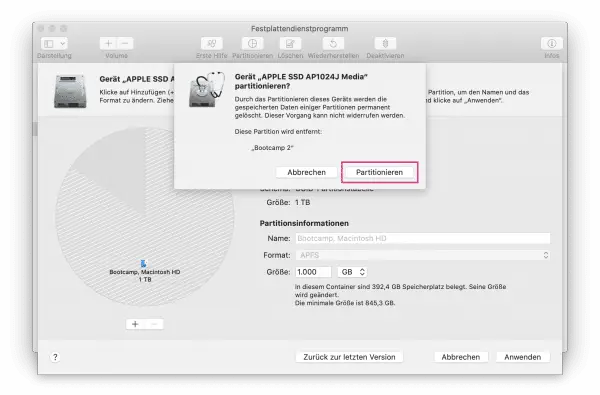 Confirm your entry by clicking on “ Partition ”.
 4th step
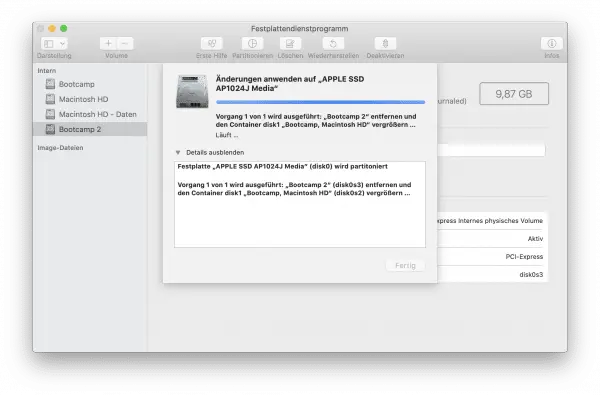 The partition will now be deleted. This process can take some time, and if you delete a partition on your internal hard drive, your Mac will be momentarily unresponsive.
 Add APFS volumes
As an alternative to a classic partition, you can add an APFS volume on newer Macs..
1st step
 To do this, open the hard disk utility via “ Applications ”> “ Utilities ” and select the desired hard disk in the menu bar on the left. Click on the “ Partition ” button .
 2nd step
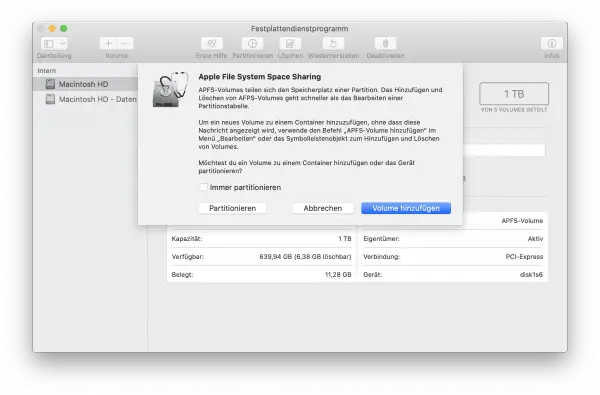
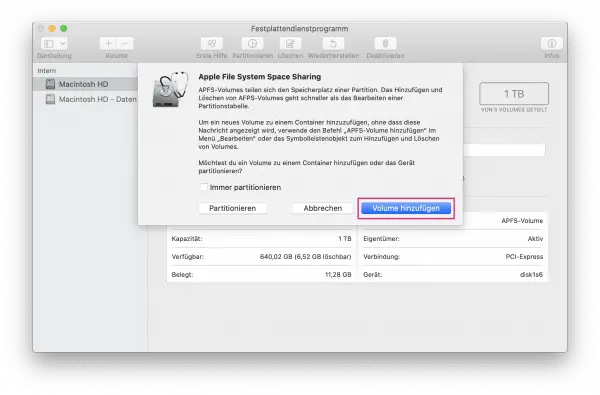 Select “ Add Volume ” here.
 3rd step
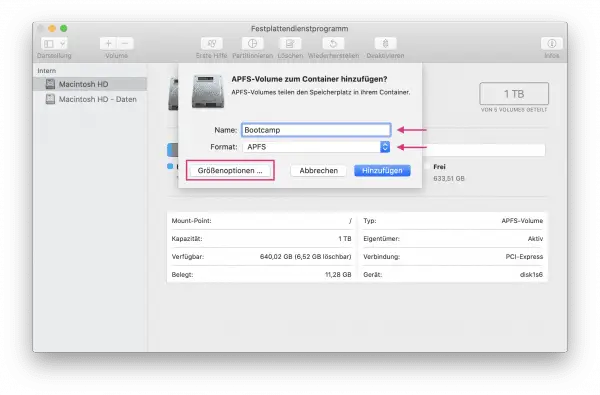 Specify a name for the new APFS volume. In addition to “ Format ”, you can set whether the new volume should be encrypted or not by selecting “ APFS ” or “ APFS (encrypted) ”. Then click on " Size Options ".
 4th step
 This step is optional as the individual APFS volumes on the hard drive are automatically allocated space depending on how much space there is. However, you can use the reserve size to specify the minimum amount of space that is to be available for the new volume, and the quota size to define the maximum storage space that the volume can take up. To do this, select the unit to the right of the input field and enter a size . Note that you can not change these settings afterwards . Click OK "And then on" Add ".
 Grow APFS volumes
The size of APFS volumes usually depends on the storage space required. This means that you do not have to allocate any additional storage space in the standard settings, as this is automatically taken over by the system.
However, if you added a quota size, the size of the APFS volume is limited. Then all you have to do is delete the volume and then reinstall it .
Delete APFS volumes
1st step
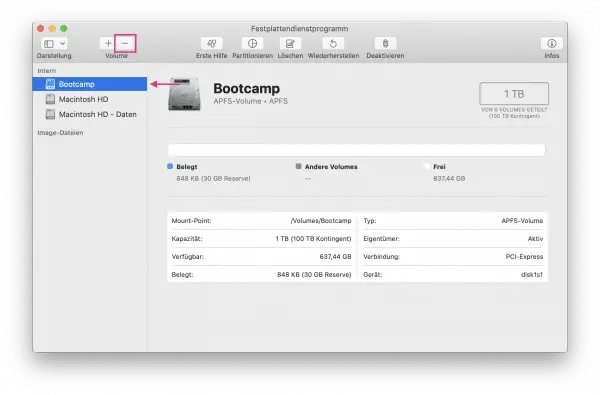 Open the Disk Utility on " Programs "> " Utilities ". Select the APFS volume that you want to delete and click the " - " icon.
 2nd step
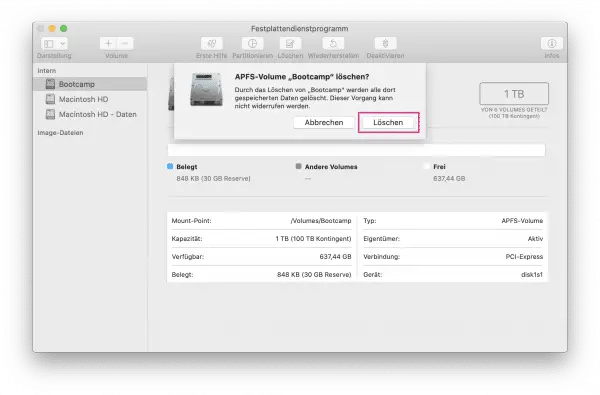 Confirm with " Delete ".
 3rd step
 The APFS volume will now be deleted. This process can take some time, depending on how much data you had stored on the volume.