With Windows 7, 8 and 10 you can let your PC shut down automatically. This is useful, for example, if you want to perform a major update overnight. The update is ready after a few hours - but the PC stays on and continues to use electricity. To prevent this, it can switch itself off automatically. We show you four possibilities for this using the example of Windows 10.
Shut down the PC after a certain period of time
You can have your computer shut down automatically after a certain period of time. Disadvantage: Unsaved data is then likely to be lost. Follow our step-by-step instructions or take a look at the quick start guide .
Step 1:
 Open the Windows search window . Enter the command that forces the computer to shut down after a certain period of time: " shutdown -s -f -t time ". This entry means: "shutdown" = shut down, "-s" = shut down, "-f" = force, "-t" = after a certain time, " time " = the exact time in seconds (in the example 3600 seconds, i.e. one hour). You can set exactly to the second after which time your computer should switch off automatically. Confirm the command with [Enter] . Attention: Your PC will definitely shut down after the specified time. Anything not saved will then be lost. So you should always set the time a little more generously .
 Step 2:
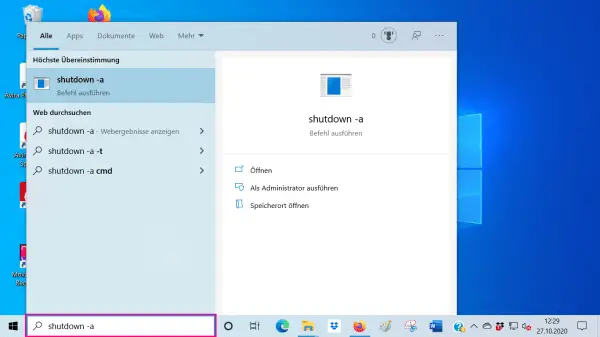 To cancel the automatic , click again in the search field before the set time has elapsed . Now write: " shutdown -a ". The "-a" stands for abort, English for cancel. Confirm the command with [Enter] .
In addition to entering the search field directly, you can also work with the Windows command prompt . To do this, enter " cmd " in the search field . A window with the command prompt opens. Enter " shutdown " here and confirm with [Enter] . You will now be presented with many different parameters that you can use in conjunction with the shutdown command. Each is followed by a brief explanation. For example, you can restart the PC or put it into sleep mode..
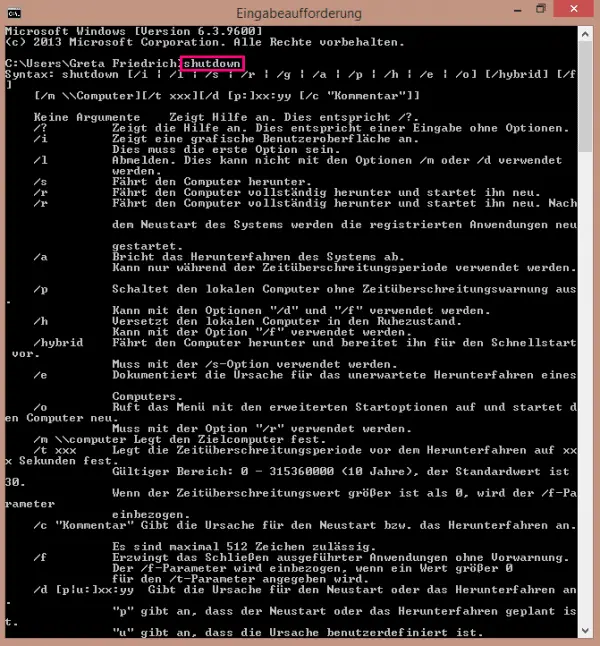 You have many options with the Windows Command Prompt. For example, you can automatically shut down, restart or put your PC to sleep.
 Put the PC to sleep after a long period of inactivity
You can put your computer to sleep after a period of inactivity. Advantage: It saves the current status of the user interface and completely shuts down the power supply. The data is then saved on a reserved space on the hard drive and can be quickly restored. Follow our step-by-step instructions or take a look at the brief instructions .
Step 1:
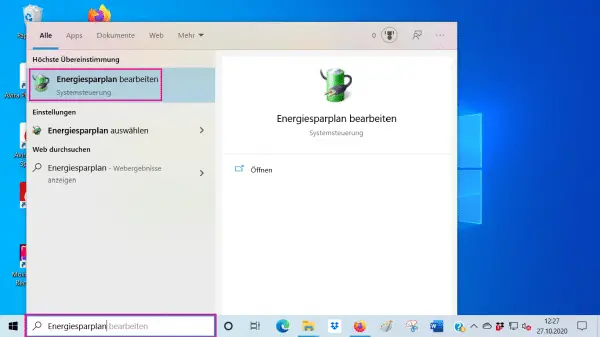 Open the Windows search bar and enter " power plan " there. Select the appropriate search result.
 Step 2:
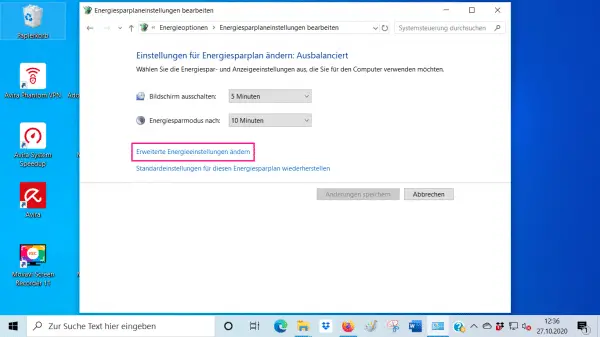 In the " Edit power plan settings " window , select " Change advanced power settings ".
 Step 3:
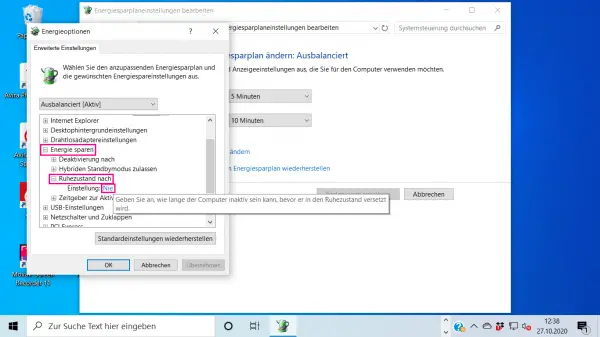 In the new window, use the plus symbol to open the item " Save energy " and then the sub-item " Idle state after ". Click on the blue font .
 Step 4:
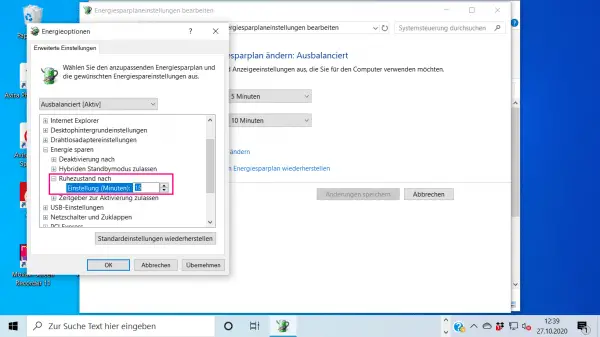 Now determine after how many minutes of inactivity your PC should automatically go to sleep.
 Schedule regular shutdowns
Would you like your PC to shut down regularly, for example every day at a certain time? You can control this with the Windows task scheduler. Follow our step-by-step instructions or take a look at the brief instructions ..
Step 1:
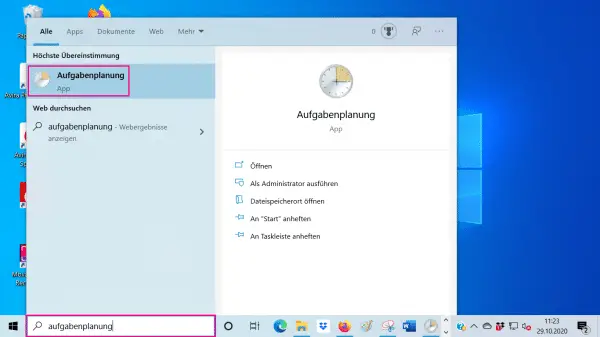 Enter " Task Scheduler" in the Windows search line and open the corresponding result.
 Step 2:
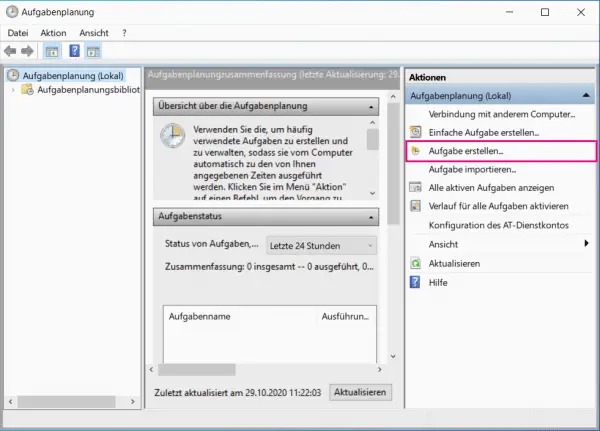 In the task planning window, click on " Create task ... ". A new window will open.
 Step 3:
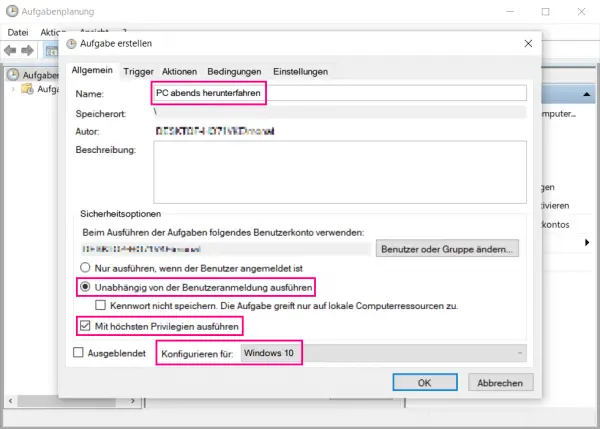 Make the settings in the " General " tab : Give the task a meaningful name . Below select " Run regardless of user login ". So you don't have to be logged in for the task to run. Then check the box next to " Execute with the highest privileges ". This means that running programs are forcibly terminated when the PC shuts down. Under " Configure for " select the option " Windows 10 ". Then switch to the " Trigger " tab .
 Step 4:
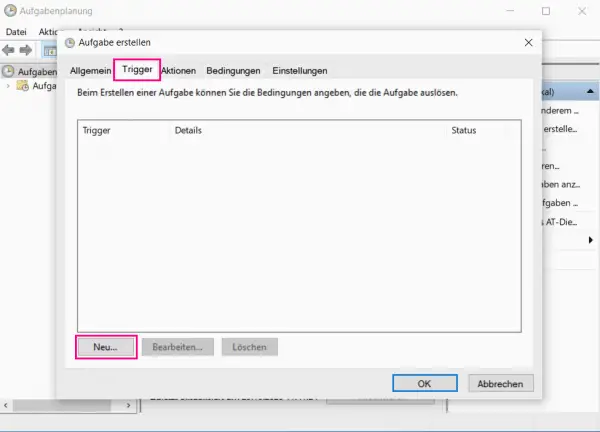 In the " Trigger " tab click on " New ... ". This creates a new trigger, i.e. a trigger for the task.
 Step 5:
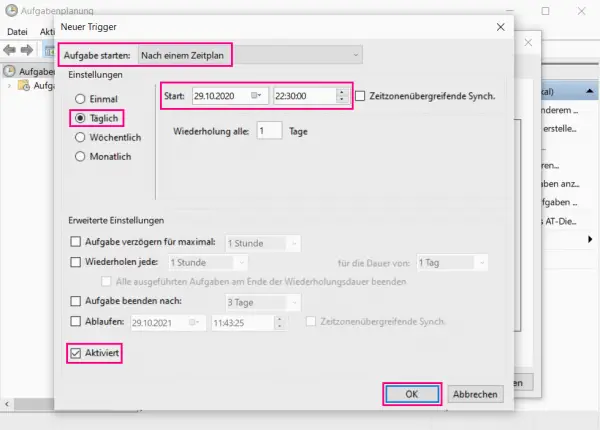 Now make the settings in the " New trigger " window . Under " Start task " select " According to a schedule ". You then decide on the left how often the task should be carried out, i.e. how often your PC should shut down automatically - e.g. every day. On the right you specify when the task should be carried out for the first time . At the bottom there must be a checkmark next to " Activated ". Confirm with " OK ". The window closes and your trigger is displayed.
 Step 6:
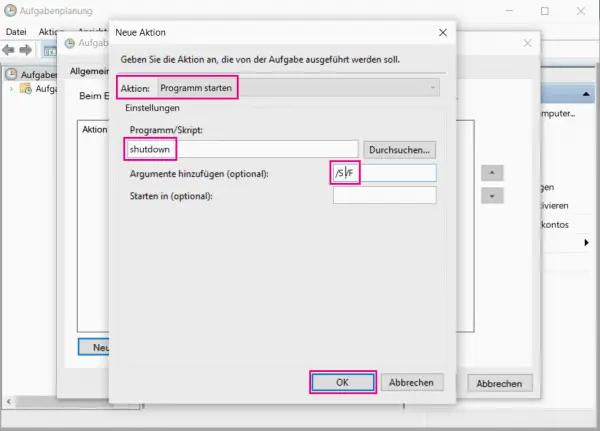 Now switch to the " Actions " tab and click on " New ... ". The " New Action " window opens. Select " Start program " as the action . Under " Program / Script " enter " shutdown ". Then add arguments: " / S / F ". Confirm with " OK ".
 Step 7:
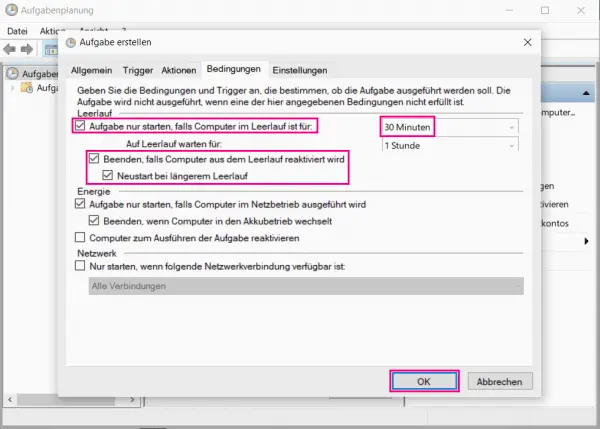 Switch to the " Conditions " tab . Here you specify the conditions under which the task is actually carried out. Check the box next to " Only start this task when the computer is idle for ". Then on the right select the period of time for which the PC should have been idle before it shuts down. Then check the " Shut down if the computer is reactivated from idle " and " Restart if the computer is idle for a long time ". Complete the new task with " OK ".
 Free shutdown tools
So there are various Windows on-board means with which you can automatically shut down the PC. If this is too complicated for you, you can also use small external programs with which you can switch off the PC automatically. There are many such programs, for example Poweroff, osShutdownTimer or Auto Shutdown.
Quick guide: Specific time
- Open the Windows search mask .
- Enter: " shutdown -s -f -t time ", the time is the seconds until shutdown.
- Confirm with [Enter] .
- To cancel the automatic mode , go to the search field again before the time has elapsed and enter: " Shutdown -a ". Confirm with [Enter] .
Quick start guide: Long periods of inactivity
- Open the Windows search mask .
- Enter: " Edit power plan ", select this entry.
- Select " Change advanced power settings ".
- Open " Save energy " and then the sub-item " Idle state after ".
- Click on the blue font and specify how many minutes of inactivity your PC should go to sleep.
Quick start guide: Task planning
- Open the task scheduler via the Windows search and click on " Create task ... ".
- Settings in the " General " tab : Give the task a name . Below select " Run regardless of user login ". Then check the box next to " Execute with highest privileges ". Under " Configure for " select the option " Windows 10 ".
- Then switch to the " Trigger " tab and click " New ... ".
- Settings in the " New trigger " window : For " Start task " select " According to a schedule ". You then decide on the left how often the task should be carried out. On the right you can define when the task will be carried out for the first time . At the bottom there must be a checkmark next to " Activated ". Confirm with " OK ".
- Switch to the " Actions " tab and click on " New ... ". In the " New Action " window, select " Start program " as the action . Under " Program / Script " enter " shutdown ". Then add arguments: " / S / F ". Confirm with " OK ".
- Switch to the " Conditions " tab . Check the box next to " Only start this task when the computer is idle for ". Select the period on the right . Then check the " Shut down if the computer is reactivated from idle " and " Restart if the computer is idle for a long time ". Complete the new task with " OK ".