Request Facebook data in the browser 1st step: 2nd step: 3rd step: 4th step: 5th step: 6th step: 7th step: 8th step: Download Facebook data via the app 1st step: 2nd step: 3rd step: 4th step: 5th step: Brief instructions: Request Facebook data in the browser Quick guide: Download Facebook data via the app
A lot of personal data ends up in social networks within seconds: profile information, messages, posts, locations and much more. Around 300 million photos are uploaded to Facebook during one day. There are over 32 million users in Germany alone. The company is often referred to as a real data octopus because every little detail is archived and saved - and that goes well beyond posts and photos. As a user, however, you have the option of viewing and downloading your data. In the following, we will explain how you can get your Facebook data.
Request Facebook data in the browser
Follow our step-by-step instructions or take a look at the brief instructions .
1st step:
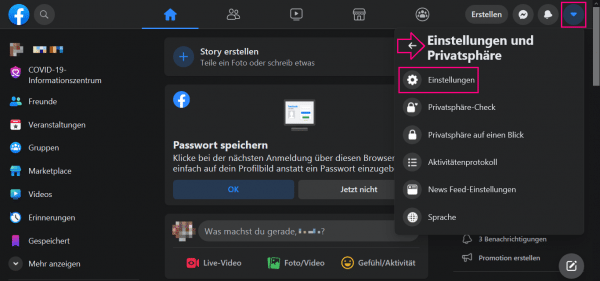 In Facebook, click on the small arrow in the top right corner and select " Settings " from the drop-down menu (in the new Facebook design you must first click on " Settings and Privacy ").
2nd step:
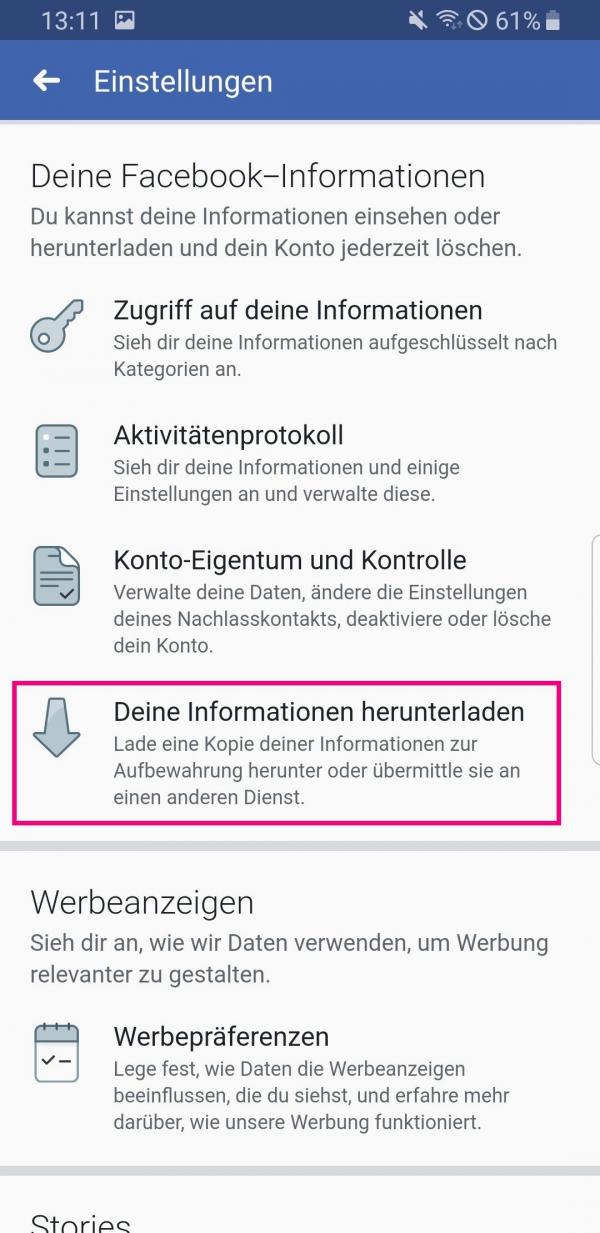
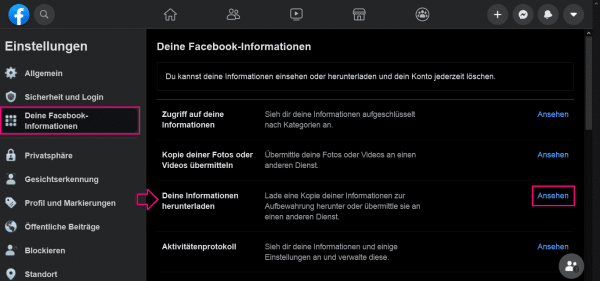 You will automatically land in the " General " tab . Go to " Your Facebook Information ". Then go next to " Your information download " to " reputation ".
Note: If you only want to view your data online and not download it, you can also click on " View " next to " Access your information ". This will take you to a list of the data that Facebook has saved about you.
3rd step:
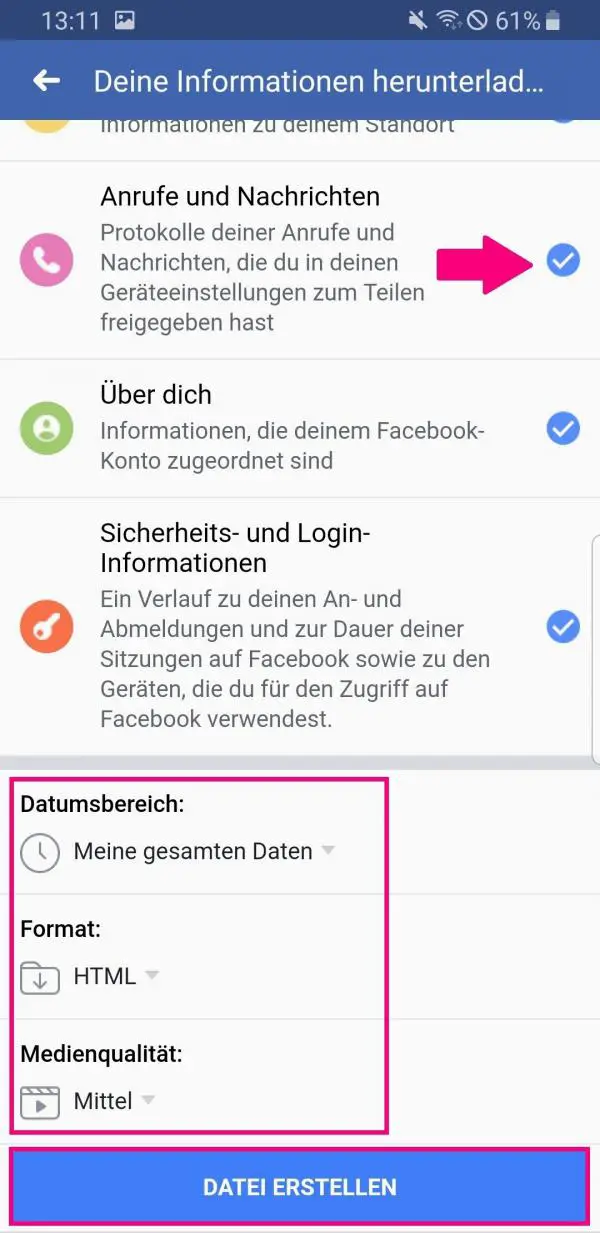
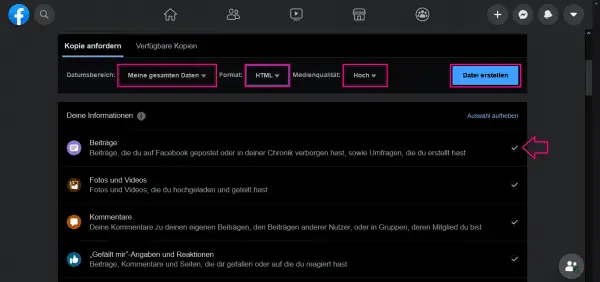 You now have the option of downloading everything at once or only certain information . With the help of the drop-down menus " Date Range ", " Format " and " Media Quality " you can define individual parameters for your download. Also, by unchecking the box next to the information categories, you can choose which data you want to download. Finally click on " Create file ".
The download is either in HTML or JSON format . The HTML format is recommended for a simple overview. The JSON format is more suitable for importing into systems or other services.
4th step:
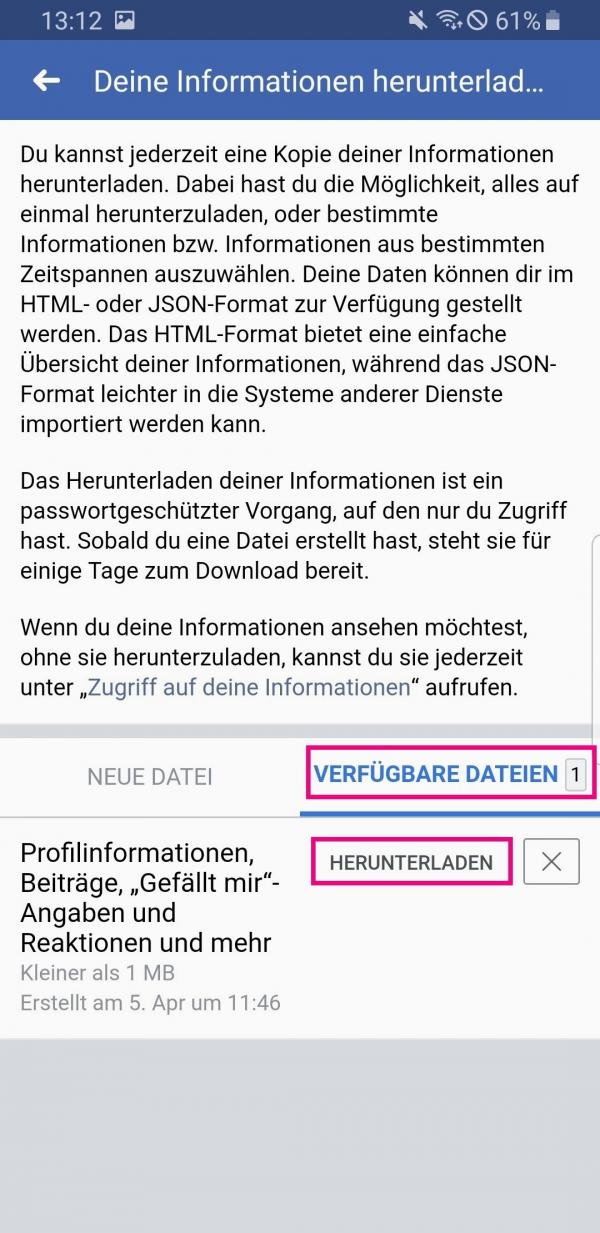
 Now it's time to wait. The file creation process is noted in the new tab " Available files " and marked with " Pending ". In the new Facebook design, the tab is called " Available Copies ".
5th step:
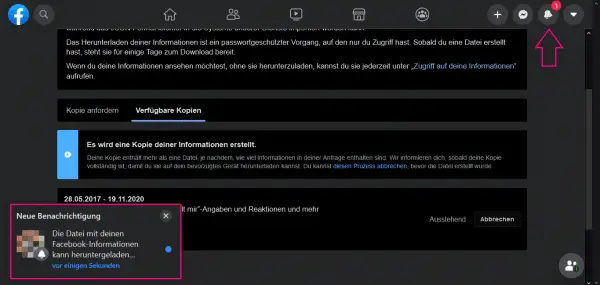 If the data is ready to be downloaded, you will receive a push notification from Facebook. Click on it. If you missed the push notification, don't worry: you will also receive a normal notification from Facebook.
6th step:
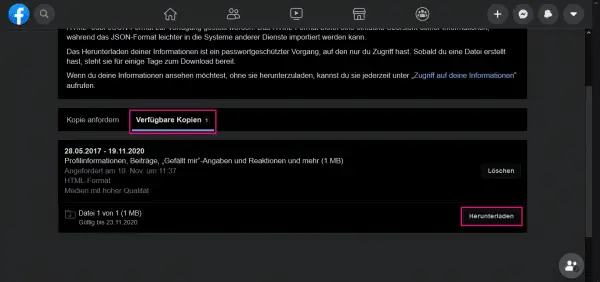 Click the " Download " button under " Available files " (in the new Facebook design under " Available copies ").
7th step:
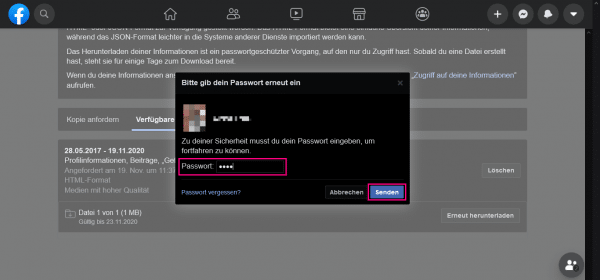 In order to verify yourself as a user for the download, you must now enter your Facebook password and confirm with " Send ".
8th step:
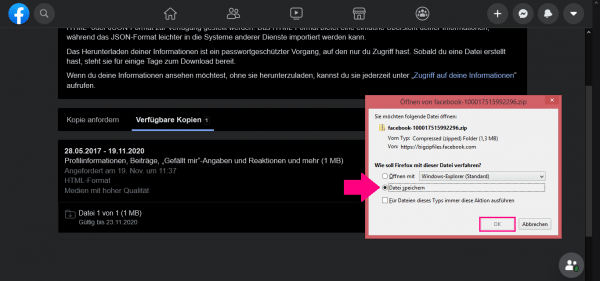 Then select " Save file " in the newly opened window and click " OK " to finish the process. You will then find the data in the download folder on your computer.
Download Facebook data via the app
The instructions are identical for iPhone and Android. Follow our step-by-step instructions or take a look at the brief instructions ..
1st step:
 Open the Facebook app on your smartphone and tap on the three-line menu in the top right (bottom right on the iPhone).
2nd step:
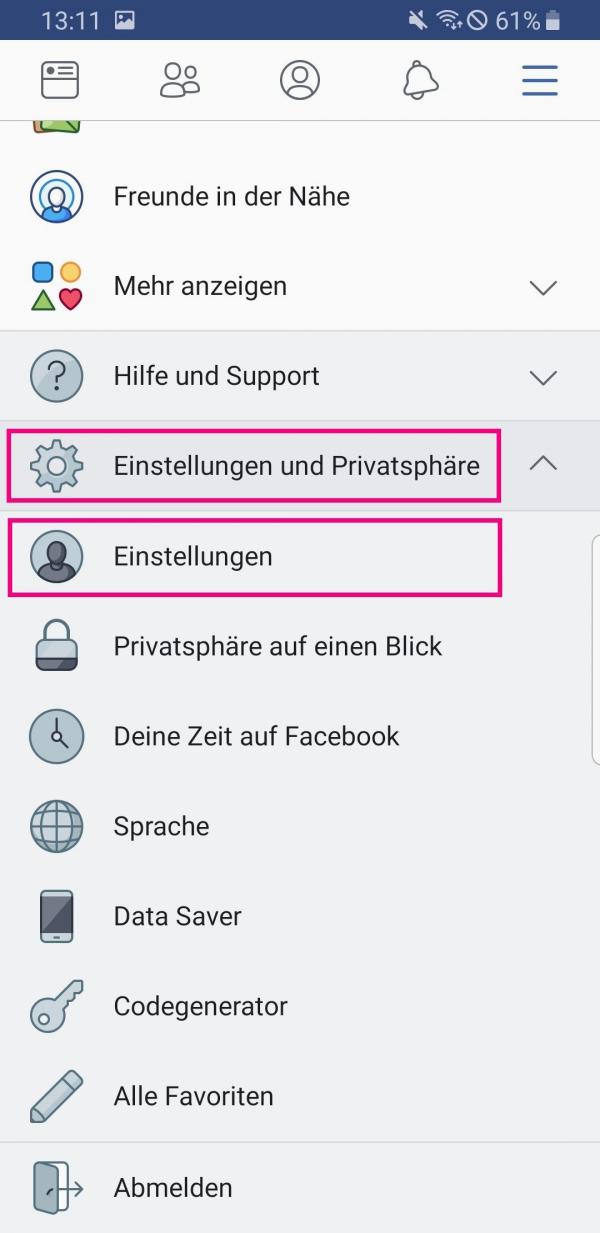 Then scroll down and tap on " Settings and Privacy " and there again on " Settings ".
3rd step:
 Here you will find the direct link to " Download your information " under " Your Facebook information ". Tap on it.
4th step:
 You can then deactivate individual categories here and, if you scroll all the way down, set " Date Range ", " Format " and " Media Quality ". Finally, tap on " Create file ".
5th step:
 Once your file has been created, you will receive a push notification from Facebook . You will then go to the " Available files " tab . There tap on " Download ". On Android devices you will find the file in the download folder, on iPhone you can save the data in "Files".
Brief instructions: Request Facebook data in the browser
- In Facebook, go to " Settings " using the small arrow in the top right corner (in the new Facebook design, go to " Settings and privacy " first).
- Select the " Your Facebook Information " tab . There click next to " Download your information " on " View ".
- You can now set " Date Range ", " Format ", and " Media Quality " or download all of them at once. Another option is to deactivate the check mark next to the information categories . Then click on " Create file ".
- While your data is being packaged as a file, " Pending " is noted in the " Available files " tab (in the new Facebook design, the tab is called " Available copies ").
- Click the Facebook push notification when the file is available for download.
- To complete the download, click on " Download ".
- Confirm your identity by entering your Facebook password and click on " Send ".
- Finally select " Save file " and confirm with " OK ".
Quick guide: Download Facebook data via the app
- After opening the Facebook app, tap the three-dash menu in the top right.
- Scroll down, select " Settings and Privacy " and then again " Settings " from.
- Under " Your Facebook Information " go to " Download Your Information ".
- If necessary, deactivate individual categories that you do not want to download. Scroll down to set Date Range , Format, and Media Quality , then tap Create File .
- If your data is available for download, you will receive a push notification from Facebook. In the " Available files " tab, select " Download " and receive your collected data from Facebook.