In a professional environment in particular, posts on Instagram should often go online at the scheduled times. There are now two different solutions for this: planning with an external app or with the Facebook Creator Studio. In this article you will learn how the two options work and what advantages and disadvantages they have.
How to schedule an Instagram post using the app
There are a variety of apps that you can use to schedule posts on Instagram. In these instructions we use "Tailwind", which is available as an app for Android and iPhone and can be accessed via the browser. The usage is very similar across the various apps, so that you can easily transfer the basic principles to it..
Note : To use an app to schedule posts, you need an Instagram business profile (instructions). In step 9, simply select “Business” instead of “Creator”.
Follow the step-by-step instructions or take a look at the quick start guide ..
1st step
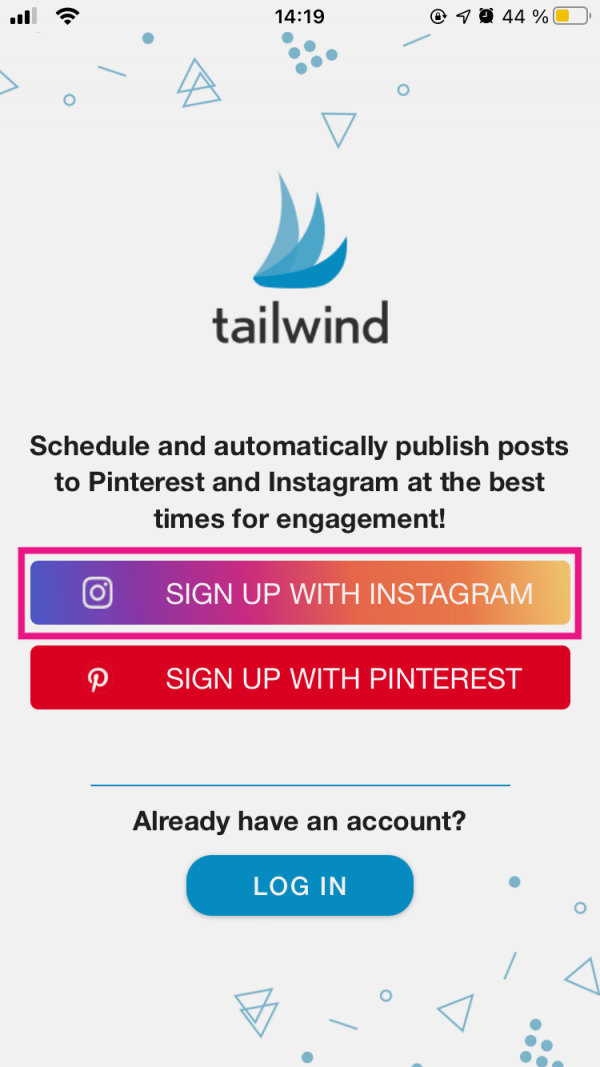 Download an app like “ Tailwind ” from the Google Play Store or Apple App Store and start it. When you open it for the first time, you must first link your Instagram account to the service. To do this, click on “ Sign in with Instagram ”.
 2nd step
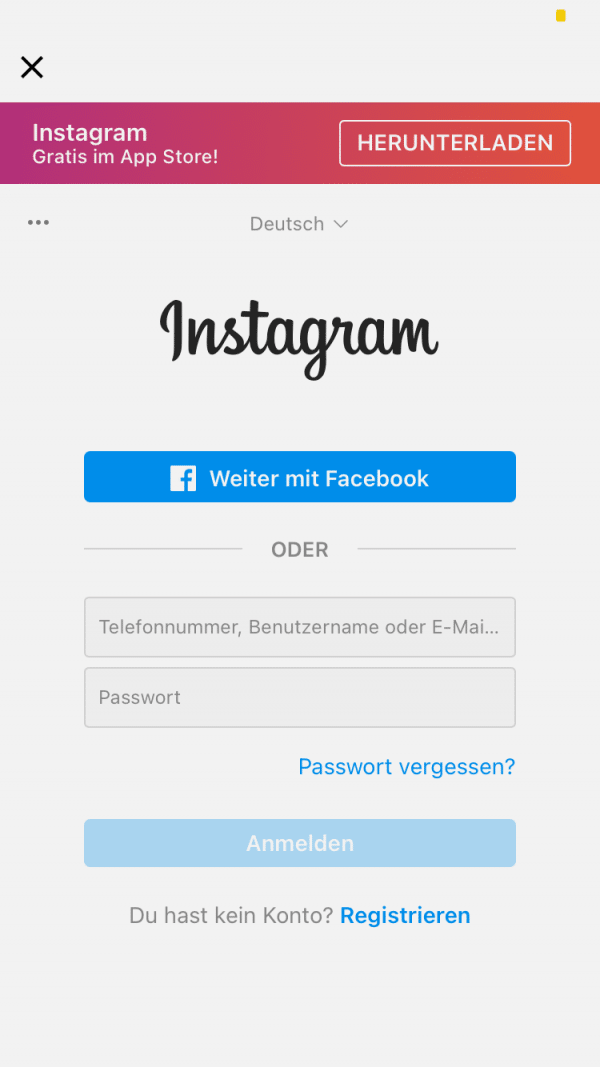 You will now be redirected to an Instagram website. Log in there.
 3rd step
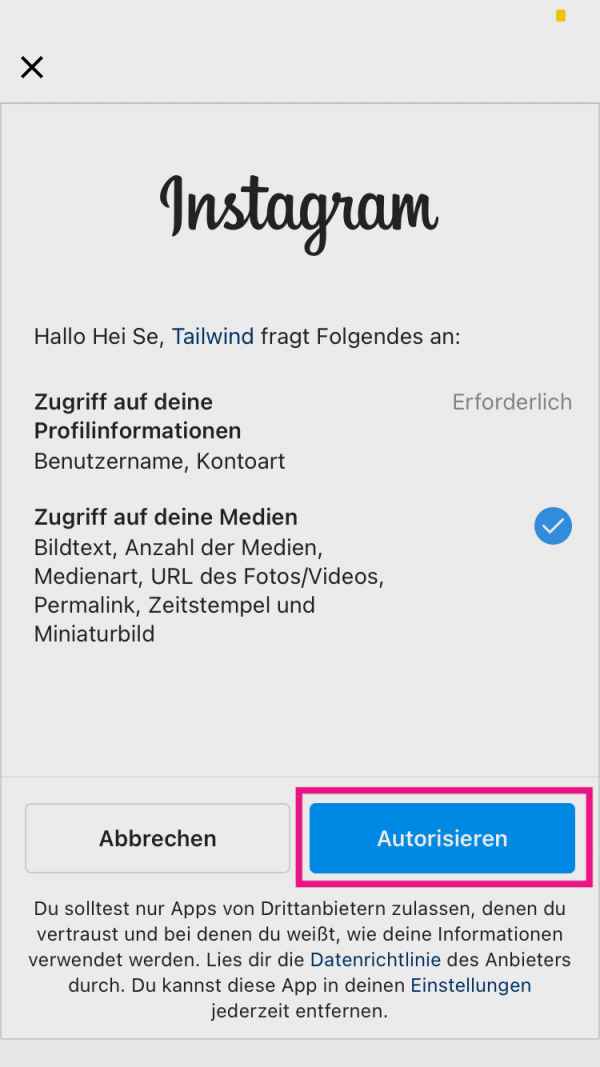 Confirm that the app has access to your account by tapping on " Authorize ".
 4th step
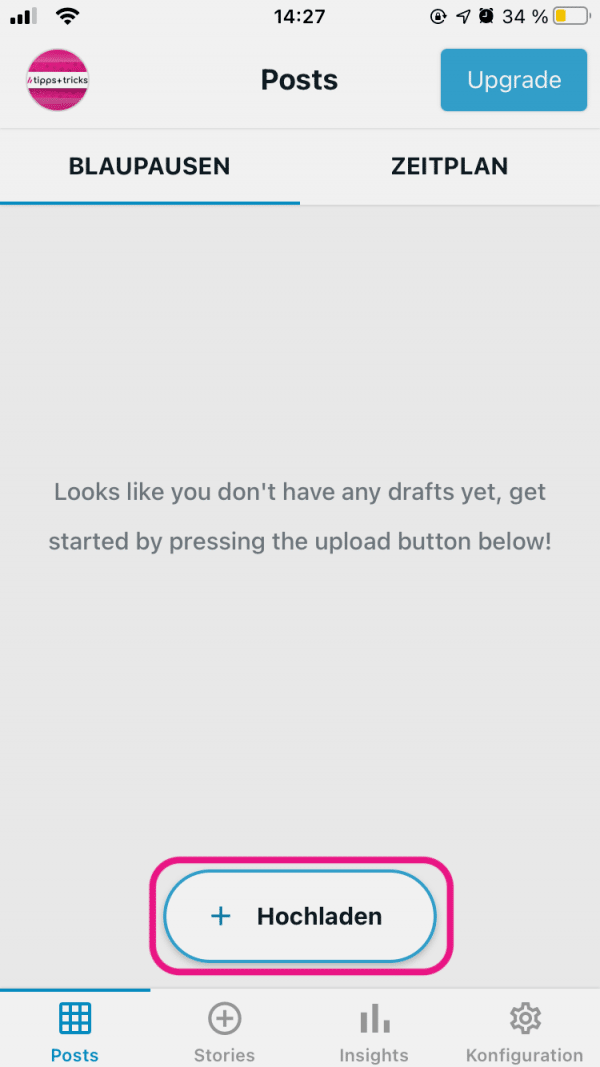 You can now plan a contribution in the app. To do this, go to " Upload ".
 5th step
 Select the media you want to share. You can select or take photos or videos from your gallery.
 6th step
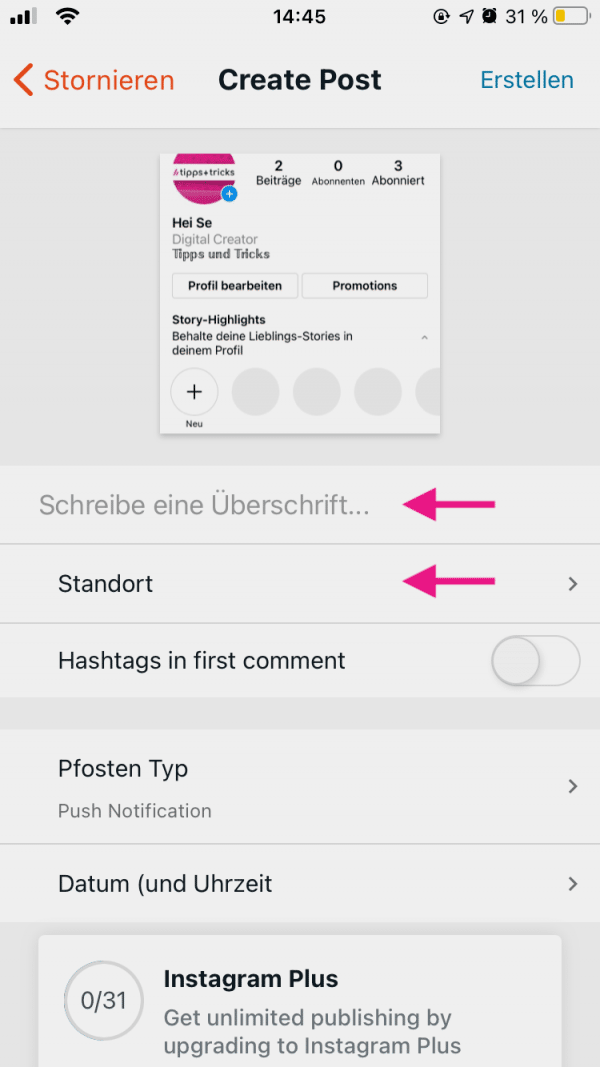 Customize the post just like you're used to on Instagram: add a description , hashtags, and location .
 7th step
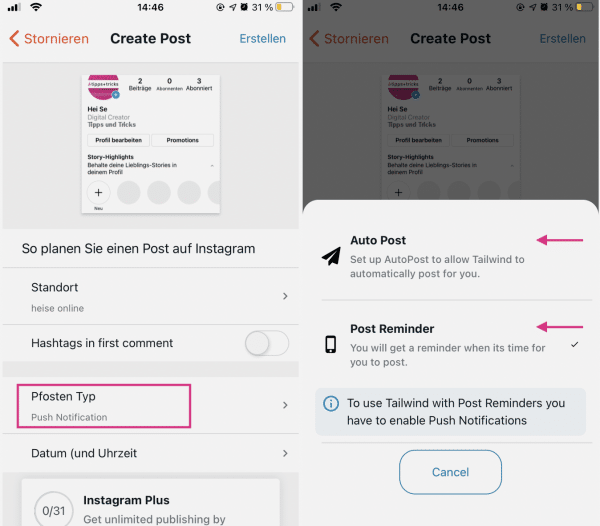 Now you can choose how you want to publish the post. To do this, tap on “ Post Type ”. You can decide whether you want to receive a notification at a certain point in time and then confirm the publication yourself (“ Post Reminder ”), or whether the post is published automatically (“ Auto Post ”). Tap on the variant that you want to use.
 8th step
 Finally, you can set a date and time for publication. To do this, first tap on “ Date and Time ”.
 9th step
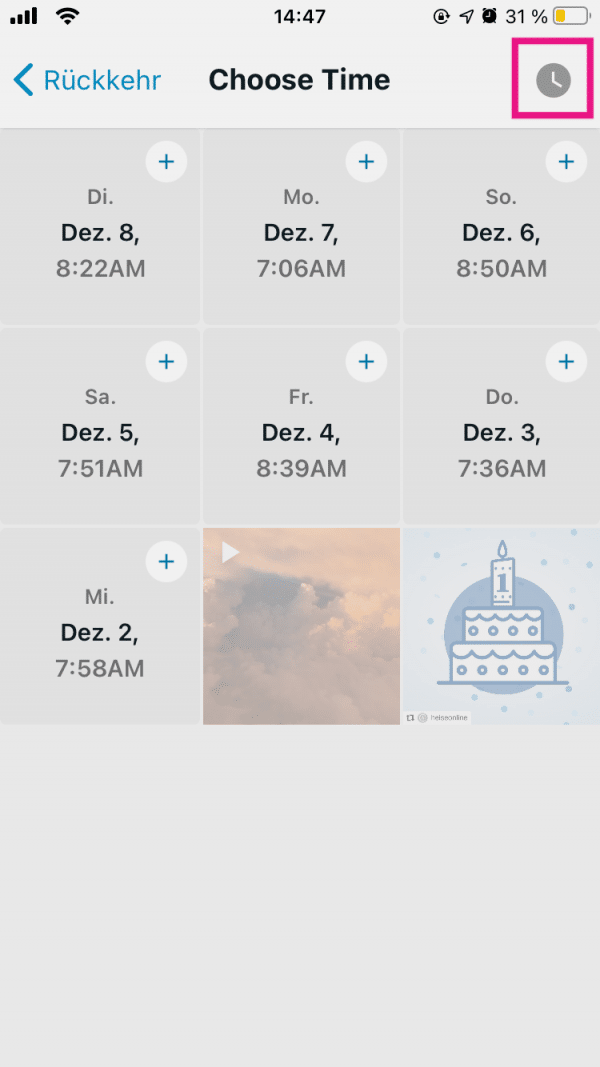 Tap the clock icon in the top right corner.
 10th step
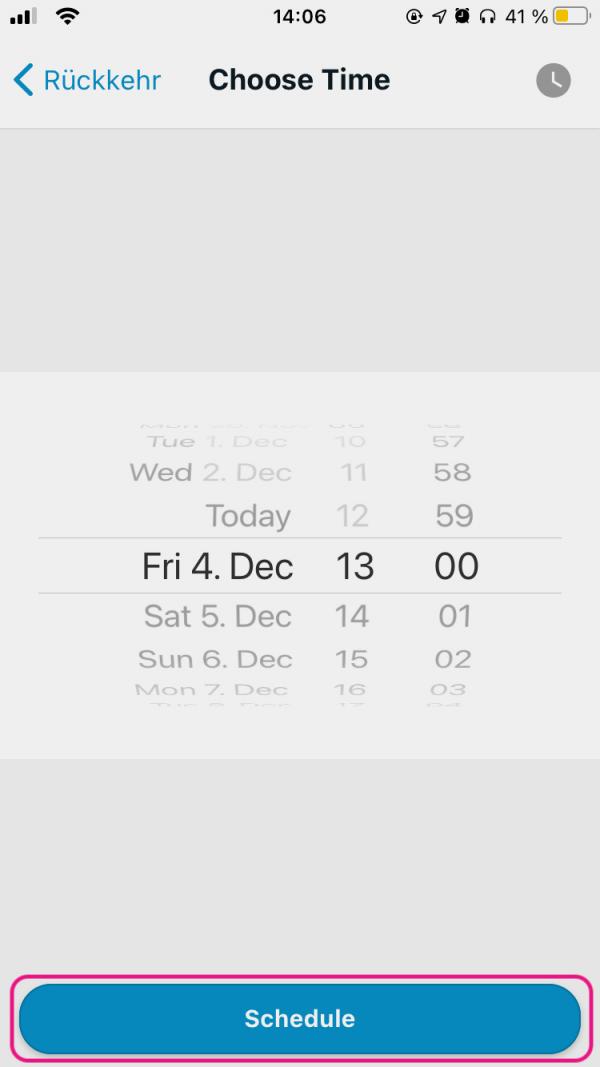 Here you can select the exact date and time of publication. Then tap on “ Schedule ”. Your post will then be published at the specified time.
 How to Schedule an Instagram Post Using Facebook Creator Studio
For some years now, Facebook has been offering the Creator Studio, in which you can view analyzes of your published posts and follower developments on Instagram, as well as plan posts. Creator Studio is currently only offered in the browser.
Note : You need an Instagram Creator profile to use Facebook Creator Studio (instructions)..
Follow the step-by-step instructions or take a look at the quick start guide .
2nd step
 Log in to the Instagram website.
 3rd step
 You will then be redirected to the main page of Creator Studio. There click on " Create contribution ". Then select “ Instagram Feed ” in the menu to share normal photos or videos, or “ IGTV ” to publish posts for Instagram TV.
 4th step
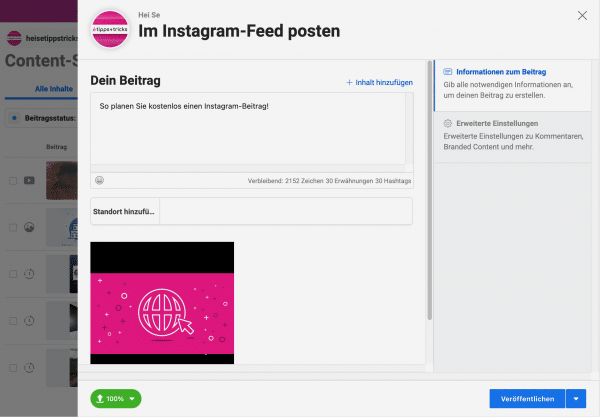 Click the Add Files button below or drag and drop the files into the box. If desired, give a description , hashtags and a location .
 5th step
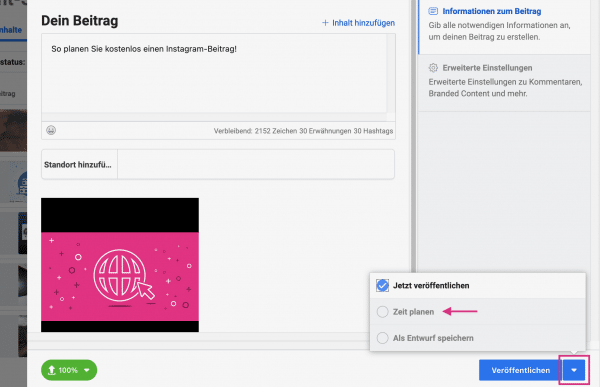 Do not click the check mark next to " Post " and then in the menu on " time schedule ".
 6th step
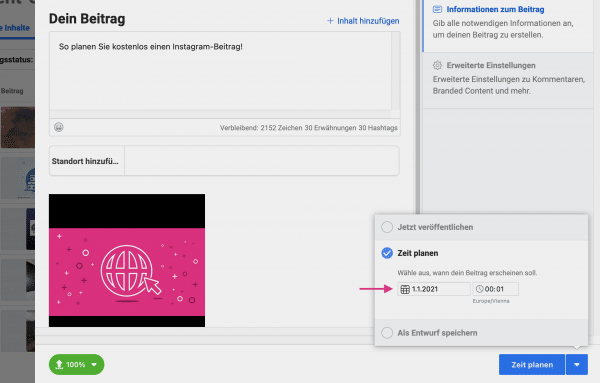 Enter the desired date and time and then click on "Schedule time ".
 7th step
 Your contribution will now be displayed in the contribution overview, but will only be published in the feed at the specified time.
 What are the advantages and disadvantages of the two ways?
The biggest advantage of using apps is the greater range of functions. In addition to posts and Instagram TV contributions, you can usually also post stories, in some cases assign hashtags based on their reach, automatically find the right time to post in order to maximize the reach, and much more. Furthermore, you can easily access the apps from a mobile device and do not have to use a browser. None of this is possible with Facebook Creator Studio.
On the other hand, Facebook Creator Studio has the advantage that it is permanently free to use. Many apps only offer a limited number of posts that can be scheduled and posted for free. Afterwards, you usually have to pay for the services with a subscription model. With Facebook Creator Studio you can also schedule posts if you do not have an Instagram business profile, but only a Creator profile. Another advantage of the Facebook tool is its close integration into the company's infrastructure, which means that insights with analyzes of follower developments and posts can be accessed directly.
Quick start guide: Schedule posts with apps
- Download an app like “ Tailwind ” from the Google Play Store or Apple App Store and open it.
- Tap “ Sign in with Instagram ” and sign in.
- Click on “ Authorize ”.
- Then tap on “ Upload ”.
- Select the media you want to share.
- If desired, add a description , hashtags , or a location .
- Under " Post Type ", select whether you would like to receive a notification at the selected time (" Post Reminder ") or whether the post should be published automatically (" Auto Post ").
- Tap on " Date and Time " and then on the clock symbol in the upper right corner.
- Set the desired time for publication and tap on “ Schedule ”.
Quick Start Guide: Schedule Posts with Facebook Creator Studio
- Open Facebook Creator Studio , click Instagram Login, and log in.
- Go to " Create a post " and then to " Instagram Feed " or " IGTV ".
- Add media below and provide a description , hashtags, and location .
- Click on the check mark next to " Publish " and then on " Schedule ".
- Enter a date and time and end the process with " Schedule time ".