With the environment minipage in LaTeX you can create smaller pages within a page with a fixed width. You can also insert familiar elements such as tables, pictures or paragraphs - only floating objects and marginal notes are not possible. How exactly the environment is defined and what it looks like in LaTeX can be found in the following tipps + tricks article.
How to use minipage in LaTeX
The idea behind minipage is that you can create another page within a page using the minipage environment. This is useful if, for example, two images are to be positioned next to each other. A minipage environment is defined as follows:
\begin{minipage}[äußere Position][Höhe][innere Position]{Breite}
Beispielbild oder -text
\end{minipage}
The environment has mandatory information ( curly brackets) and three optional items (square brackets):
- {Width} : The width in the curly brackets is mandatory and defines the width of the minipage. An absolute value such as 4cm or a relative value such as 0.2 \ textwidth can be specified here. In practice, several minipages are placed next to each other - this means that the sum of the widths should not be wider than the total width of the text. That can be defined wonderfully with the relative latitudes.
- [outer position] : The outer position aligns the minipage with respect to the current baseline. The following three arguments are valid: c = center : the center of the minipage forms a line with the current baseline; t = top : The top baseline of the minipage forms a line with the current baseline; b = bottom : The lowest baseline within the minipage forms a line with the current baseline.
- [Height] : The height is given as a measure of length (eg 5cm ) and determines the total height of the minipage created. However, this does not mean that the text is compressed to the height, but rather that the actual height of the content is used. The specification is optional.
- [inner position] : Similar to the outer position, the inner position is also optional. The reference to the height is aligned here. The three arguments are again: c, t, b .
An example: You want to create a minipage that is positioned at the top so that the header of the minipage lies on the current baseline of the page , so to speak . In addition, the minipage should be 8 cm high and the content should be centered on it. The width should be half the width of the text. The whole thing is implemented in LaTeX as follows:
\begin{minipage}[t][8cm][c]{0.5\textwidth}
Text oder Bild
\end{minipage}
Examples of minipage
In the first example, two images are to be positioned next to each other. The individual images should be set to half the width of the text. This works with 0.5 \ textwidth . The minipage is positioned with t in relation to the current baseline.
It is also advisable to integrate the minipages in a floating environment. This guarantees that the environment is flush with the edges of the surrounding text. The whole thing works by enclosing the minipages with \ begin {figure} [htbp] and \ end {figure} ..
Note : In order to use images, the Graphicx package must be imported with \ usepackage {graphicx} in the preamble.
\begin{figure}[htbp]
\begin{minipage}[t]{0.5\textwidth}
\includegraphics[width=\textwidth]{heise.png}
\end{minipage}
\begin{minipage}[t]{0.5\textwidth}
\includegraphics[width=\textwidth]{heise.png}
\end{minipage}
\end{figure}
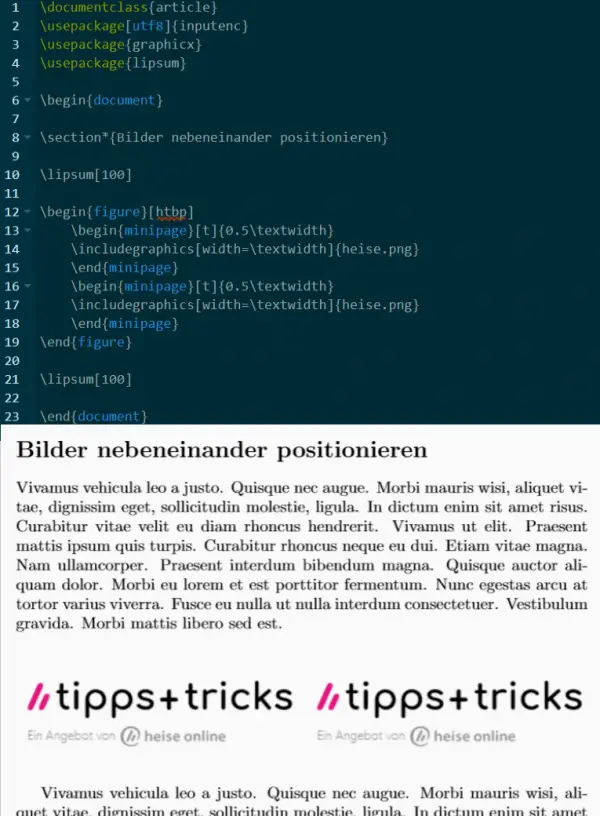 Two minipages with a picture next to each other - here integrated and positioned in the text.
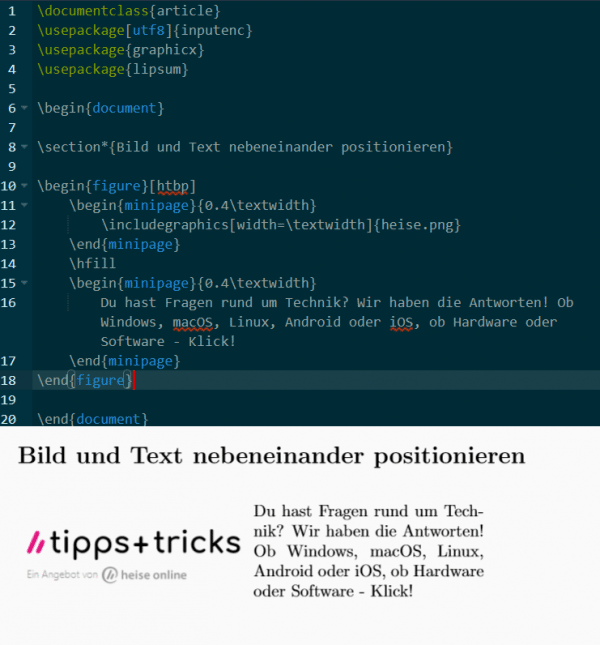
 As a second example, we would like to place our logo next to text with minipages. Both minipages should be 0.4 * text width wide. The remaining space can be filled with \ hfill so that the two minipages do not hang on each other and the entire space on the page is filled. We also integrate the whole thing back into the figure environment in order to ensure a clean positioning..
\begin{figure}[htbp]
\begin{minipage}{0.4\textwidth}
\includegraphics[width=\textwidth]{heise.png}
\end{minipage}
\hfill
\begin{minipage}{0.4\textwidth}
Du hast Fragen rund um Technik? Wir haben die Antworten! Ob Windows, macOS, Linux, Android oder iOS, ob Hardware oder Software - Klick!
\end{minipage}
\end{figure}