The fields of application of the single-board computer Raspberry Pi are almost limitless. A private web server can also be set up on the RPi - of course, its performance is not perfect. But with the fourth generation, the configuration is definitely an alternative. For example, if you want to host a website on it or set up other projects in your own network, the Raspberry Pi is the perfect introduction to the world of servers. In our post we will show you how you can set up a web server with Apache on the RPi.
What do you need for a web server?
In our instructions we would like to show you how to install Apache as web server software on the RPi. To do this, of course, you need a Linux operating system (Raspberry Pi OS) and the aforementioned web server software. Furthermore, we would like to install the so-called LAMP stack in order to use Apache as web server software as well as MySQL for database management and the PHP scripting language. LAMP is simply the acronym for L inux operating system, A pache, M ySQL and P HP. We use Apache in our tutorial, but Nginx is also a good alternative. In order to operate a web server on the Raspberry Pi, you need the following in addition to the microcomputer:
- Internet via network cable or a WLAN adapter. In the newer RPi variants, Wi-Fi is already integrated.
- SD card on which the Raspberry Pi OS (formerly Raspbian) operating system is installed.
- SSH access: If you want to use the web server headless - i.e. without keyboard, mouse and monitor - remote access via SSH should be set up. Read here how to allow SSH access on the Raspberry Pi.
Tip: If you use the Raspberry Pi via SSH, you can find out its IP address via your router. To do this, call up the router in the browser (e.g. via fritz.box for a Fritz! Box) and check which IP has been assigned to the RPi.
How to install Apache on the Raspberry Pi
Connect to your Raspberry Pi via SSH and log in with the password. To do this, open a terminal or the command prompt and enter " ssh username @ IP-Adresse-des-RPis ". By default, the username is pi . Before the web server can be set up, all packages should first be updated. To do this, enter the following command:
sudo apt update && sudo apt upgrade -y
Execute the command with [Enter] . Apache can now also be installed. To do this, enter the following command in the terminal:
sudo apt install apache2 -y
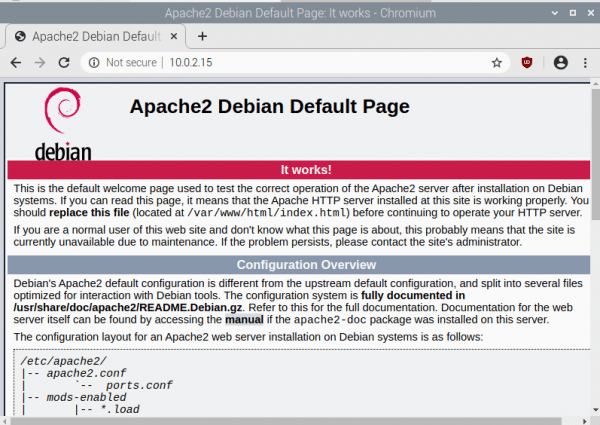
To check whether the Apache web server is running correctly on your Raspberry Pi, you can enter the IP address of the Raspberry Pi into a web browser. The server should display the following page:
 It works!
If you now upload files to the / var / www / directory , they can be accessed at http: // IP-Adresse-des-RPIs / filename - but only locally in your own network. So far, static HTML files can now be displayed. In order to expand the whole, we will now show you how you can also install and set up the PHP scripting language in order to create dynamic websites..
How to install the PHP scripting language
The installation of PHP is very easy, just like Apache. Enter the following command again in the terminal:
sudo apt-get install php -y
In order to check the successful installation, a file must now be created which can then be called up in the browser. First change to the directory / var / www / html / with:
cd /var/www/html/
Here you create a new file phpinfo.php with the Nano-Editor:
sudo nano phpinfo.php
and insert the following text:
<?php
phpinfo();
?>
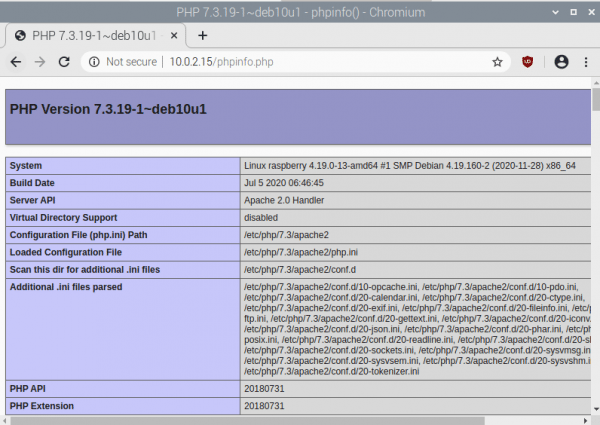
Save the file with [Ctrl] + [O] and close it with [Ctrl] + [X] . Now switch to your browser and enter http: //IP-Adresse-des-RPIs/phpinfo.php . You should see the following page if everything went well:

Tip: If the page does not appear immediately, restart Apache with the command sudo service apache2 restart .
Installation of the MySQL database service
Hardly any web server can do without a database. Therefore, we also show how the MySQL (MariaDB) database service is installed on your Raspberry Pi. Install the MySQL-Server (MariaDB-erver) and PHP-MySQL packages by entering the following command:
sudo apt install mariadb-server php-mysql -y
After that, the initial setup of the database has already been completed. Then restart the RPi with " sudo reboot " to complete the installation..