Obviously, when you surf the internet, you want to have a stable internet connection. But sometimes problems can arise that can quickly become quite annoying. For example, the message "Cannot connect to this network". But in this case there is no need to be desperate, because we will explain how you can solve this problem.
Restart the router
Rebooting your router should be the first step if you are having problems with your connection. Therefore, unplug your router from the power supply and wait a few minutes so that everything can reset itself. Then reconnect the router and wait for it to re-establish a connection. Now try again to connect your computer to the network.
Connect the LAN cable
You have two options for connecting your PC to the Internet. Either your device has a network card, like pretty much all laptops and some desktop computers. This enables you to establish a wireless connection to your router. Or you can connect your PC directly to the router with a LAN cable. This connection is usually faster..
So if you connect your laptop with an Ethernet cable, it will have priority over other connected devices. So take such a cable and plug one end into the appropriate port on your router and the other into your device. The connection should then be established automatically. If not, follow the next suggested solutions.
Deactivate the firewall
Your firewall can also be to blame for the connection failure. If it blocks your connection, you can try deactivating it. Read here how to disable the firewall in Windows 10..
If your firewall is deactivated, try to access a trustworthy website using a browser, for example www.heise.de/tipps+tricks. If you can see the website, you have a problem with your firewall settings. Now have a look here, how to add exceptions to your firewall and put a check mark everywhere.
Update the drivers of the network cards
An outdated or incompatible network driver can also cause problems. If you have recently performed a Windows update, the currently installed drivers may no longer be up-to-date. Follow our step-by-step instructions or take a look at the brief instructions .
1st step:
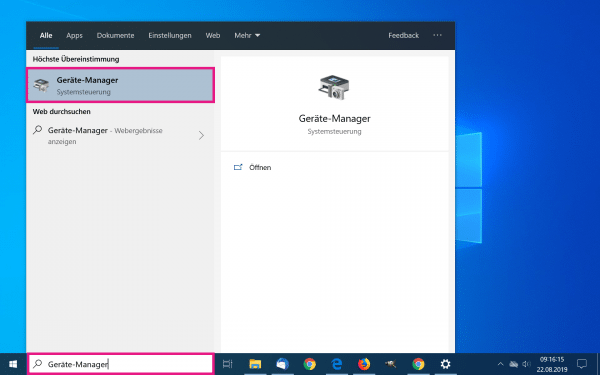 Open the start menu with the [Windows] key and enter " Device Manager ". Then click on the search result of the same name.
 2nd step:
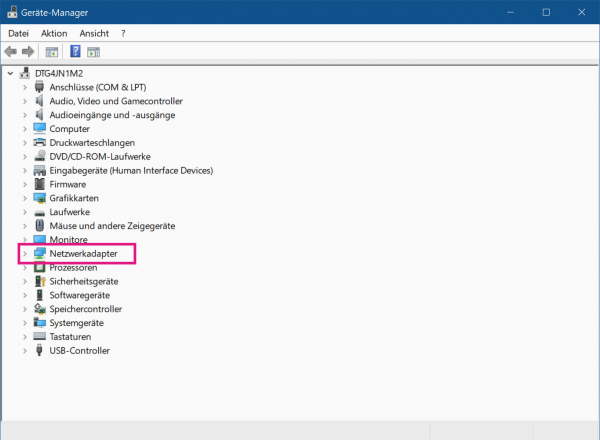 Now click on the entry " Network adapter ".
 3rd step:
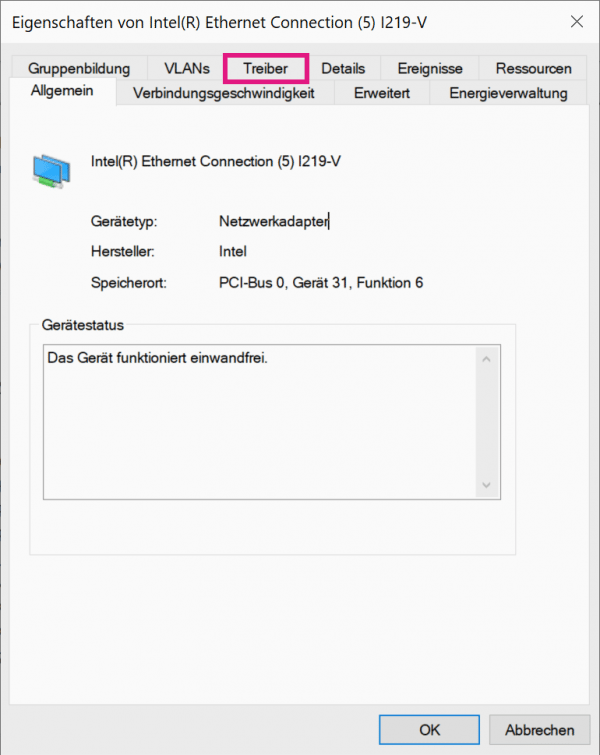 Now double click on your network name . A new window opens in which you switch to the " Driver " tab .
 4th step:
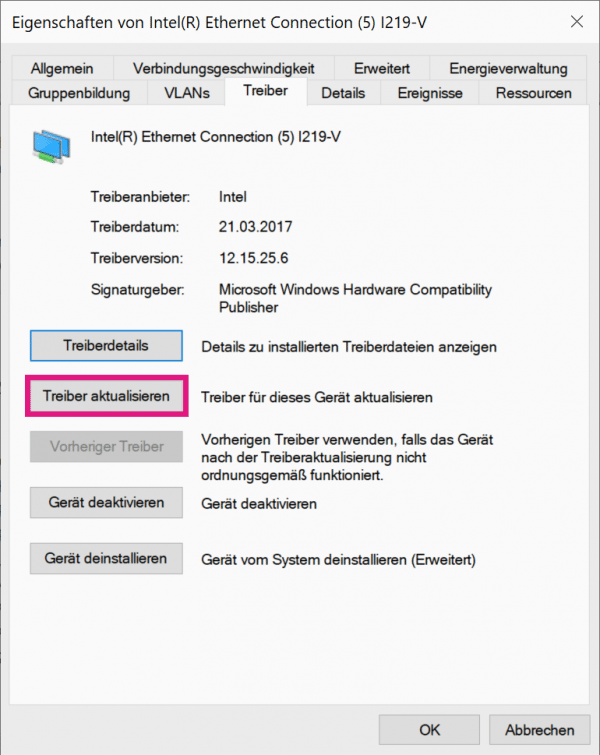 Click the " Update Driver " button . If the button is grayed out, your drivers are up to date.
 5th step:
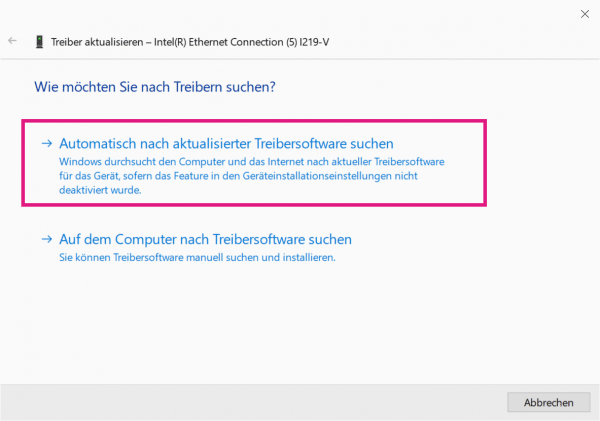 Now select the option " Automatically search for updated driver software " and then wait until the drivers have been updated. After the installation, perform a restart .
 Tip : If updating the driver does not help , uninstall the network card or adapter and then reinstall it.
Every time you connect to a new network, Windows 10 creates a profile for it - the network profile. If some data are incorrect and lead to problems, you can delete the profiles:
1st step:
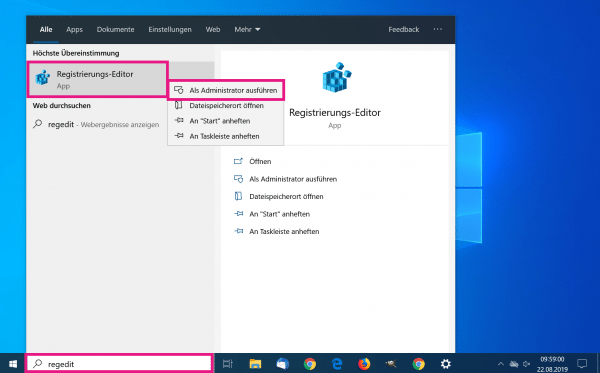 Enter " regedit " in the Windows search field and right-click on the " Registry Editor " result. Then select " Run as administrator ".
 2nd step:
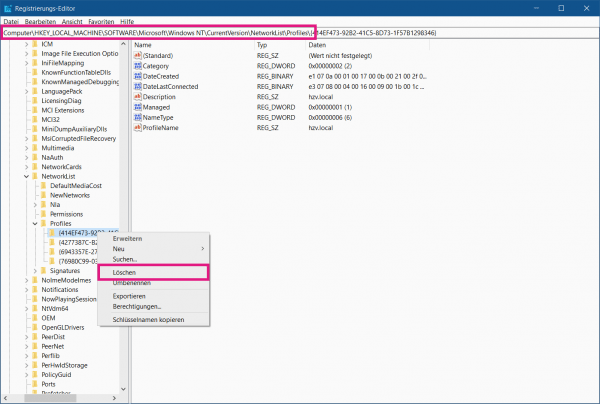 Now navigate to the path HKEY_LOCAL_MACHINE \ SOFTWARE \ Microsoft \ Windows NT \ CurrentVersion \ NetworkList \ Profiles . Right-click on the respective profile on the left and then select " Delete ". If you now re-establish a connection to your network, a new profile will be created.
 Reset TCP / IP
If your router has problems and does not accept your TCP / IP address, you can reset it:
1st step:
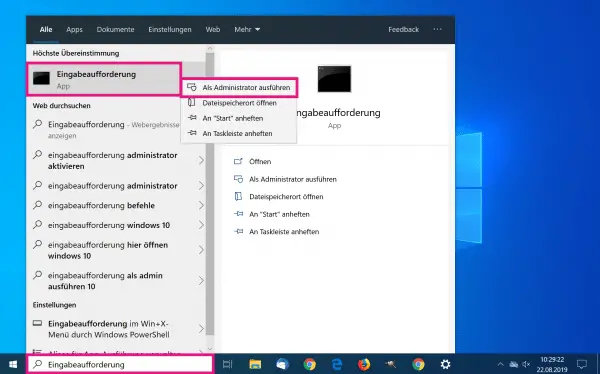 Enter " Command Prompt " in the Windows search bar and right-click on the entry of the same name. Then click on "Run as administrator ".
 2nd step:
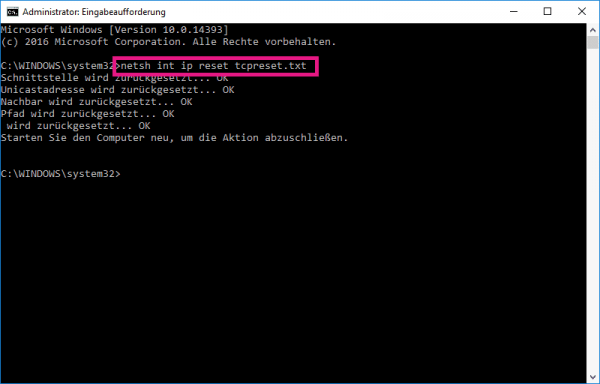 Now enter the command " netsh int ip reset tcpreset.txt " in the new window and press the [Enter] key. Then wait for the process to finish and restart .
 Run network troubleshooter
Windows 10 has a tool that you can use to identify and fix network problems:
1st step:
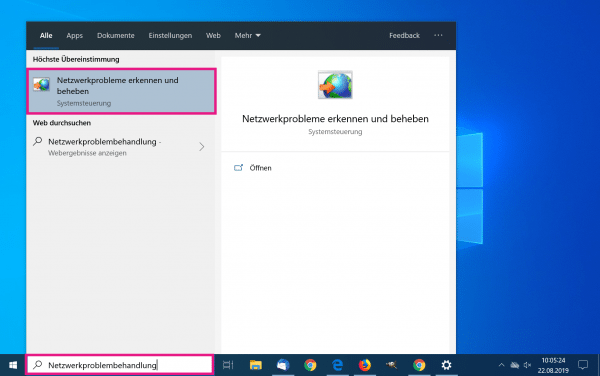 Type " network troubleshooter " in the Windows search bar and click the " Detect and fix network problems " entry .
 2nd step:
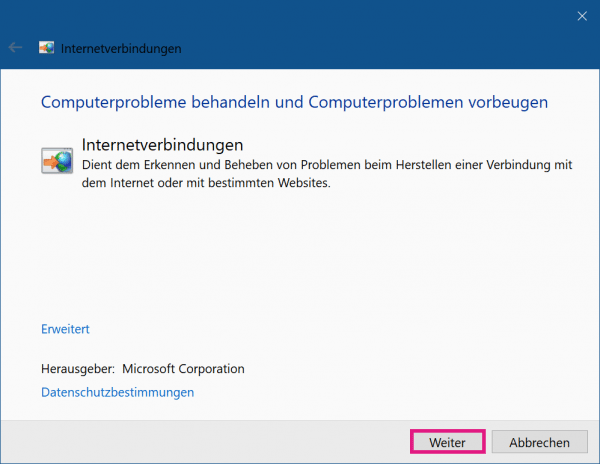 In the new window click on the button " Next " and then follow the instructions of the program.
 Quick Start Guide: Update Driver
- Enter " Device Manager " in the Windows search bar and click on the result of the same name.
- Open " Network Adapters " and then double -click your network name .
- In the new window switch to " Driver " and then click on the " Update Driver " button.
- Now select " Automatically search for updated driver software " and wait for the installation to complete. Then do a restart .