Google's Android mobile system can be found practically everywhere: Not only is it the dominant system on smartphones alongside iOS, but Android is no longer uncommon on TVs, streaming boxes or even in on-board computers. On the other hand, Android has never really established itself on PCs or laptops - no wonder, since the system is primarily designed for use with a touchscreen. Nevertheless, in many cases it can be worthwhile to use Android on the PC. For example, you can play your favorite mobile games on your PC or try out apps that you don't necessarily want to have on your smartphone. Unfortunately, Google does not offer Android itself as an installable system. But there is an excellent solution to this misery: the open source project Android x86 brings Android to the PC.
How to install Android in VirtualBox
In addition to a full Android installation, Android x86 also offers full access to the Google Play Store - and thus the gigantic selection of apps for the Android system. With it, you can bring practically the full Android experience to your PC. In principle, however, Android x86 is designed to be installed directly on a PC or a laptop. This is especially worthwhile if you still have an old computer that is too slow for Windows, for example. But there is a practical alternative to turning off real hardware: Simply install Android in a virtual machine. Android x86 gets along well with the free VirtualBox. It's available for Windows as well as Linux and macOS, so you can use Android practically anywhere.
This is how you do it:
1st step:
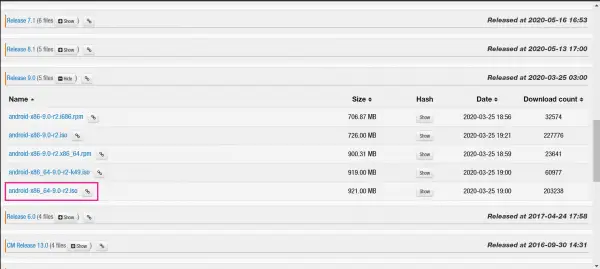 First, download and install the latest version of VirtualBox for your system. The current downloads can be found here: https://www.virtualbox.org/wiki/Downloads . Also, download the latest version of Android x86 as an ISO file. In the following we use the version based on Android 9.0 "Pie". You can find the downloads for Android x86 under this link: http://www.android-x86.org/download . We choose osdn.net as the mirror. Then download the version " android-x86_64-9.0-r2.iso "(it is important that it is exactly this version). You can find it by clicking on" Show " next to" Release 9.0 " .
 2nd step:
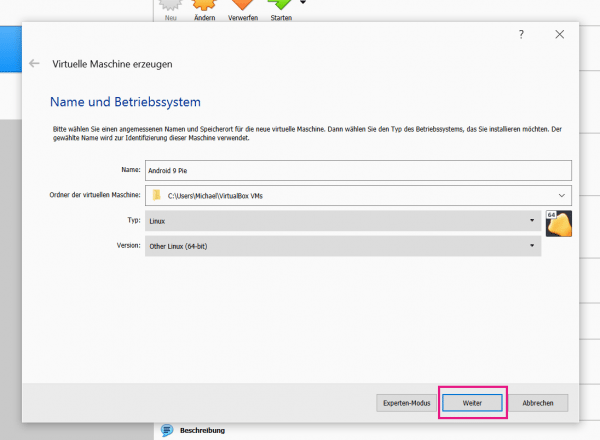 Start VirtualBox and use the " New " button to create a new virtual machine. Assign a name of your choice and select the entry " Linux " in the " Type" field . For " Version " select " Other Linux (64-bit) and click" Next ".
 3rd step:
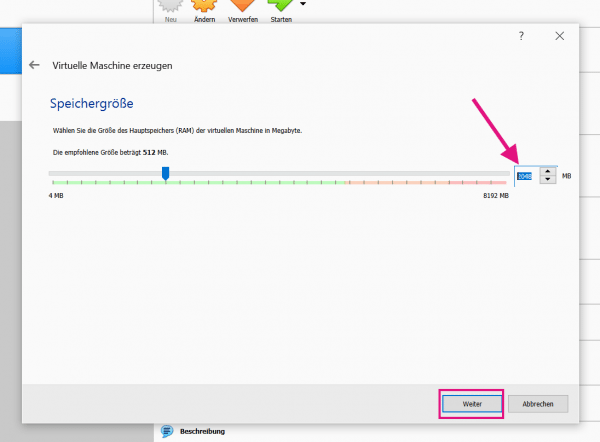 In the " Memory size " menu, enter the main memory that should be available to the Android virtual machine. As a rule of thumb, the more, the better. You should provide at least one gigabyte (= 1,024 MB). If your PC has 8 gigabytes of RAM or more, we recommend that you set the setting to " 2048 MB ". Click on " Next " again.
 4th step:
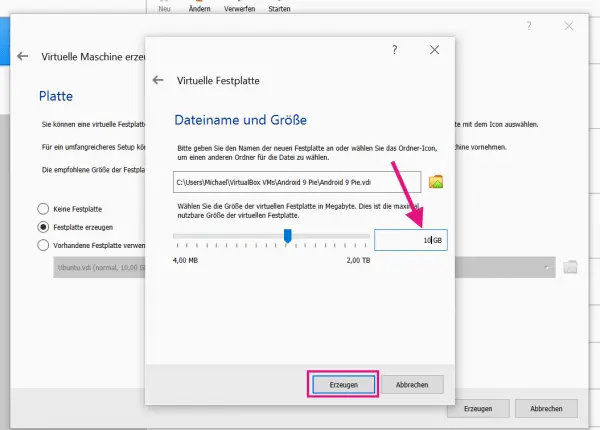 In the next menu, create a virtual hard drive on which Android x86 will be installed. To do this, select " Create hard disk " and click on " Create ". In the opened wizard, accept the default settings up to the " File name and size " menu . Here you determine the storage folder of the Android hard drive and the maximum size . We recommend reserving at least 10 gigabytes for Android. Apply the change with " Create ".
 5th step:
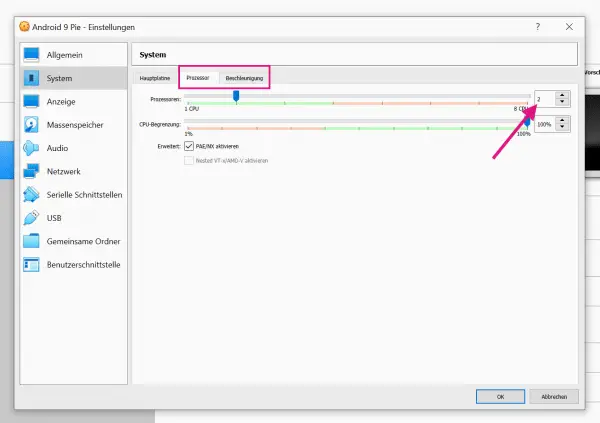 Your Android VM is practically ready for use - however, we recommend a few more settings so that the system runs smoothly. In the Android selection menu, click on " System " or the settings symbol. Here switch to the " Processor " tab and select at least 2 processors . In the adjacent " Acceleration " tab, select " KVM " for paravirtualization .
 6th step:
 It continues in the menu with " Display" . Here you set the graphics memory to the maximum value (with us 128 MB) and change the graphics controller to " VBoxSVGA ".
 7th step:
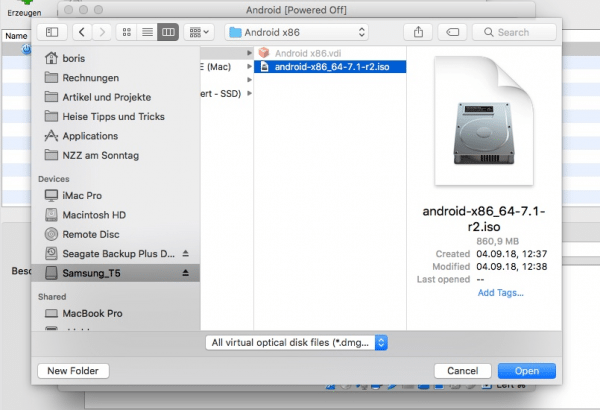 In the next step you can mount the downloaded ISO file under " Mass storage ". First click on "empty" (we already have the Android ISO here) and select " android-x86_64-9.0-r2.iso " as the optical drive via the CD symbol . This works with " Select image ". Confirm all settings with " OK ".
 8th step:
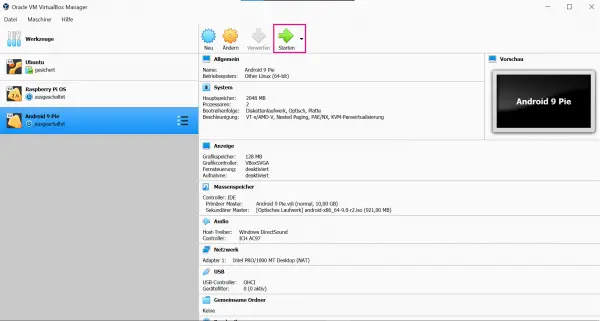 In the main menu of VirtualBox, select Android 9 Pie (or the name given to the VBox) and click on " Start ".
 9th step:
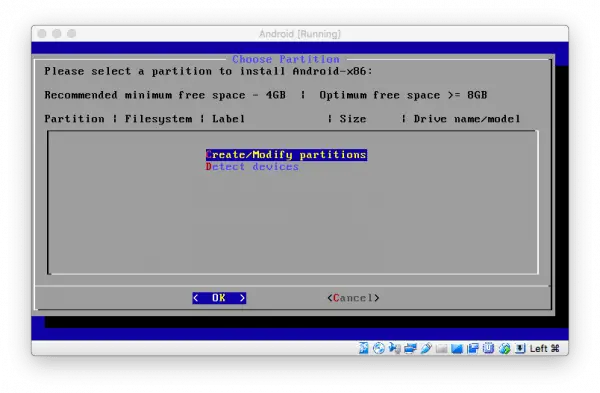
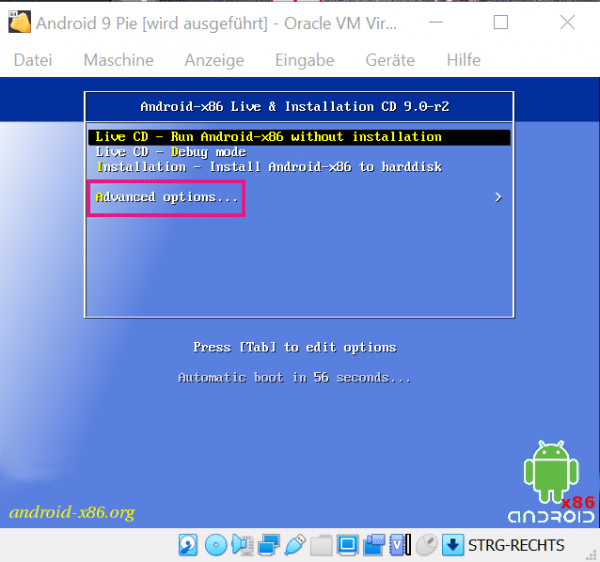 VirtualBox now shows the text-based installer of Android x86. Use the keyboard to select the entry " Advanced Options " by navigating with the arrow keys and pressing [Enter] .
 10th step:
 In the next step select " Auto_Installation - Auto Install to specified harddisk " and press [Enter] . Confirm the upcoming question with " Yes " by navigating with the arrow keys and pressing [Enter] again .
 11th step:
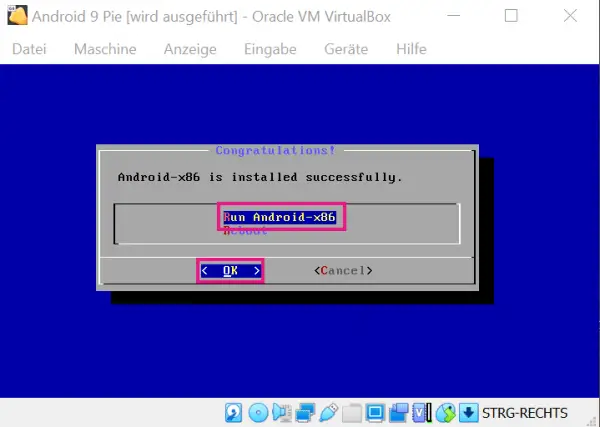 Android will now be installed on your virtual machine. Then select " Run Android-x86 " and " OK " and press [Enter] again .
 12th step:
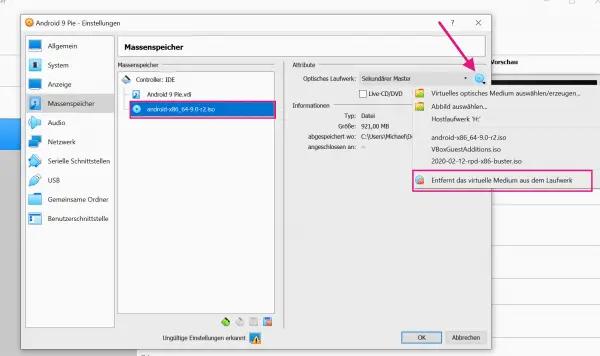 Now you have to remove the virtual installation CD from Android x86. Interrupt the Android startup process, close the virtual machine and select " Close the virtual machine ". Navigate back to the settings of the mass storage and go here for the mass storage under the CD symbol to " Removes the virtual medium from the drive ". Then "empty" should appear here again.
 13th step:
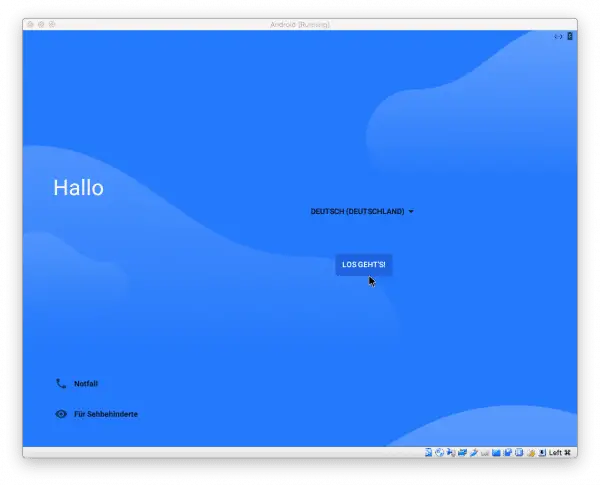 Now start the virtual machine again via " Start ". Android x86 now welcomes you with the setup wizard that you may already know from your Android smartphone. Do this and sign in with your Google account . Afterwards you can basically use Android x86 on your PC in the same way as you know it from your smartphone or tablet. Incidentally, you can safely ignore messages about a missing WLAN connection: Android x86 automatically takes over the correct connection from the “host” PC.
Tip: Problems starting Android with VirtualBox 6.0.x
If you have problems starting Android with VirtualBox version 6.0.1 or higher, there are a few settings that you should adjust. In the VirtualBox menu click on " Display " and activate "Enable 3D acceleration " and " VBoxVGA ". You must also switch off the UTC hardware clock. This works via " System "> " Motherboard "> " Hardware - Clock in UTC ". Just uncheck this option. The Android GUI should now boot successfully..
Another tip: If you have problems with the mouse input when using Android x86, deactivate the mouse integration. To do this, click on “ Input ” in the VirtualBox menu and uncheck “ Mouse integration ”. If you now click into the Android x86 window, the mouse will be “caught” and you can use Android correctly. To get back in control of the real system, you'll need to use VirtualBox's " release button". You can see this in the lower right corner of the virtual machine window. For example, in Windows it is the right CTRL key on your keyboard, in macOS the left command key is used.
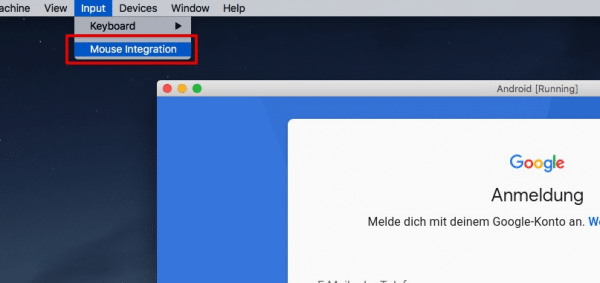
If you have problems using the mouse, simply deactivate the VirtualBox mouse integration.