In a text document, horizontal or vertical lines can be used to separate sections. There is a very easy way to add a horizontal line to Word files. If you want to be able to move the line as well, there are two other solutions. In this article, we're going to show you all three ways. We'll also show you how to draw vertical lines.
Insert a simple horizontal line in Word
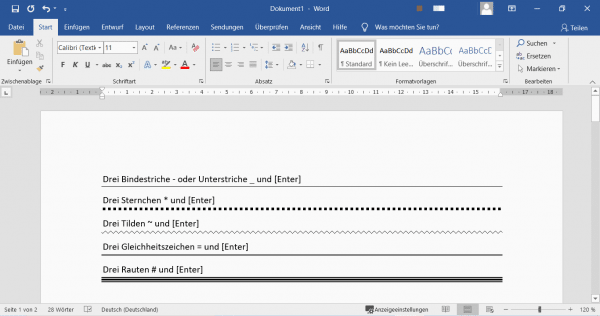
How to create a simple, horizontal, black line directly above your current line: At the beginning of the line, type three hyphens or three underscores in a row and then press [ Enter ]. The line appears automatically over the full width of the page and cannot be moved. In tables, the line extends across the width of the column.
If you type in other characters instead of the dashes and then press [Enter], the line looks a little different:
- three asterisks * create a dotted line
- with three tildes ~ a wavy line is created
- three equal signs = create a double line
- using three hashes # you create a triple line
 If you write different characters three times and then press [Enter], you will create different lines in Word.
 Insert movable horizontal line in Word
To insert a line in your Word document that you can then move and otherwise edit, follow these step-by-step instructions or take a look at the quick start guide ..
1st step:
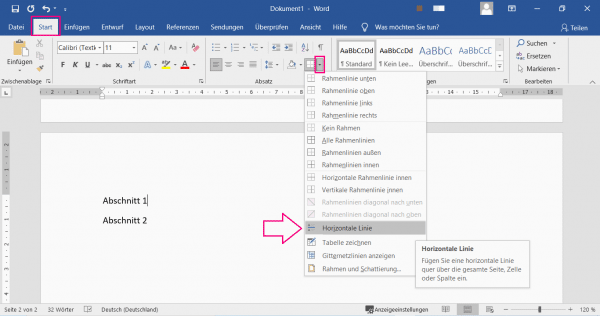 Move the cursor to the line under which you want to insert the line. At the top of the " Home " tab in the " Paragraph " area click on the small arrow next to the frame line symbol . In the menu that opens, select " Horizontal line ".
 2nd step:
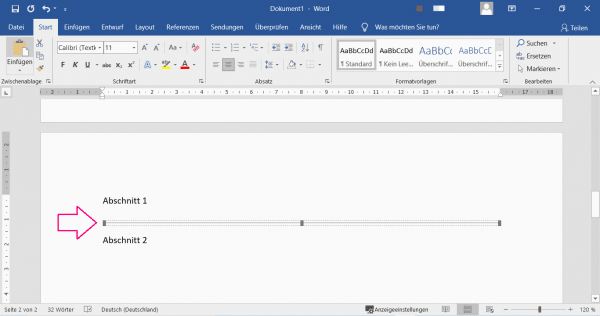 The line appears below your line. If you once on the line click , you can up and down move .
 3rd step:
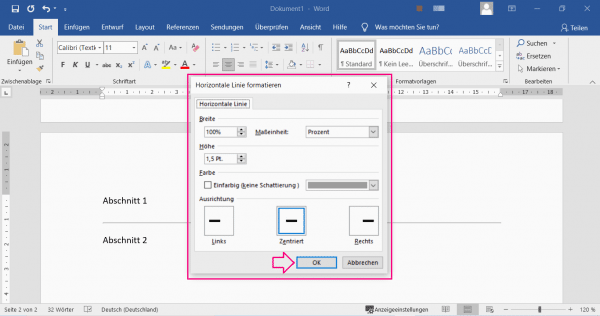 Make a double on the line for more options to obtain. A window opens in which you can set how wide and high the line should be, what color it should be and how it should be aligned in the document. To apply your settings, click " OK ".
 Insert line as shape in Word (any alignment)
To insert a line in your Word document that you can move, rotate and shape as you like, follow these step-by-step instructions or view the quick start guide .
1st step:
 Go to where you want to insert the line in your document. At the top of the " Insert " tab, under the " Illustrations " area, select the " Shapes " field . In the " Lines " section, click on the line you want .
 2nd step:
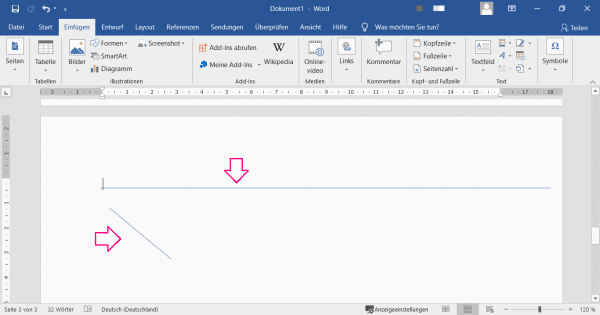 Your mouse pointer will now turn into a crosshair . Hold down the left mouse button and drag the mouse to draw any line. If you hold down the [ Shift ] key, a horizontal line is automatically created . When the line is ready, release the mouse button.
 3rd step:
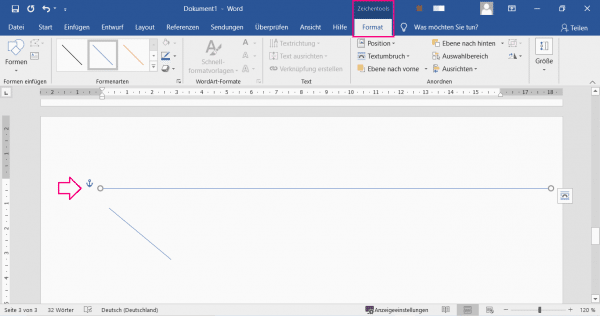 Click the line to select it. Small circles appear at their ends, and the " Drawing tools " or " Format " tab appears at the top . There you have many options for editing the line (color, contour, effects, position, ...).
 Insert a vertical line between columns
If you are working with a multi-column layout in Word, you can insert vertical dividing lines between the columns..
1st step:
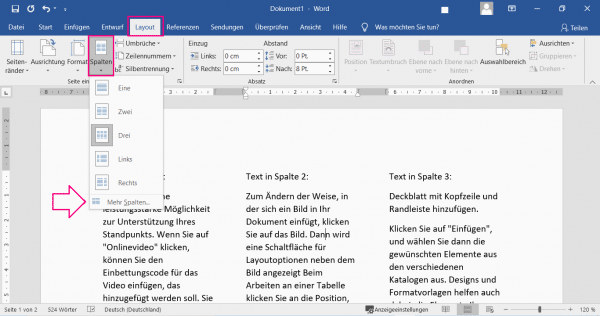 Go to " Columns " under the " Layout " tab in the " Page setup " area. In the menu that opens, select " More columns ... " at the bottom . A window will open.
 2nd step:
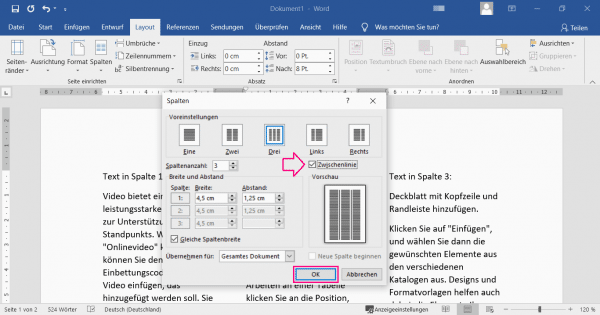 Now check the box next to " Intermediate line " on the right and confirm with " OK ". Vertical lines are now inserted between the columns.
 Quick guide: inserting a movable line in Word (horizontal)
- Click in the line below which the line should appear. At the top of the " Home " tab, click in the " Paragraph " area on the small arrow next to the frame line symbol .
- A menu opens. Select " Horizontal Line " here.
- The line will now appear below your line. To move the line up and down, click it once and then drag it to where you want it .
- For more options, double-click the line. In the window that opens, you can set the following: width, height, color and alignment of the line.
Quick guide: inserting a line as a shape in Word
- At the top of the " Insert " tab under " Illustrations " click on the " Shapes " field. Select a line under " Lines ".
- Your pointer will turn into a crosshair that you can use to draw the line. To do this, hold down the left mouse button and drag the mouse. To draw a horizontal line , hold down the [ Shift ] key. When the line is ready, release the mouse button.
- Select the line for more options . Under the tab " Drawing tools " or " Format " you can edit the line (color, contour, effects, position, ...).