Apple has released macOS High Sierra as its latest operating system edition for its macOS computers and with it we have a wide and consistent range of options that will make this experience something productive and totally interesting..
Although the Apple development team has strived to offer the best with macOS High Sierra, we know and must recognize that, like any operating system, being a new version, it will be exposed to a series of failures and errors that We can report in order to improve the support and productivity of the system .
One of the critical errors is associated with the Wi-Fi network , which is the vital element in most Mac computers, since a high percentage are portable computers, because an error in network connectivity will prevent us from having access to the system and perform the necessary tasks..
Among the most typical errors we have:
- Difficulty connecting to Wi-Fi networks
- General connectivity problems with Wi-Fi networks.
In this tutorial we will cover some options that we can execute in macOS High Sierra with the aim of improving Wi-Fi connectivity.
1. Update macOS High Sierra system
Before executing any procedure, if our team is currently in High Sierra, then we must update to the latest version of macOS High Sierra that is available. Apple regularly releases software updates for the operating system, and macOS High Sierra is no different. If we are still running macOS High Sierra 10.13, then it will be necessary to update to the latest available version (10.13.1, 10.13.2, etc.). Remember that before updating it is always recommended to make a backup copy of the most delicate documents.
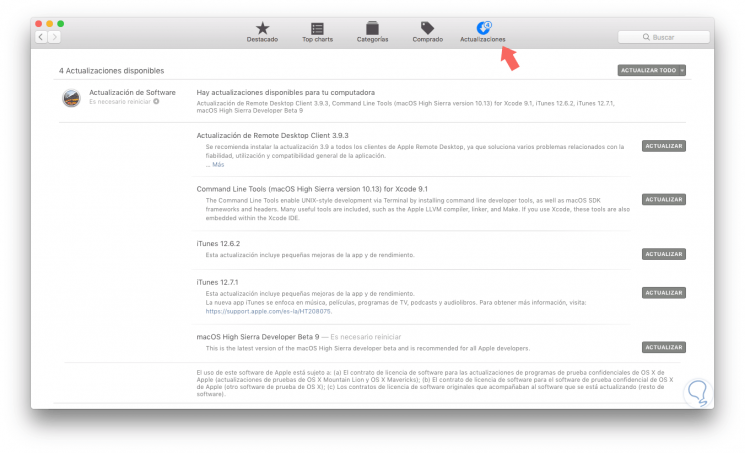
Step 1
To check if there are updates for the system available, we will access the App Store, log in with our Apple ID and in the "Updates" tab we check that it is available for the system:
Step 2
Once updated we can click on the Apple logo and there select the option "About this Mac" and check the current version of macOS High Sierra:
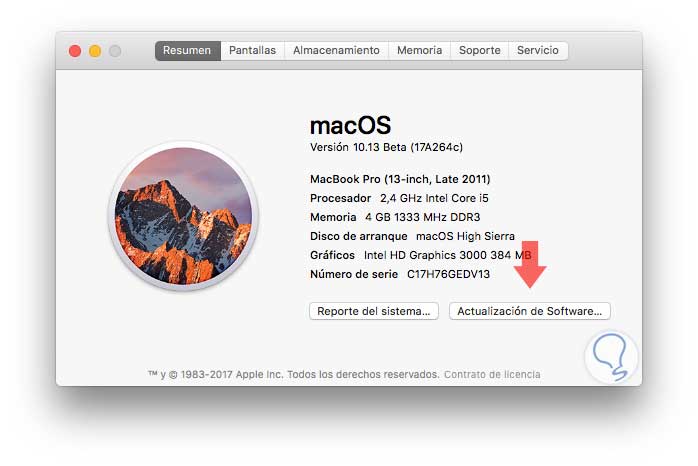
Note
It is also possible to update the system by clicking on the "Software update" button from the "About this Mac" option.
Remember that the goal of system updates is to correct various general system errors and improve system performance and security..
2. Check if the Wi-Fi router SSID (name) is hidden
Some macOS High Sierra users have reported difficulties connecting to Wi-Fi access points that have a hidden SSID.
We can try to disconnect and then connect directly to the hidden SSID router in Mac OS, but the connection may drop again or fail to activate.
One possible solution is to make the SSID visible, this should be done directly on the Wi-Fi router itself and will vary depending on the wireless access point, but if we have access to the Wi-Fi router this may be a solution. This works for many users, but obviously if we have a hidden SSID for some reason, making the SSID visible is not always a viable option for privacy and security issues.
3. Wi-Fi connection is only reduced when macOS High Sierra is activated from sleep mode or screensaver
Some users have reported that macOS High Sierra loses its Wi-Fi connection when it is activated after using the screen saver or from hibernation, or that it takes a long time for macOS High Sierra to reconnect to Wi-Fi after running this task.
We may be able to resolve the Wi-Fi crash after macOS High Sierra is active by configuring a new wireless setting.
For this we will do the following.
- Go to the Wi-Fi menu and select the option "Disable Wi-Fi"
- Wait a few seconds and then go back to the Wi-Fi menu and select "Activate Wi-Fi".
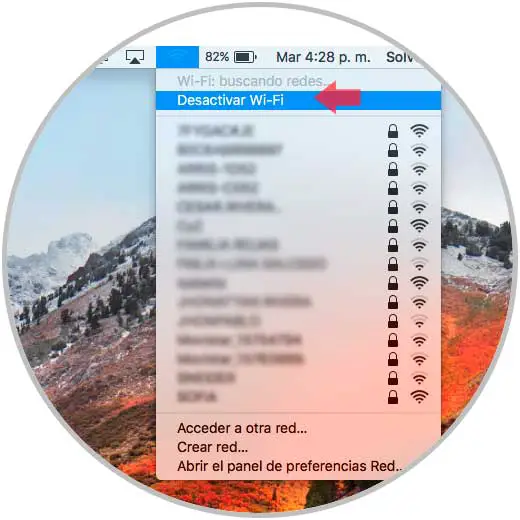
On many occasions, simply turning the wireless network on and off again resolves the failure to rejoin a Wi-Fi network.
4. Create a new Wi-Fi configuration in macOS High Sierra
At this point, we recommend creating a backup of the computer before continuing, as these steps involve deleting configuration files at the system level.
Step 1
Once the backup is created, we will carry out the following process:
- First, we will disable Wi-Fi from the Wi-Fi menu bar in the upper right corner and selecting the option "Disable Wi-Fi"
- Now, we will create a folder on the desktop called WiFiConfigBackup.
- Later we will go to the Go menu of the Finder and select the option "Go to the folder":
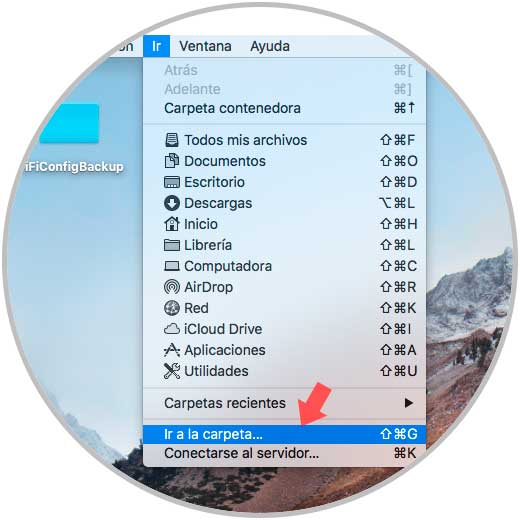
- We can also use the key combination:
Shift + Command + G
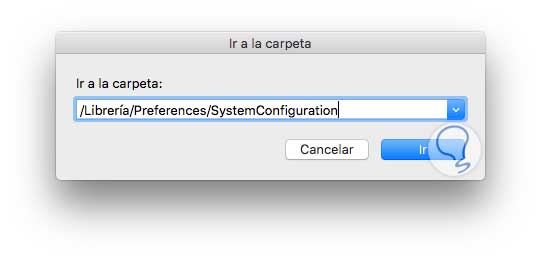
Step 2
In the displayed pop-up window we will enter the following route:
/ Library / Preferences / SystemConfiguration /
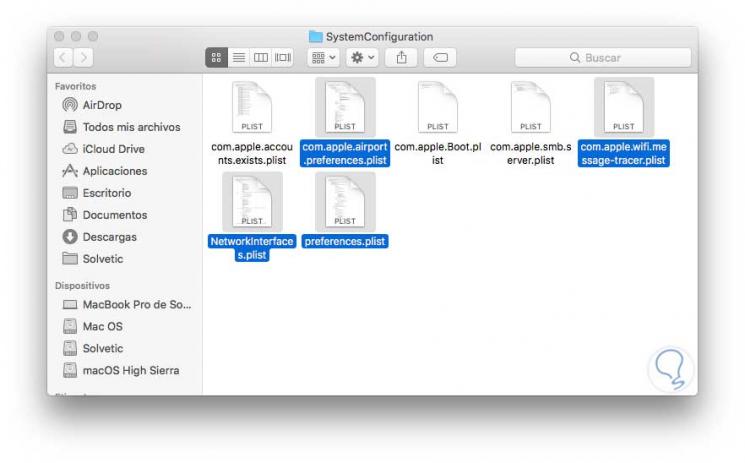
Step 3
Click on the "Go" button and in the open folder we will locate the following files. We proceed to select them and drag them to the new folder that we have created on the desktop.
com.apple.airport.preferences.plist com.apple.network.eapolclient.configuration.plist com.apple.wifi.message-tracer.plist NetworkInterfaces.plist preferences.plist
Step 4
We proceed to restart the computer and, once we access it again, we go to the Wi-Fi menu and select the option "Activate Wi-Fi".
Basically, what we have run is removing the old wireless preferences and having macOS High Sierra replace them by generating new Wi-Fi preferences.
For many users, this is enough to solve any problem with the Wi-Fi network.
5. Create a new network location in macOS High Sierra
This option is an alternative in case the previous step still causes connectivity problems.
Step 1
To do this we go to "System Preferences" and we will see the following:
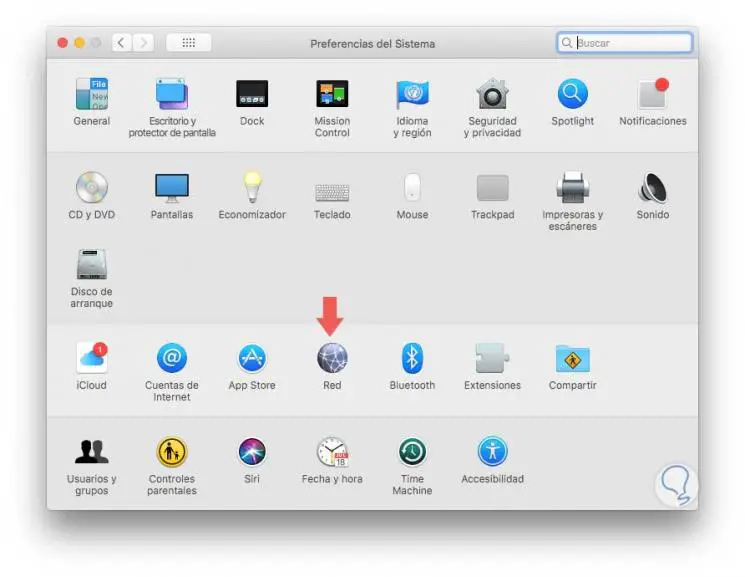
Step 2
There we click on the “Network” option and in the displayed window we go to the Wi-Fi line and we will see the following:
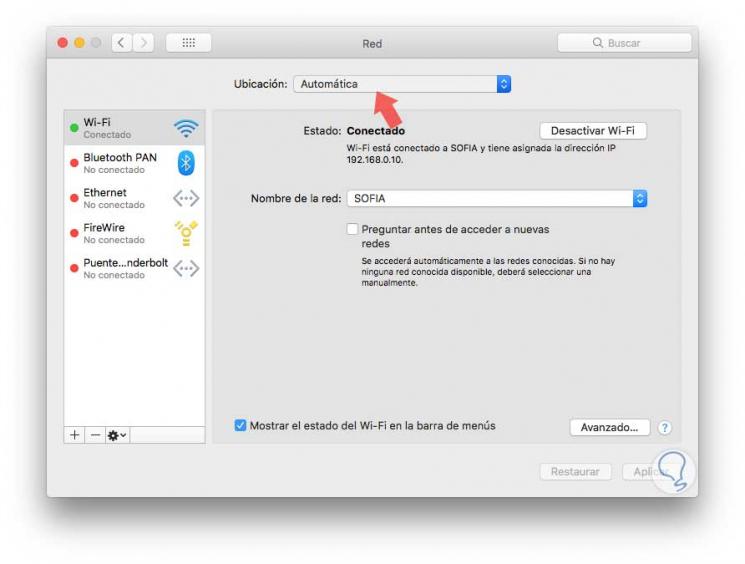
Step 3
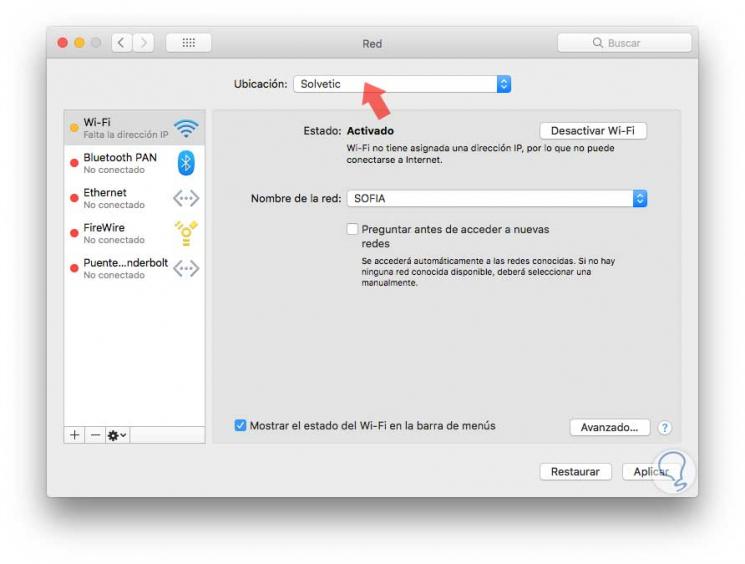
There we click on the "Location" field and the following options will be displayed:

Step 4
We will select the option “Edit locations” and we will see the following window displayed:
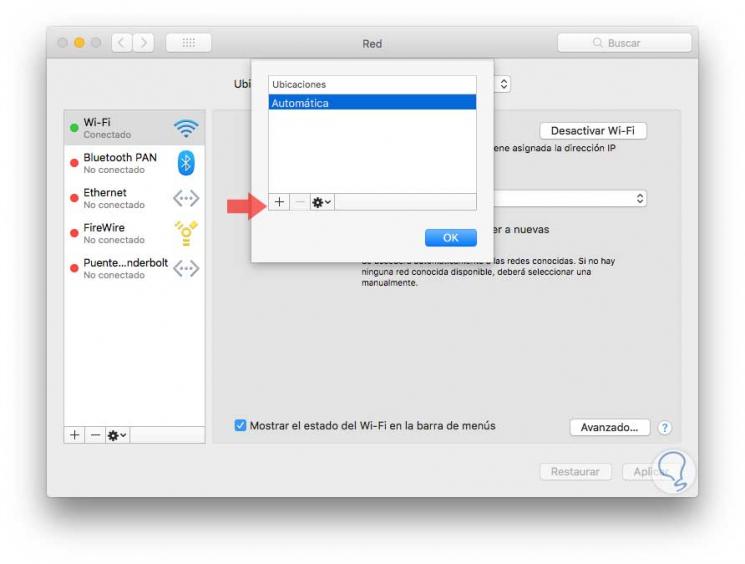
Step 5
There we click on the + sign and we will assign a name to the new location:
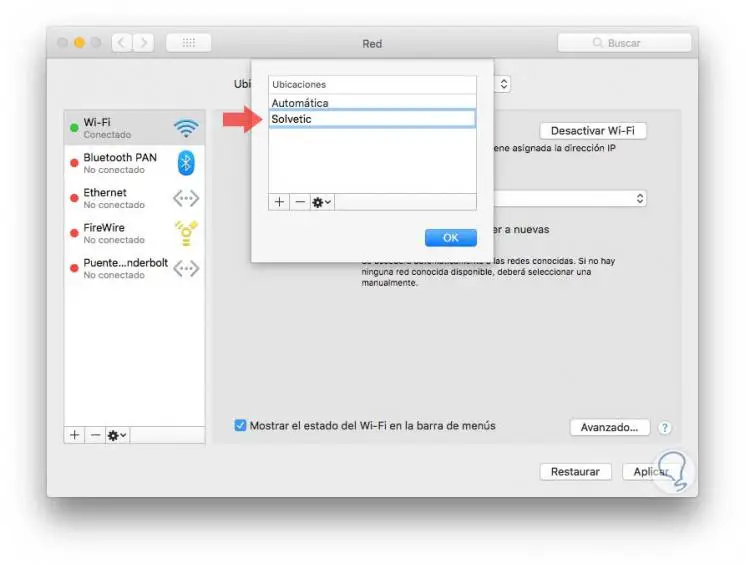
Step 6
Click on Ok to complete the process and see that the new location has been created correctly:
Step 7
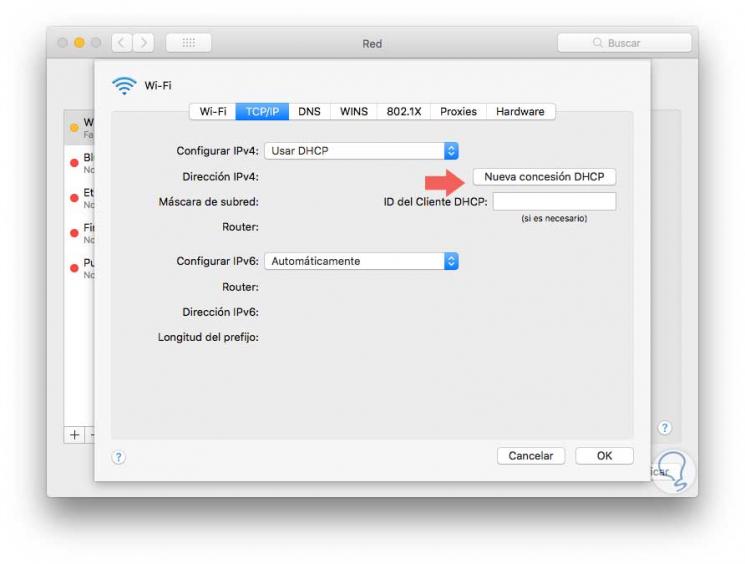
Now, click on the "Advanced" button and we will make the following configuration. First, we go to the "TCP / IP" tab and click on the "New DHCP lease" button:
Step 8
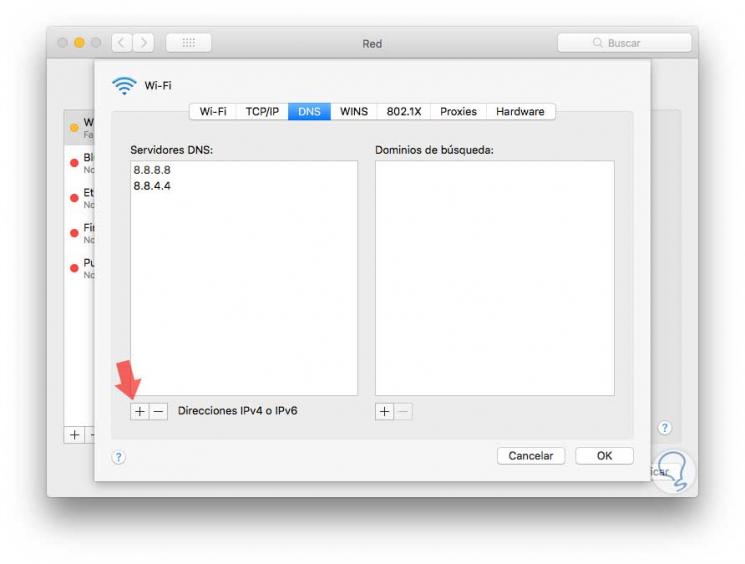
Second, we go to the "DNS" tab, click on the + sign to add new servers and enter the IP addresses of the respective DNS servers, in this example we have used Google's public DNS:
Step 9
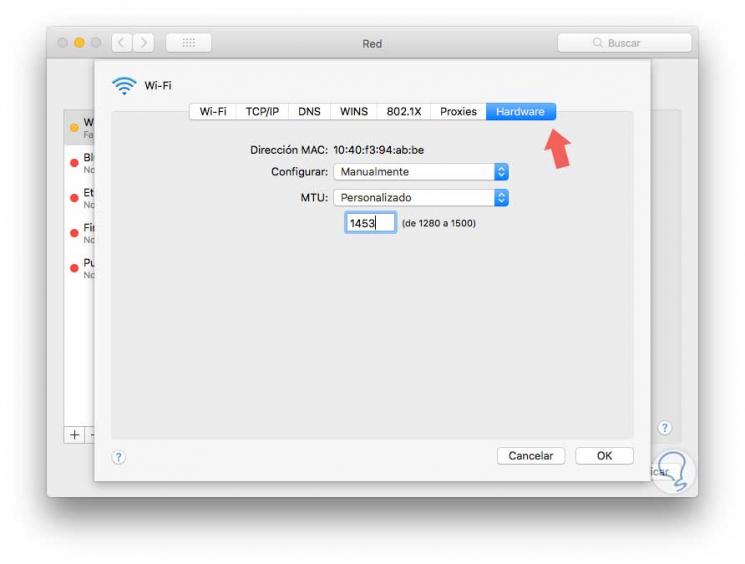
Finally, we go to the "Hardware" tab and configure the following:
- In the "Configure" field we set the "Manually" option.
- In the "MTU" field we leave the option "Custom".
- We enter the value "1453"
We can click Ok to save the changes and we can exit System Preferences. Now we can navigate functionally and without any error in macOS High Sierra.