Apple continues to surprise us with its new current, powerful and safe equipment. When we buy a new equipment of these, or when we have decided to carry out a clean installation of the system in general, when we access we can see the limitation that we have when using the contextual menu, or right click (Ctrl + click)..
macOS High Sierra gives us the opportunity to edit this menu as we like to add or remove items , but this is a process that requires care since the processes involve many more steps than we are used to in other operating systems.
Today we will see how to do this process carefully but effectively..
1. How to add or remove context menu services on Mac
The main way to add and remove items in the macOS context menu is through services. Services are available from the "Services" drop-down menu in the context menu at the bottom of the menu. macOS offers a GUI-based method here for adding and removing context menu items.
Step 1
For this we must access System Preferences using one of the following options
- From the Apple menu select the System Preferences option
- Click on the System Preferences icon located in the Dock
The following window will be displayed:

Step 2
There we select the Keyboard option and in the new window displayed we go to the Quick functions tab:
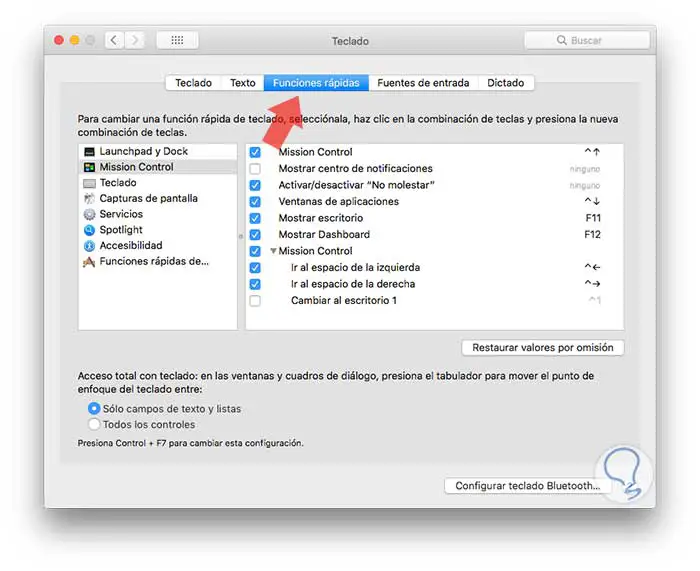
Step 3
There we select the Services line located on the left side and we will see the following:
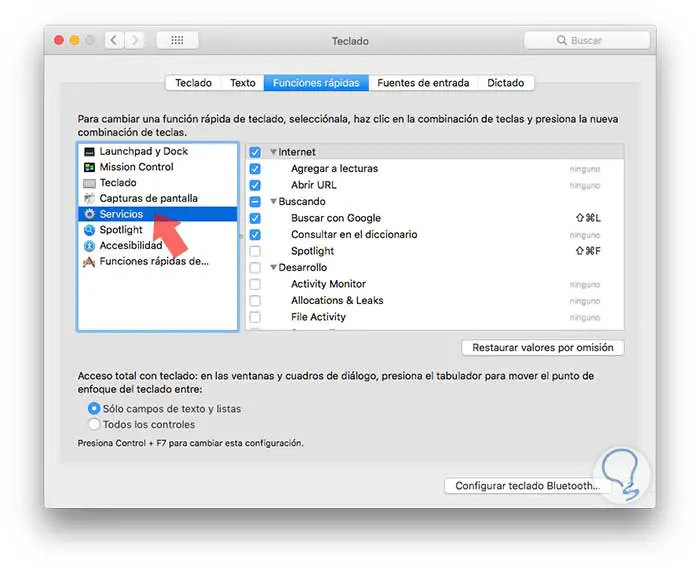
This will display a list of all available services, arranged in some main categories based on the information that is entered. We can click on the checkboxes to toggle the visibility of the associated services.
Step 4
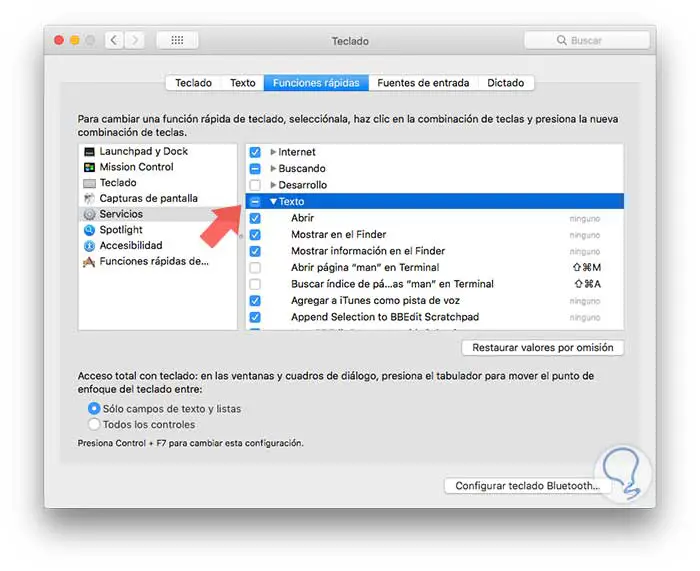
Applications have the ability to add their own services here. These will be found based on the type of item (file, folder, text) that the context menu item takes as input. For example, if a context menu item appears when you right-click the selected text, you will find the service in the "Text" drop-down menu.
2. How to show services in Mac context menu
If we have many services or use them frequently, it can be annoying having to constantly wait for the drop-down menu to open. In macOS High Sierra it is possible to make all services appear in the main drop-down menu with a Terminal command.
For this we open the terminal using one of the following options
- Using the key combination Shift + Command + U and in the displayed window select Terminal
- From the route Go / Utilities / Terminal
- Using Spotlight and enter the word terminal and select the respective utility
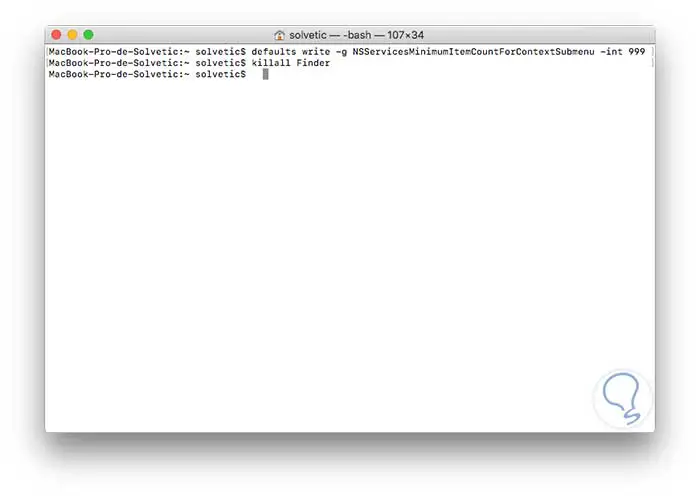
In the deployed console we will execute the following line:
defaults write -g NSServicesMinimumItemCountForContextSubmenu -int 999
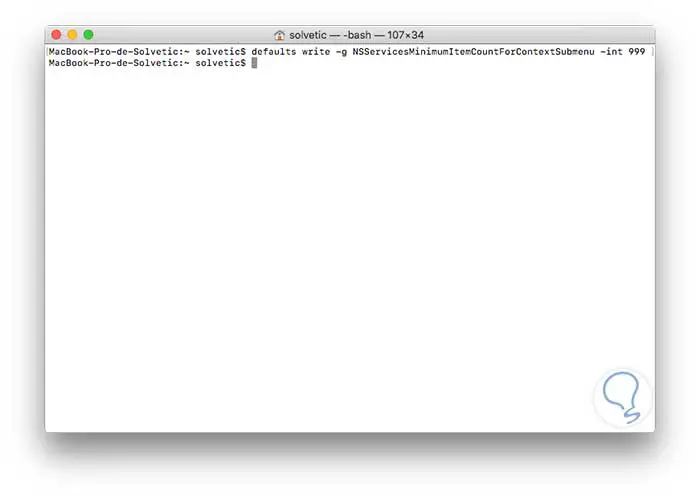
This command will edit the default values for the minimum services required to create the Services submenu. The number at the end is 999 in this case, it will be the one that establishes the number of elements that we will use to create the Services submenu..
Note that if the number of services is less than this value, you will not see the Services submenu. In this situation, 999 is not significantly different from infinity, so you will always see each item of Services.
We can restart Finder by executing the following command in the terminal:
killall finder
3. How to edit the menu "Open with" Mac
One of the submenus in the context menu of macOS High Sierra is the "Open With" menu, which tends to be a little messy. We can work with it in various ways.
Remove duplicates from the "Open With" context menu
Step 1
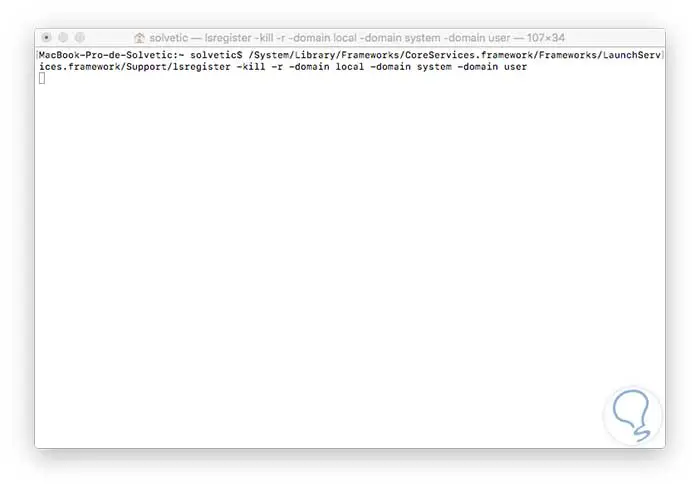
In some cases, the LauchServices database can become corrupted, causing the massive duplication of the items in its "Open with" menu, to correct this we can execute the following line in the terminal:
/System/Library/Frameworks/CoreServices.framework/Frameworks/LaunchServices.framework/Support/lsregister -kill -r -domain local -domain system -domain user
Step 2
This command allows us to rebuild the LaunchServices database. Once the process is complete, we restart Finder by executing the following. Manually ban apps from specific extensions
killall finder
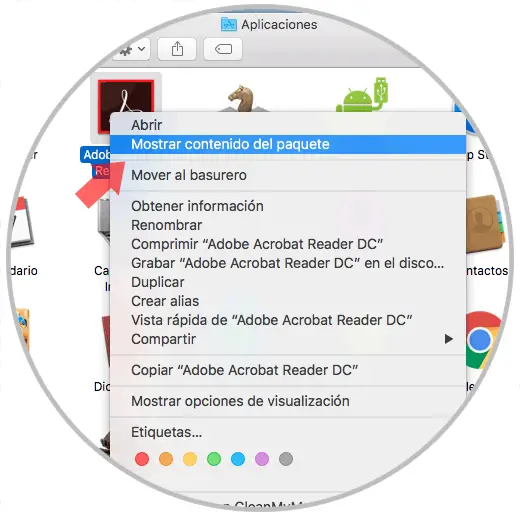
In macOS High Sierra we have the possibility to prohibit a specific application from being associated with a file extension defined in the Open with menu. This is a delicate point, therefore we can do it if we are sure of editing plist files. For this we will right-click on the application to edit and select the option Show package content:
Step 3
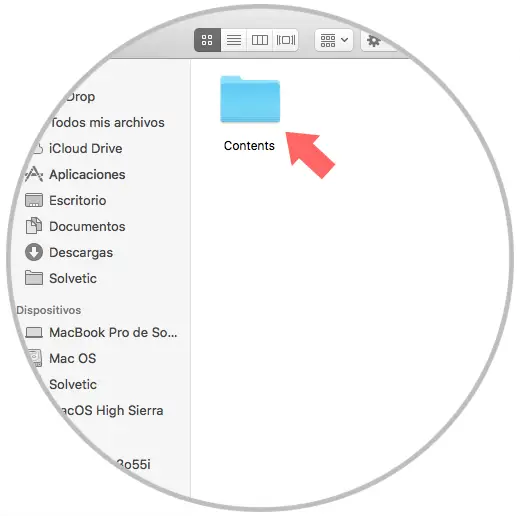
The following window will be displayed:
Step 4
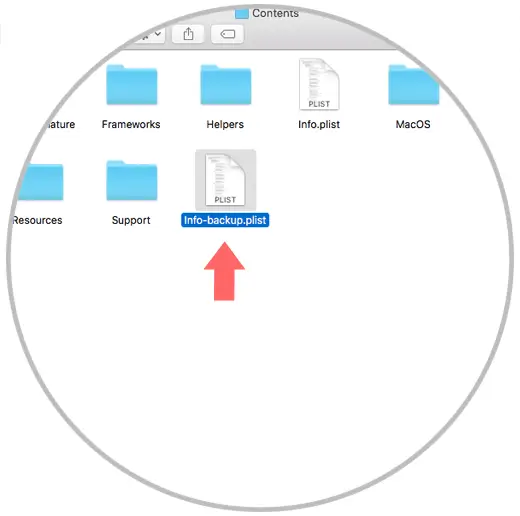
We access this folder and there we will copy the Info.plist file and rename it as Info-backup.plist:
Step 5
Once we copy the file, we proceed to open the info file. plist with some text editor, once there we will use the command + F key combination and look for the following line: “CFBundleTypeExtensions”
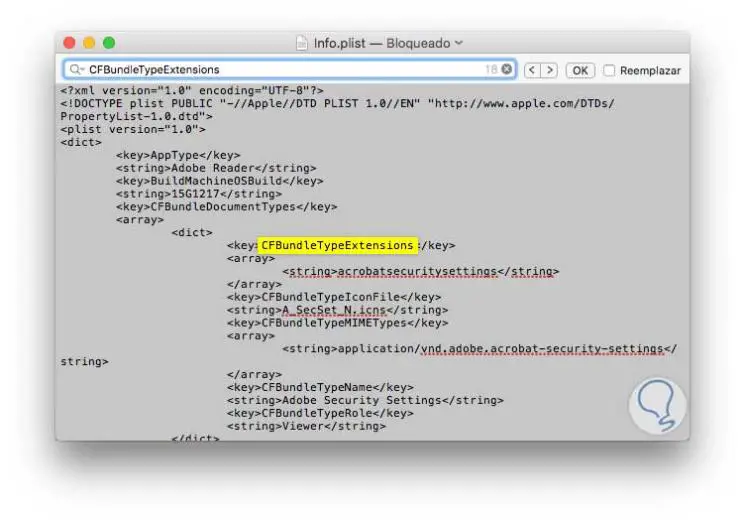
This file will show us a lot of information. We must locate the line "<string> ... </ String>" that contains the type of file that we want to prohibit. For example, if we want to remove Adobe from the Open With menu in PDF files, it will be necessary to search for "<string> pdf </ string>" in CFBundleTypeExtensions.
We proceed to delete that string and save the file. Finally we restart the Finder by running killall Finder from the terminal.
So we have seen how to manage the context menu of macOS High Sierra in a simple way.