Windows 10 has multiple special tools to control the behavior and management of the data that we use within itself. Although Windows PowerShell has been designed to be the future at the console management level for Windows, we still have a series of useful commands that are of great help to carry out tasks within the system either at the data level or at the configuration level. This is the case of Robocopy (Robust File Copy), a command designed to quickly and efficiently copy files or folders both locally and on a network in Windows environments..
What is Robocopy
Robocopy is a tool that allows files to be copied using commands that allow more useful management when working with the information associated with these files. This information that can also be cloned corresponds to elements such as permissions, attributes, owners or timestamps.
Robocopy Advantages
Some of the advantages of using Robocopy are:
- Able to withstand interruptions in file copying either due to power outages or network connection.
- It performs automatic retries if a certain file cannot be accessed.
- It allows copying large amounts of files, something that is not possible with XCOPY.
- It has a progress indicator.
- Allows multithreading copying.
- Supports selective copying of objects.
- It copies all the information of an element such as properties, attributes, owner data, and also keeps the file permissions unchanged.
Next, we will see how we can use the Robocopy command
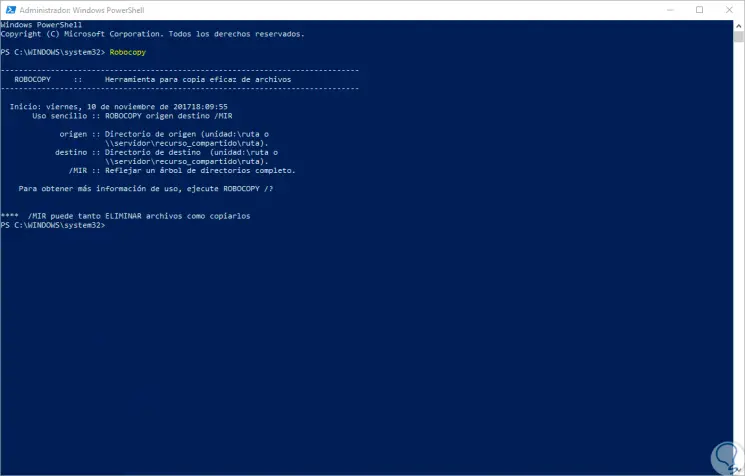
1. How to start and run Robocopy in Windows 10
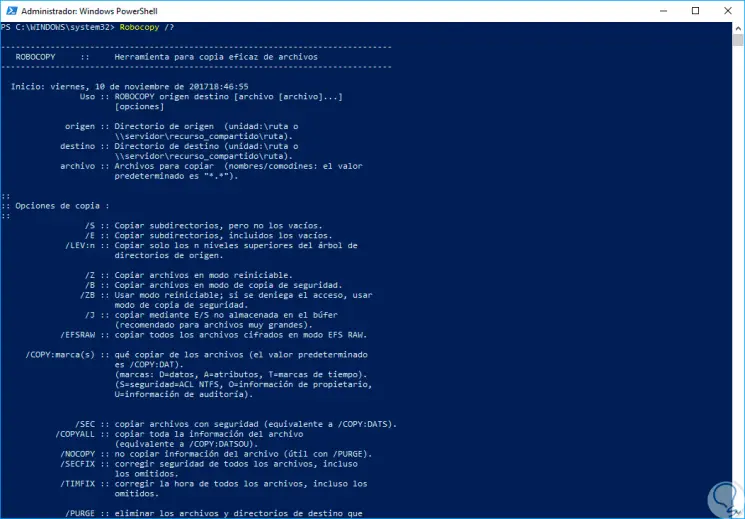
To start using Robocopy we can access the command prompt or Windows PowerShell as administrators and in the deployed console execute the Robocopy line, the result will be as follows. There we have the description of the tool and the multiple ways of use.
2. Robocopy options and uses in Windows 10
There are a number of basic options when using Robocopy, these are:
Robocopy origin destination / E
Using this option it is possible to recursively copy folders with subdirectories even if they are empty. When executing it we can see a complete summary of the executed action indicating if there were errors, coincidences or more.
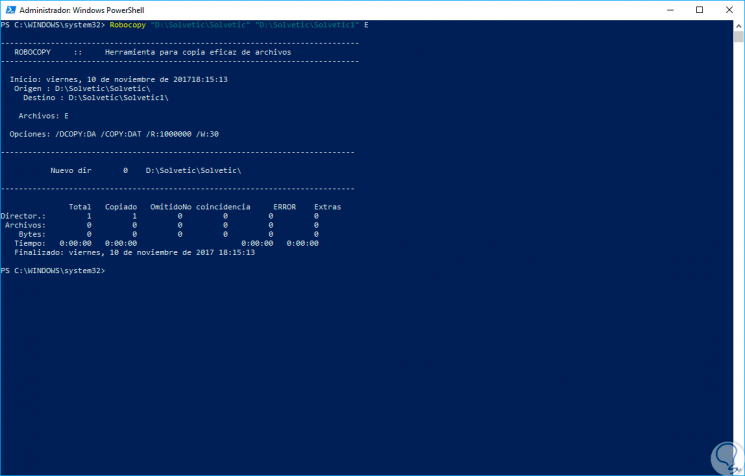
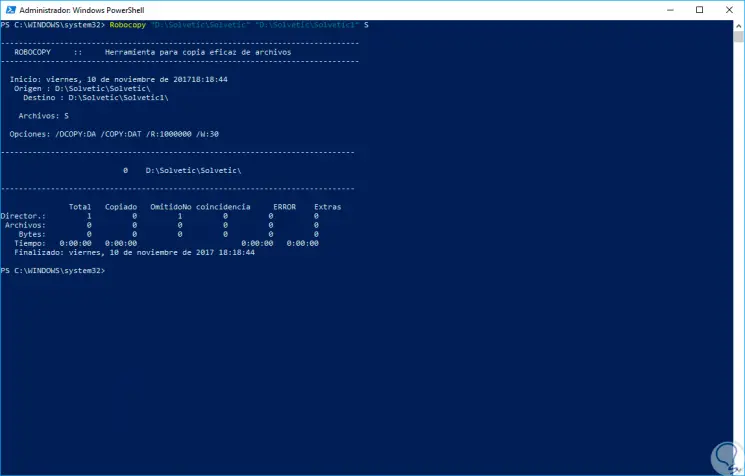
Robocopy origin destination / S
Thanks to this option we can recursively copy folders with subdirectories but not those that are empty. In this case we can see that the folders that do not have any type of information are omitted.
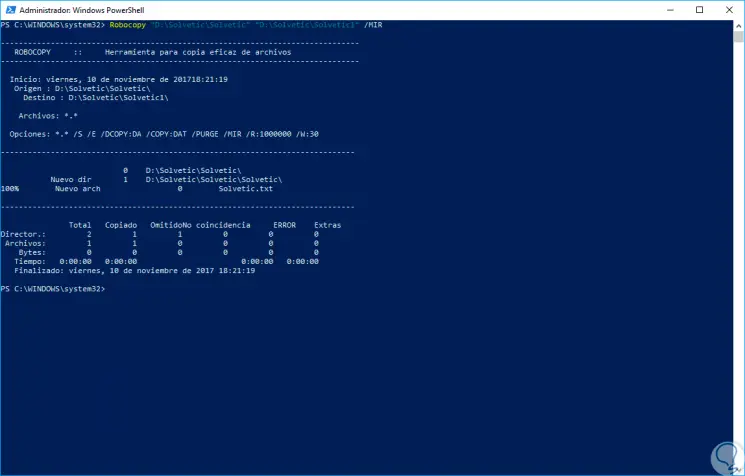
Robocopy origin destination / MIR
The MIR or mirror mode parameter allows you to recursively copy the elements, but when finished, the files in the destination that no longer exist in the copy source are deleted.
Robocopy origin destination * .jpg / E
This option allows us to indicate specific files to be copied.

Robocopy general parameters
The general parameters of Robocopy are:
- <Source>: Lets you indicate the path to the source directory.
- <Destination>: Indicates the path to the destination directory.
- <File>: Lets you indicate the file or files that will be copied. We can use wildcard characters (* or?), If we wish. If the file parameter is not specified, *. * is used as the default value.
- <Options>: Allows you to specify the options that can be used with the robocopy command.
Copy options with Robocopy
- / s: Allows you to copy subdirectories excluding empty directories.
- / e: Supports copying subdirectories including empty directories.
- / Lev: <N>: Copy only the top N levels of the source directory tree.
- / z: Allows you to copy the files in restart mode.
- / b: Copy the files in backup mode.
- / ZB: This option uses the reset mode. If access is denied, this option uses the backup mode.
- / EFSRAW: Copy all files encrypted in EFS RAW mode.
- / copy: <CopyFlags>: Lets you specify the file properties to be copied. The following are the valid values for this option:
- D for data.
- A for Attributes
- T for Timestamps
- S for NTFS Access Control List (ACL)
- O for Owner Information
- U for Audit Information
- The default value for bookmarks is DAT (data, attributes, and time stamps).
- / DCOPY: t: This option copies the timestamps from the directories.
- / sec: With the use of this parameter we will copy the files safely (equivalent to / copy: DAT).
- / COPYALL: Copy all the information from the file.
- / NOCOPY: This option does not copy the information of the file.
- / secfix: Executes security file fixes for all files, including skipped files.
- / TIMFIX: Corrects the time of all files, even the skipped ones.
- / Purge: Responsible for removing destination files and directories that no longer exist at the source.
- / MIR: Reflects a directory tree.
- / Mov: Moves the files, and removes them from the source after copying them.
- / Move: This option moves files and directories and removes them from the source after copying them.
- / a +: [RASHCNET]: Add the specified attributes for the copied files.
- / a-: [RASHCNET]: Remove the specified attributes from the copied files.
- / create: Create a directory tree and only zero length files.
- / fat: Create only target files by using 8.3 character length FAT file names.
- / 256: Disables support for very long paths (more than 256 characters).
- mon: <N>: This option Monitors the source and runs again when more than n changes are detected.
- / MOT: <M>: It is in charge of monitoring the origin and it runs again after m minutes if changes are detected.
- / rh: hhmm-hhmm: Specifies the execution times at which new copies should start.
- / PF: Check the execution times according to each file.
- / IPG: n: Indicates the pause between packets to free up bandwidth on slow or low-resource networks.
- / SL: Copy the symbolic link instead of destination.
File selection options
- / a: Copy only the files for which the modified attribute is set.
- / m: This option copies only the files that the modified attribute has been set to and resets the modified attribute.
- / IA: [RASHCNETO]: This option includes only the files for which any of the specified attributes are established.
- / XA: [RASHCNETO]: Using this option excludes files for which any of the specified attributes are set.
- / xf <FileName> [...]: This option excludes files that match the specified names or paths.
- / XD <Directory> [...]: Excludes the directories that match the specified paths and names.
- / xct: Using this option excludes modified files.
- / Xn: Newer files are excluded.
- / xo: Older files are excluded.
- / xx: Extras directories and files are excluded.
- / XL: "Lone" directories and files are excluded.
- / Is: The same files are included.
- / IT: Files "and" are included.
- / max .: <N>: Lets you specify the maximum file size (to exclude files larger than n bytes).
- / min: <N>: Lets you specify the minimum file size (to exclude files smaller than n bytes).
- / MaxAge: <N>: The maximum file age is specified (to exclude files older than n days or date).
- / MINAGE: <N>: It allows specifying the minimum age (excluding files more recent than n days or date).
- / MAXLAD: <N>: Specifies the maximum number of last access date (excludes files not used since N.).
- / MINLAD: <N>: The last access date is specified (excludes files used since N.) Minimum if n is less than 1900, N indicates the number of days. Otherwise, N specifies a date in the format YYYYMMDD.
- / XJ: Lets you exclude junction points, which are normally included by default.
- / FFT: Assumes the times of the FAT file (precision of two seconds).
- / DST: Compensates for one hour time differences from daylight saving time.
- / xjd: Exclude directory junction points.
- / XJF: Excludes junction points for files.
Retry options
- / r: <N>: Allows you to specify the number of retries on failed copies. The default value of n is 1,000,000 (one million retries).
- / w: <N>: Supports specifying the time to wait between retries, in seconds. The default value of n is 30 (30 second timeout).
- / reg: Saves the values specified in the / r and / w options as default settings in the registry.
- / TBD: Indicates that the system will wait for the share names to be defined (Retry error 67).
Registration options
- / l: Specifies which files to display only (and not copy, delete, or time-stamped).
- / x: Generate reports of all additional files, not just selected ones.
- / v: Produces verbose output and shows all skipped files.
- / TS: Includes the timestamps of the source file in the output.
- / FP: Include the full path names of the files in the output.
- / bytes: Print sizes, such as bytes or KB.
- / NS: Specifies that file sizes will not be registered.
- / NC: Specifies that the file classes will not be registered.
- / NFL: Specifies that file names will not be registered.
- / NDL: Specifies that directory names will not be registered.
- / NP: Specifies that the progress of the copy operation (the number of files or directories copied so far) will not be displayed.
- / Eta: Displays the estimated time of arrival (ETA) of the copied files.
- / log: <LogFile>: Writes the status output to the log file (overwrites the existing log file).
- / log +: <LogFile>: Write the status output to the log file (append the output to the existing log file).
- / Unicode: Display the status output as Unicode text.
- / unilog: <LogFile>: Writes the output status for the log file as Unicode text.
- / unilog +: <LogFile>: Writes the output status for the log file as Unicode text.
- / tee: Writes the status output to the console window, as well as to the log file.
- / NJH: Indicates that there is no job header.
- / njs: Specifies that there is no job summary.
In this way, Robocopy becomes an integral function for copy and backup tasks in Windows environments.
Note
If we want to consult more help from Robocopy we can execute the following line:
Robocopy /?
3. Uses and examples of the Robocopy command in Windows 10
Some of the options that we can find using the Robocopy command are the following:
Simple file copying
This is the most basic Robocopy task
Robocopy C: \ UserFolder C: \ FolderBackup
Copy all content
This option clones all content including empty folders.
Robocopy C: \ SourceFolder C: \ DestinationFolder / E
List files
The following syntax will list files that we will put have a limit of more than 32 MBytes in size. With the / l - parameter we will only filter files that match that size condition.
Robocopy.exe c: \ Source Folder d: \ targetfolder / min: 33553332 / l
Copy changes to files
This syntax will copy all the changes to the files in the c: \ data directory that contains the date. A batch file will be created:
@echo off set day =% date: ~ 0.2% set month =% date: ~ 3.2% established year =% date: ~ 6,4% Robocopy "c: \ data" "c: \ backup \ data \% day% -% month% -% year% \" / MAXAGE: 1
Copy directory tree
In this way we will make a copy of the directory tree including origin time stamps:
Robocopy C: \ Folder1 C: \ Folder2 / MIR / dcopy: T
Mirror directories
This option will reflect directories with subfolders that includes the empty directories. For this we use the / MIR option of Robocopy that duplicates a directory tree including all subfolders and empty directories, also doing a deletion of elements that are no longer available in the destination folder. You have two possibilities to use:
ROBOCOPY \\ sourceserver \ share \\ destinationerver \ share / MIR ROBOCOPY source drive: \ DIR target drive: \ DIR / MIR
Thanks to this utility, we will be able to more fully manage the backup of our information without losing its attributes..