As new editions of the various operating systems used for the management and control of the different services are released, we find new functionalities and new roles focused on optimizing the experience of end users and simplifying the task of administrators..
Windows Server 2016 is not the exception to this rule and that is why it has introduced a series of features that make it unique and one of the best systems at the level of user and object management and not only for its new roles but for the options that we It currently offers to reduce size when it comes to installation.
Recall that currently the latest version of Windows Server 2016 has an approximate weight, its ISO image, of 6.5 GB..
Microsoft now offers us a new option called Nano server which will dramatically reduce not only the size of the image, but the consumption of local resources of the team.
Nano Server is designed to be implemented in a virtual environment through Hyper-V and getFastAnswer today will do a complete analysis on this practical and useful option offered by Microsoft developers..
What is Nano Server
Nano Server is one of the new installation options in Windows Server 2016, Nano Server is a remotely managed server operating system optimized for private clouds and data centers especially for its control and management capacity.
It is identical to Windows Server in its Server Core mode, but is essentially smaller, does not have local login capability, and only supports 64-bit applications, tools, and agents. It takes up much less disk space, is configured significantly faster, and requires far fewer updates and restarts than Windows Server.
When restarted, this process is much faster. The Nano Server installation option is available for Standard and Datacenter editions of Windows Server 2016.
Nano Server is useful to implement for a series of scenarios such as:
- As a "compute" host for Hyper-V virtual machines, whether clustered or not.
- As a storage host for Scale-Out File Server.
- As a web server running the Internet Information Services (IIS) role.
- As a host for applications that are developed using cloud application patterns and run on a container host or virtual machine.
Nano Server Differences
Most of us are used to the graphical interface of Windows Server 2016 or to the Core mode which reduces the simplicity of use, but with Nano Server we have a series of differences compared to the GUI (Graphical Interface) of Windows Server 2016.
Given that Nano Server is optimized as a lightweight operating system to run on cloud-native applications, which are container-based and microservices-based or as a nimble and cost-effective data center host with a dramatically smaller footprint, there are important differences in Nano Server compared against central installations of Windows Server or server with desktop experience, some of these are:
- Nano Server is flat, there is no local login capability or graphical user interface.
- They only support 64-bit apps, tools and agents.
- Nano Server cannot be used as an Active Directory domain controller.
- Group policy, or GPO, is not supported, however it is possible to use the desired state settings to apply the settings at scale.
- Nano Server cannot be configured to be used as a proxy server to access the Internet.
- The NIC Teaming (Load Balancing and Failover, or LBFO) feature is not supported, instead Integrated Switch Teamwork (SET) is supported.
- System Center Configuration Manager and System Center Data Protection Manager are not compatible with Nano Server.
- Best Practices Analyzer (BPA) cmdlets and BPA integration with Server Manager are not supported.
- Nano Server does not support Virtual Host Bus Adapters (HBAs).
- Nano Server does not require activation with a product key. When operating as a Hyper-V host, Nano Server does not support Automatic Virtual Machine Activation (AVMA). Virtual machines running on a Nano Server can be activated using Key Management Service (KMS) with a generic volume license key or using Active Directory based activation.
- The version of Windows PowerShell provided with Nano Server has important differences.
Nano Server for business
Nano Server has a more active model, called Current Branch for Business (CBB), which has been developed to help clients moving in a cadence in the cloud, making use of rapid development cycles. With this model, the feature update versions of Nano Server are released two to three times per year. This model requires Software Assurance for Nano Servers deployed and operated in production. To maintain support, administrators must maintain no more than two versions of CBB. However, these versions do not automatically update existing implementations.
Server Core and Server with Desktop Experience installation options are still served in the Long Term Branch (LTSB) model, which comprises 5 years of primary support and 5 years of extended support.
With these Nano Server concepts we will now see how it will be possible to install it and know its practical operation.
1. Ways to get Nano Server 2016 VHD disk
The VHD (Virtual Hard Disk) is a virtual machine image that contains the Windows Server 2016 Nano Server installation option.
The packages included in said VHD are:
- Microsoft basically offers us two options to create or obtain the Nano Server VHD disk in a simple way.
Download the VHD directly
Using this option Windows offers us the CHD disk ready to be downloaded within the test options of the operating system. For this we can go to the following link:
VHD Nano Server
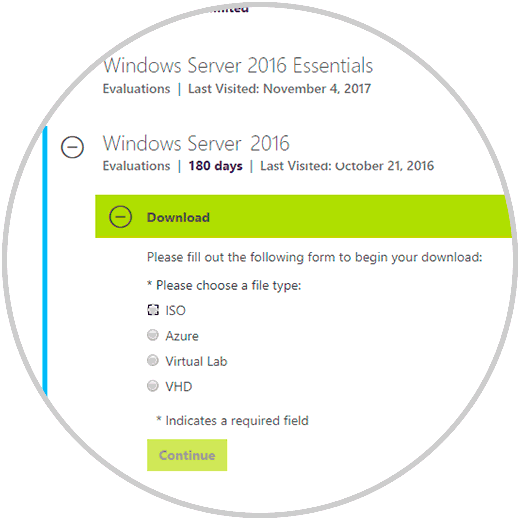
There we must register and in the available download options we will select the “VHD” box and click on “Continue” to select the language.
This is the most practical option for downloading and using the Nano Server VHD disk.
Note
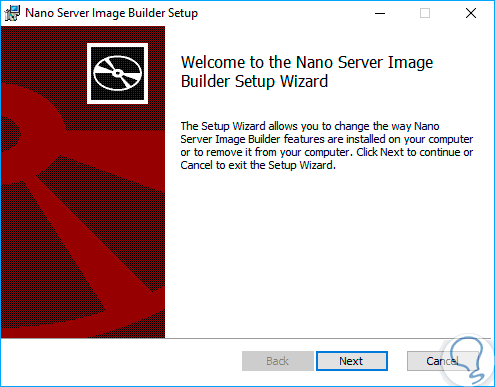
As an additional point, Microsoft offers us a tool for creating bootable images and media in a graphical environment with the "Nano Server Image Builder" tool which we can download at the following link:
Nano Server Image Builder
With this tool we can generate reusable PowerShell scripts that allow us to easily automate consistent Nano Server installations by running Windows Server 2016 Datacenter or Standard editions. The tool requires Windows Assessment and Deployment Kit (ADK).
Nano Server Image Builder creates custom Nano Server images in VHD, VHDX or ISO formats and can create bootable USB devices to deploy the Nano server or detect hardware configuration of a server. You also have the ability to do the following:
- Accept the terms of the license.
- Create VHD, VHDX or ISO formats.
- Set the machine name, administrator password, log file path, and time zone.
- Join a domain by using an Active Directory account.
- Enable WinRM for communication outside the local subnet.
- Enable virtual LAN IDs and configure static IP addresses, and much more.
Create the VHD using Windows Server 2016 installation media
The next option that Microsoft offers us to obtain the Nano Server VHD is through the installation media of the Windows Server 2016 operating system itself and it is there that getFastAnswer will analyze the process in detail.
For this we must have the ISO image of Windows Server 2016 available for download at the following link:
ISO Windows Server 2016
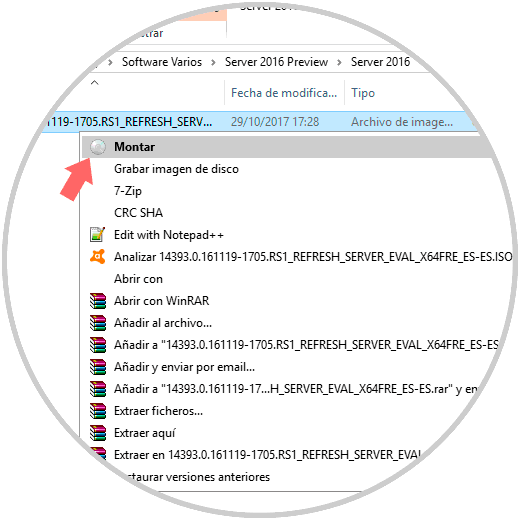
Once we download the ISO image, we must mount it in the system to generate the respective VHD and then use it in Hyper-V.
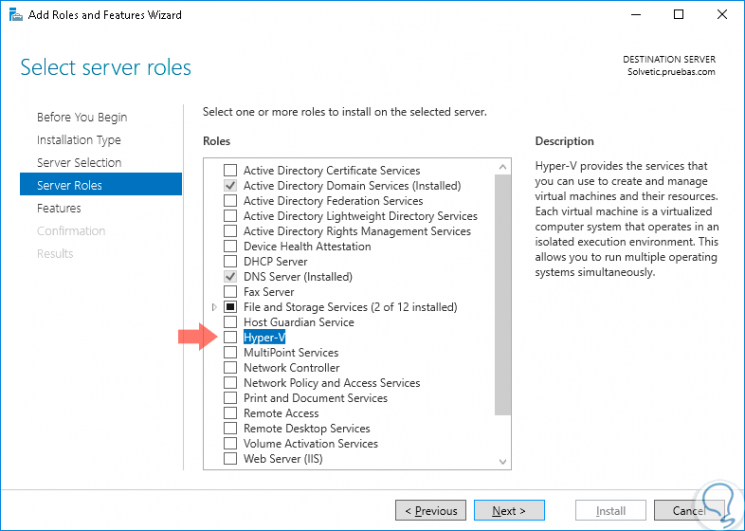
For this process we can use Windows 10, Windows 8 or Windows Server 2016, all with the Hyper-V feature enabled.
Note
To enable Hyper-V we will do the following:
In Windows Server 2016 we must go to the Server Administrator, select Add roles and characteristics and then select the Hyper-V role:
In Windows 10, which is the system used for this analysis, we go to the path "Control Panel \ Programs \ Programs and Features" and there we click on the option "Activate or deactivate Windows features" and in the displayed window we activate the Hyper-V box:
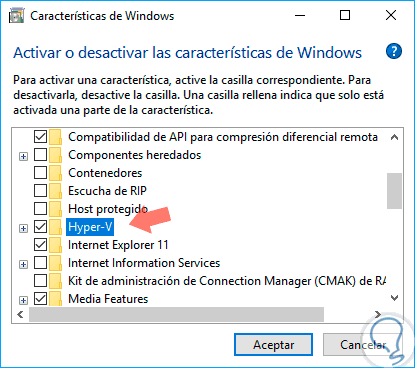
In both cases we must restart the system to apply the changes.
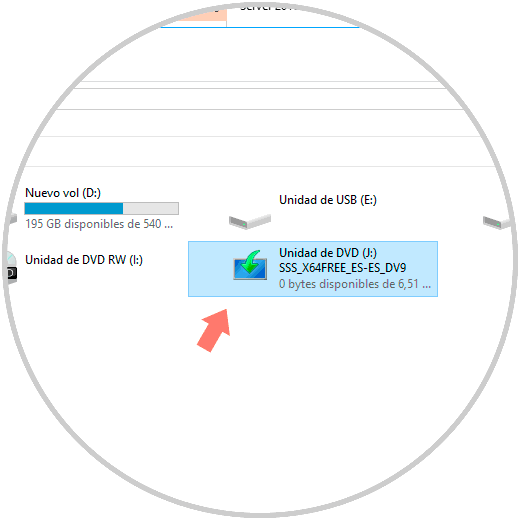
When we mount the ISO image of Windows Server 2016 we can see that a new drive is created in the file explorer with the content of Windows Server 2016:
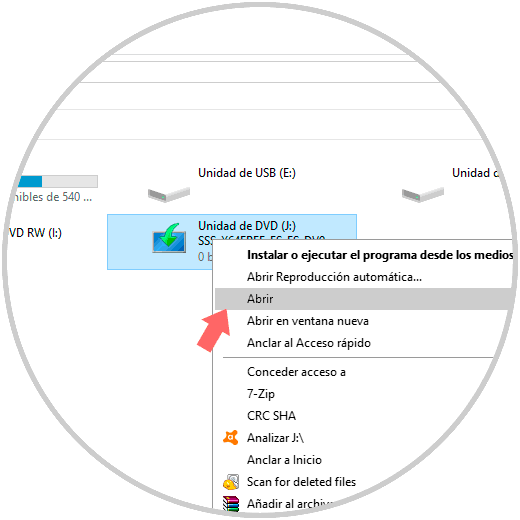
To access its content we right-click on the unit and select the "Open" option:
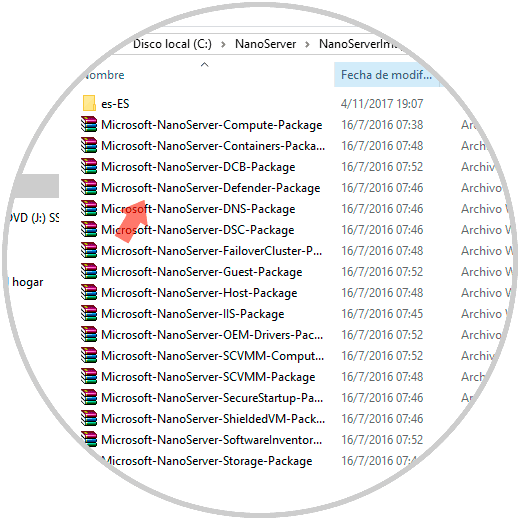
When accessing the contents of the unit we will see that there is a folder called "NanoServer":
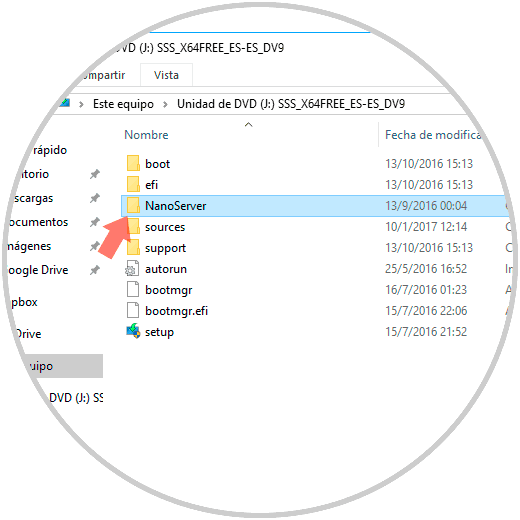
When we open it we will see details such as:
- The .wim image which will be useful to create the VHD file.
- Scripts for creating and configuring new images.
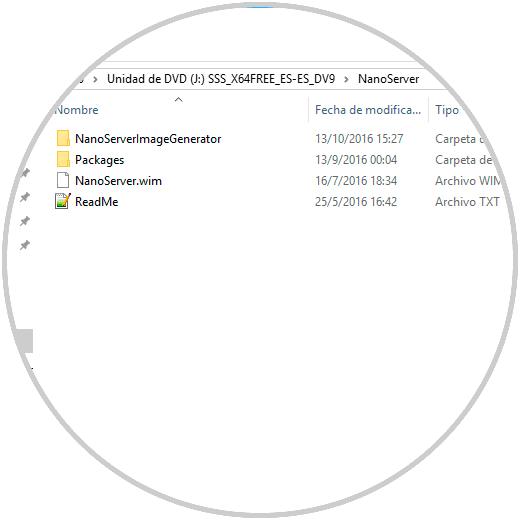
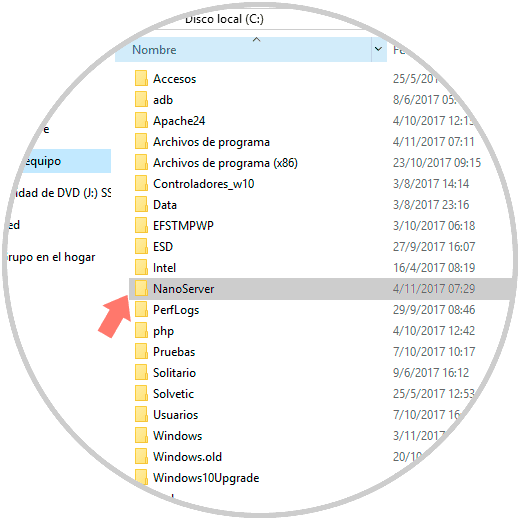
The scripts are found in the "NanoServerImageGenerator" folder. Let's copy the NanoServer folder from the installation media to the C drive of our computer:
2. Create the Nano Server 2016 VHD disk
Step 1
To start the process, we will open Windows PowerShell as administrators and first of all we must run the following cmdlet which will allow us to execute unsigned scripts in PowerShell:
Set-ExecutionPolicy Unrestricted
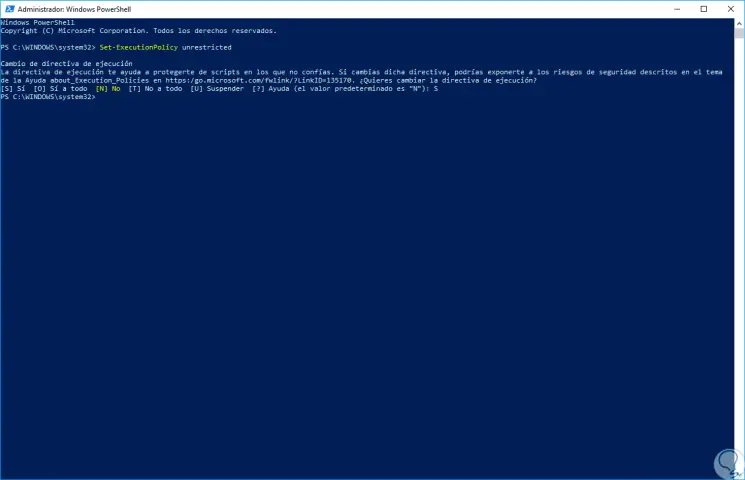
Step 2
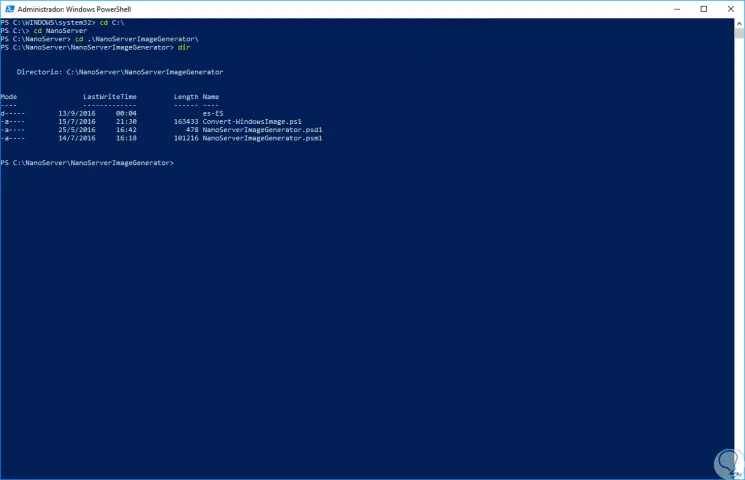
In the displayed message we will enter the letter S to confirm the action. Now we must access the folder where the scripts to be generated are located, for this we execute the following lines:
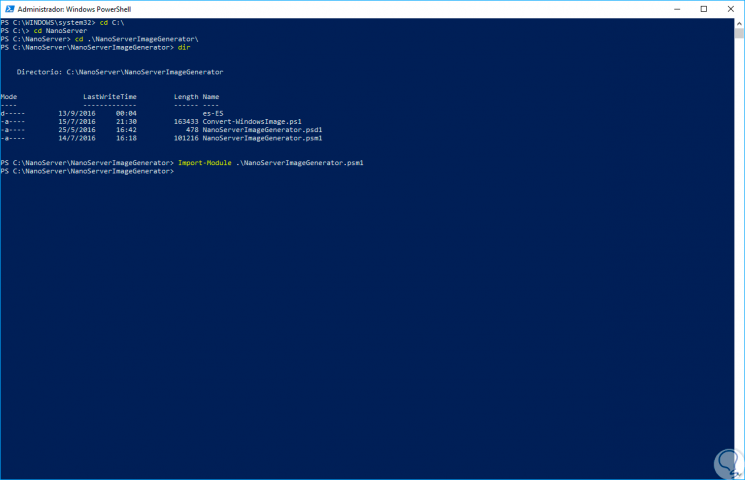
cd C: \ cd nanoServer cd NanoServerImageGenerator
We enter dir to list the available scripts:
Step 3
There we will first import the script called "NanoServerImageGenerator.psm1" which is a Windows PowerShell module that is not installed in the Windows Server 2016 version. To carry out this import we will execute the following:
Import-Module NanoServerImageGenerator.psm1
Step 4
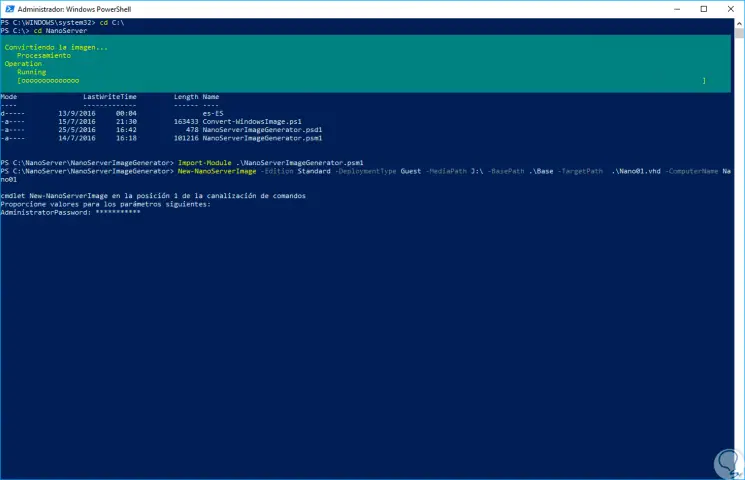
Once the module is imported, we will execute the following line:
New-NanoServerImage -Edition Standard -DeploymentType Guest -MediaPath J: \ -BasePath. \ Base -TargetPath. \ Nano01.vhd -ComputerName Nano01
Step 5
We explain the following in detail:
New-NanoServerImage
It allows us to create a new image of Nano Server.
-Edition
Allows us to define the image edition.
-DeploymentType
It allows us to define the type of development of the image.
-MediaPath
Refers to the drive where the installation media is located, in this case drive J.
-BasePath
It allows the creation of a folder called Base where the server packages will be created.
-TargetPath
It allows the creation of a file that will be the virtual disk.
-ComputerName
Using this option we can specify the name of the computer where the VHD will be installed.
Step 6
When executing this line we will see that it is necessary to enter an administrator password for the virtual machine:
Step 7
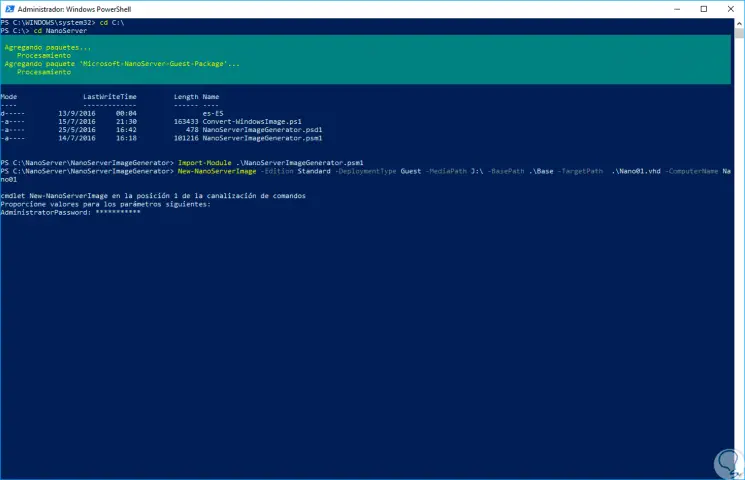
Pressing Enter will start the process of creating the VHD disk:
Step 8
Concluding we will see the following:
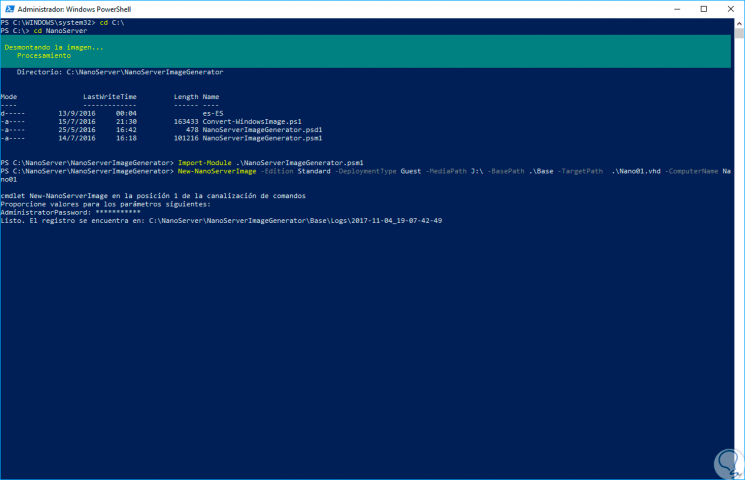
Step 9
We can check that the disk has been created correctly by accessing the folder we have created on the local disk C:
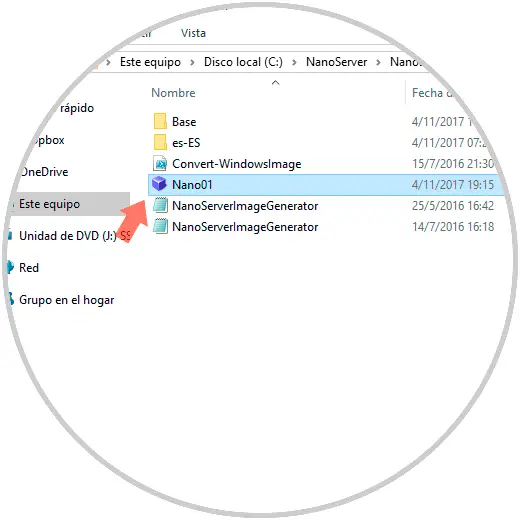
Step 10
There we will see the files that have been created and the respective scripts. As we see the size of the virtual hard disk that only weighs 524 MB. By accessing the Base folder we can see the multiple tools available for managing Nano Server:
3. Create the Nano Server virtual machine with Hyper-V
As mentioned previously, this process can be performed in environments such as Windows 8, Windows 10 or Windows Server 20165 with the role or feature of Hyper-V installed.
Step 1
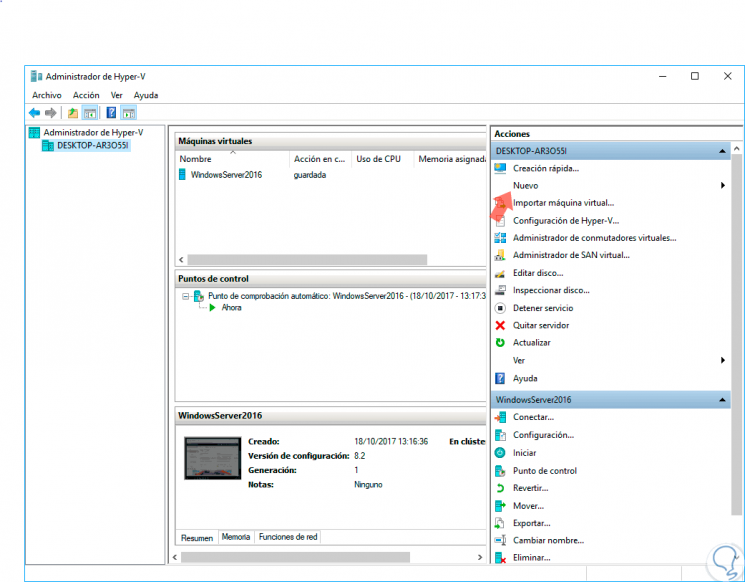
In this case we will use Windows 10 and the first step is to open the Hyper-V Manager and we will see the following:
Step 2
We have copied the VHD disc into a new folder on drive C to take more central control of it.
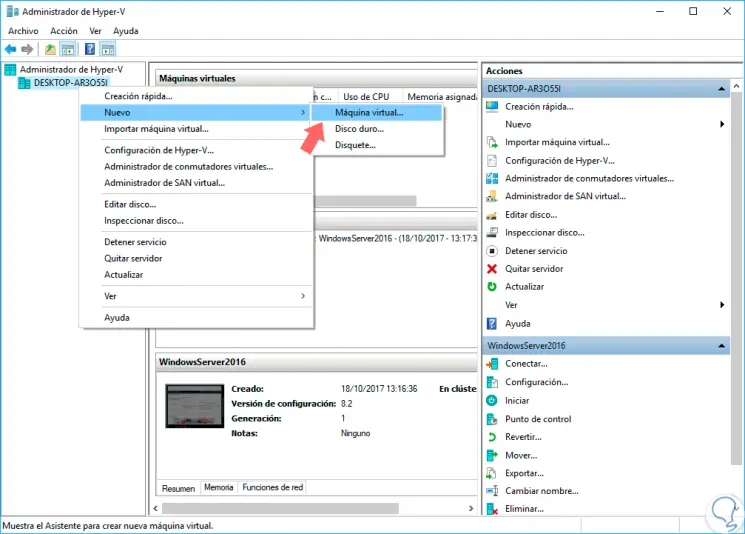
To create the new virtual machine we have several options:
- Click on the New / Virtual Machine line located in the Actions section.
- Right click on our team in the left column and select the New / Virtual machine option.
- Go to the Action menu and there select New / Virtual machine
Step 3
The following window will be displayed:
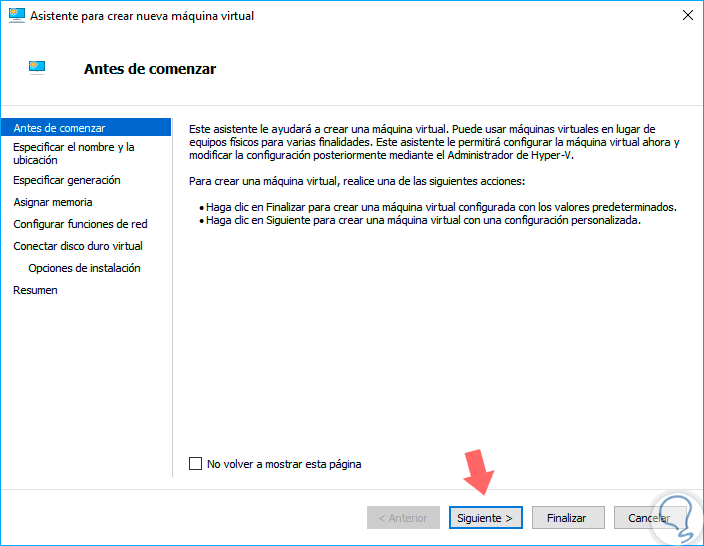
Step 4
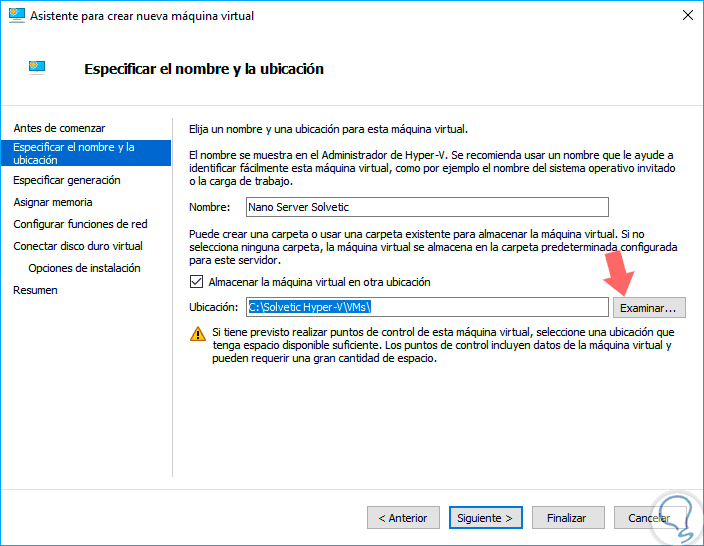
There we have the initial steps of Hyper-V. Click on "Next" and in the next window we will define the name of the virtual machine and, if we wish, we can specify the path where the virtual machine will be stored:
Step 5
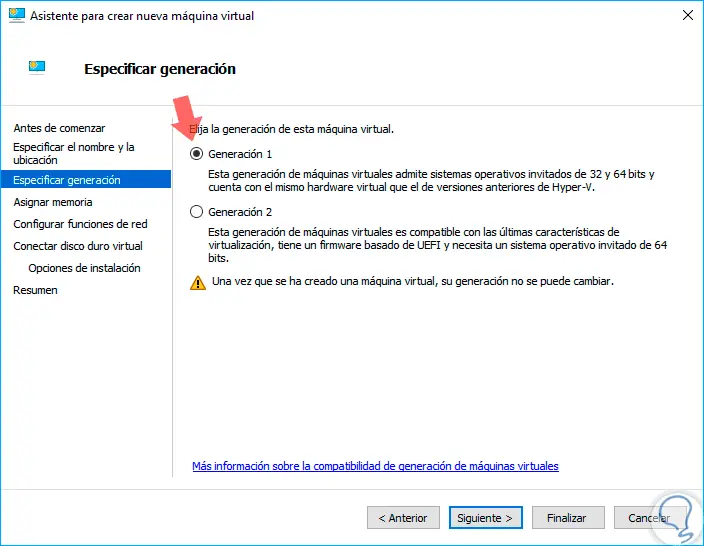
Click again on "Next" there we will define the type of generation assigned to the virtual machine, in this case we leave the default option which is Generation 1:
Step 6
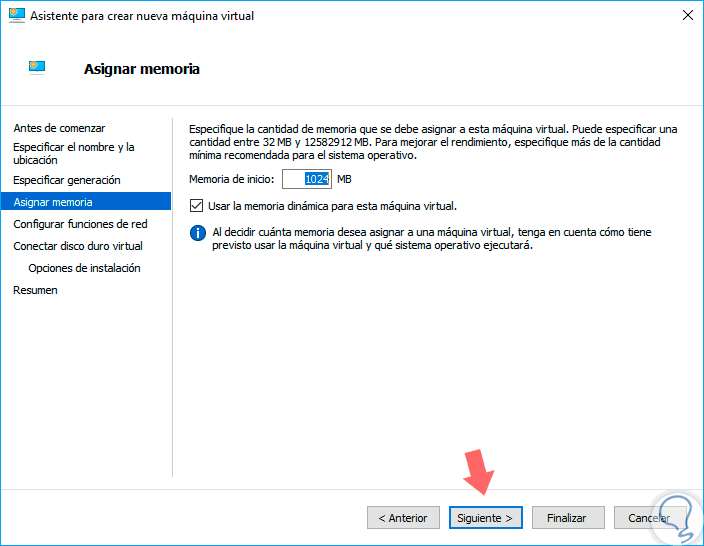
Click on "Next" and then we will define the RAM for the computer, remember that Nano Server consumes very few system resources, so we can leave the default option which is 1024 MB:
Step 7
In the following window we must assign the network adapter, in this case we can create an external connection, which we have called getFastAnswer, to establish this connection:
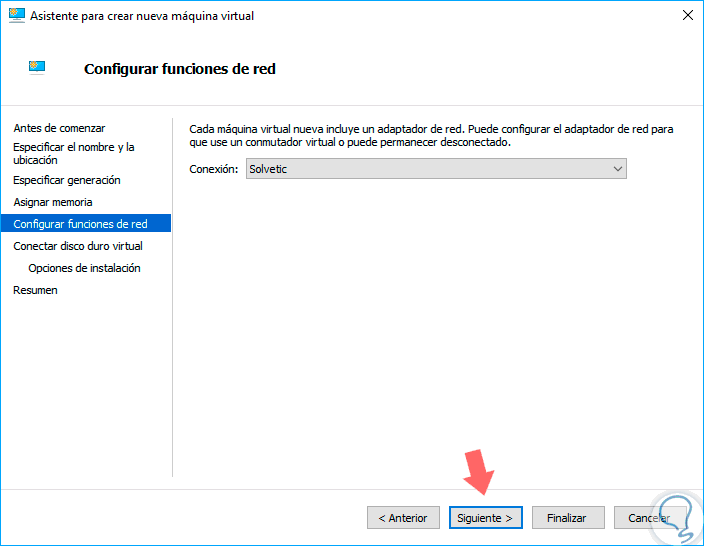
Step 8
This point is delicate since Nano Server will be managed thanks to PowerShell Direct which was introduced in Windows Server 2016 and Windows 10 and basically allows us to run PowerShell in a virtual machine.
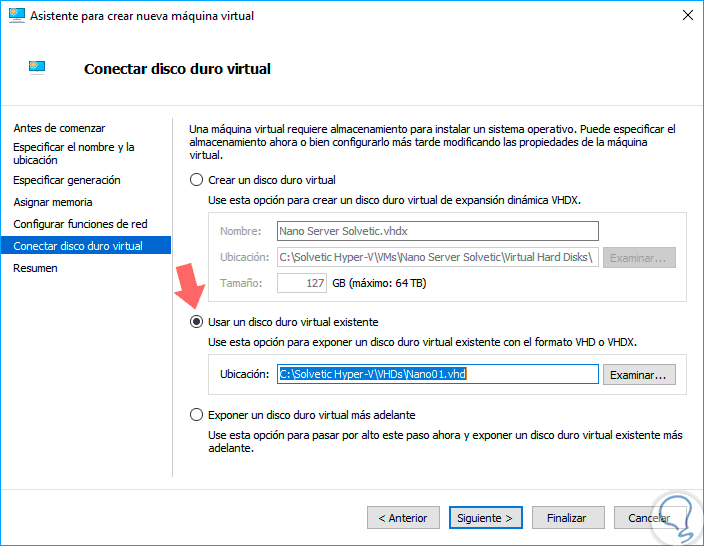
By clicking on "Next" we reach the point of configuration of the hard disk, in this case it will be necessary to use the VHD disk that we have created previously, therefore, we activate the box "Use an existing virtual hard disk" and go to the path where we have said virtual disk:
Step 9
By clicking on "Next" we will see a summary of the virtual machine to create:
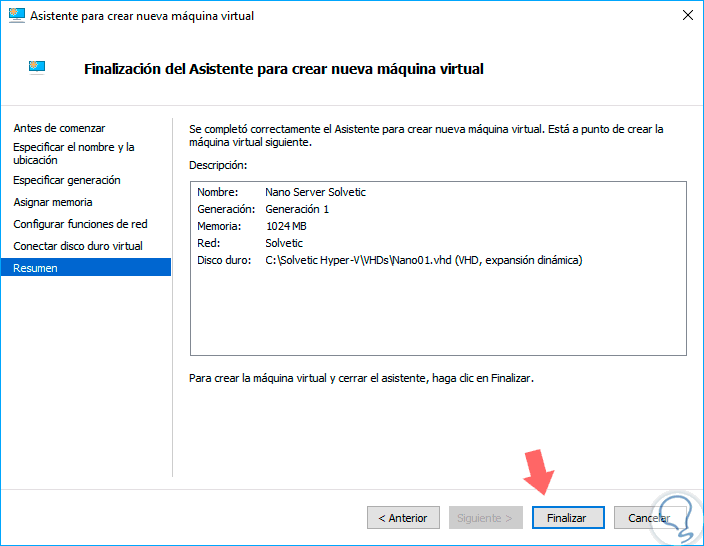
Step 10
Click on "Finish" to exit the Hyper-V virtual machine creation wizard.
In the Hyper-V administrator we can see the created machine:
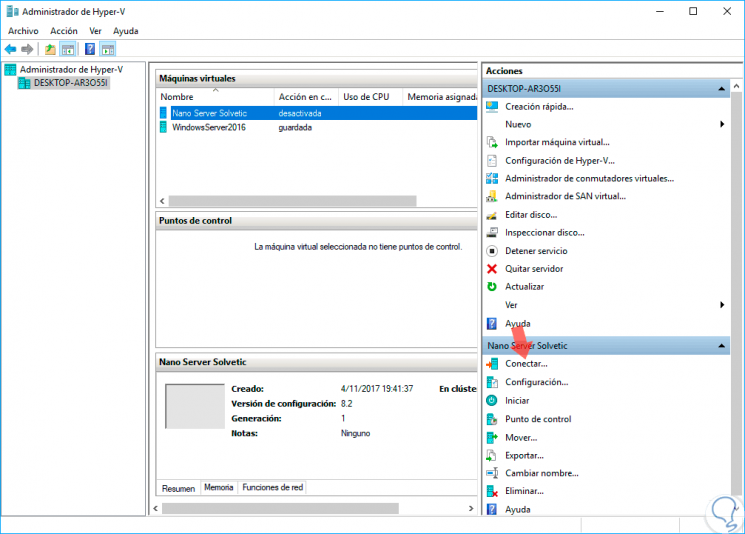
Step 11
To start the configuration process of this, click on the "Connect" line on the right panel and we will see the following:
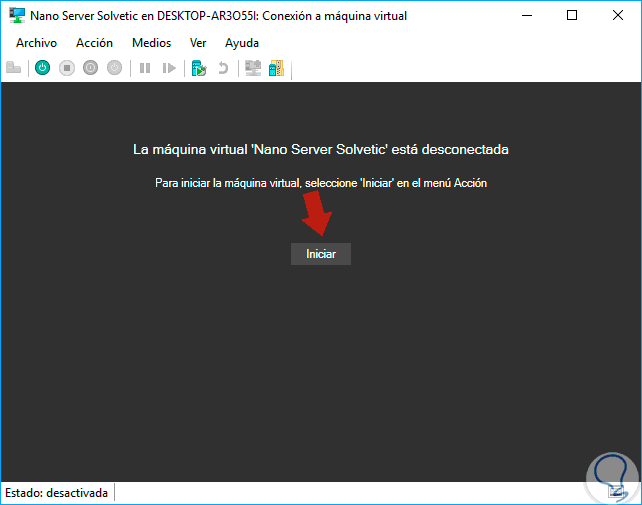
Step 12
Click on the Start button to start the respective Nano Server installation process:
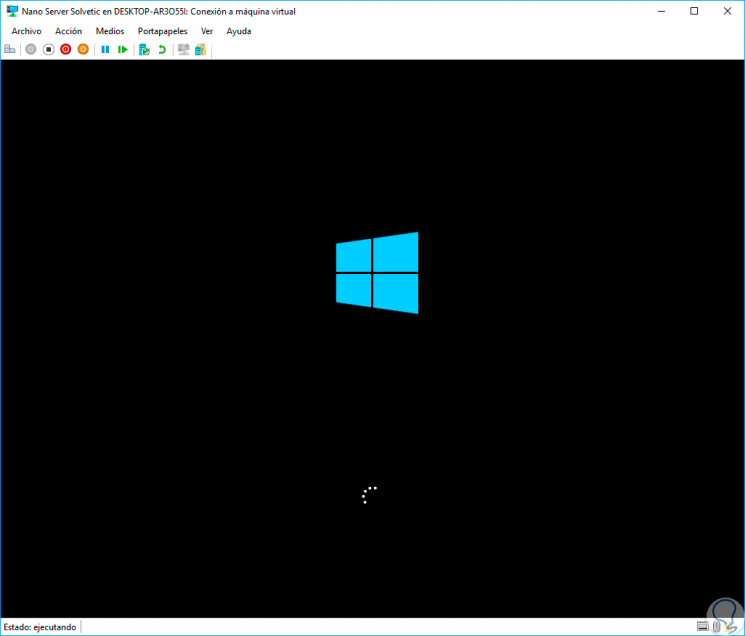
Step 13
This process takes around 20 seconds and then we will see the following window where we will enter:
- Username, Administrator (If in Spanish) or Administrator (If in English).
- Password that we have assigned during the VHD creation process in PowerShell.
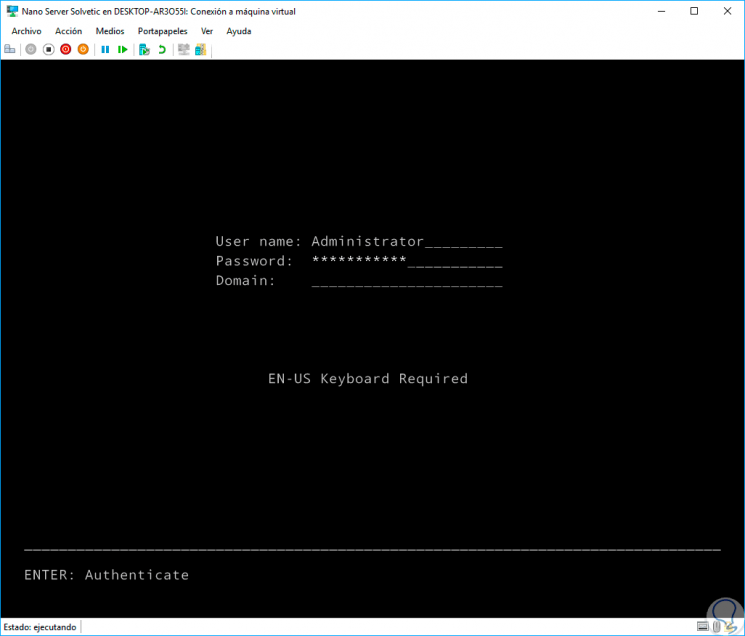
Step 14
In this case we do not have assigned domains so we press Enter to continue. Once we enter we will have the basic information of the system:
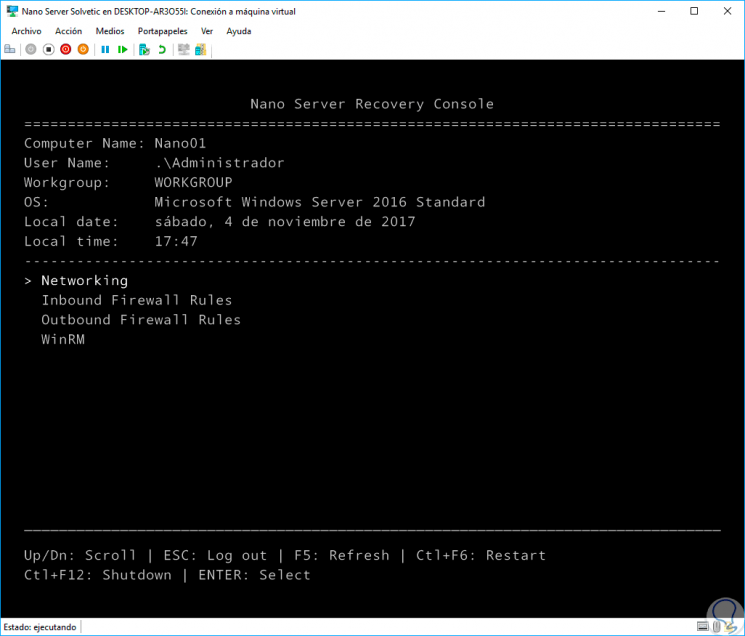
Step 15
There we have values like:
- Computer name (Created in Windows PowerShell)
- Operating system version created in PowerShell
Step 16
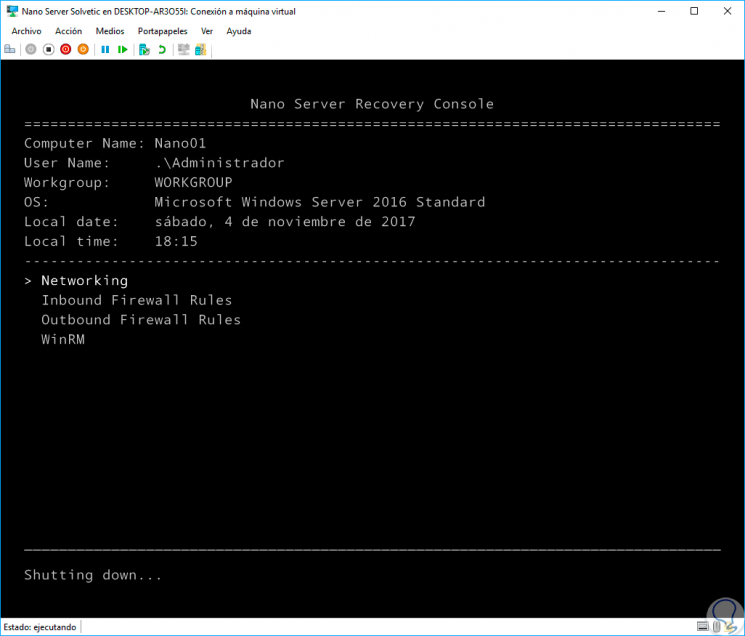
At the bottom we can select a series of control options, for this, we can use the scroll arrows and press Enter on the desired option which are:
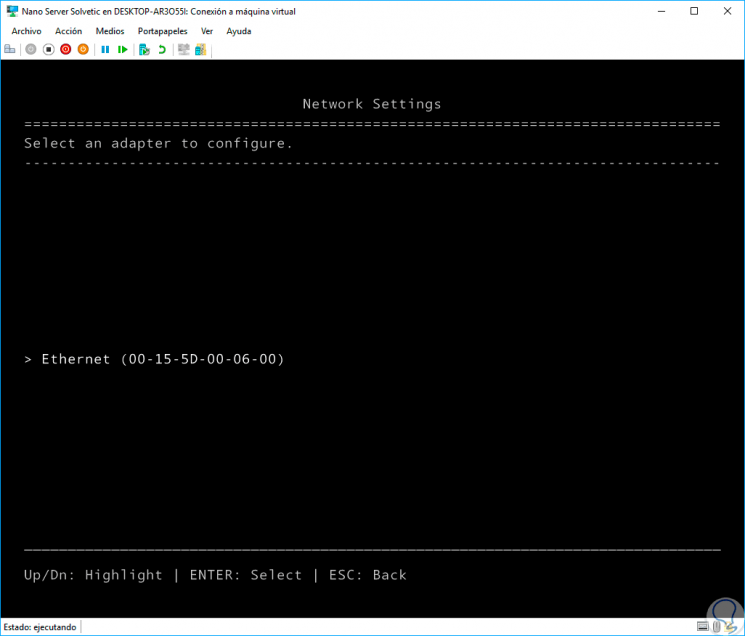
Networking
Selecting this option we can see the current network adapter of the operating system:
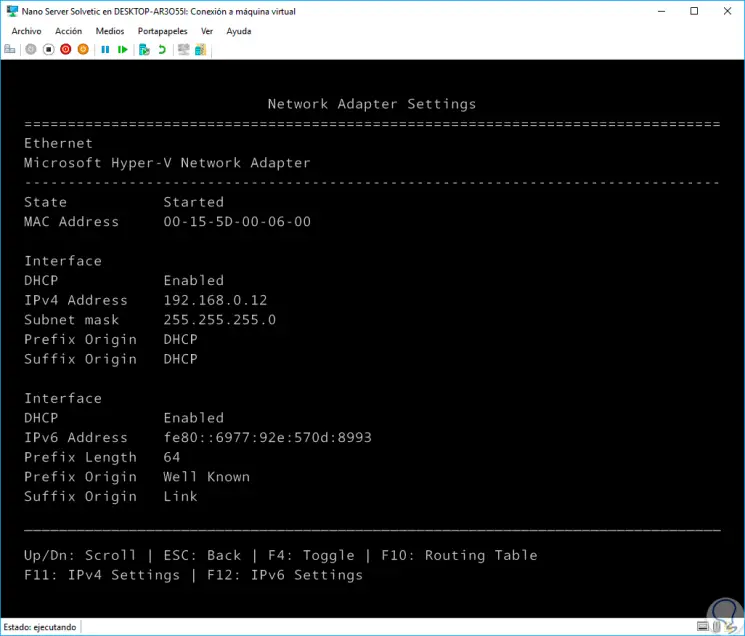
If we click on this adapter we will see full details such as:
Inbound Firewall Rules
When selecting this option we can see in detail all the current rules that the operating system has at the entry level in the Firewall:
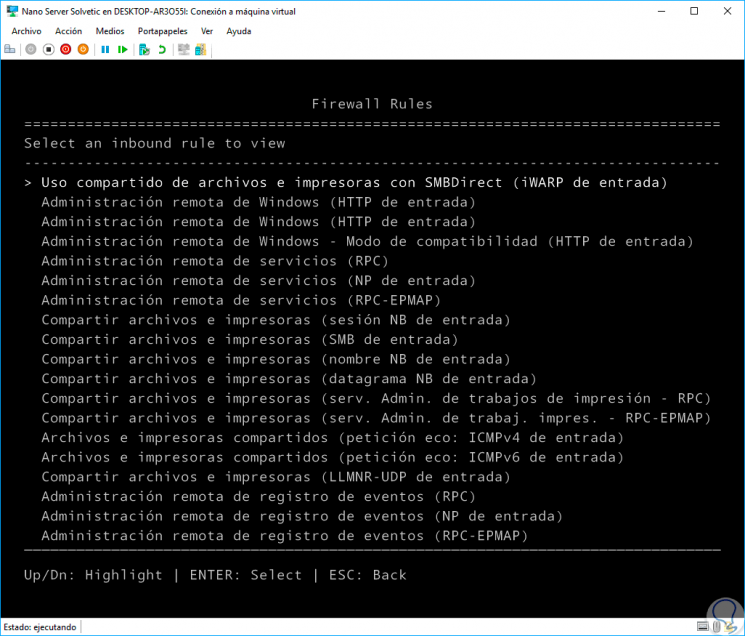
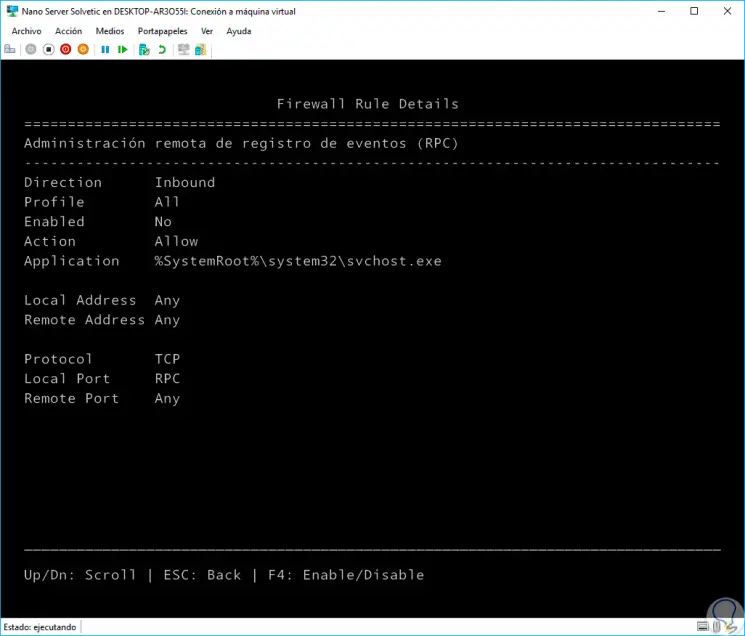
We can click on any of them to obtain more detailed information:
Outboud Firewall Rules
Like the previous option, through this option we will have access to all the exit rules that are currently configured in the Firewall.
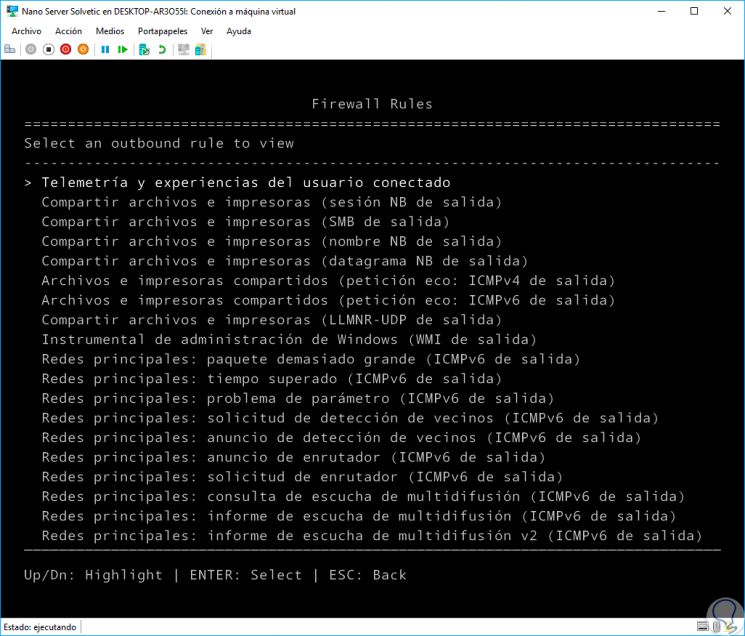
We can choose the desired one for more details.
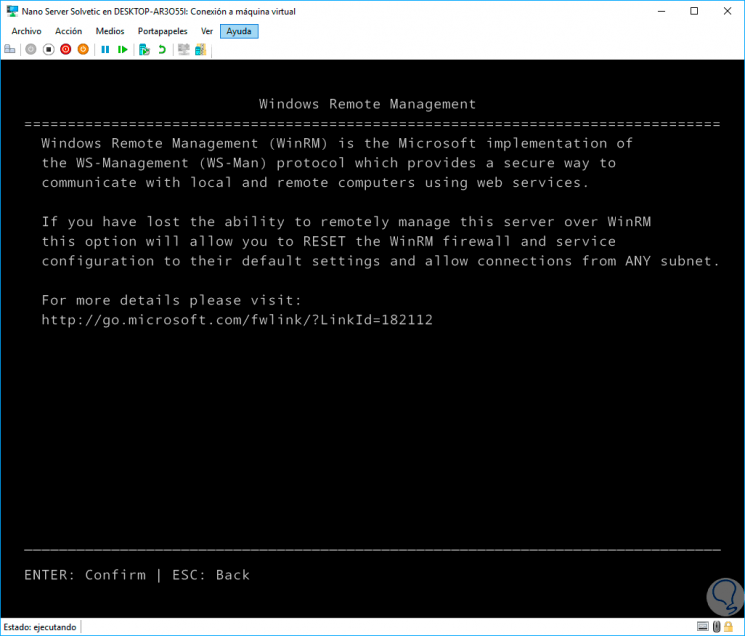
WinRM
In this option we find everything associated with Windows Remote Management and thanks to which we can establish secure communications with the server.
In this way we have multiple options for managing Nano Server 2016.
4. How to connect remotely to Nano Server
Step 1
To do this, we will use the Windows PowerShell console as administrators and first of all we run the following cmdlet to list the virtual machines created in Hyper-V:
Get-VM
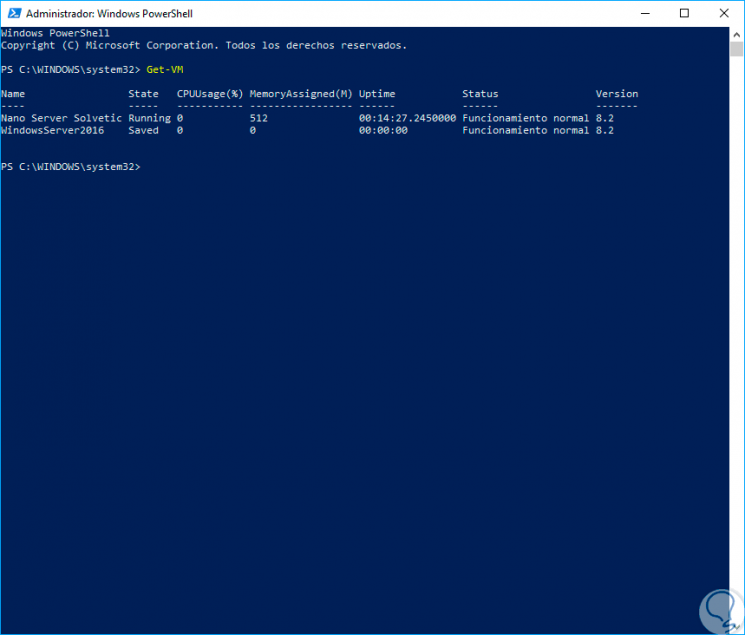
Step 2
There we can see the Nano Server machine created with details such as:
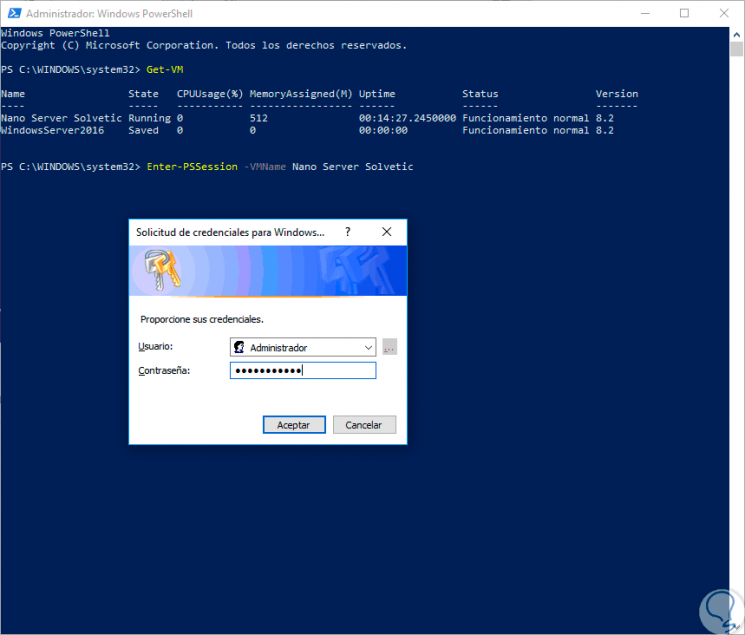
Step 3
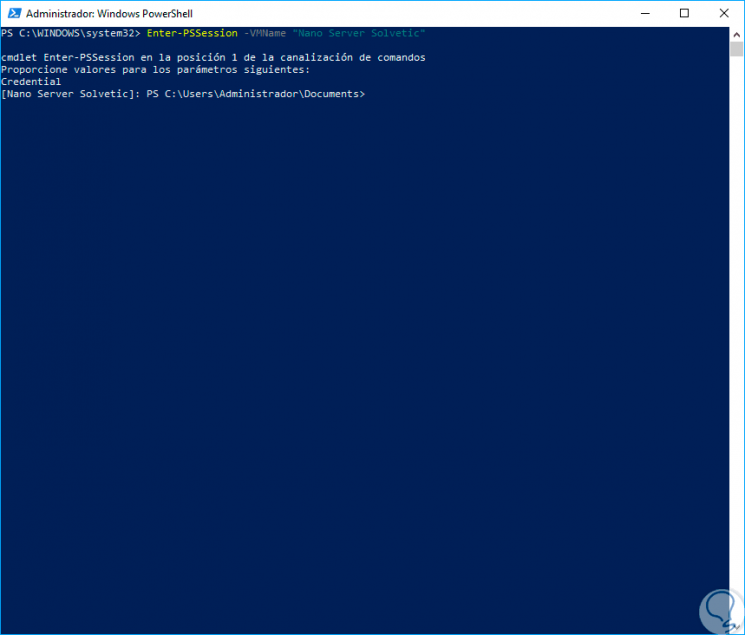
To access the Nano Server virtual machine we will execute the following:
Enter-PSSession -VMName "Nano Server getFastAnswer"
Step 4
When executing this line, the following window will be displayed where we must enter the access credentials:
Step 5
When accessing we will see that the Nano Server session is inactive:
Step 6
In PowerShell we can see that we have accessed the server remotely since we have the name of the server on the command line:
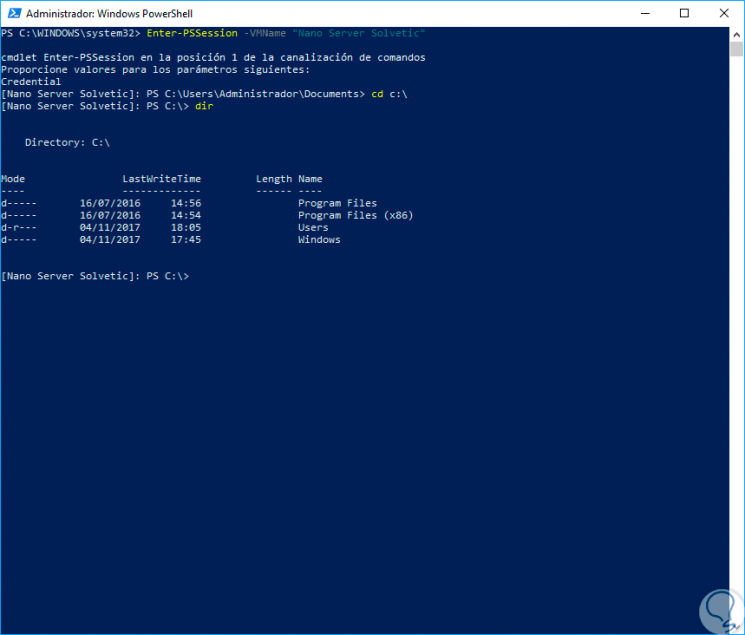
Step 7
We can access the C drive by running C: \ and then use dir to see its contents:
Step 8
We can use the "Get-Process" cmdlet to get a complete list of the processes that are being executed in real time in Nano Server:
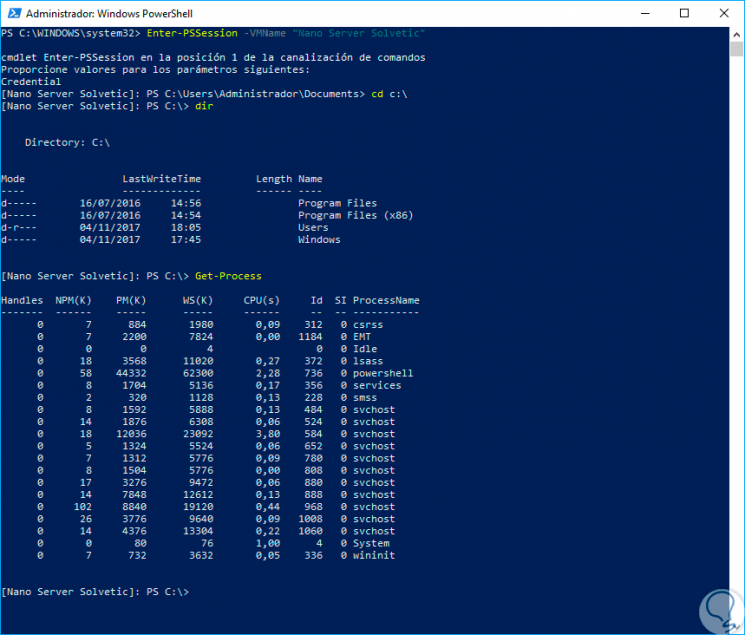
Step 9
To check the difference between Nano Server and another Windows operating system it is from this point, while Nano Server runs 21 processes, we can execute exit to quit remote administration, and again execute "Get-Process" and see the number of processes running for example Windows 10:
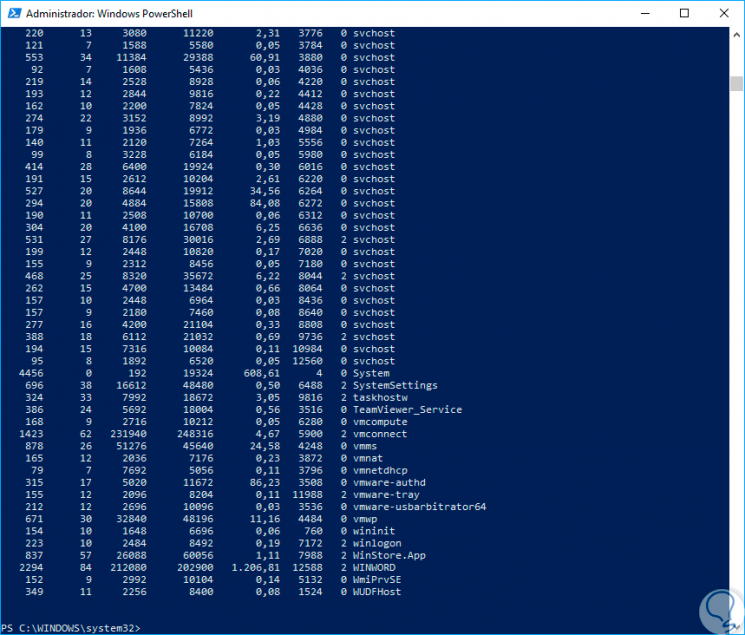
Step 10
This is one of the main advantages of using Nano Server since it will be a system that saves us the use of many operating system resources.
Finally, to shutdown Nano Server we must use the following key combination and then press Enter to confirm:
Ctrl + F12
Thanks to PowerShell it will be possible to carry out the entire management and administration process on Nano Server in a simple and complete way.