Backups in Windows 10 are more than essential to preserve the integrity and availability of information. A backup copy allows us to create a backup of the most relevant data and thus, in case of failures or errors either of the system or of the applications. Know that we have the possibility of recovering the data thus avoiding headaches or critical failures when losing information..
In Windows 10 there are various methods to create backup copies , along with their respective restoration, and one of the most important for its development capacity is to do this process from the terminal with wbadmin.
The wbadmin command is a command designed to back up and restore the operating system, volumes, files, folders, and applications directly from the command prompt or CMD console. In order to configure a backup using wbadmin, we need to be a member of the Administrators group and in order to run the other available wbadmin tasks, we need to be a member of the Backup Operators group or the Administrators group.
getFastAnswer will explain through this tutorial the complete way to create backup copies and restore data from the command prompt console..
To stay up to date, remember to subscribe to our YouTube channel! SUBSCRIBE
1. How to create CMD backup Windows 10
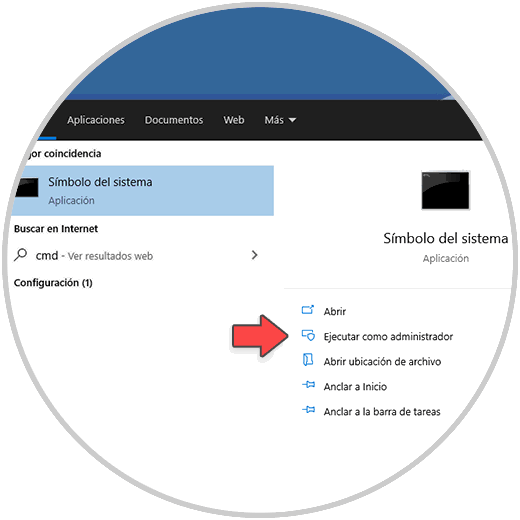
Step 1
To start, we access the command prompt as administrators:
Step 2
Then, we execute the command "diskpart" to access the Windows 10 disk utility, there we list the available volumes with the following command:
list volume

Step 3
We take into account the volume in which the backup will be created, especially the letter assigned by the system to it (in this example, volume 1 with letter E). We exit diskpart with "Exit".
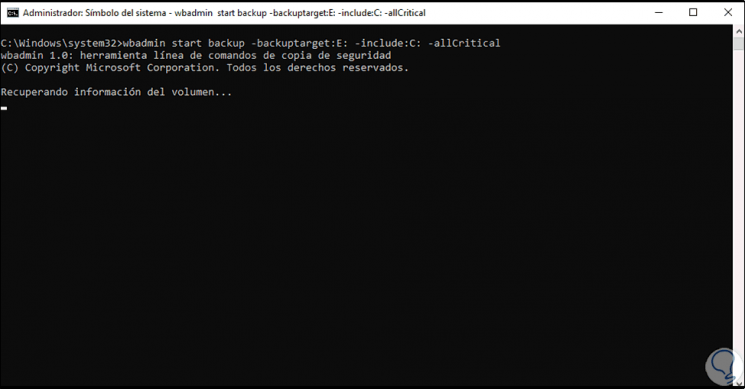
Now, we run the following syntax to create the backup:
wbadmin start backup -backuptarget: "Volume letter" -include: C: -allCritical
Step 4
Pressing Enter we will see the following:
Step 5
We confirm the process with the letter S:
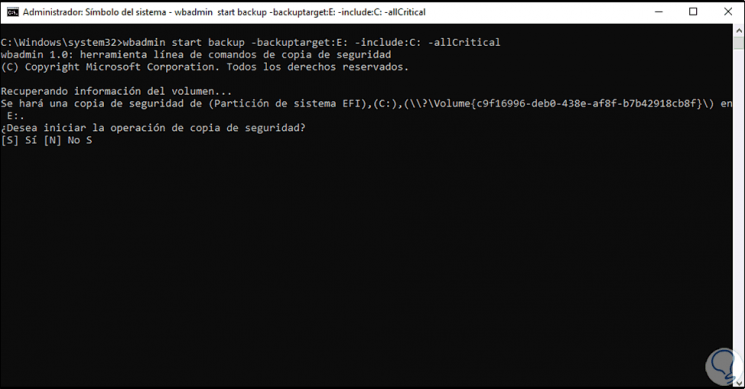
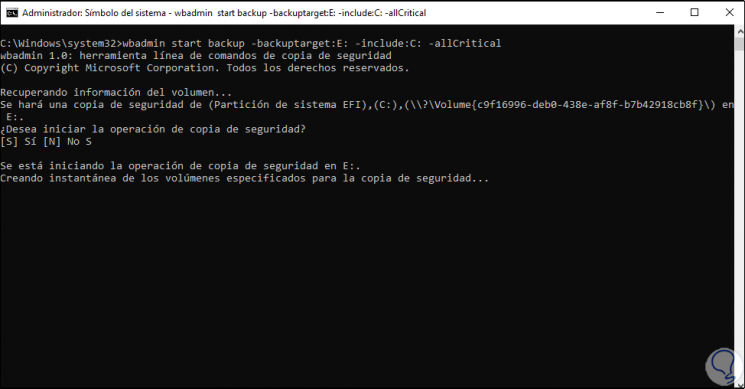
Step 6
This will go through the backup snapshot creation process:
Step 7
We can see the percentage that we carry:
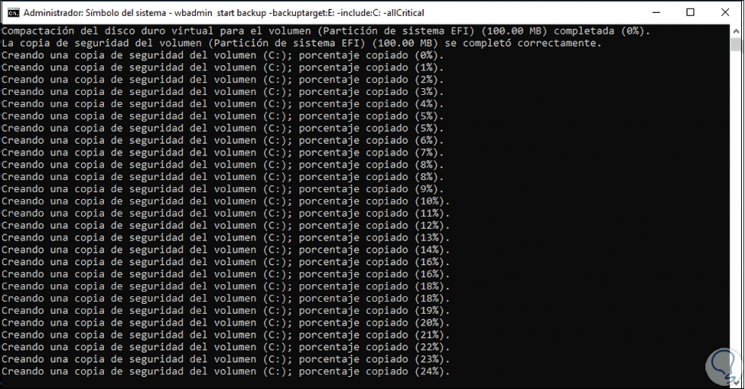
Step 8
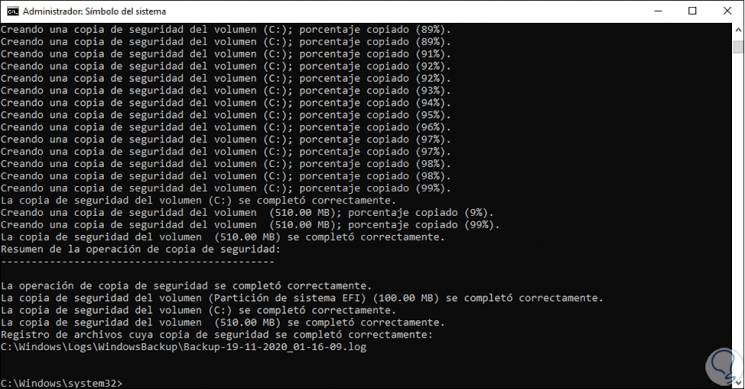
At the end of this process we will see that the copy has been correct:
Step 9
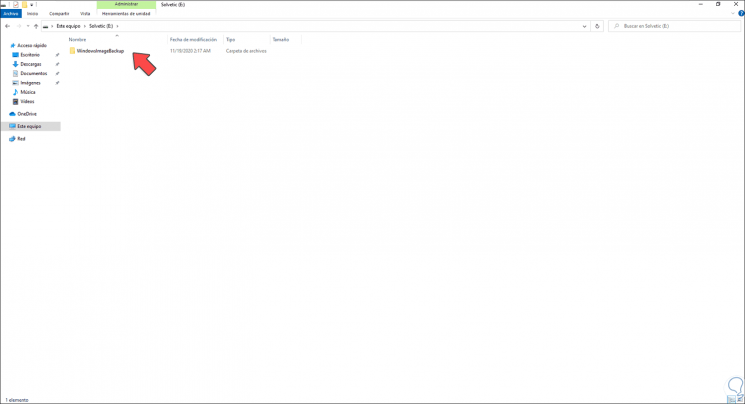
The wbadmin start backup command allows us to create a backup through various parameters, it will create a backup copy of the Volume Shadow Copy Service (VSS) and it does not execute the update of the history of the copy files. Once the copy is finished we can go to the path where it was created, on the destination volume:
Step 10
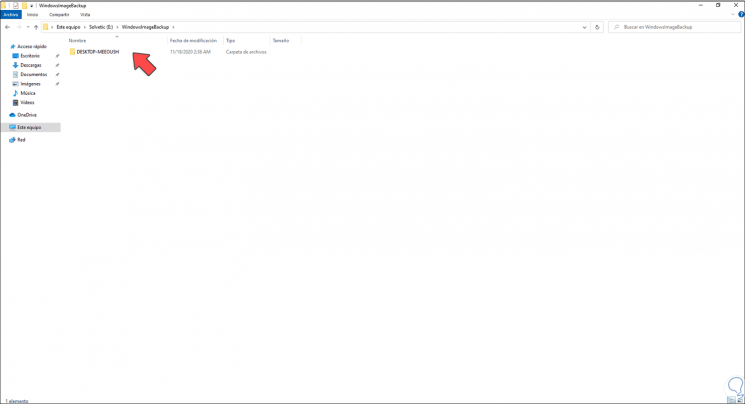
We click there and click on Windows permissions, we will see the name of the computer:
Step 11
Double click there again and now we will see the backup folder with date and time:
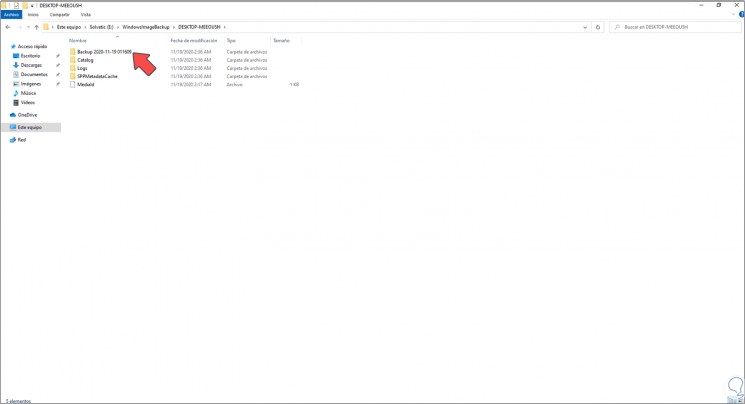
Step 12
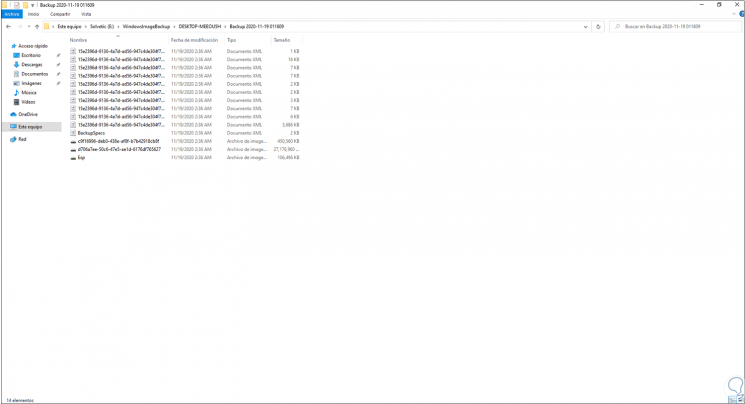
By accessing this we can see the objects that have been backed up:
Up to this point the backup has been created in Windows 10 from the terminal.
2 . How to Restore CMD Backup Windows 10
Step 1
To restore this copy, we restart the system and in some cases we can see the following:
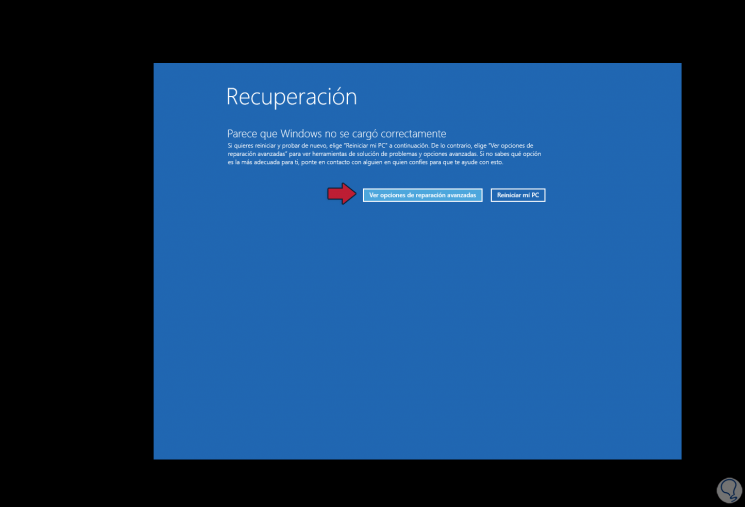
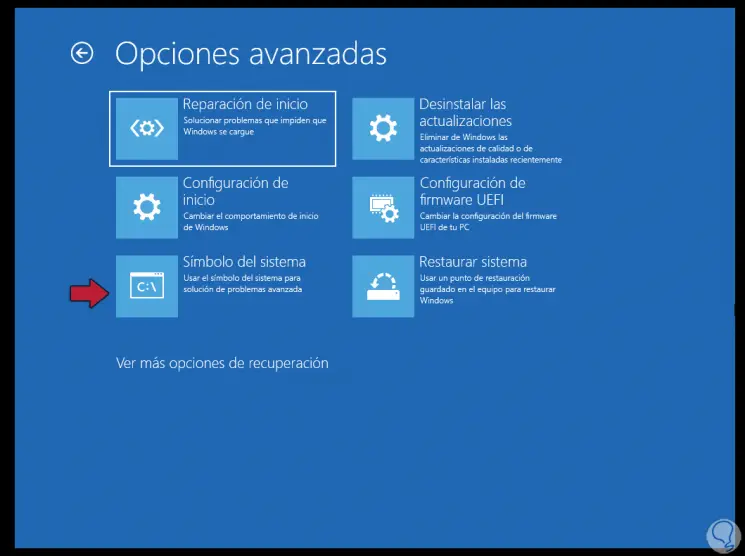
Step 2
There we click on "See advanced repair options", in other cases we must insert the bootable DVD or USB with the Windows 10 ISO image to repair the computer, then we will see the following:
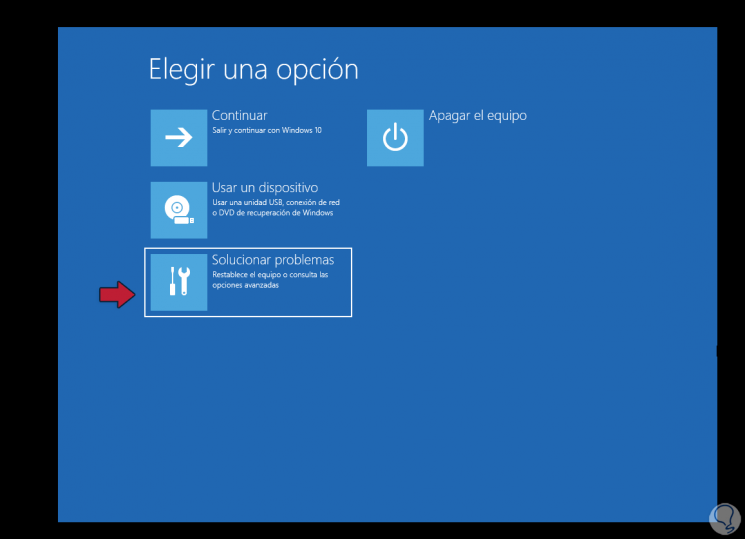
Step 3
We click on "Troubleshoot" and in the next window we go to "Command Prompt":
Step 4
We select the username and password. With the ISO we will see this:
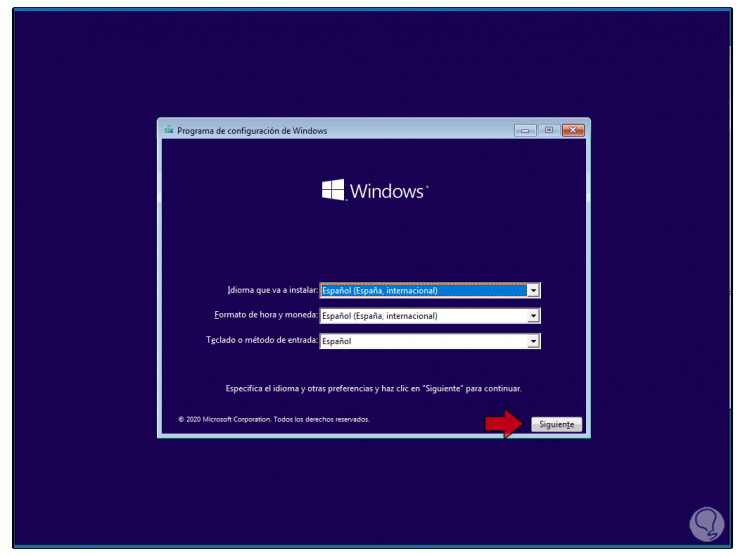
Step 5
There we click on Next and then on "Repair the computer" to use the previous steps (Troubleshoot).
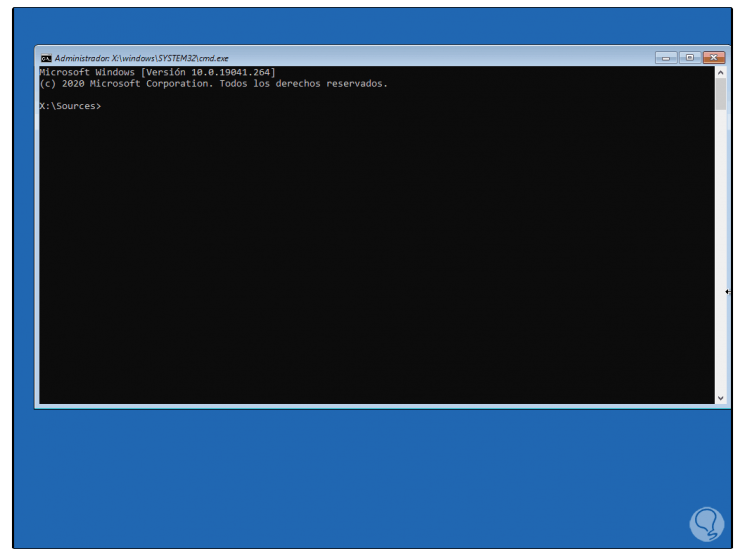
When accessing the command prompt console we will see the following:
Step 6
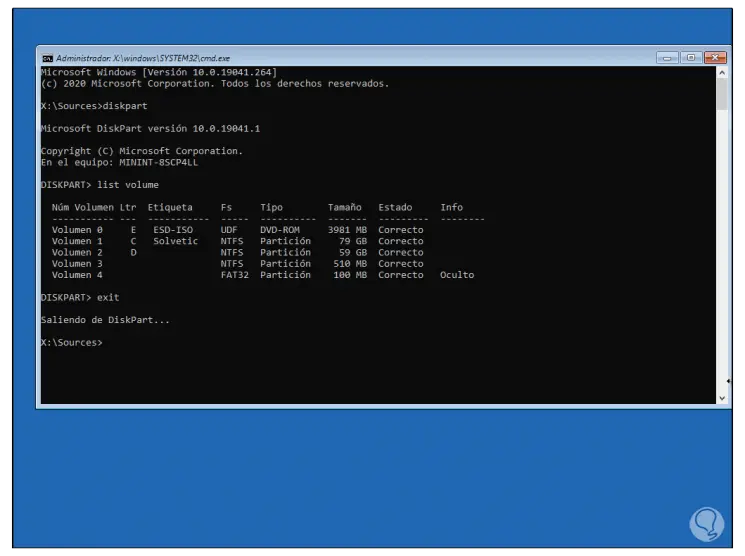
We execute "diskpart" and then we list the volumes with "list volume":
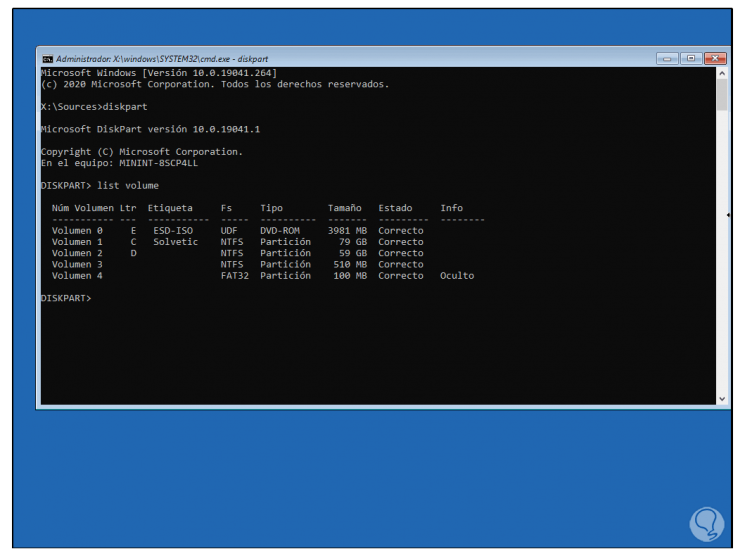
Step 7
In this case, the copy has been saved on volume 1, with drive C. We exit Diskpart with the "exit" command.
Step 8
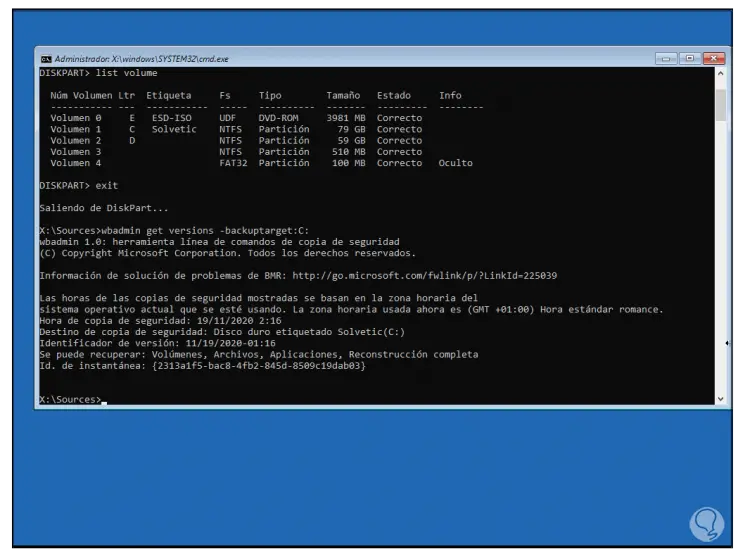
Now we are going to get the details of the backup with the following command:
wbadmin get versions -backuptarget: C:
Step 9
In the results we take into account the value of the field "Version identifier" where the date and time are. To restore this copy we execute the following:
wbadmin start sysrecovery -version: ”version created” -backuptarget: C:
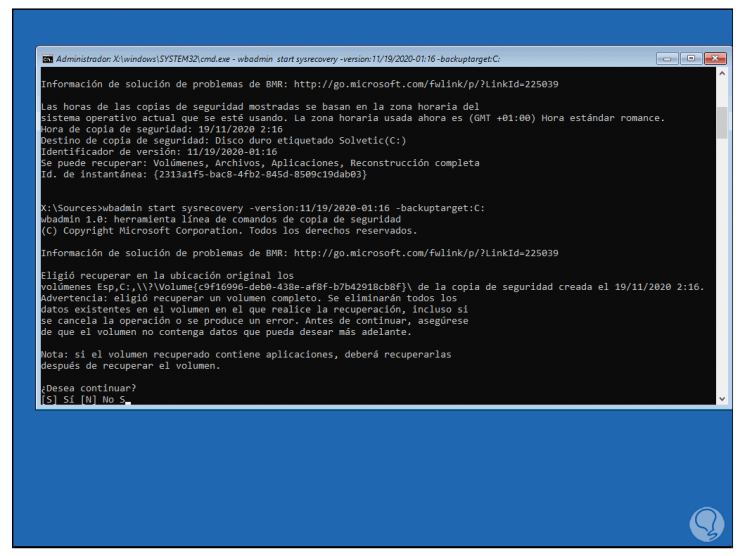
Step 10
We confirm the process with the letter S and we will see that the data is restored:

Step 11
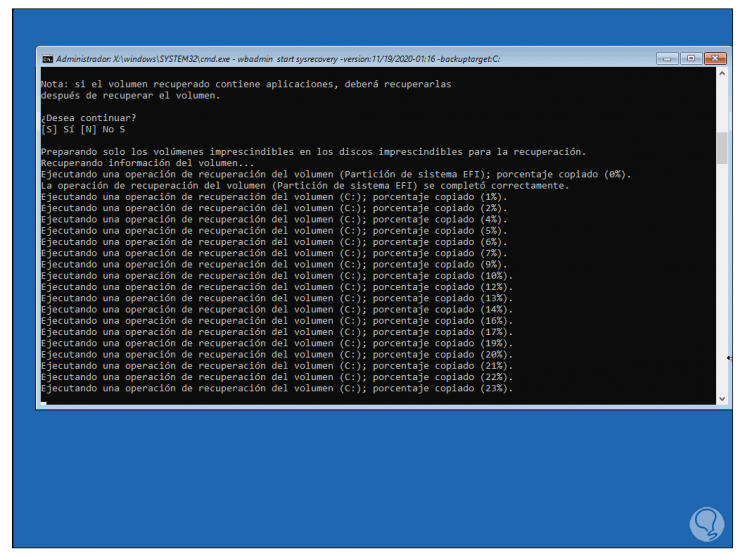
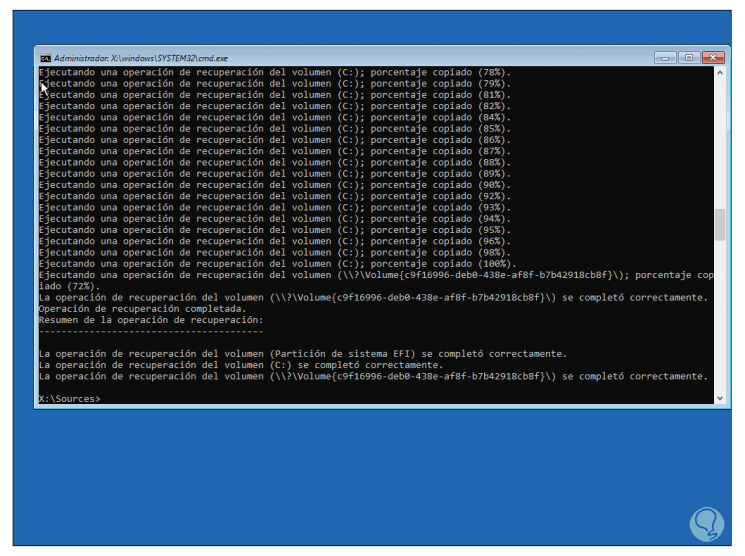
We track the percentage in real time:
Step 12
At the end of this restoration we will observe the following. As we can see, the restoration has been correct.
Step 13
We exit the console with the command "exit" and we will be redirected to the following:
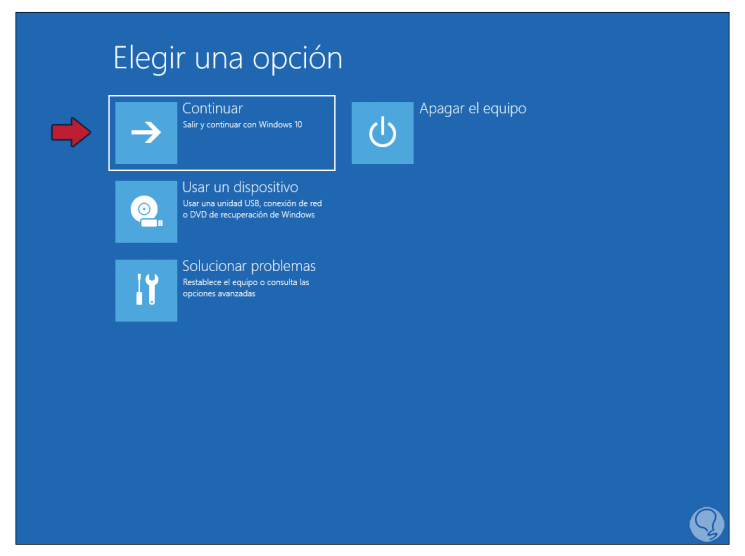
Step 14
We click on "Continue" so that the computer is restarted and we start session with the new restored data:

Thanks to this command it will be possible to have the certainty of having a complete and effective backup and restoration..