We use the computer for many things, so it is important and necessary to always have it optimized with the best possible conditions and in this way that we are comfortable when working with it or performing different actions..
Defragmenting the hard drive in Windows 10 is a task that the system itself has automated to help us preserve the life and performance of the drive . Defragmentation is a task that searches for and consolidates fragmented files on the available hard drives to improve and optimize the speed not only of this but of the tasks that are executed in the system and in the applications.
By default this defragmentation is an automatic task of Windows 10 and if for any reason you want to disable it we will explain how to do it. This is especially useful when we have SSD solid state drives..
To stay up to date, remember to subscribe to our YouTube channel! SUBSCRIBE
How to disable defragmentation in Windows 10
Step 1
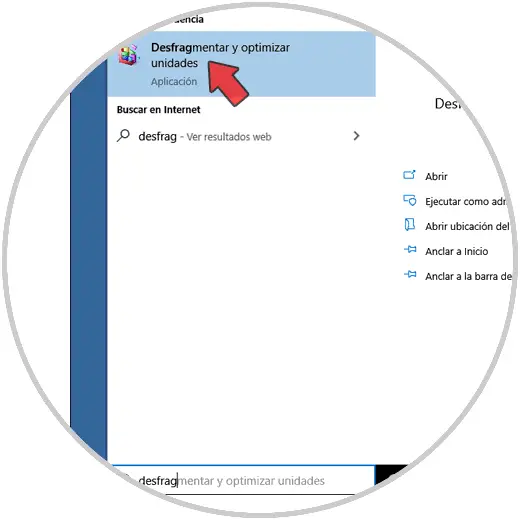
In the Start search engine we enter "defrag", in the displayed results we select "Defragment and optimize drives":
Step 2
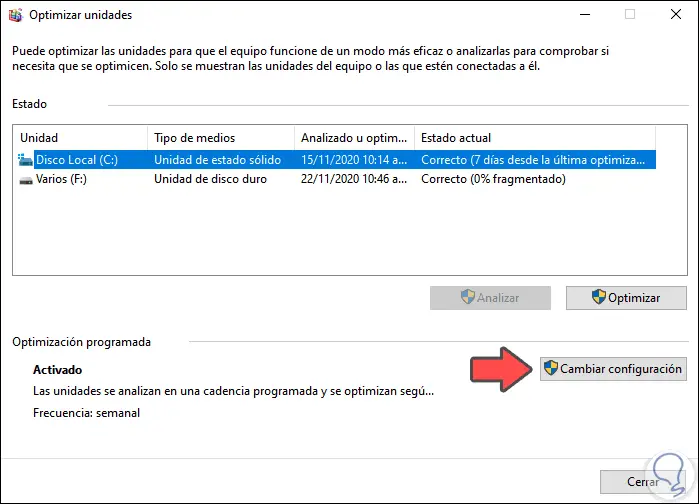
The following will be displayed, we can see that the task is enabled by default:
Step 3
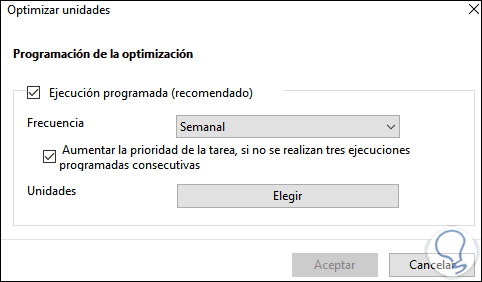
We click on the "Change settings" button and we can see the following:
- Defragmentation priority level
Step 4
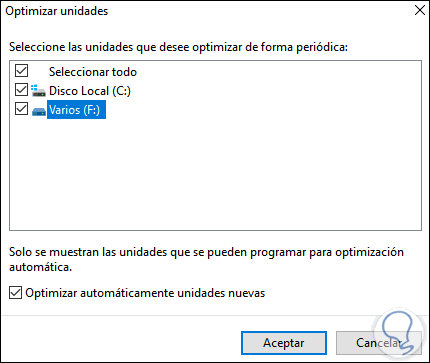
There we can click on "Choose" to define which hard drives on the computer the defragmentation process will be applied to:
Step 5
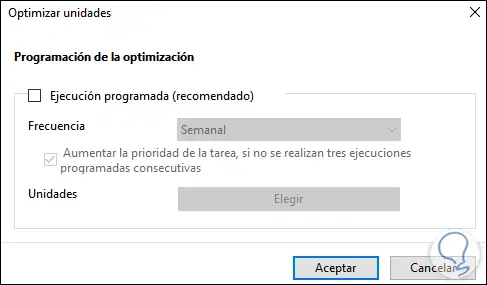
To deactivate defragmentation, we deactivate the "Scheduled execution" box:
Step 6
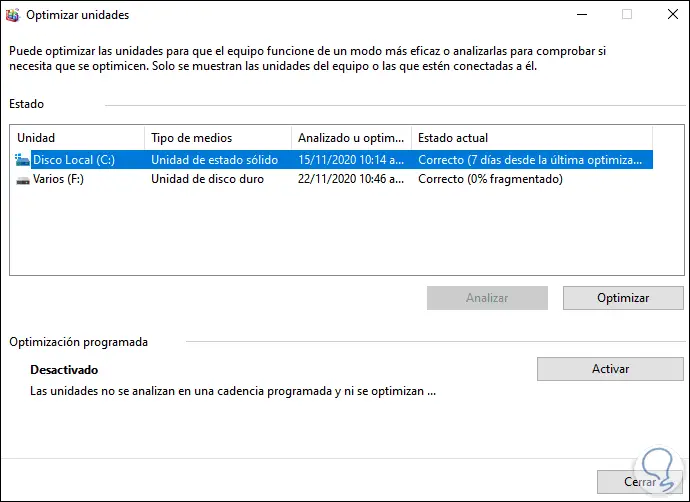
We click OK to apply the changes and we will see that the status of this task is now deactivated:
With these simple steps we have disabled defragmentation in Windows 10.