By default, our network configuration presents our IP address established in DHCP mode, that is, the IP addresses associated with our devices connected to the network are automatically generated . Within it, the PS5 also has its associated IP address . The IP address forms a kind of license plate that is associated with a device when we are on a network and that allows us to identify with respect to others. The IP will serve as an identifier and will be a unique address that cannot be repeated or will conflict..
Normally from our router and with the Internet service provider we can obtain the data from both fixed IP and DHCP . Although the latter is the model that comes by default, if you experience problems when playing on your PS5, one option is to put a fixed IP rune and thus make sure that those problems are going to appear. That is why we are going to know how to put fixed or static IP on PS5.
To stay up to date, remember to subscribe to our YouTube channel! SUBSCRIBE
How to put static IP or fixed IP on PS5
Step 1
Let's see our current IP. We will go to "Settings" in the main panel.

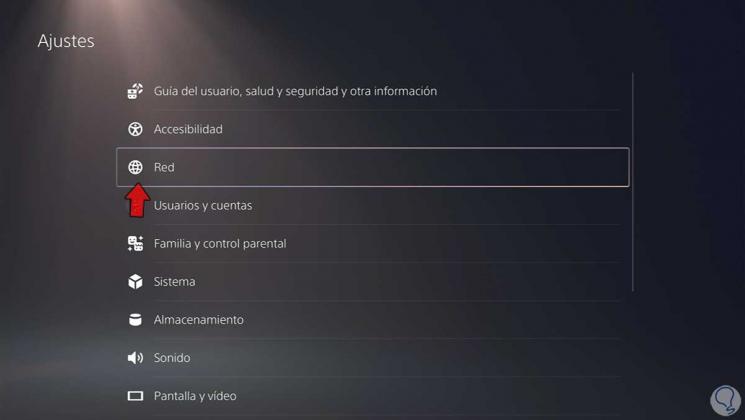
Step 2
Now we will go to "Red".
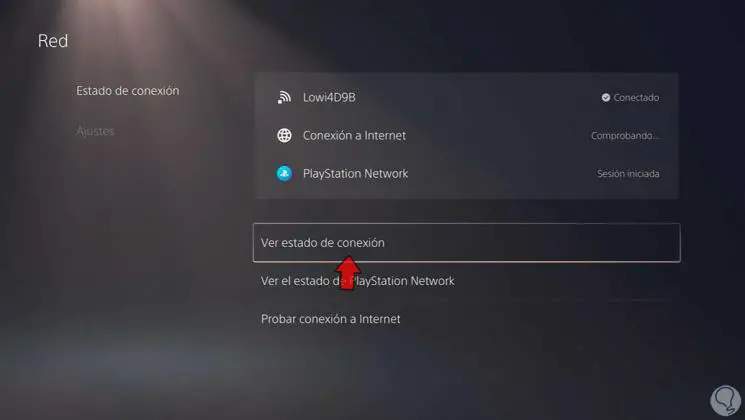
Step 3
We go to "Settings" and then to "View connection status".
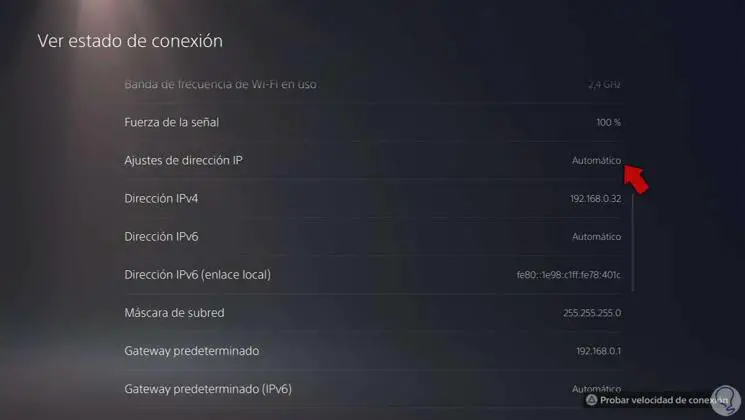
Step 4
If we go down we can see what our current IP is and that we have activated the DHCP mode with "IP address settings: Automatic"
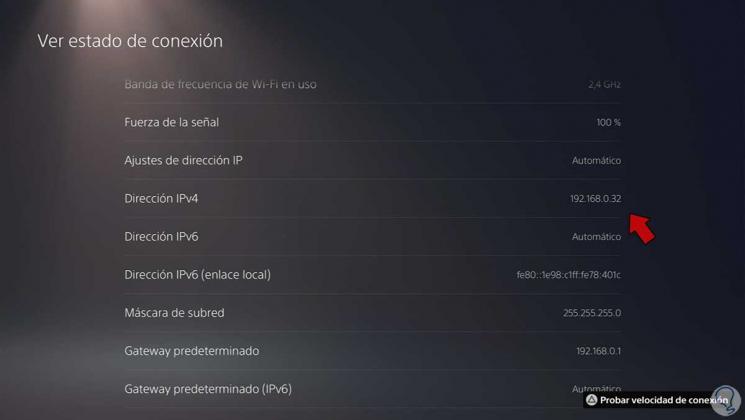
Step 5
We see that its structure is 192.168.0.X. The X is the final value that will vary to assign an IP to each device connected to the same network. Normally within the DHCP configuration there is a range of reserved addresses so we would have to choose a static IP outside this range so that they cannot match
In our case, 50 addresses are reserved, so we are going to choose the one with the value 200, that is, 192.168.0.200
Step 6
To change the IP we go back to the previous menu and click on "Settings - Configure Internet connection"
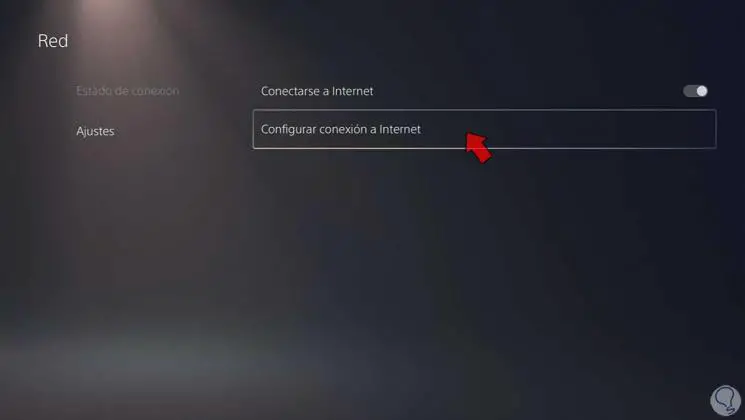
Step 7
Click on the current network and choose "Advanced settings"
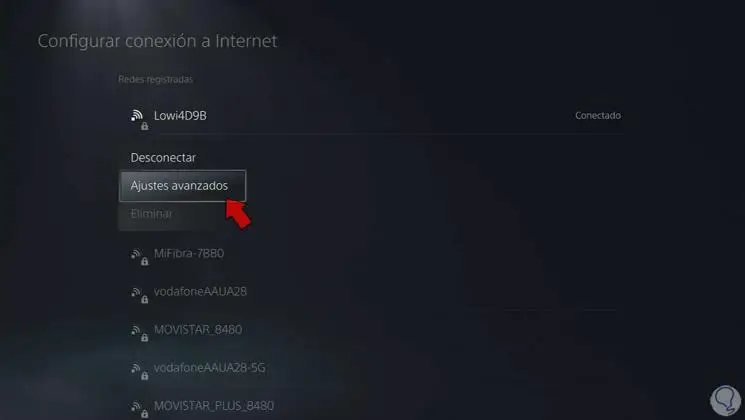
Step 8
Now click on "IP address settings" and select "Manual"
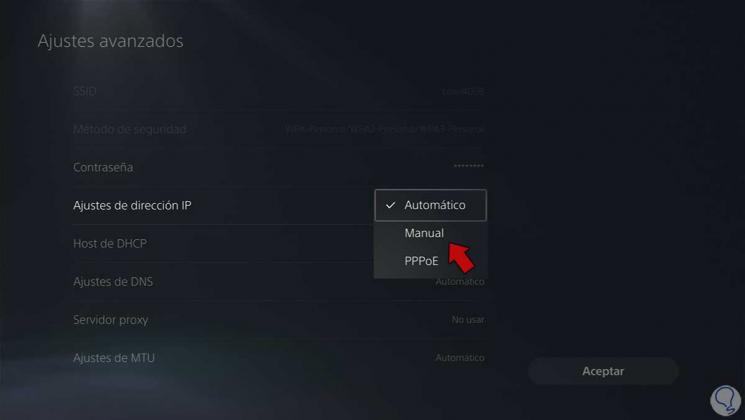
Step 9
Click on "IPv4 Address" and assign an IP address.
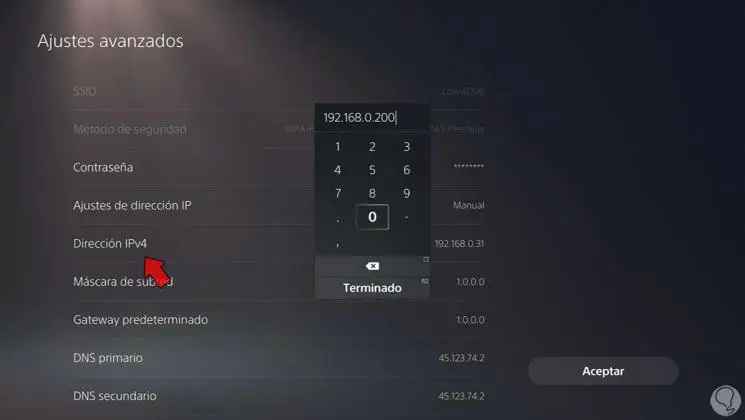
Note
You can check on your router the range of IP addresses reserved for DHCP. If you are not sure of the reserved IPs, choosing a high number of up to 253 prevents it from matching others that are created. In this case we have chosen 192.168.0.200
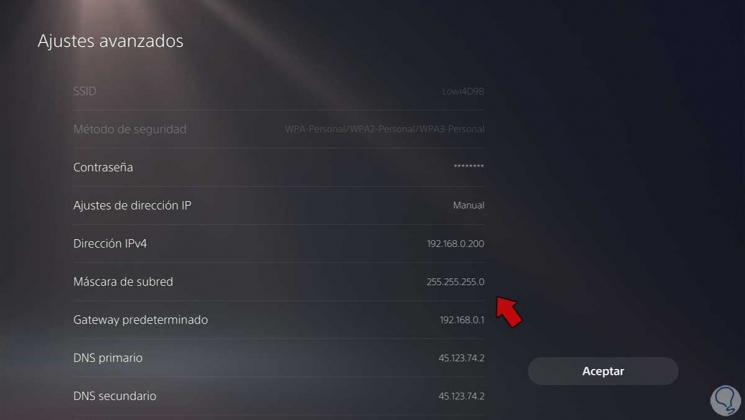
Step 10
We are also going to configure the rest of the data such as the "Subnet mask or the gateway", the values will be left the same as those that appeared in DHCP or dynamic IP mode.
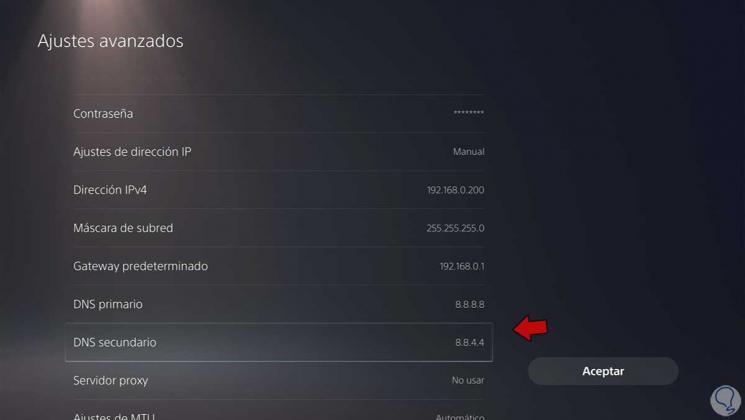
Step 11
To configure DNS we are going to use Google values:
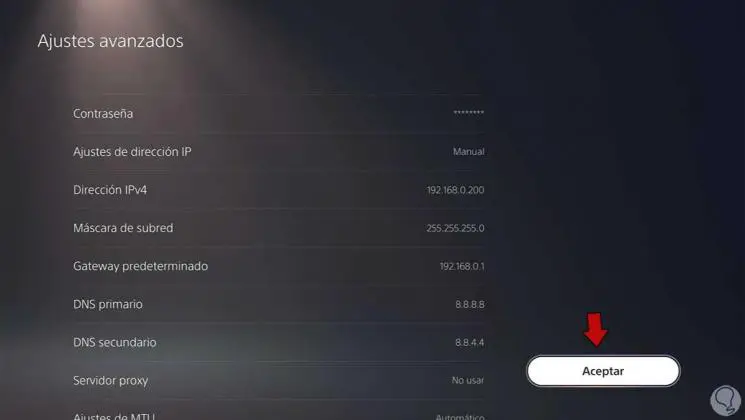
Step 12
Click on “Accept and we test the connection to verify that it is correct.
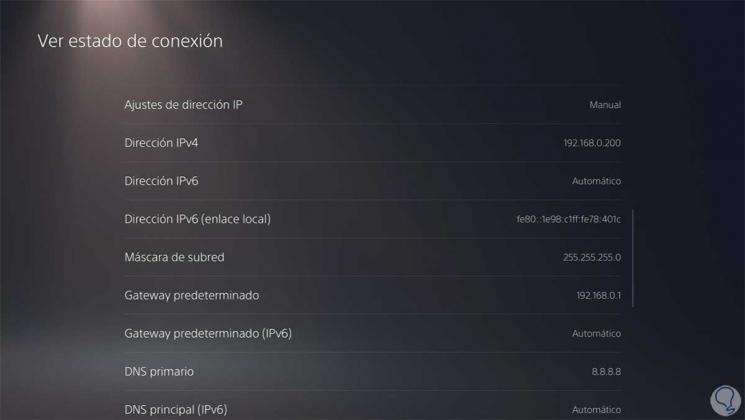
Step 13
If we see the connection status again, we will see our new configuration.
In this way we can configure a static IP or a fixed IP within our PS5 and thus avoid possible connection errors..