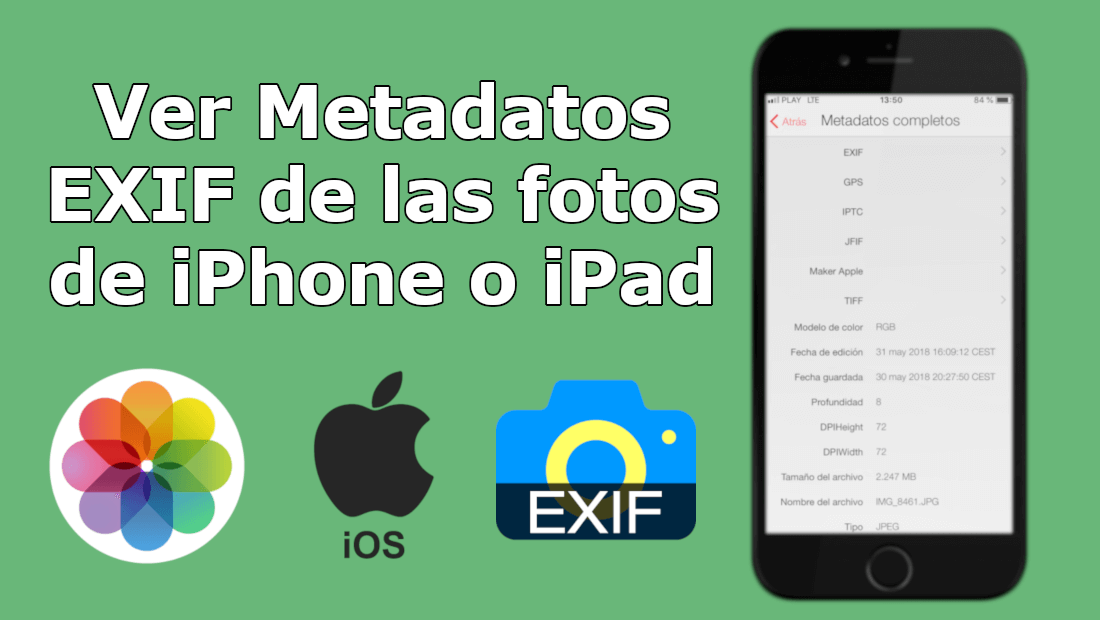
Photography is something that every day interests more and more users, especially since social networks give more relevance to this type of content. In addition, mobile devices such as iPhone or iPad increasingly incorporate higher quality cameras that allow incredible photos to be taken in more extreme conditions. However, there are still some limitations on your iOS devices such as the impossibility of knowing the parameters to which the photo was taken, that is, the EXIF metadata.
You may also be interested in: How to delete or edit the metadata of your photos or images.
When we take a photo with our iPhone or iPad, it is saved in the Photos app on your iOS device. The problem is that we did not find much information other than the place where you took the photo, people who appear in the photo, the date and time the photo was taken. However, what happens to the truly important parameters for photography such as shutter speed, ISO, aperture, etc.?
This information relevant to the photograph taken is stored in the EXIF metadata attached to the photo file. This occurs on digital cameras but also on Apple mobile devices even if it is not capable of displaying them. Among the information that is usually stored as EXIF metadata you will find the GPS location, camera settings, image file size and format, etc..
Well, by default the iOS device is not capable of displaying the metadata information attached to the photo taken with your iPhone or iPad. However, by default the parameters in which the photo was taken cannot be displayed, does not mean that we are not able to view them.
That said, below we want to show you step by step how to see the EXIF metadata of the photos taken with your iPhone or iPad with iOS:
How to view the metadata of the photos of your iOS device, whether iPhone or iPad:
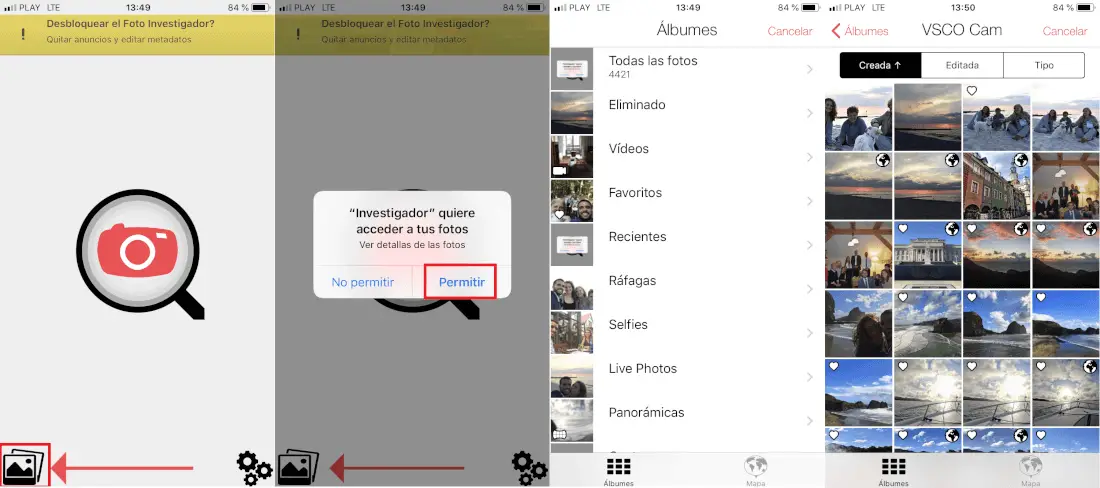
As we cannot visualize this metadata by default, we will have to use a third-party application that is capable of reading this data. Among the wide range of applications capable of performing this operation, we recommend the use of: Photo researcher: read, edit, remove metadata . This app is in the App Store completely free of charge..
When this app is installed on your device, all you have to do is open the application to access its interface. Once inside you will have to click on the icon in the form of photos in the lower left corner in order to authorize the access of the Photo Investigator app to your reel and therefore to all the photos stored in the memory of your iOS device.
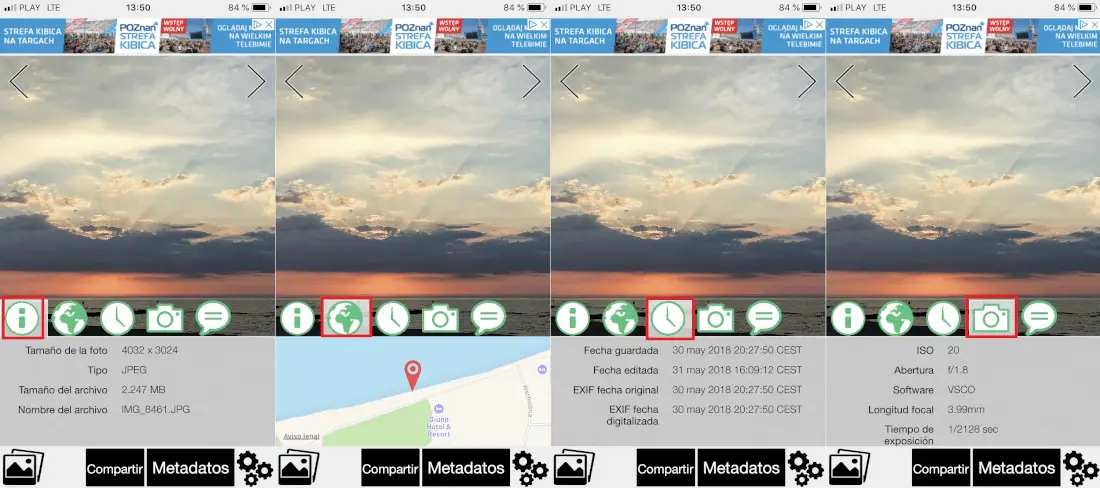
When you already have access to the photos, you can choose the image from which you want to know its metadata. When it is displayed in the app viewer, you will see several tabs at its bottom. These tabs will give you access to: Basic information, GPS location, Date and time of taking and editing the photo, camera settings and photo comments such as copyright..
But everything does not end here since we will be able to access all the complete information of the EXIF metadata, for this you will have to click on the Metadata button. This will automatically display a menu in which you will have to click on the View All option. This will take you to a new screen where you can see all the Complete Metadata. However, if you want to see all the information contained in EXIF, you will only have to click on said element, which will take you to another screen with more information on said photograph.
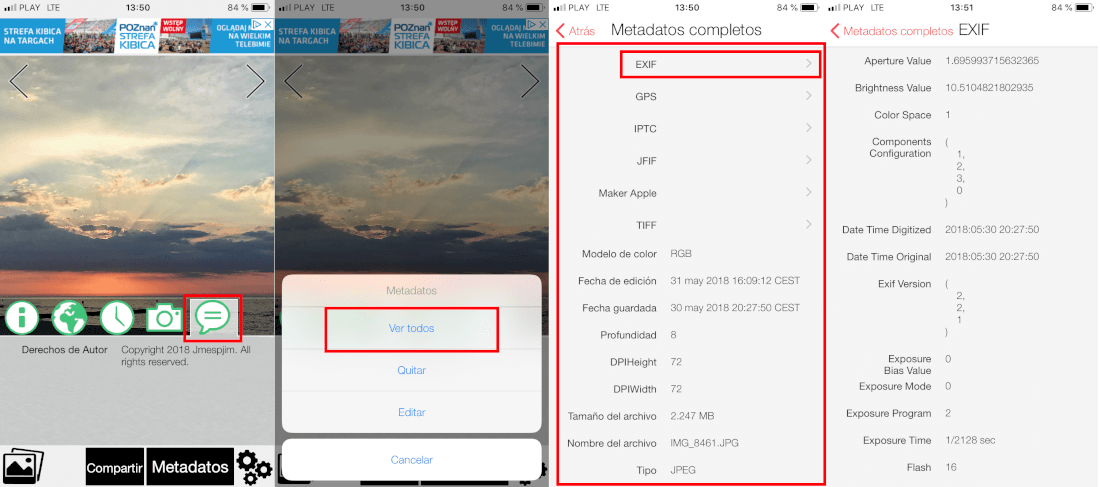
If you want to know more details about the place where the photo was taken, you only have to click on the GPS option from the Full Metadata screen to access information as detailed as the specific coordinates.
Finally, it should be noted that the application also has options to be able to modify or even delete all the metadata of an image, however these two options are paid, that is, you will have to purchase the Pro version of the app to be able to use of them.