Subtitles is something really popular among all moviegoers or series addicts and therefore for users of the Netflix platform that is currently the leader in multimedia entertainment. What happens is that Netflix has a great limitation regarding subtitles since these will vary depending on the region in which you have registered or your account belongs.
You may also be interested: Netflix Spain is here and offers a month totally free.
Many users use the VPN service to access series or movies that are not available in their countries, however, this does not solve the problem of subtitles since they are predetermined depending on the region of your account. In this way, in my case I live in Germany and my Netflix account is German, it only offers me subtitles in German, Ukrainian, Polish or English..
This means that if the movies or series are not Spanish, I am forced to listen to them in their original version or with subtitles in the default languages for the region of my Netflix account. Netflix only allows you to change the subtitle language from the video player's subtitle icon at the bottom right of the interface.
However, after much searching how to solve this problem, I have managed to find a very useful and simple way to customize Netflix subtitles and be able to use those you want externally. The only requirement to enjoy the subtitles is the use of the Google Chrome web browser..
That said, below we show you step by step how to put external subtitles to the Netflix series to use the ones you want in the language you want:
How to add any external subtitle to Netflix movies or series.
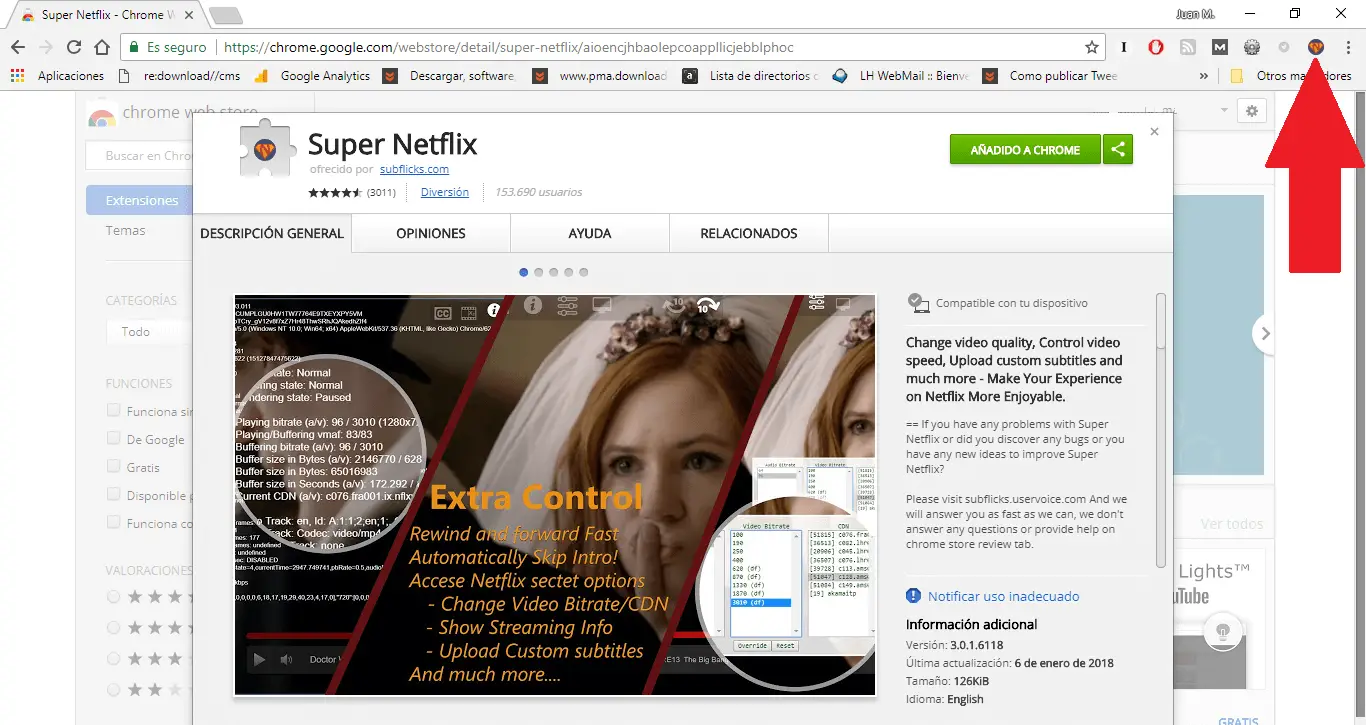
1) The first thing you will have to do is install the Super Netflix plugin / extension. You can do this by accessing from the following links: Super Netflix for Google Chrome .
2) When the extension is installed in the browser, it will be your turn to download the subtitle of the chapter or movie in the language in which you want to view them. Obviously you should pay attention to download the correct subtitles which is easy to find on the internet. The only drawback is that in most cases the subtitle file that you download will do so in .SRT format, however the Super Netflix extension only supports the .DFXP format.
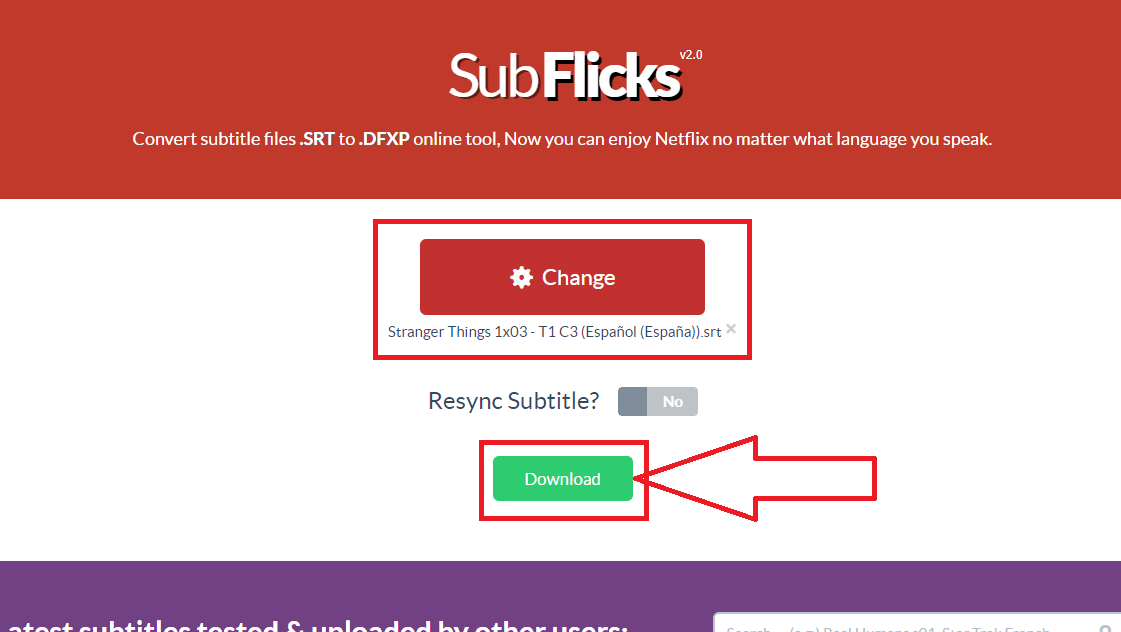
3) To convert the .SRT subtitles file to the .DFXP format, you should go to the following website and proceed with its conversion: SubFlicks SRT subtitles converter to the .DFXP format .
4) When you have downloaded the .DFXP files, all you have to do is go back to Netfix and start playing the chapter of the series or movie you want to see with the custom subtitles. As soon as playback starts, click the Pause button. Once the playback has been paused you will have to move the mouse on the screen to see how various options are displayed on the top of the player..
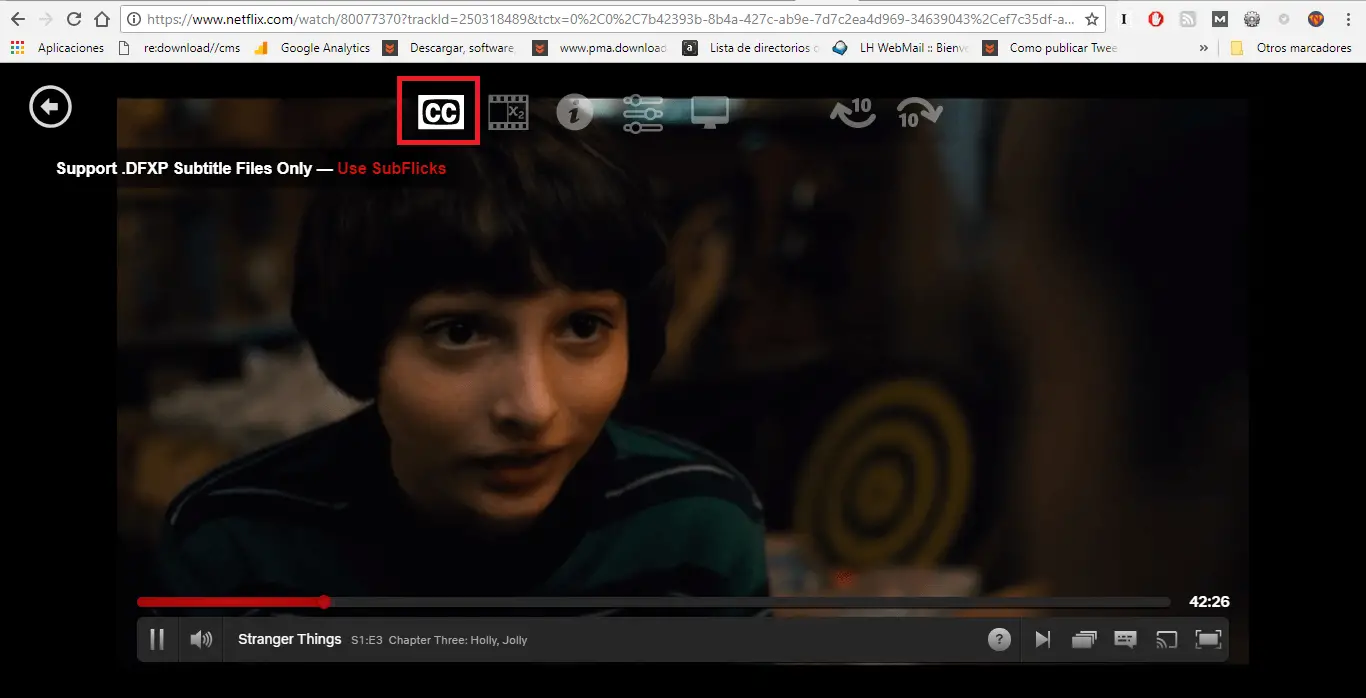
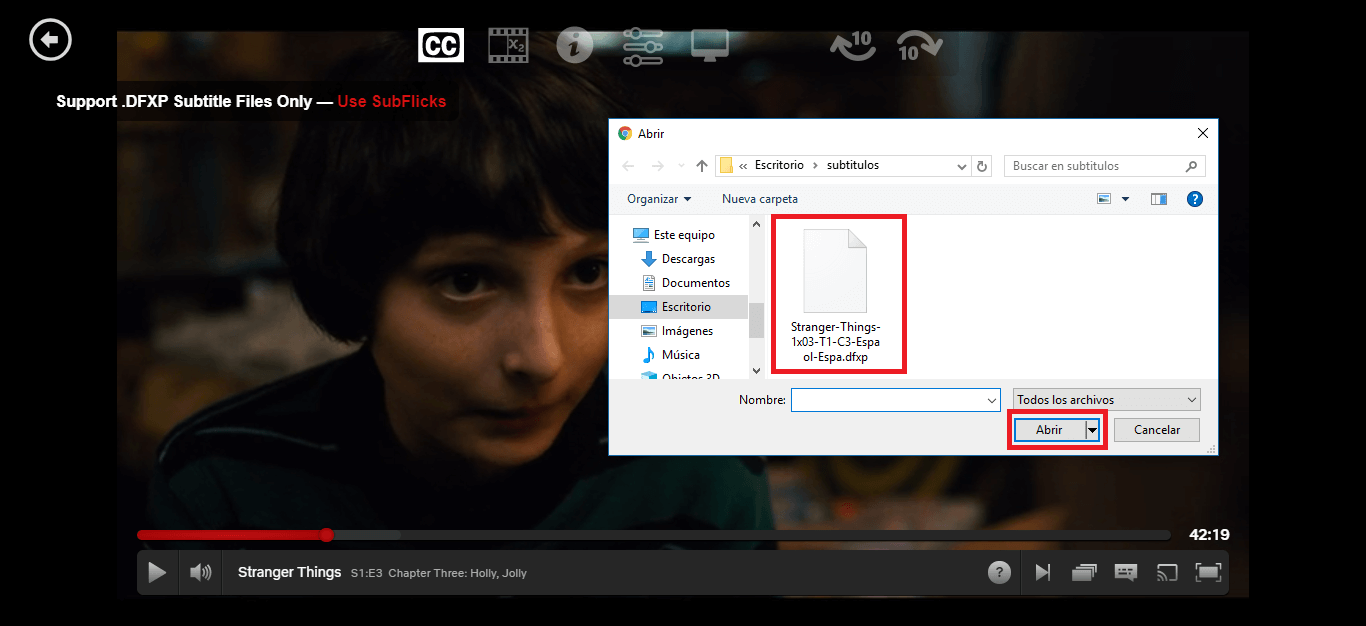
5) Among these options you will have to click on CC icon. This will open a window where you can select the subtitle file in .DFXP format so that it is loaded with the extension.
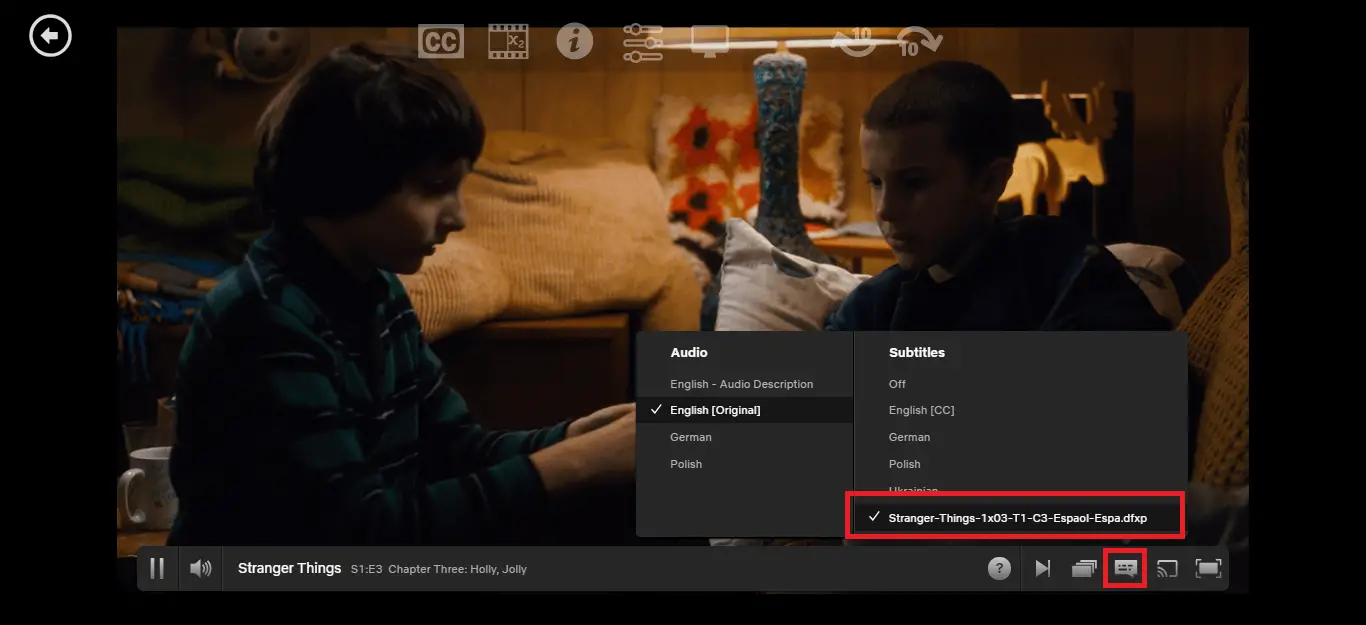
6) When the file has been uploaded to the extension you must click on the Netflix default subtitle button to see how the subtitle you just uploaded will now appear. Obviously you must make sure that this subtitle, now this subtitle must be marked.
7) Now press the Play button again to start playing again. Now you will see how the external subtitles you just added to Netfix will start to appear fully synchronized with the image of the movie or series.
