Windows 10 is the most used operating system today, with millions and millions of users worldwide. This makes virtually any computer owner familiar with Windows. Therefore, virtually everyone knows that when you log into the Windows 10 operating system, a name is displayed on the screen. In my case all my full name is shown. After several months I have decided to change it for privacy and security reasons, but can the Windows 10 username be changed?
You may also be interested in: How to activate or deactivate the Windows 10 Timeline
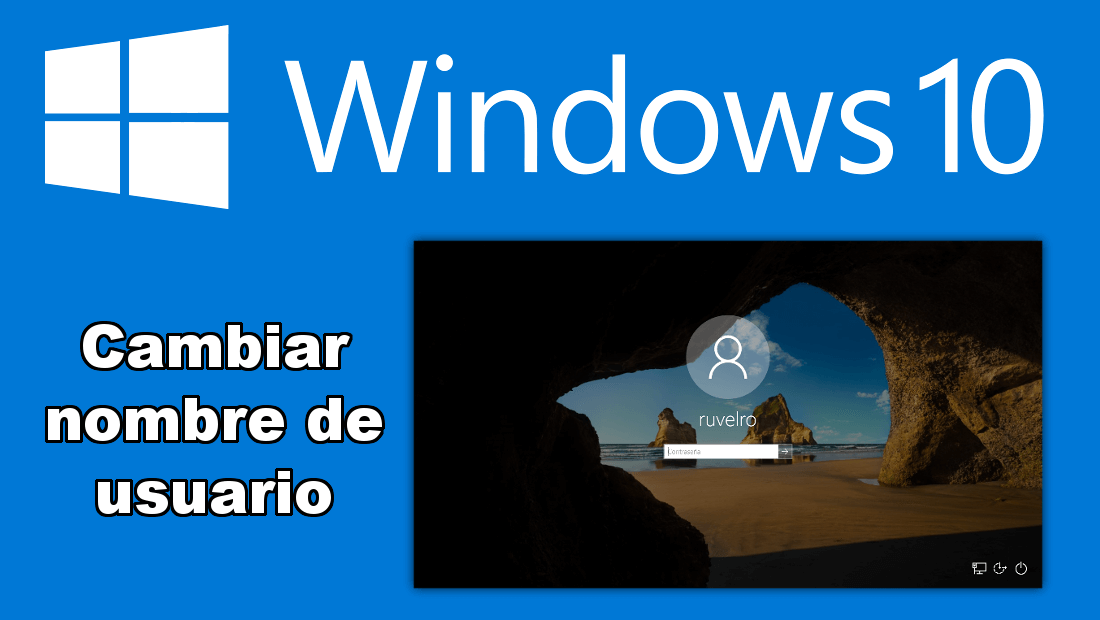
Whether you are a user of a local user account or Microsoft, on the login screen you will always see the username on the login screen to Windows 10. This name is what the user enters when creating their local or Microsoft user account so you cannot set a different username or alias to the Name used in your Microsoft account or local user..
However this does not mean that Windows 10 users cannot change the Windows 10 username, what happens is that we will have to change the name of our account so that in this way the username displayed on the home screen of session is different from the original.
Obviously the most advisable thing would be for Windows 10 to allow us to change the user name of the operating system in a more direct and simple way, however until Microsoft decides to incorporate this function we will have to use the methods shown below..
With that said, we show you step by step how to change the Windows 10 username displayed on the operating system login screen from a local user account or from a Microsoft account:
Change the Windows 10 username with a Microsoft account.
If your Windows 10 user account is linked to your Microsoft account, we will have to change the name of your Microsoft account. To do this you will have to go to the Windows 10 Settings application .
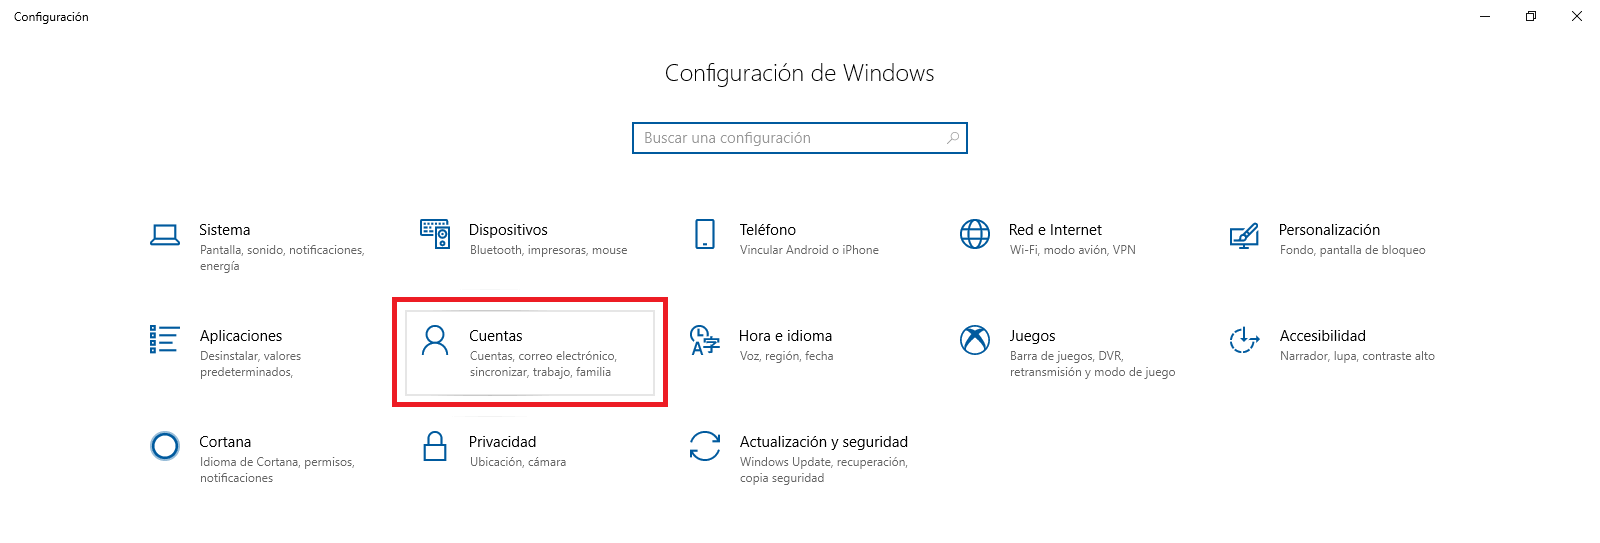
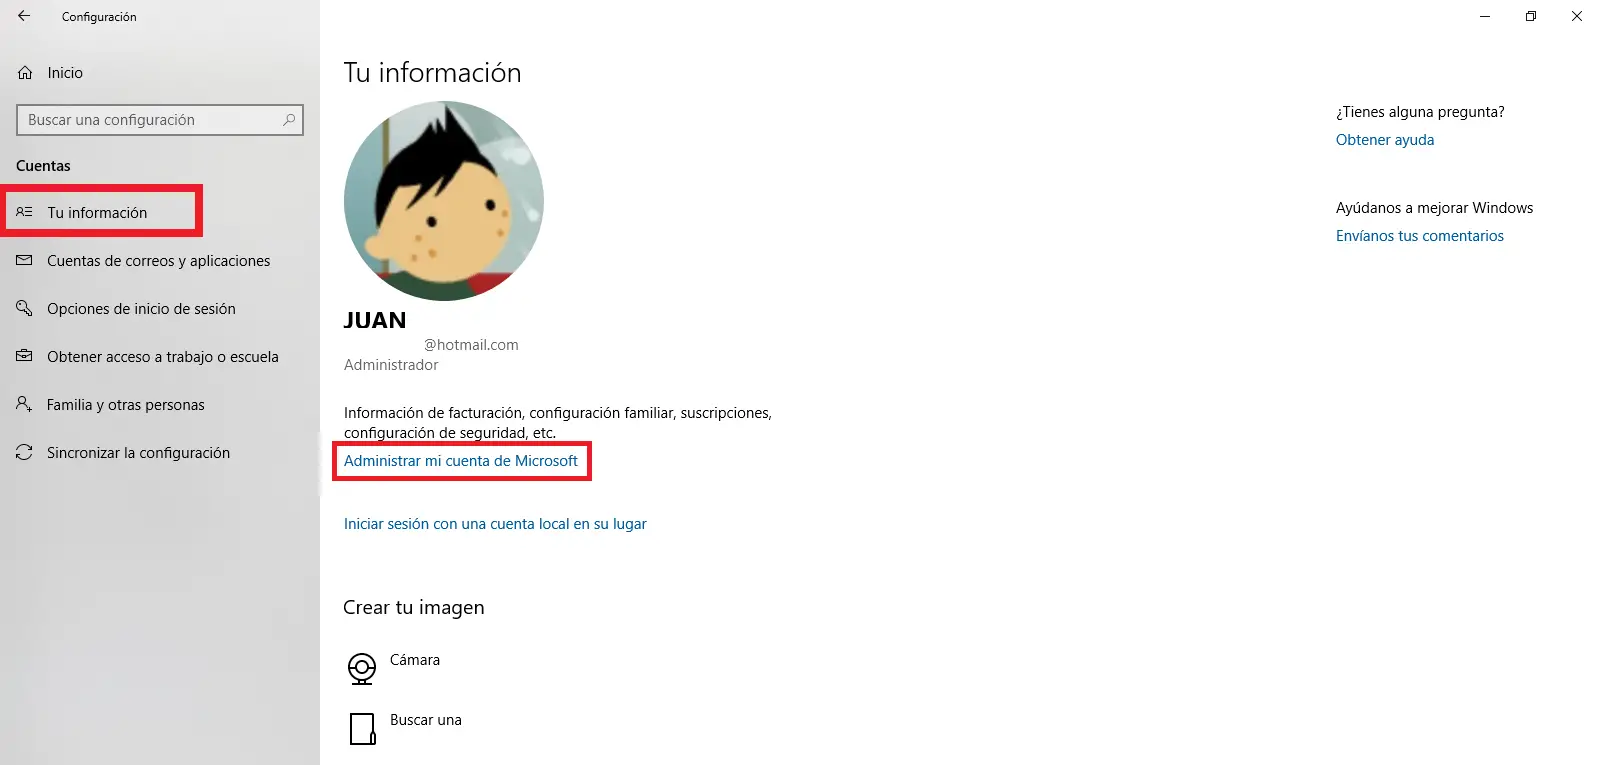
Once here, select the Accounts option, which will take you to a new screen where you will have to pay attention in the menu on the left to select the option: Your Information . This will cause the main part to display a series of options from which you will have to select: Manage my Microsoft account ..
This will cause a web page to open in your browser. Under your username and email you will find the option: More Actions . Select it to check how a menu is displayed in which you will have to click on: Edit Profile .
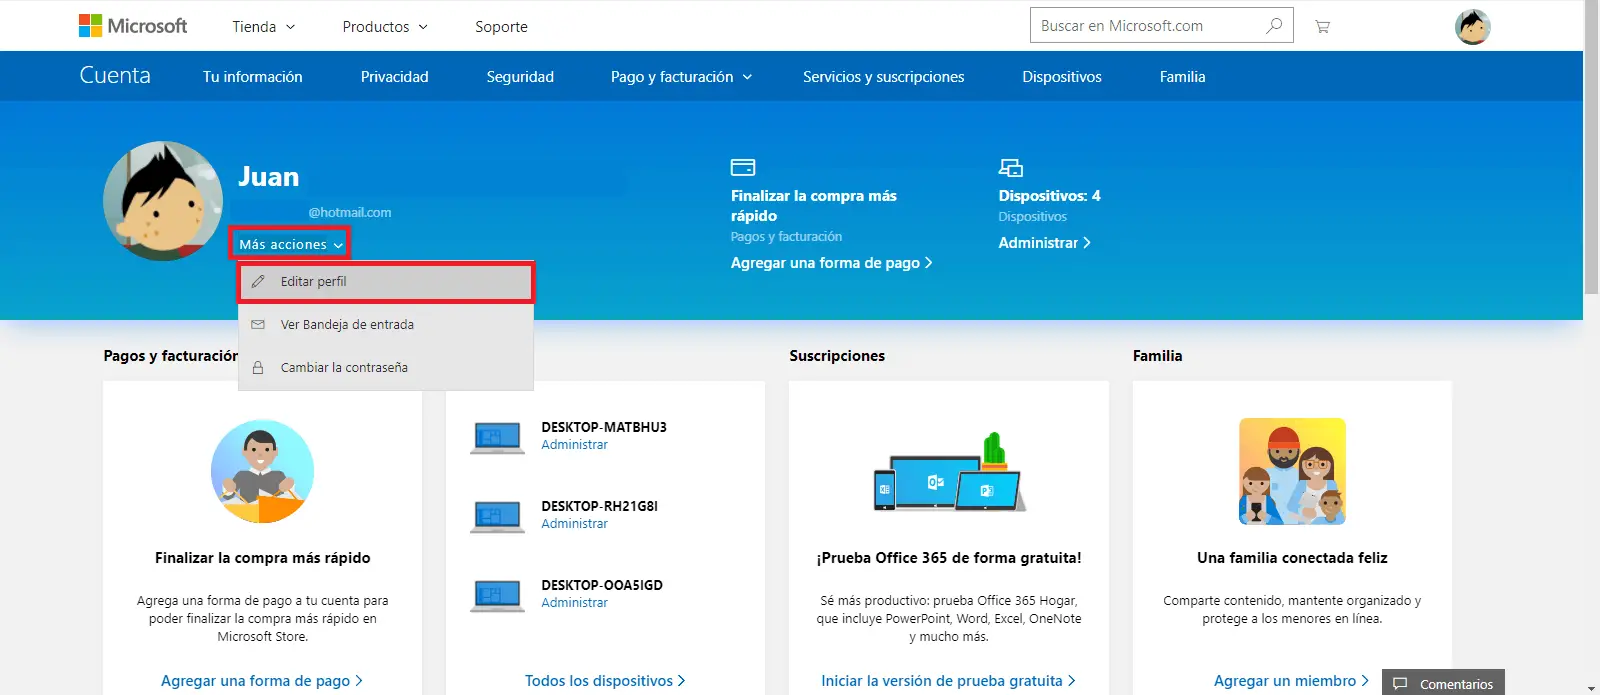
Now you will be redirected to a new screen where you will have to click on: Change Name.
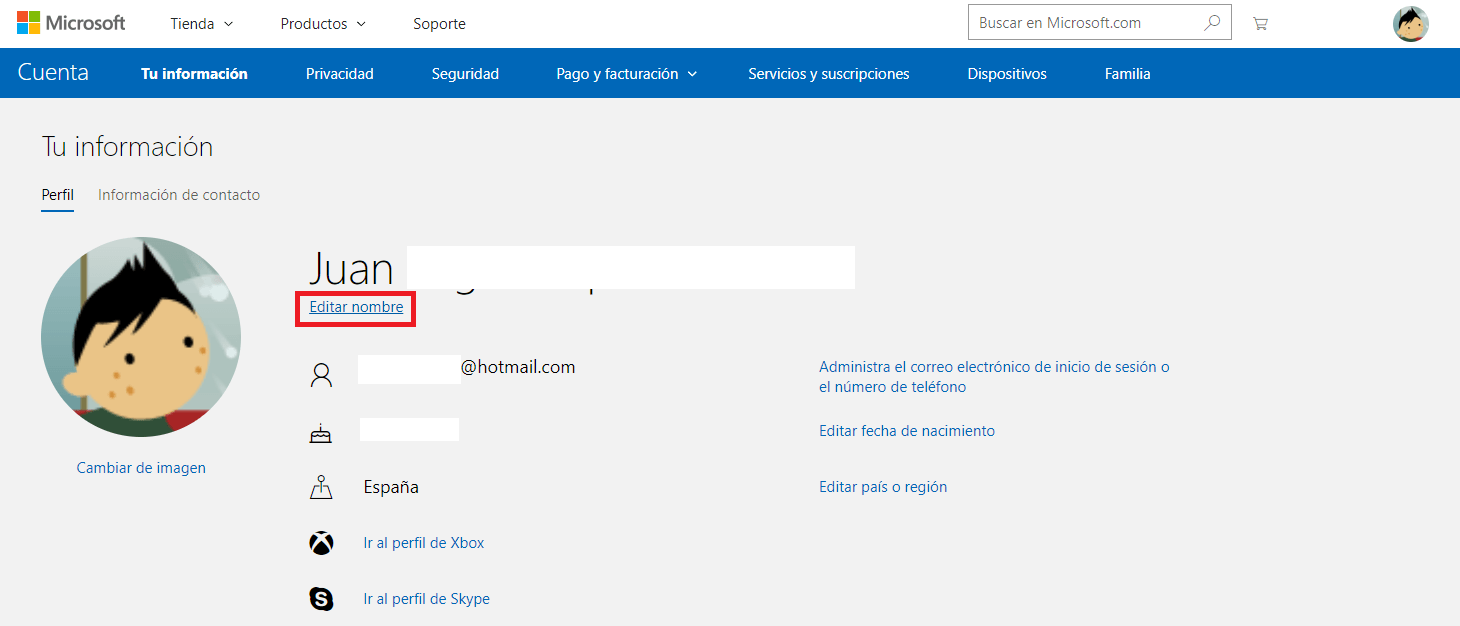
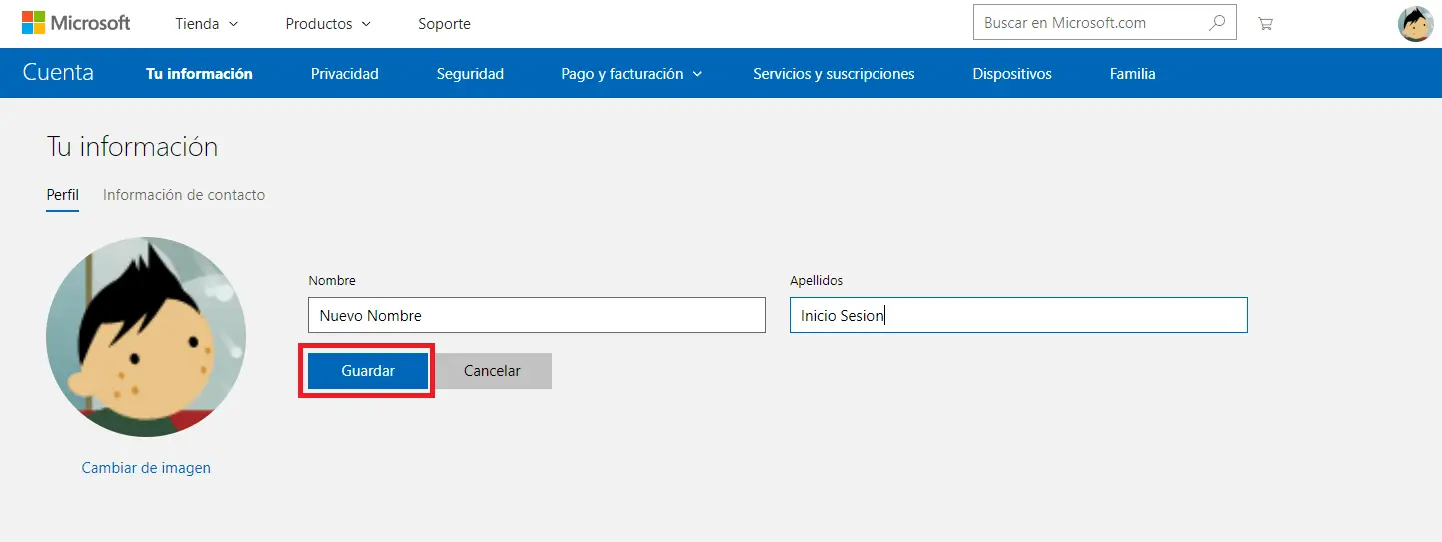
Once the page loads, click Edit name. This will allow you to change the name and surname of your account. Once you've entered the new name for your Microsoft account, don't forget to click on the Save option. From now on, the username displayed on the Windows 10 login screen will have changed and the new saved name is now displayed.
Change the Windows 10 username with a local account.
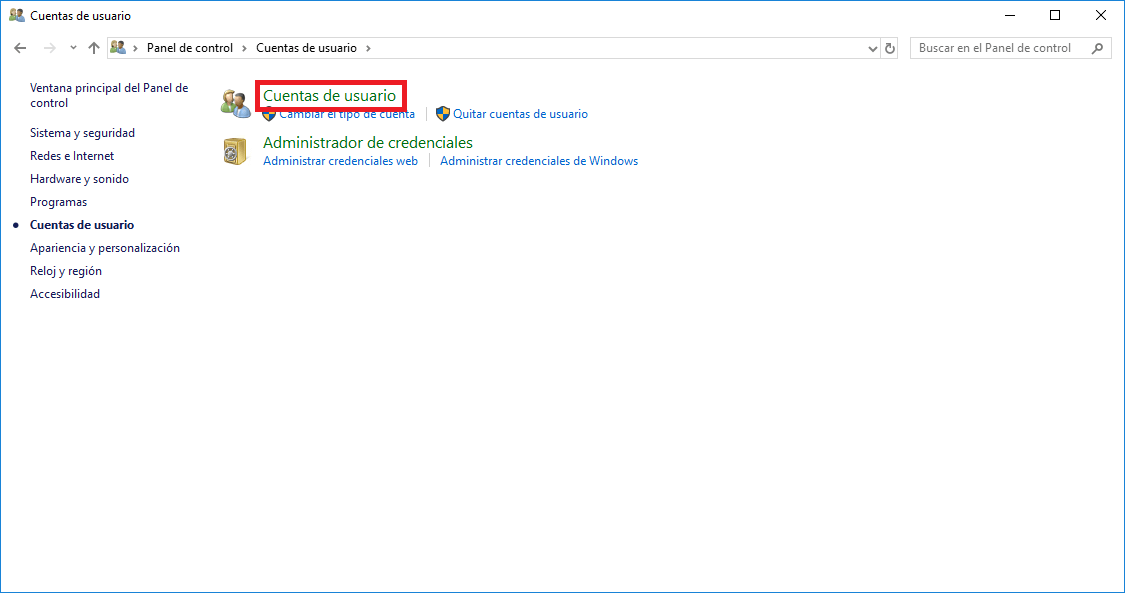
If you have a local account, the process is much easier since all you have to do is access the Windows 10 Control Panel. Once here, access the User Accounts section. Line you will often have to select the local account to which you want to change the username.
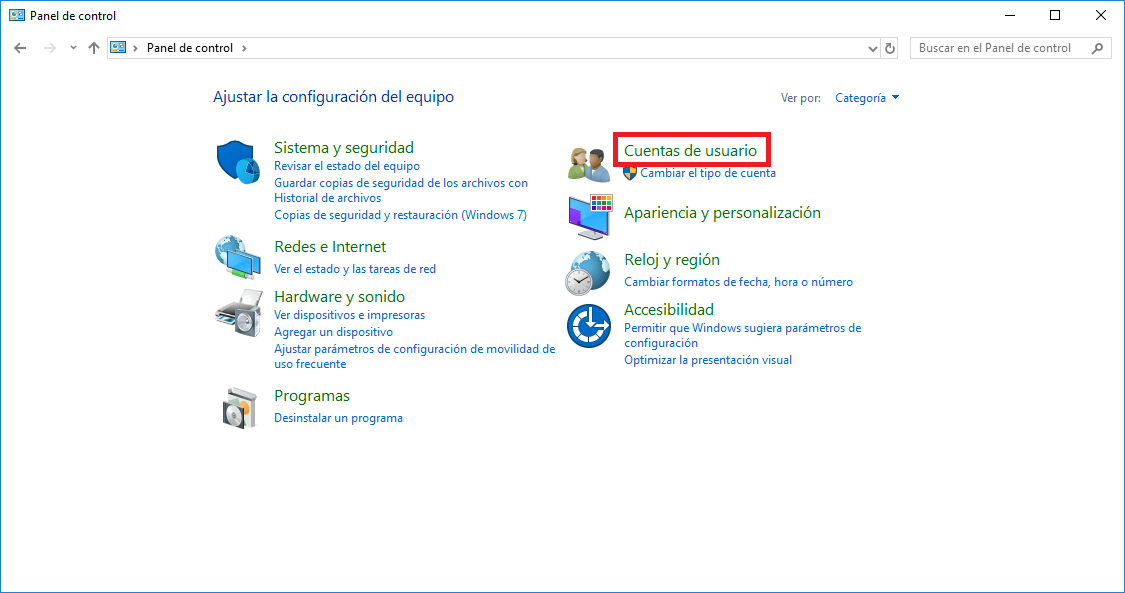
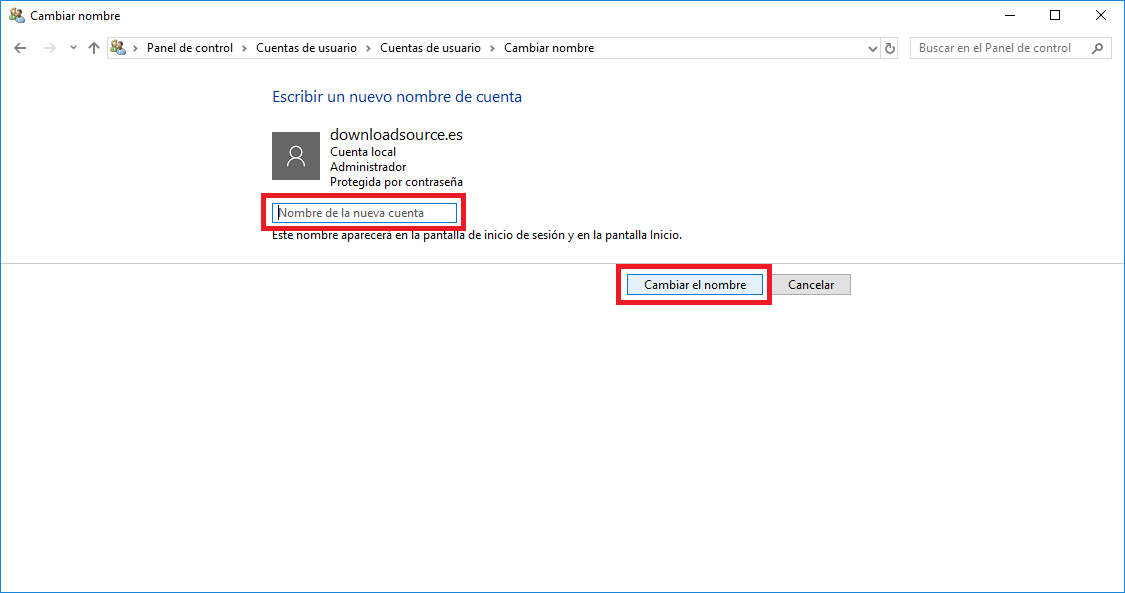
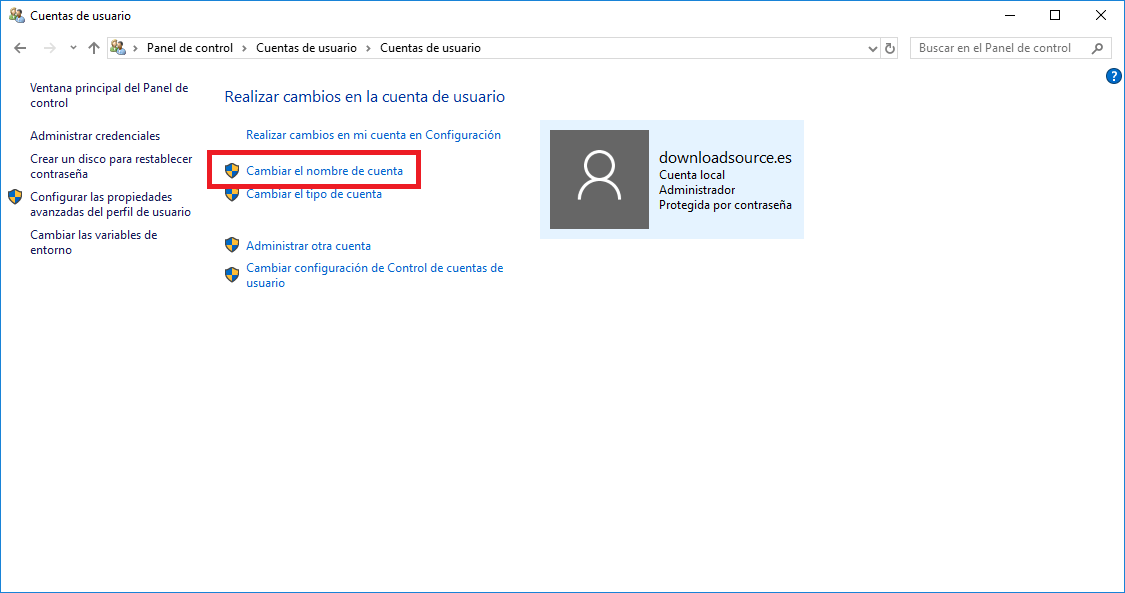
Now you will have to select the option " Change the account name " for which you will need administrator rights. This will bring up a new screen where you can enter a new name for your local Windows 10 account.
When you've entered the new username don't forget to click the Rename button for the changes to take effect. From this moment on, every time you log into Windows 10 with your local account, you will see how the username will be the new configured name.
Without a doubt, the username change should be much easier to carry out. Hopefully in the future in a future update of the Windows 10 operating system this feature will be introduced.
