The Windows 10 operating system and all the previous ones assign an identifying letter to any storage unit connected to your computer, be it internal or external storage. Among the storage devices to which Windows grants an identifying letter are: internal and external hard drives, partitions, optical drives, Flash memory cards, etc.
You may also be interested in: How to join partitions of our hard disk in Windows 10, 8 or 7.
The letters given to the storage devices connected to your Windows computer help users to identify and directly interact with these devices through the operating system. Obviously Windows makes this assignment automatically, which saves us precious time, as it does not have to be done manually every time we connect a device to our PC..
When Windows puts a letter to your memory or storage disk , it will make that device available in Windows File Explorer so that users can access its interior and therefore all its information and files stored inside it.
Although letter a priori is a good thing, some users may not want to display the letter automatically assigned to your computer. The reasons for this decision can be very varied, for example, hiding a storage unit or partition from a hard disk that you do not want to be accessible from the Windows operating system..
Fortunately, although Windows automatically assigns a letter to your hard drive or USB memory, it also offers users the possibility to delete or delete the assigned letter , which will cause said partition, hard drive, USB memory, etc. is hidden in the operating system. Consequently, that device or partition will no longer be displayed in Windows Explorer.
Having said this, we show you step by step how to remove the letter from partitions or hard drives connected to your Windows 10, 8 or 7 computer :
How to delete the drive letter using Disk Manager
All versions and editions of Windows include the Disk Management Tool. To access it, it will be enough to search for said tool using the term: Create and format partitions of the hard disk. Once the tool is located, you will have to double-click on the search result to open the tool..
Alternative: You can also access Disk Manager using the keyboard shortcut: Windows key + R. When the Run tool is displayed, enter the command diskmgmt.msc and press Enter.
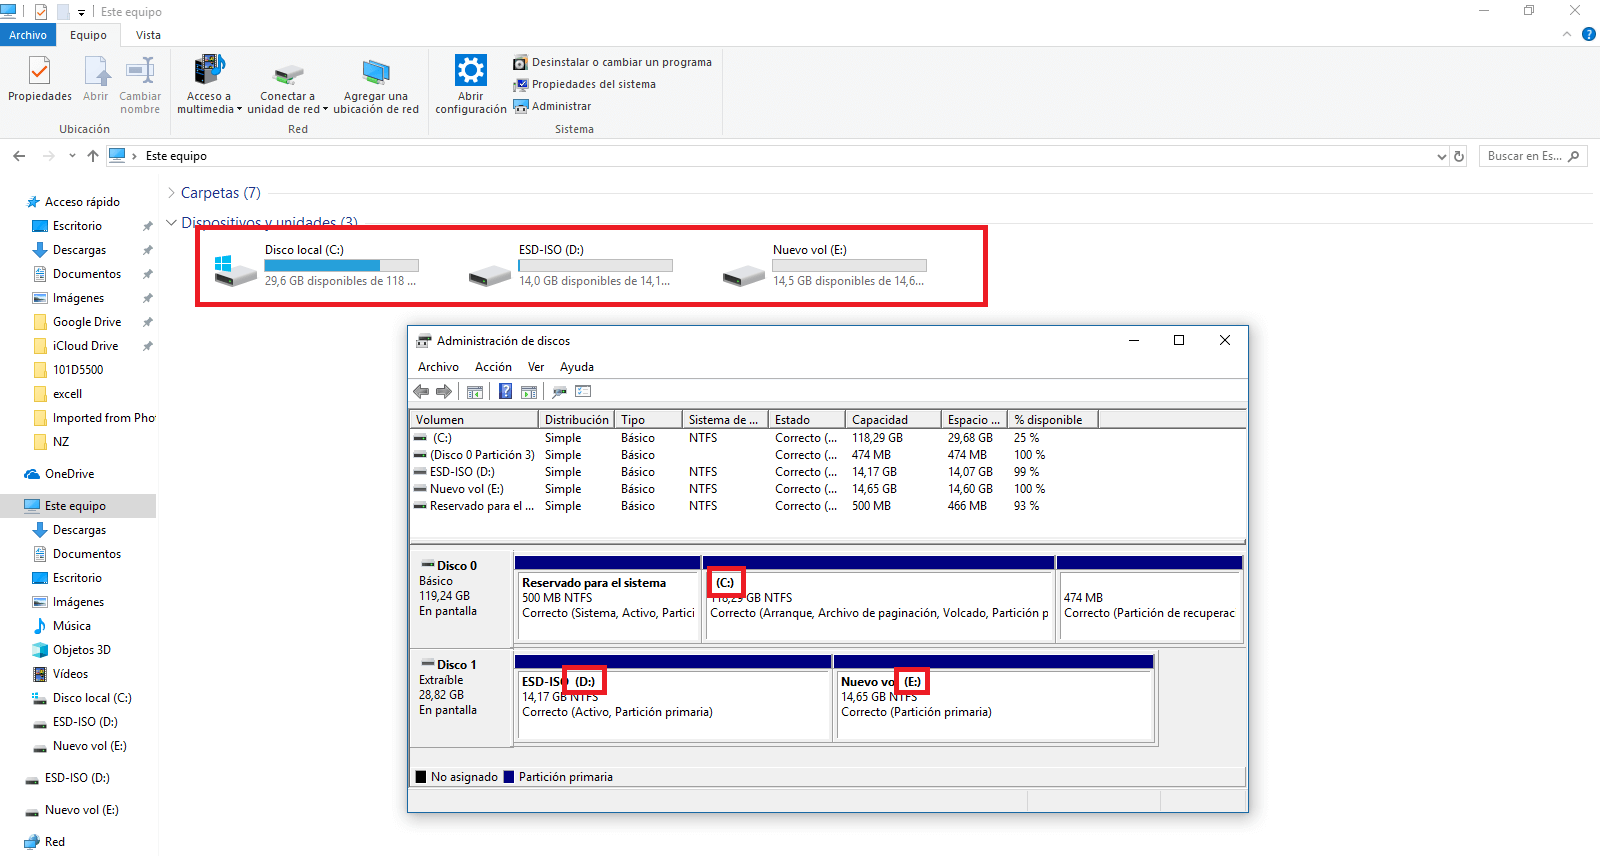
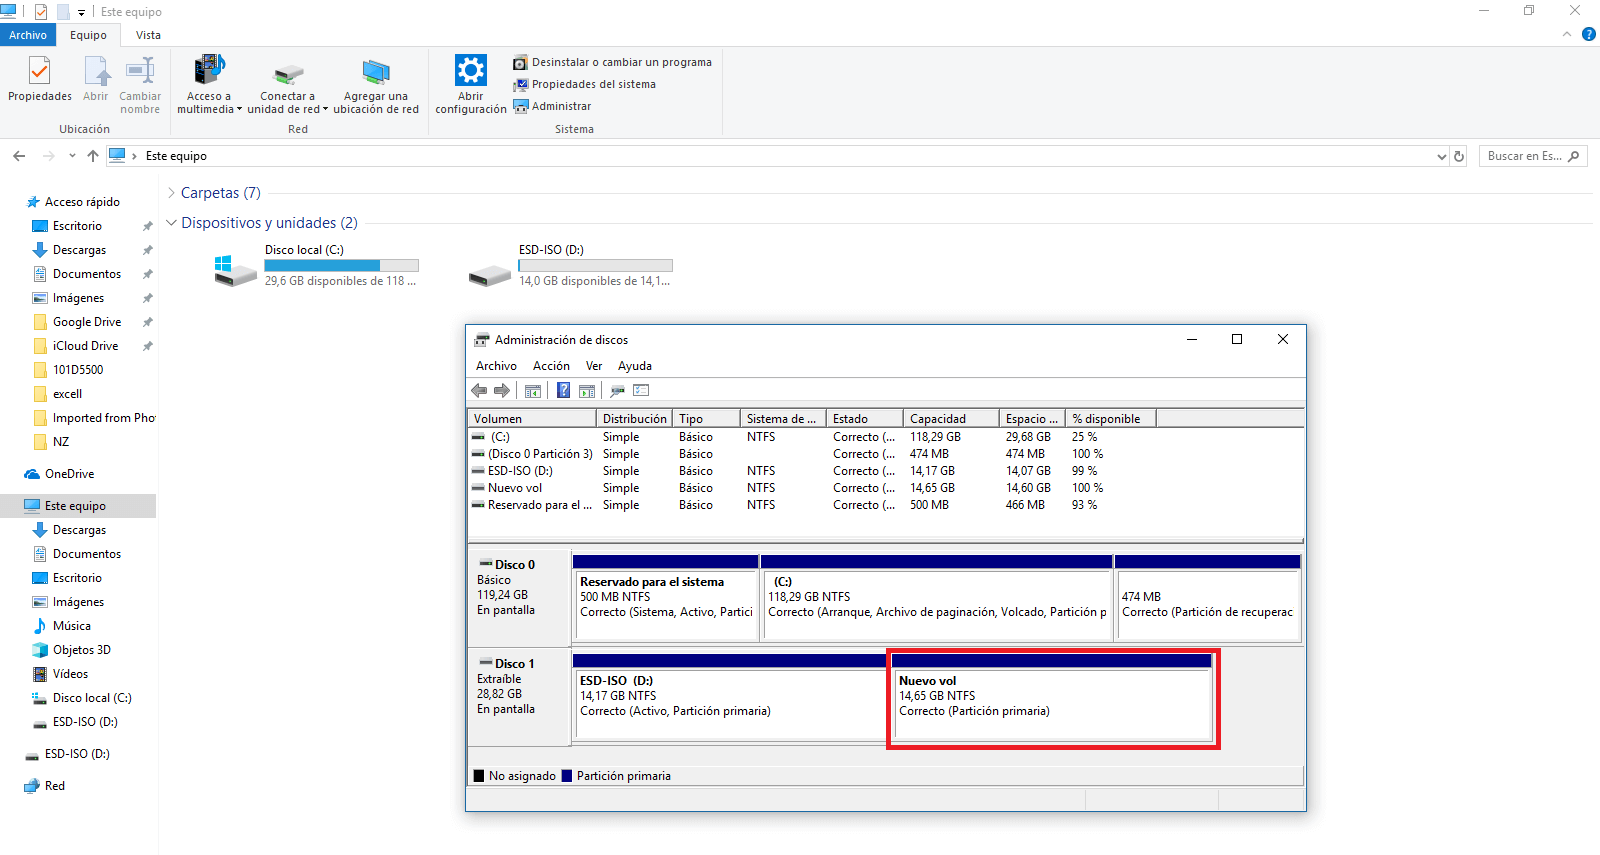
When the tool screen is displayed, you will see all the connected hard drives on your Windows computer as well as all their partitions (volumes). At the bottom of the Disk Manager screen you will find all the letters assigned to each of the available disks and partitions. It should also be noted that in the event that any partition or drive does not have an assigned letter, it will also be shown in the Disk Management tool.
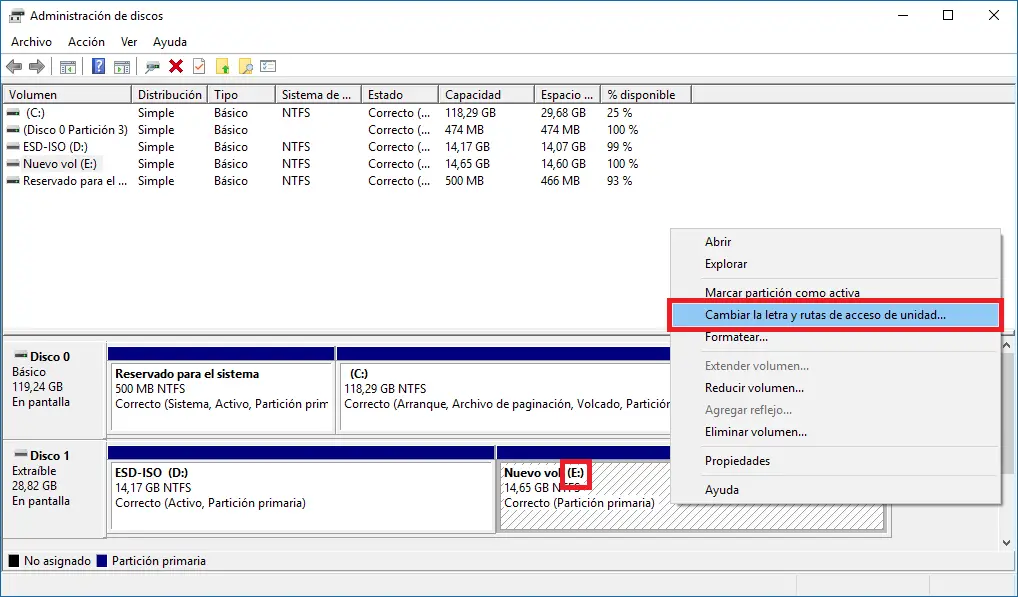
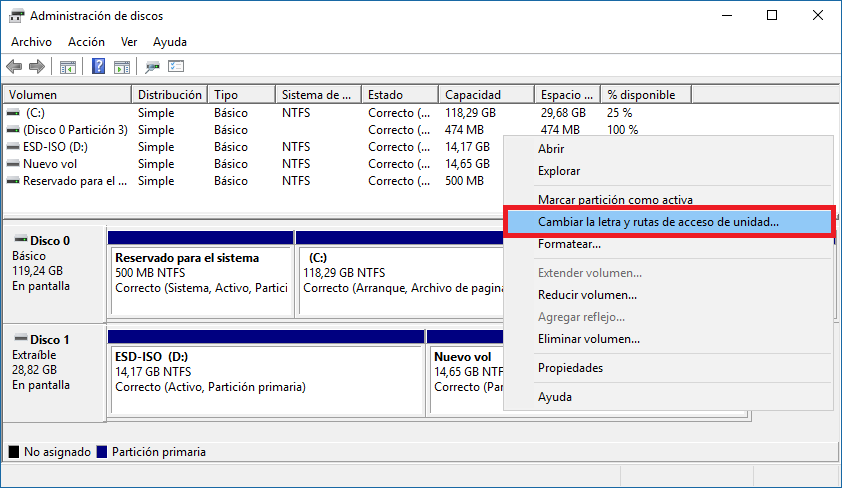
Here you will have to locate the partition or drive to which you want to remove the letter assigned by Windows and click the right mouse button so that when the context menu is displayed, select the option: Change the drive letter and paths .
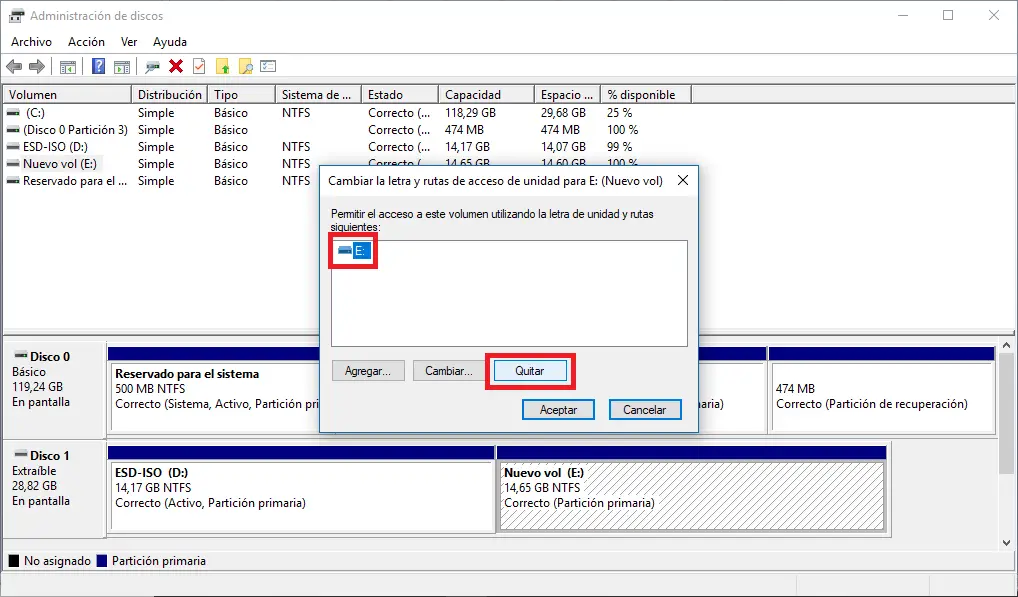
This will cause a small window to be displayed in which you must select the letter you want to delete. A selected one, you will have to click on the Remove button.
This, in turn, will cause a warning message to appear, in which you can read:
"Some programs whose operation depends on drive letters may not run correctly. Are you sure you want to remove this drive letter?"
In this dialog window, you must click on the Yes button to confirm the deletion of the letter of that drive or partition. Now you can go to Windows File Explorer to check how the partition or drive stops showing in the interface.
How to add the drive letter using Disk Manager
The process of removing the letter from a USB memory, hard disk or partition is completely reversible, so we can reassign a letter. To do this, you will have to right-click on the partition or drive without a letter, and then click on the option: Change the drive letter and paths
This will open a small window in which you will have to click on the Add button . This in turn a new window in which you must check the option: Assign the following drive letter :. Obviously you can indicate the letter you want to assign as long as it is no longer in use.
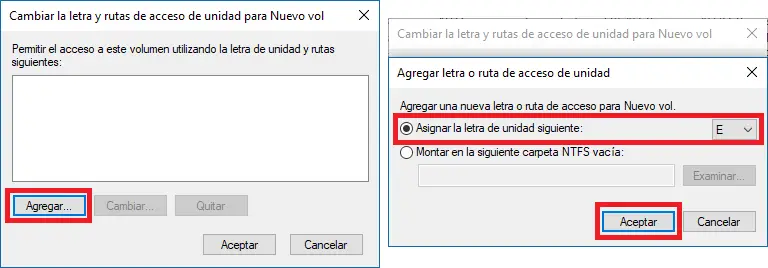
Once the letter is indicated, click on the OK button. This will automatically make the drive or partition available again from the Windows operating system for access and use from Windows File Explorer.