If you usually surf the internet using the Google Chrome browser from your computer or laptop, surely once in a while visiting a website, you have received a notification in the upper left part of the window. Specifically, this notification is displayed just to the left of the URL address bar. These notifications are usually requests for access to your computer's microphone, webcam, etc. such as:
- Request: The site_Web wants to show Notifications.
- Request: The site_Web wants to use the Microphone.
- Request: The Web site wants to use the WebCam.
- Request: The site_Web wants to access your location.
- etc
This can be quite annoying, especially if you are obsessed with privacy, since on some occasions you may mistakenly click on this notification and unknowingly activate some of the requests. These notifications do not belong to the Google Chrome web browser, but are sent by the website you are currently visiting. The Google Chrome browser only shows you requests from the Web ..
Among the different requests that you may receive in Google Chrome from a website , you will find: Request to send notifications, Request to access your computer's webcam, Request to access your computer's microphone, etc. It is true that the moment you receive the request from a website in Chrome, you can choose to Allow or Block such access by simply clicking on the buttons shown in the Request.
However, this can be somewhat tiresome, so you can decide to disable the sending of notifications by websites when they are visited from Google Chrome. Fortunately, the Google Chrome browser allows you to disable these types of notifications / requests . If you want to know how to do it then we will show you step by step:
How to disable requests for web pages in the Google Chorme browser.
- The first thing will be to access your Google Chrome browser to row followed by clicking on the icon in the form of three vertical dots. In the displayed menu you must select the Configuration option ..
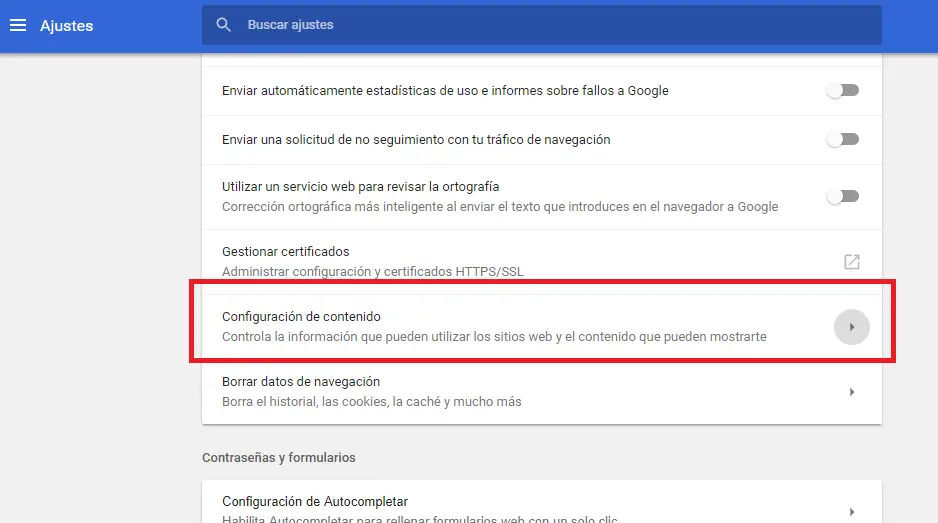
- This will take you to the General settings of Google Chrome where you will have to scroll down and click on Advanced Settings. Now look for the section: Content Settings .
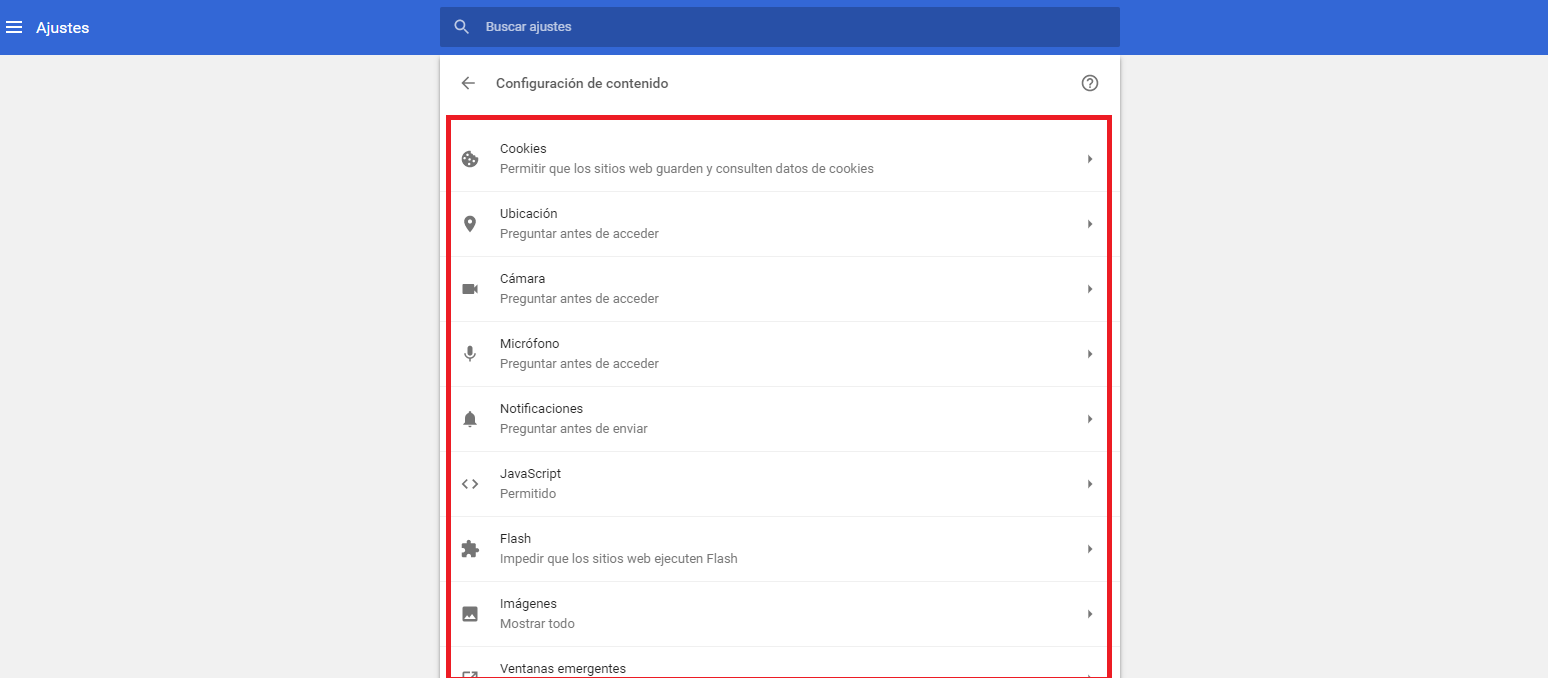
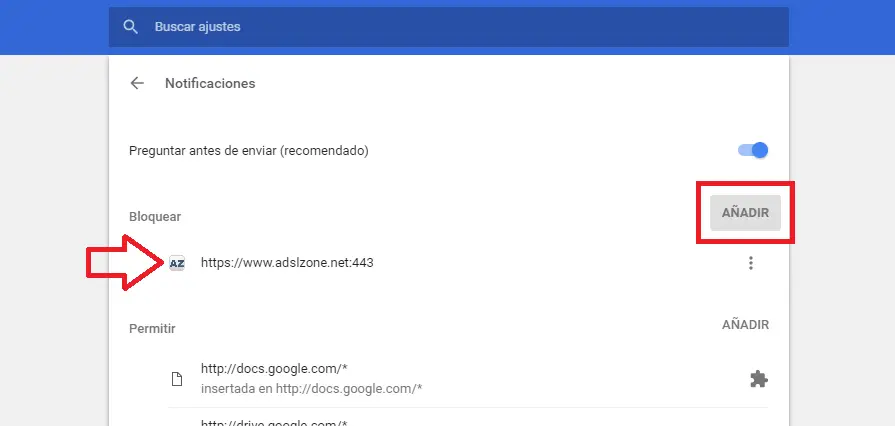
- This will give you access to a list with all the contents that a Web page will send you an access or activation request. Here you can select each of the displayed options to deactivate the option: Ask before accessing (recommended) or Ask before sending (recommended).
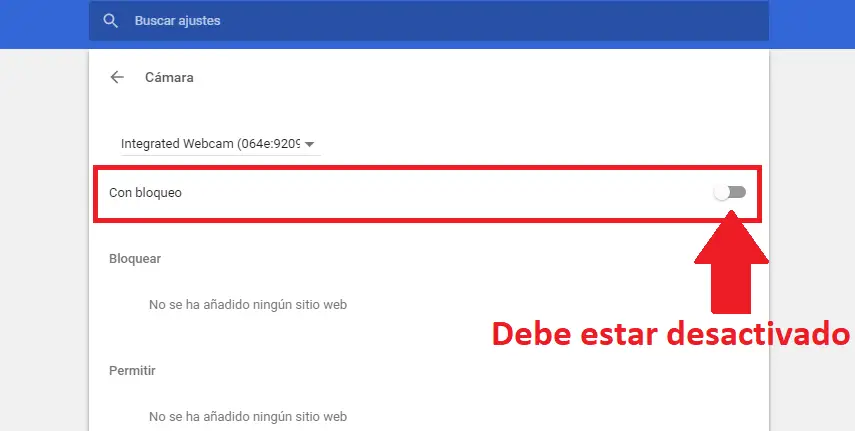
- When deactivating these options, they will be shown as: With lock . It will be from this moment when you will stop receiving the request message. All requests will be automatically blocked without being asked about it..
Obviously if you only want to stop receiving a specific request such as access to your webcam, you can always deactivate this option specifically and keep the rest enabled. On the contrary, if you want no request to be displayed, it will be enough to Block all the contents shown in the configuration list.
How to stop receiving access requests or notifications from a specific website:
Google Chrome settings also allow you to disable notification and access messages for a specific website instead of all visited websites. Thanks to this, we can stop receiving annoying messages when we visit a specific website, but they will be shown when we visit other web pages. If you want to know how to carry out this configuration, we recommend reading the following post: How to disable notifications and access messages from a specific website in Google Chrome
All the changes you make are completely reversible, that is, if at any time you want to reverse them, you can do it by following the same steps indicated in this tutorial. The only difference is that instead of deactivating the indicated option, you will have to activate it so that it is displayed as: Ask before sending or Ask before accessing.