The amount of emails we can receive inbox from our email service can be huge, however not all emails received are important or wanted. In fact if you gave or used your email account to subscribe to any service, platform, etc. Most likely, your tray will fill up with emails called spam (ads or hoaxes). Fortunately, most post managers and applications have filters to remove these emails from your inbox and the Mail app on iPhone or iPad with iOS could not be less.
You may also be interested: How to receive notifications from the Mail app on iPhone when we receive a new Mail. (IOS)
If you are the owner of an iOS device, be it iPhone or iPad , you will know that by default the Mail app is incorporated, which is nothing more than an email account manager from which to receive, read and send emails from all the accounts of emails you have and everything from a single app. As we have mentioned, the Apple Mail app also has the possibility of creating filters that send Spams emails directly to the Unwanted folder ..
It is true that at first glance it can be a bit messy, however, the automatic configuration of sending mail directly to the spam folder is very simple and this will allow you to keep the inbox completely clean of unnecessary mail, being able to pay attention only to those that you consider appropriate.
In addition, the anti-spam filter of the Mail app can be complemented with the VIP functions and Indicators to not only eliminate spam from your inbox but also to highlight in that tray those emails that are more important than the rest..
Having said this, below we show you how to configure the Mail app on our iPhone or iPad to automatically send certain specific emails to the Spam folder :
How to automatically send spam messages to the Junk folder in the iPhone Mail app. (iOS)
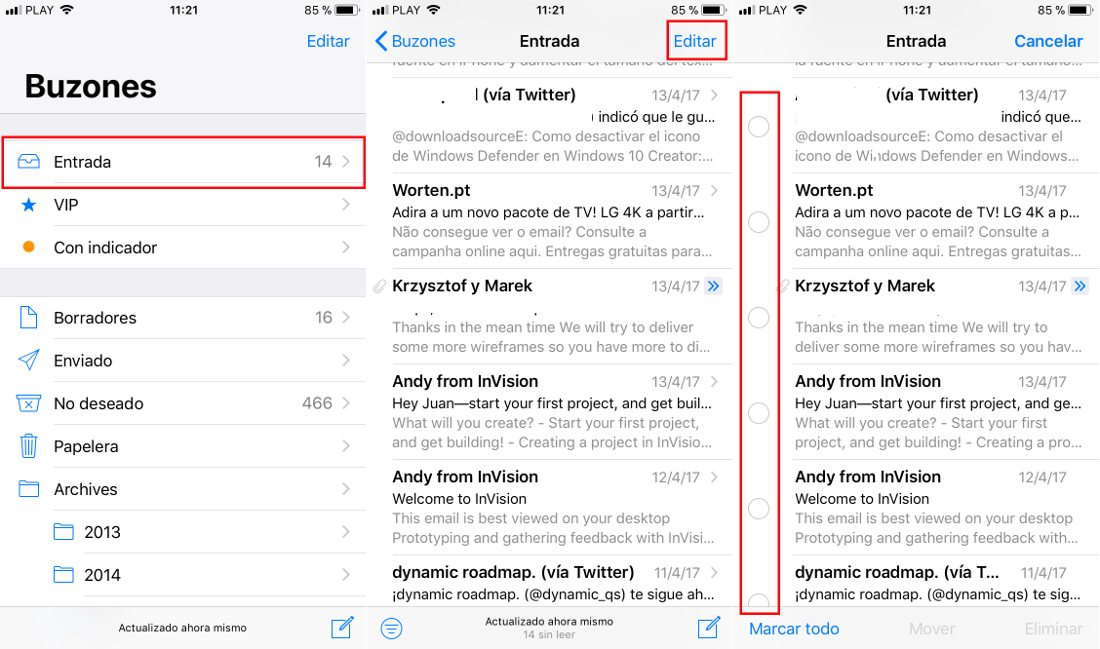
The first thing we will have to do is access the Mail app on our iOS device and select the email account we want to configure with the Anti-Spam filter . Once inside, go to the inbox and locate the email or emails that you want to always and automatically send to the Unwanted folder . Here we will have 2 options:
- Configure anti-spam filter for several different emails in the iPhone Mail app. (iOS)
1. Select the Edit option located in the upper right part of the screen, this will cause a circle to appear along the email list which you must check. Obviously you can mark one or several emails according to your preferences.
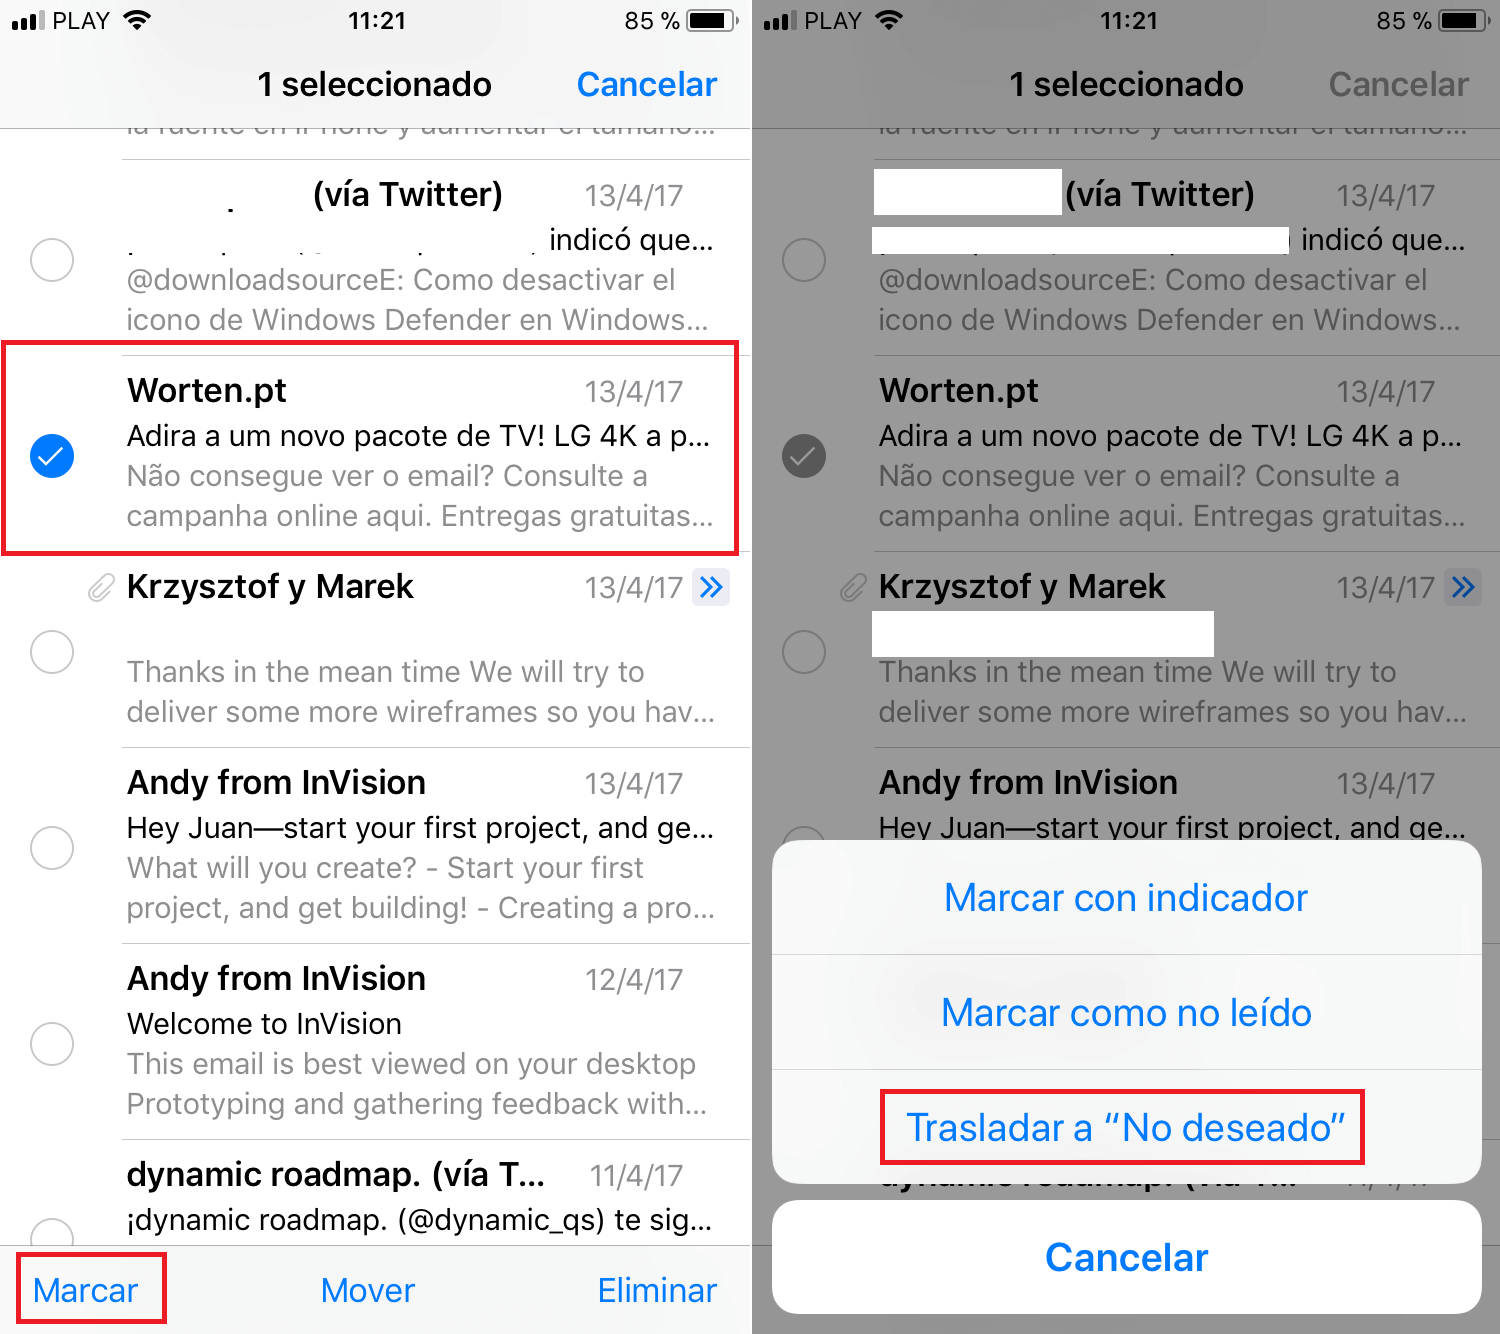
2. Once you have selected the emails that you consider Spam you will have to click on the Dial option located in the lower left corner of the screen, which will cause a menu to appear in which you will have to select the option :; Transfer to "Unwanted"..
3. All these emails will be automatically transferred to the Unwanted tray, but not only that since from now on, any new email received from any of the addresses where you applied the filter, will be sent to the spam folder directly.
- Configure anti-spam filter for a specific email in the iPhone Mail app. (iOS)
1. If you prefer to do it individually, when you go to your email inbox, you will have to open the spam that you want to automatically send to the Spam folder. Once inside the email, click on the flag icon in the lower left corner of the screen.
2. In the contextual menu shown below you will have to select the option: Move to “Unwanted” . From then on, emails received from this sender will not be shown in your main inbox but will be automatically sent to the spam box.
- How to unmark an unwanted email, so that it appears in the inbox of the iPhone Mail app. (iOS)
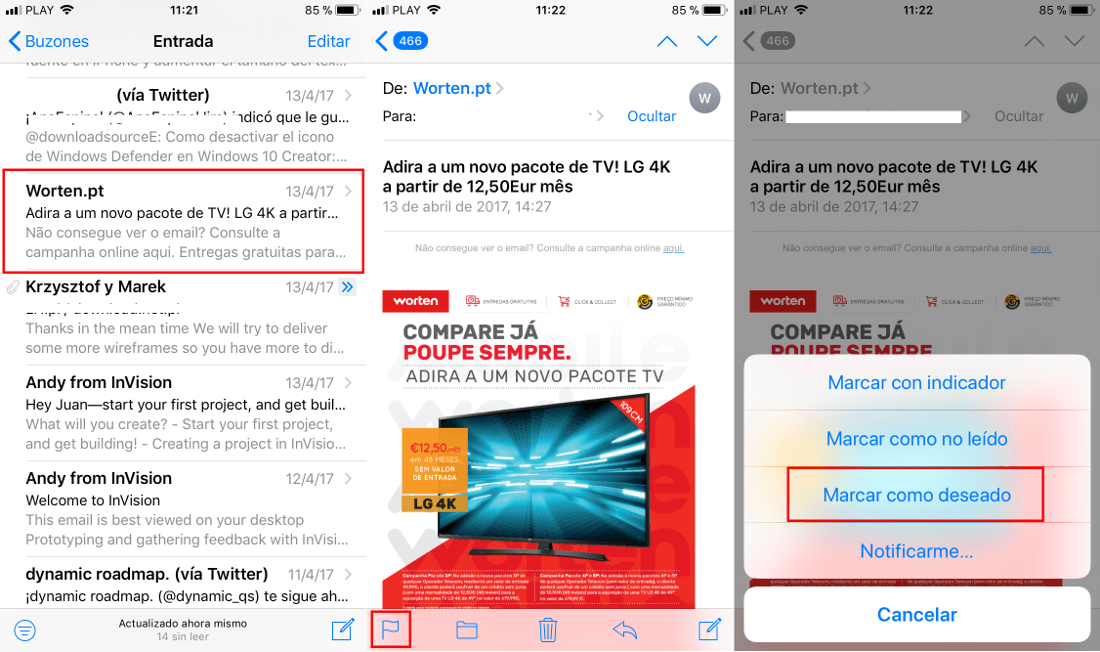
1. In this case to revert the configuration of an email that has been configured as Spam, we will have to open our Mail app, select the email account that we want to configure and go to the Unwanted folder.
2. Here you will find a list with all the emails that have been classified as Spam and therefore are automatically sent to the Unwanted folder . In this list you will have to find and open the email from whose sender you do want to receive in the inbox.
3. Once opened, click on the tray icon located at the bottom left to display the menu where you will have to select the option: Mark as desired.
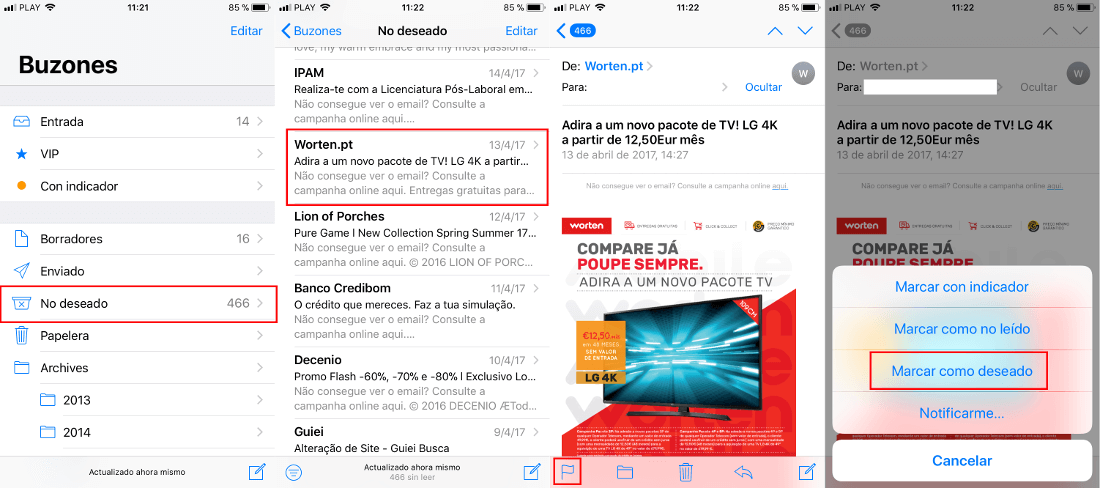
From that moment on, said email will be sent back to your inbox of the Mail app and the subsequent emails received from its sender will continue to be displayed in that inbox instead of being automatically transferred to the Unwanted folder.