We continue to tell you the benefits of the new features incorporated in the latest update of Windows 10 Fall Creators, especially in terms of security and protection of your computer. In fact, a large number of new features have focused mainly on the Windows Defender Security Center. An example of these features is for example Windows Defender network protection in Windows 10.

You may also be interested in: How to activate and configure Windows 10 Defender Vulnerability Protection.
The network protection is a function that complements and enhances the lock screen SmartScreen Windows Defender as it is able to block outgoing traffic (HTTP and HTTPS) that connects to resources that have low or bad reputation. Windows 10 network protection belongs to Windows Defender vulnerability protection ..
However, it should be noted that in order to take advantage of Network Protection, you must have Windows Defender activated. But not only activated since you must also have real-time protection enabled since it is what will allow you to control all the connections you make at the exact moment you make them.
Having said this, we want to show you in detail various methods by which we can activate and configure the default Windows Defender network protection in Windows 10 Fall Creators:
Enable and configure Windows Defender network protection from the local Group Policy editor:
Owners of Windows 10 Fall Creators computers can use the local Group Policy Editor to enable the network protection feature. However, you should bear in mind that the owners of the Home version of Windows 10 do not have access to this tool, so only users of the Pro or Enterprice versions will be able to use this method..
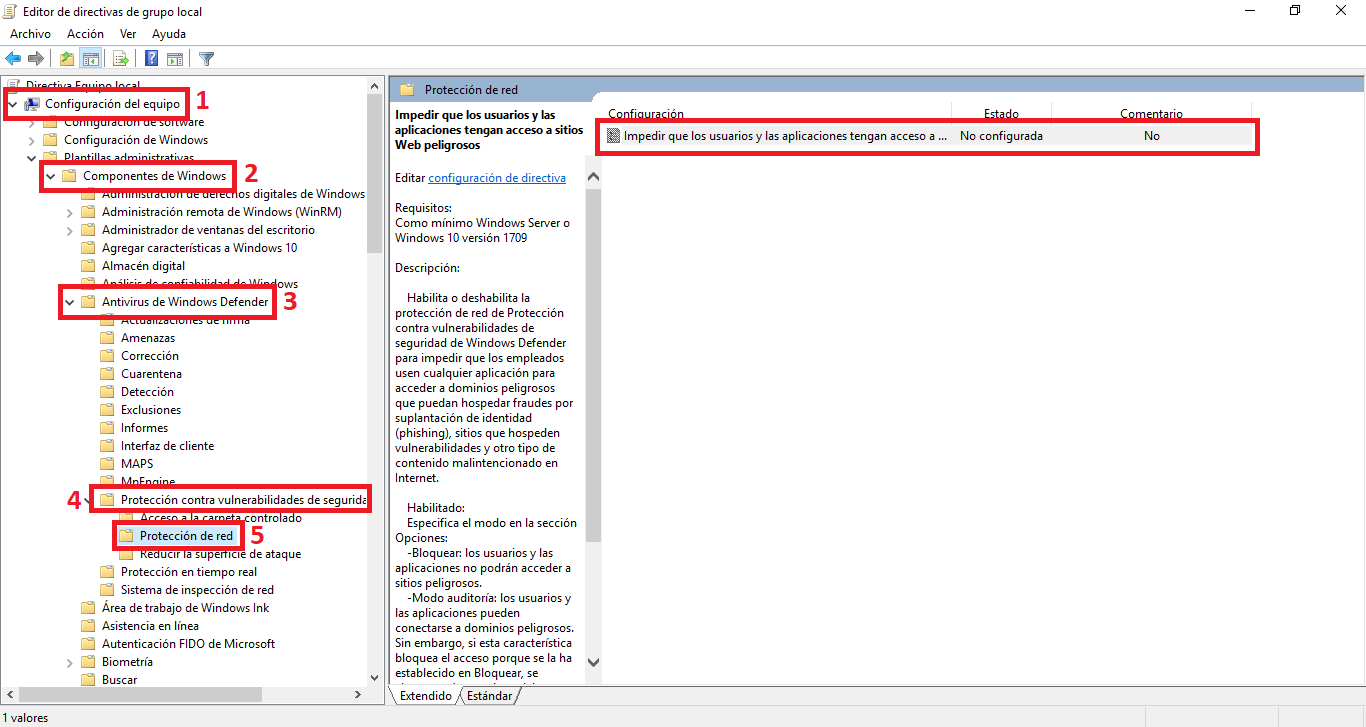
To do this we will have to use the shortcut: Windows key + R and in the Run tool window you must enter and access the following command: gpedit.msc . This will open the local group policy editor window in which you will have to go to: Local Computer Policy> Computer Configuration> Administrative Templates> Windows Components> Windows Defender Antivirus> Protection against Windows Defender security vulnerabilities > Network protection.

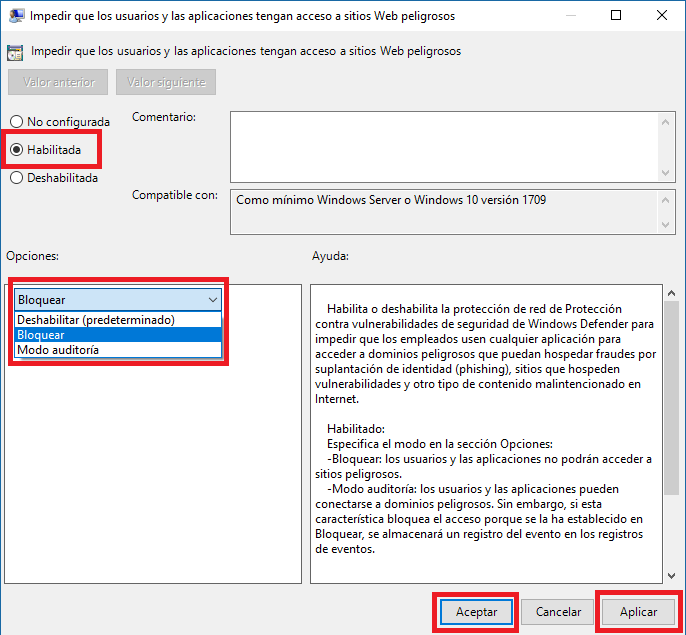
Here is the option: " Prevent users and applications from accessing dangerous websites " which you will have to double-click with the left mouse button, which in turn will open a new window in the which by default is shown as Not Configured. In this window you must check the Enabled option. Once marked as enabled, in the options section you will have to open the drop-down menu to select one of the possibilities according to your preferences:
Block: Malicious IP addresses and domains will be blocked.
Audit Mode - Records blocked events but does not block these events.
When you have configured the option you want, you must click the apply button and then click OK to save the changes to the new configuration.

Configure Windows Defender network protection from PowerShell:
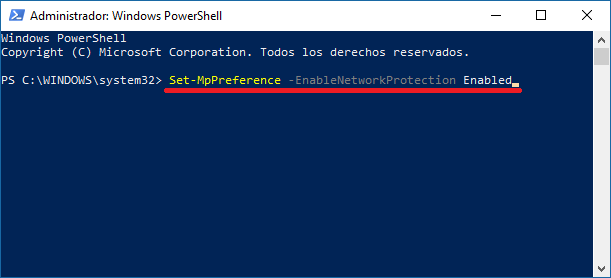
In this method we will use the default PowerShell tool to configure Windows Defender network protection. To open this tool with managed rights, we will use Windows search. Once PowerShell is shown among the search results, you will have to right-click on the line and then select the option Open as Managed..
Once the PowerShell window is displayed, you will need to enter one of the following commands:
Block :
Set-MpPreference -EnableNetworkProtection Enabled
Audit mode :
Set-MpPreference -EnableNetworkProtection AuditMode

Undoubtedly, this new network protection feature of Windows Defender, plus many other new options included in the Windows 10 Fall Creators update make Microsoft's default antivirus a security tool to take into account and has nothing to envy. to other antivirus or security programs in the sector.