Last June, Snapchat launched a new function known as Snap Map thanks to which users could know the Snaps that were made from specific places. These Snap could be located through a Map in which colored areas were drawn indicating the greater or lesser number of Snaps publications. This function had been received with some enthusiasm, especially for event organizers, since in this way users could locate it on the map as well as see snaps on it.
You may also be interested: How to use Snapchat's Multi-Snap function to record longer videos.
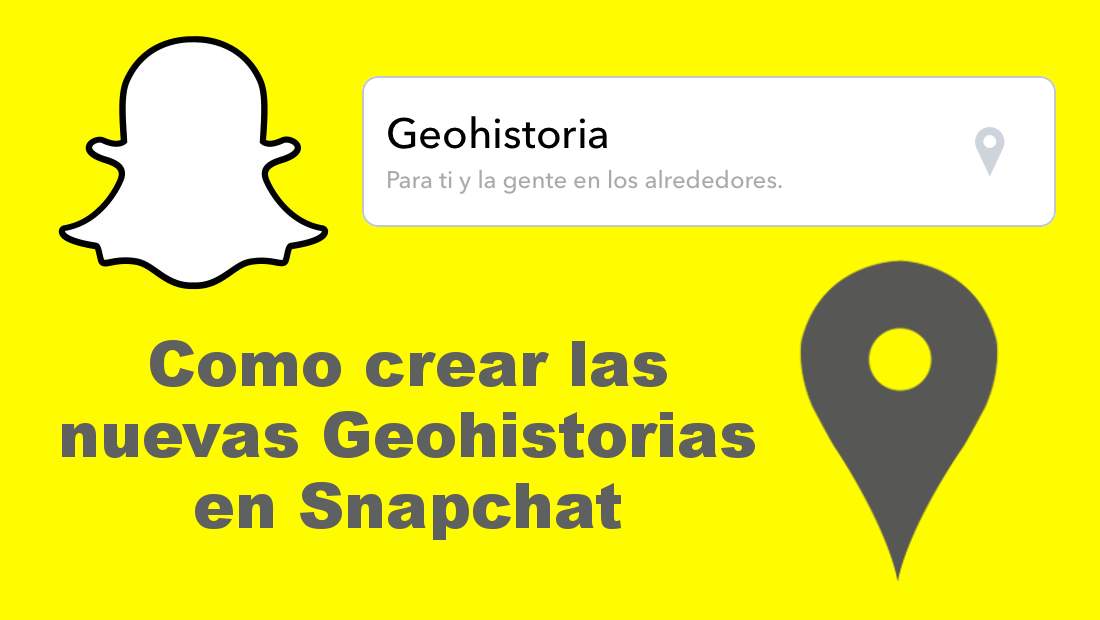
However, until now, there was no possibility to create locations (Geo Histories) so that they would appear to other Snapchat users when they are close to the created location. Snaphat's New Geohistories is a feature that allows you to create stories that are visible only to people within a specific geographic parameter..
Users who are within the created geographical area will not only be able to view the snaps but you will also be able to add Snaps to that story. As we have mentioned, this new option is oriented especially for events or parties, since you can create a GeoHistory so that all participants in the party can add Snaps to that story.
Having said this, we want to show you step by step how to create GeoStories with Snapchat on both iOS and Android devices:
How to use Snapchat's new Geohistories feature on iOS and Android.
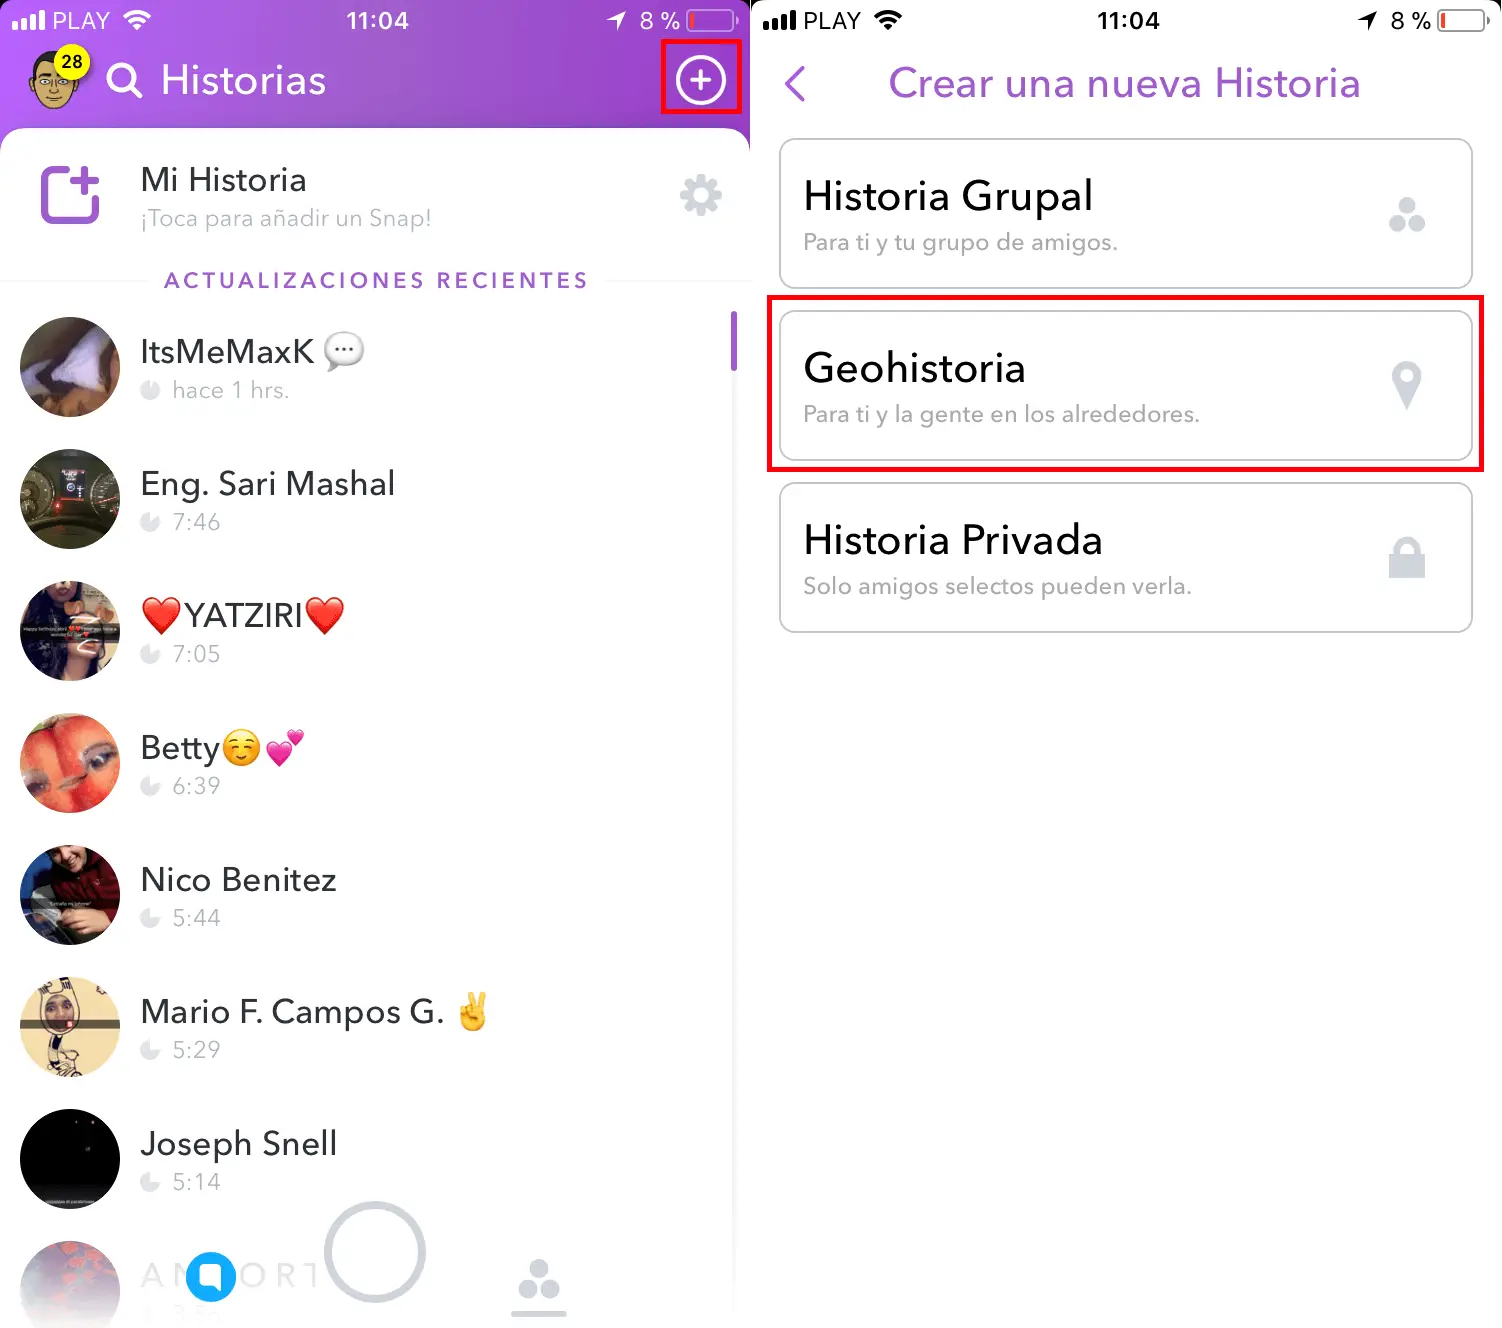
The first thing we will have to do is update our Snapchat application to the latest version for screed followed by clicking on its icon to open it. Once the camera is displayed you will have to swipe the screen from right to left to access the Snapchat Stories section. This will be where you must click on the + icon located in the upper right corner of the screen. After clicking on this icon, a screen with three options will be displayed. In these options you will now find the Geohitoria (for you and people in the surroundings) in which you must click. This will take you to a new screen where we can customize the location that we are going to create on Snapchat..
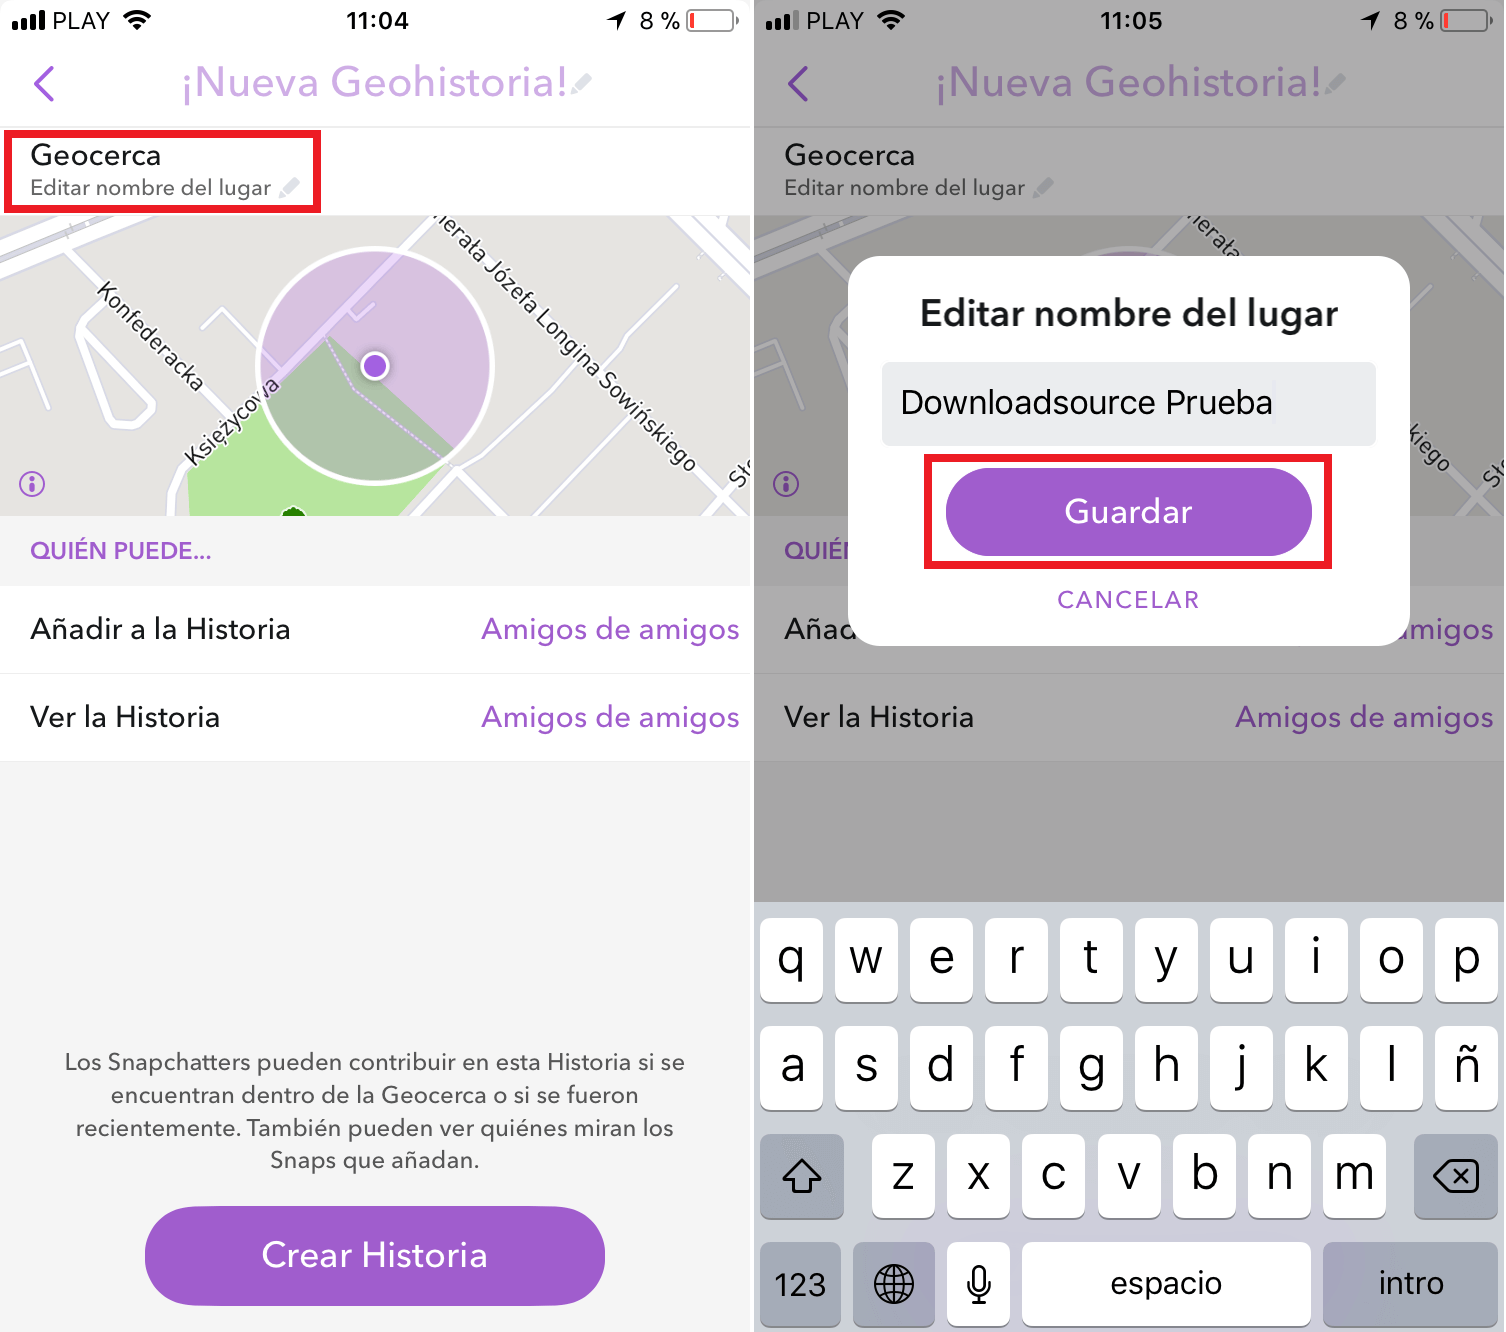
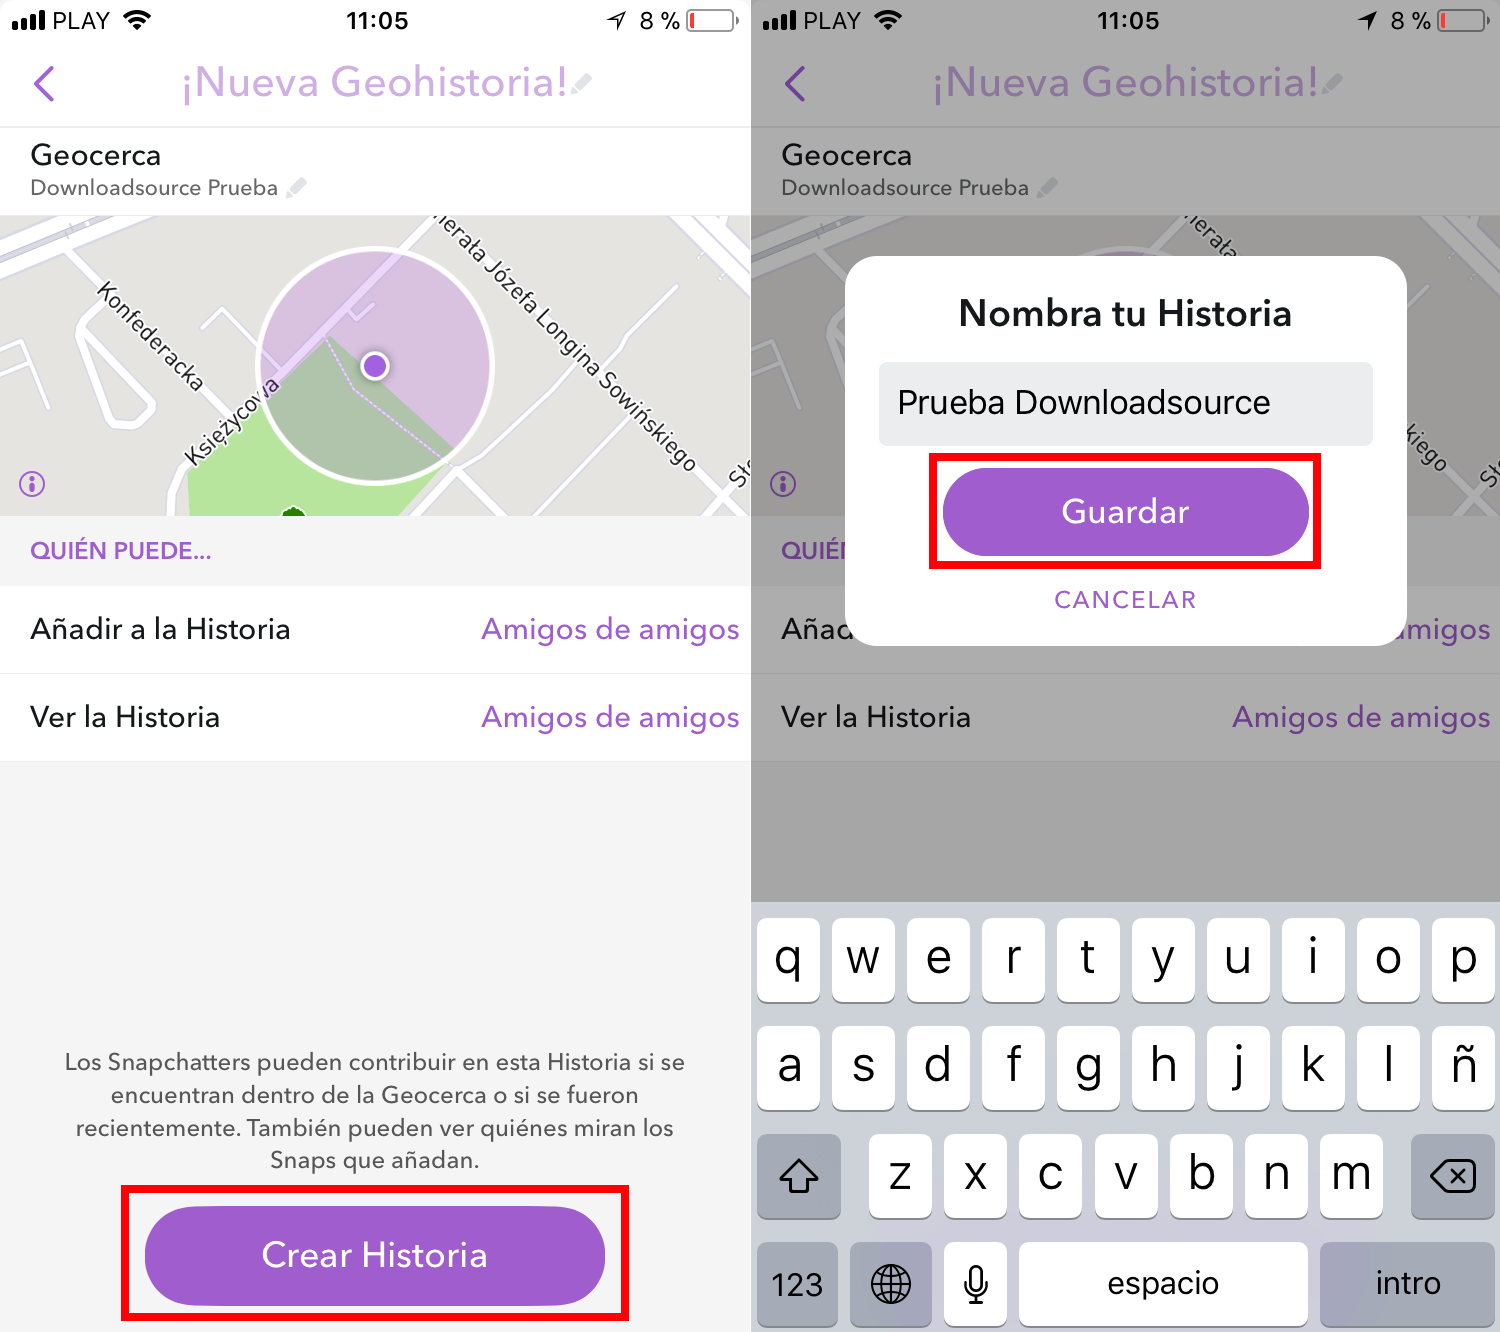
On this screen you can provide a name to the place that we are going to create by pressing on the option: Edit place name. This will bring up a small window where you can enter the name you want to give to that location. Don't forget to click on the purple Save button.
Line followed, in the section: Who can ... you can visualize the privacy that the Geohistory you are creating will have. This shows who can add snaps to the Stories or who can see the Story. If you want a different configuration you can click on each of these options and choose between the options: Friends or Friends of friends.
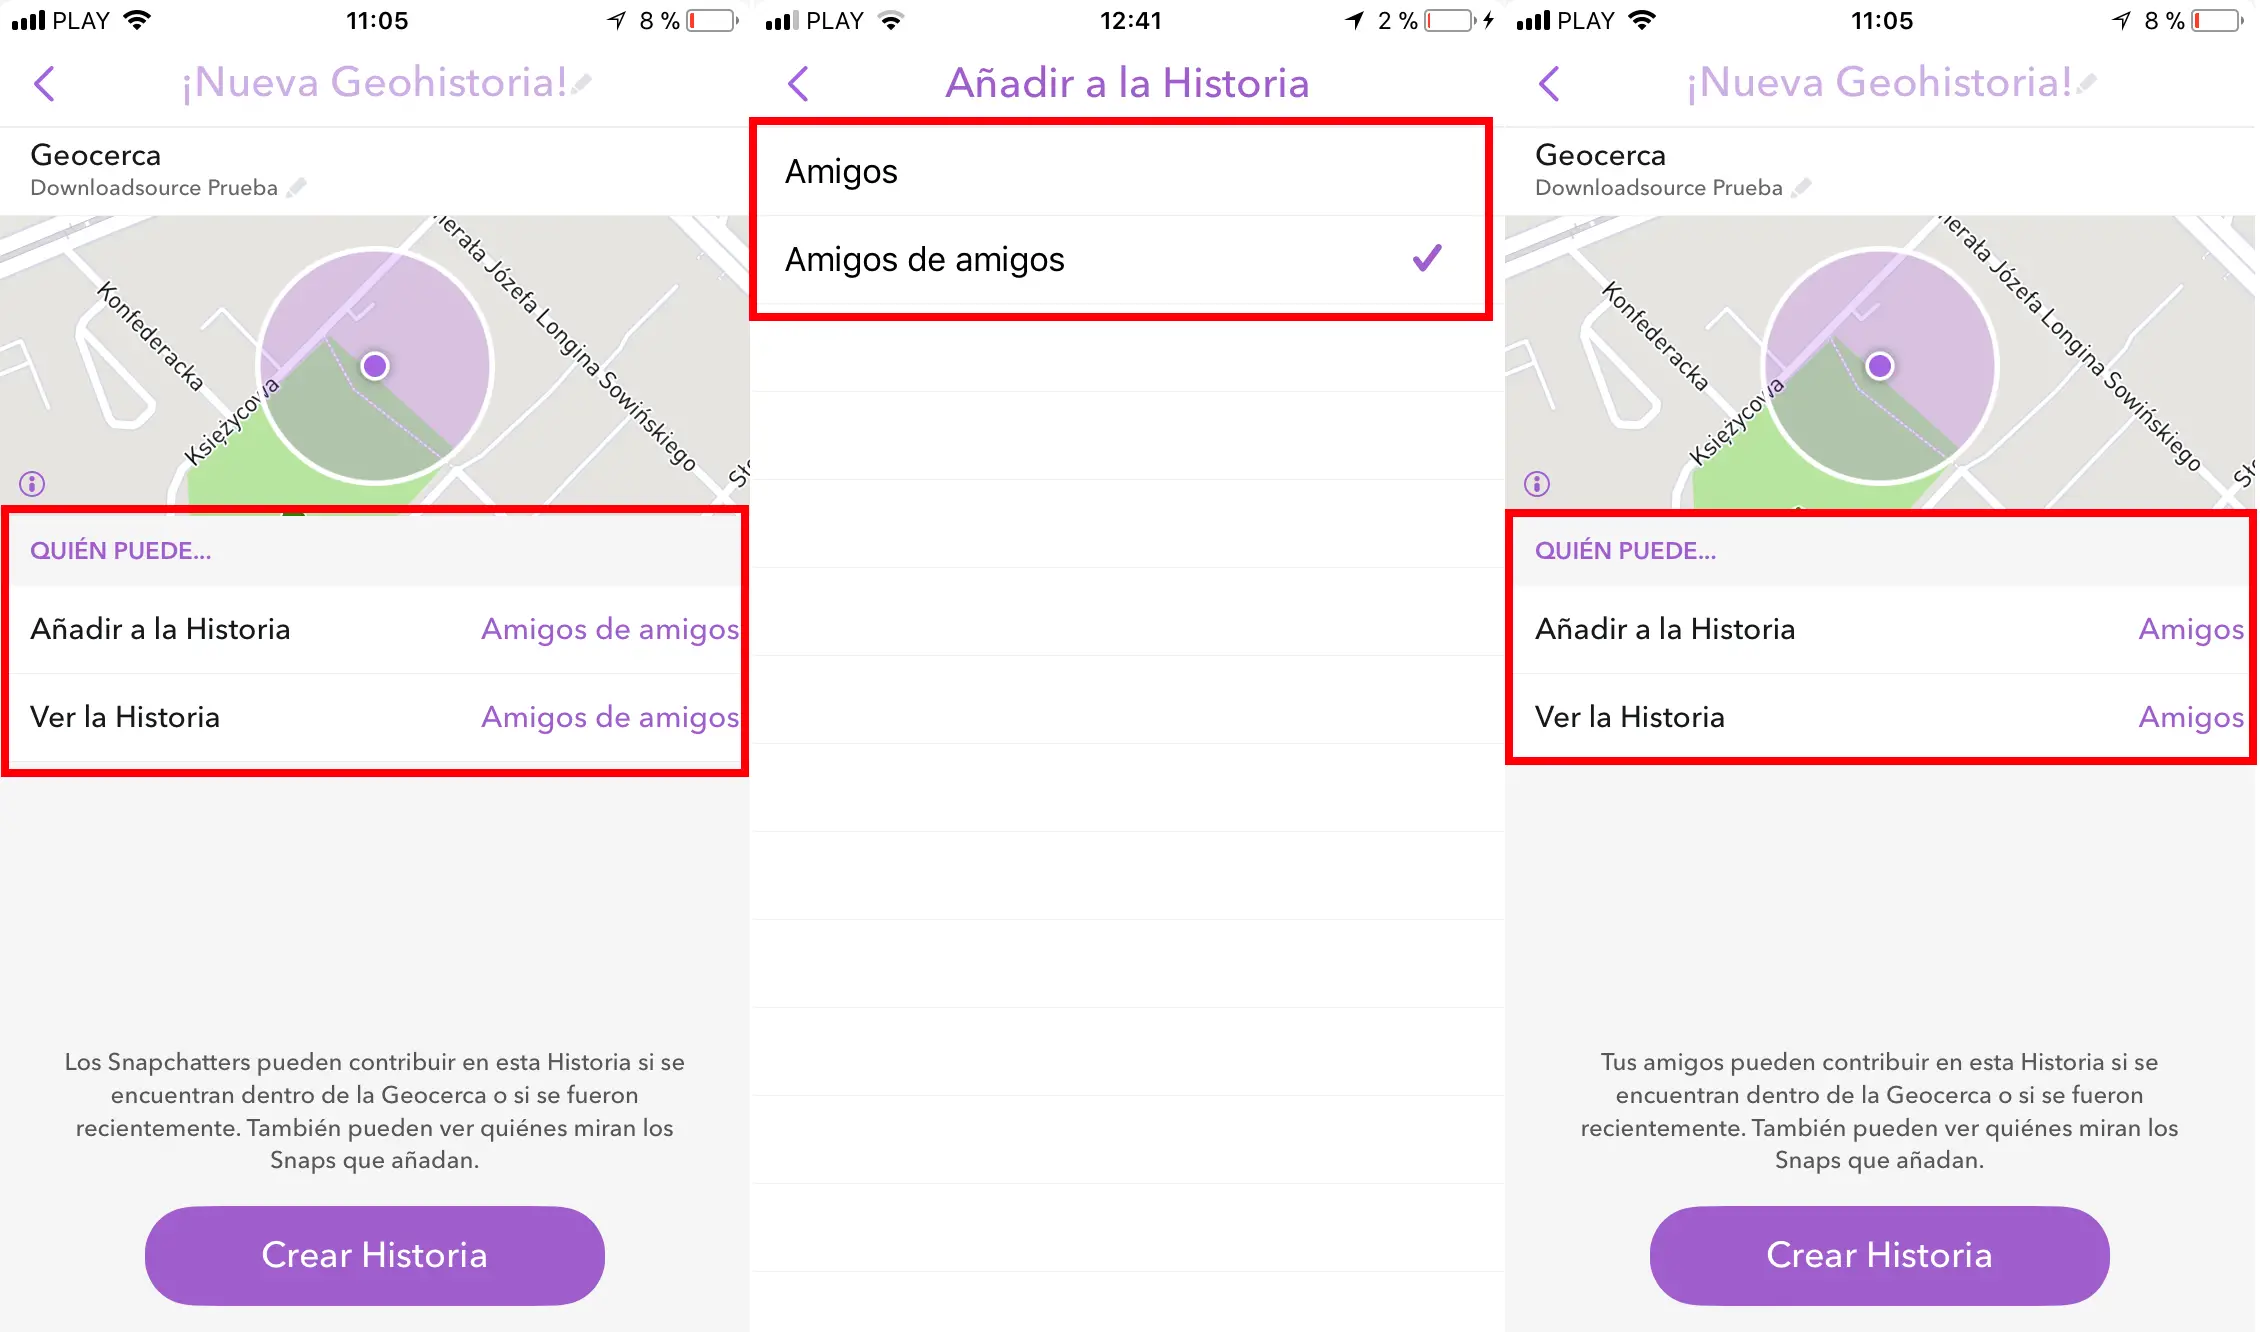
Once the privacy is configured according to your taste, you only have to click on the button: Create History . This will bring up a small window in which you can Name your Story . When you provide a name, click on the Save button to save the changes provided..
After this customization, the camera of your device will be shown so that you can take a snapshot or video and you can publish it in your Geohistory. Obviously these Snaps you can customize as you would with any other story. Once the snap is published, it will be shown in the created GeoHistoira.
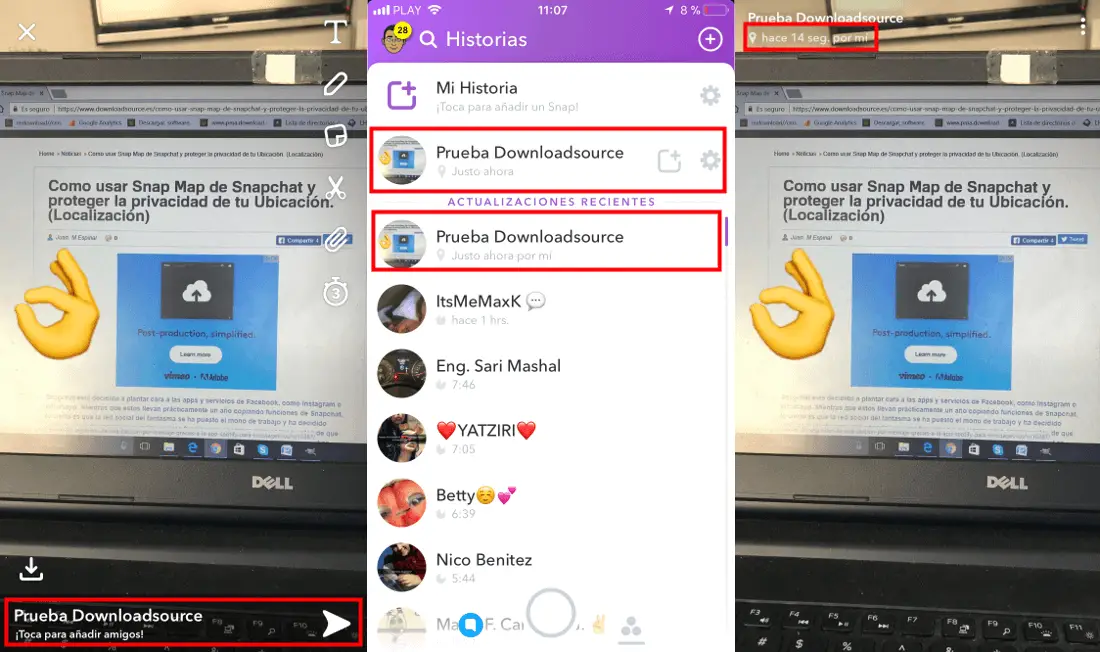
From that moment on, any user who passes near the created location (geohistory) will be able to view your story as well as contribute to it with more photos or videos. Obviously you can also add more snaps to the GeoHistory.
Note: Officially this new Snapchat GeoHistory feature is only available in countries Canada, Australia, Brazil, Saudi Arabia, United Arab Emirates, United Kingdom, France, Netherlands, Sweden, Norway, Germany, Denmark, Finland, Mexico, Qatar, Kuwait and Lebanon. However, both in Spain and Poland it also works at least in my case. If this function has not yet appeared in your Snapchat app, all you have to do is wait for it to activate.