By default on Mac computers with MacOS Sierra, Capitan, or Yosemite, the Library folder is usually hidden as a security measure. This folder usually contains preference files, caches and support data of the applications installed on your Mac. This content is sensitive since if it is removed improperly, we can make our programs not work correctly. This is precisely why by default the Library folder is hidden by default on Mac.
You may also be interested: How to enter Mac without knowing the password.
However, there are many users, especially the most advanced, who prefer that this folder be shown in their MacOS operating system. In this way, for example, they can have greater control when eliminating applications or programs. In general, when we uninstall an application from our Mac, certain files and folders will still be preserved, which usually do so in the Library folder..
Thus, if you want to completely remove an uninstalled application, you must delete certain files or folders belonging to that application and that are still stored in the Library. Obviously to proceed with this removal you must know specifically the folder and files that you must remove so as not to create problems on your Mac OS.
Having said this, we want to show you step by step how to enable / activate the Library folder and show it on your MacOS Sierra, Capitan or Yosemite system:
How to activate and access the Library folder on Mac (Sierra, Capitan or Yosemite)
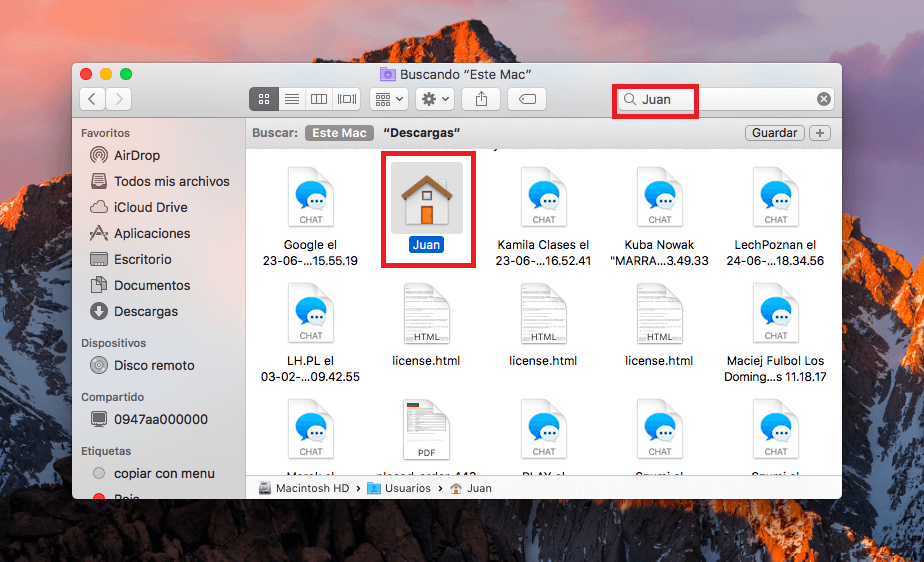
Having said that, the first thing we will have to do is open the Finder. Once the window is displayed on the screen of your Mac must open your user folder, the folder is represented by an icon of a house . If this is not shown at first glance, you can use the Finder search or the Spotlight. The search must be done with the name of your profile; that is, with the name of the user you are using at the moment..
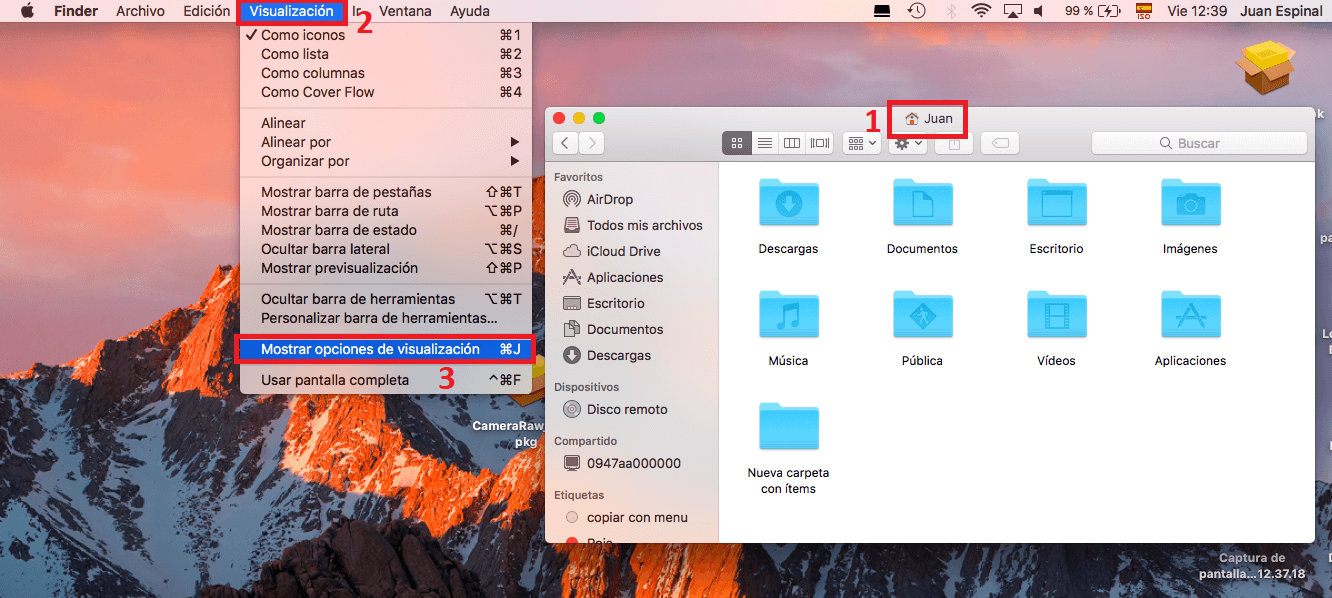
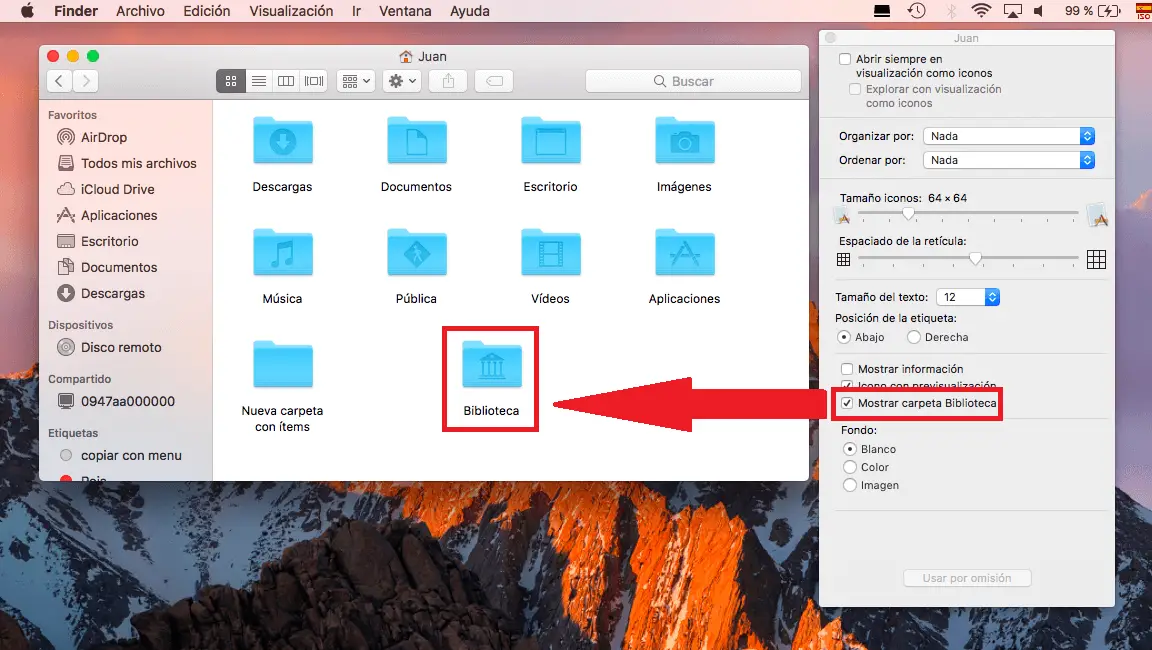
Once you open the user box and it is displayed in the Finder, you must click on the Display option located in the upper bar of the screen. This will bring up a menu where you will have to click on the Show display options option . By clicking on this option you will see how a new window opens in which you can see various configuration options. In our case we should look for the one that says: Show Library folder.
Once the box shown next to said option is checked, you can close this window and check how the Library folder will be shown in the user folder. From this time you can access the Library folder simply by using the keyboard shortcut: Shift + CMD (command) + L ..
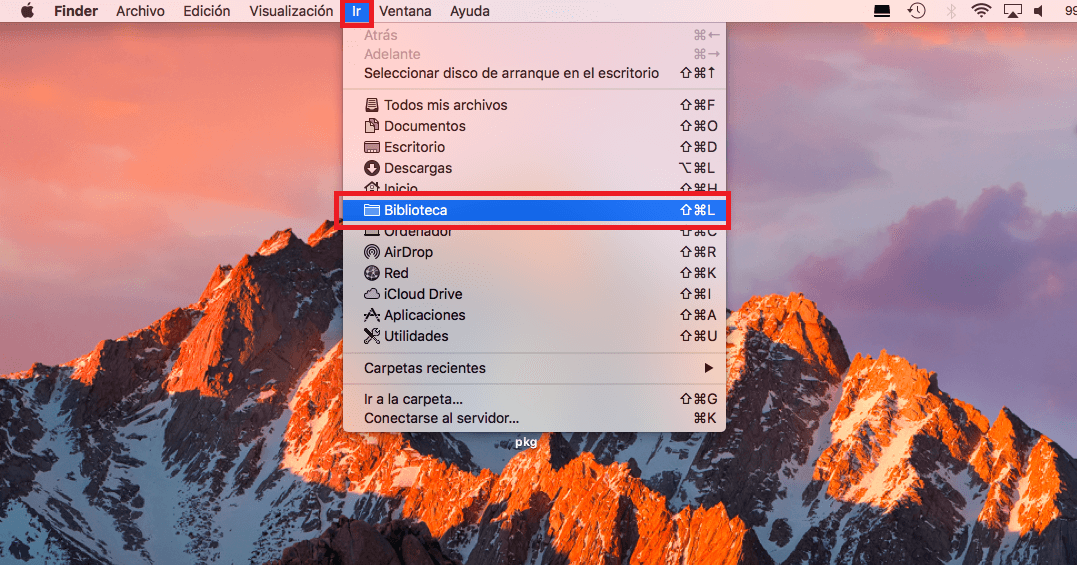
Another way to access the libraries will be by using the Go Menu located in the upper bar of your Mac's screen. Clicking on the Go option will display a menu where the Library option will now be displayed in which you will have to click to access it directly.
