In the computer we get used to handling, managing and sharing a number of different documents , since through them we store different information and data in a simple and orderly way..
There are files with different types of extensions, each one created to allow the user to manage and work focused on a special segment, as well as with the XLSX extensions we can work with Excel files, DOCX for text files.
There is an extension that is XPS which we can find at some point when using Windows 10. This by default cannot be opened with a browser as a PDF file . XPS files are files that are XML-based with access and read properties. Windows 10 does not have an application for this type of files and for this we must install the XPS viewer, this can be installed through CMD or from PowerShell..
Let's see how to use these two methods to install the XPS viewer in Windows 10.
To stay up to date, remember to subscribe to our YouTube channel! SUBSCRIBE
1. How to install the XPS viewer from CMD
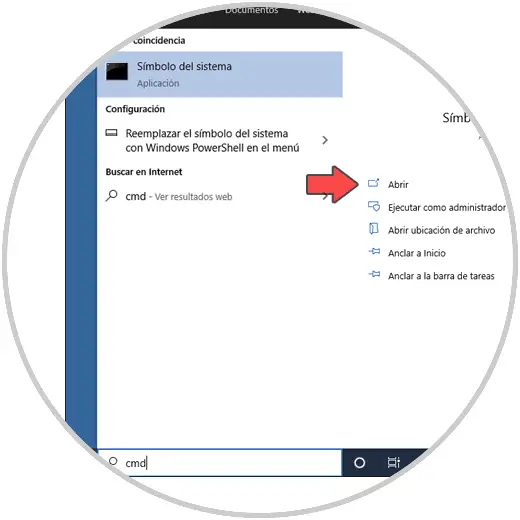
Step 1
We access the CMD console as administrators:
Step 2
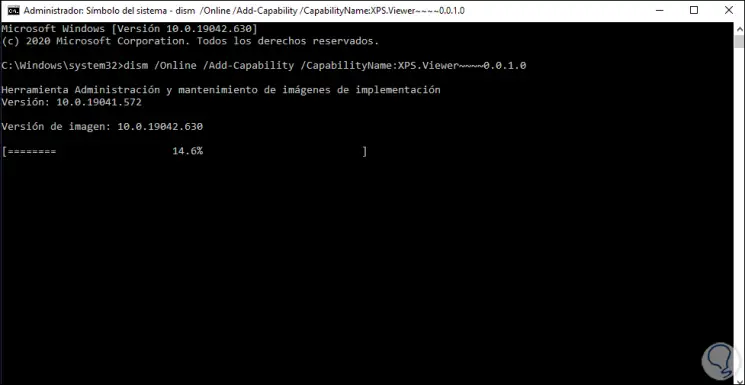
Once the console is open, we execute the following:
dism / Online / Add-Capability /CapabilityName:XPS.Viewer~~~~0.0.1.0
We press Enter and wait for the installation process to start:
Step 3
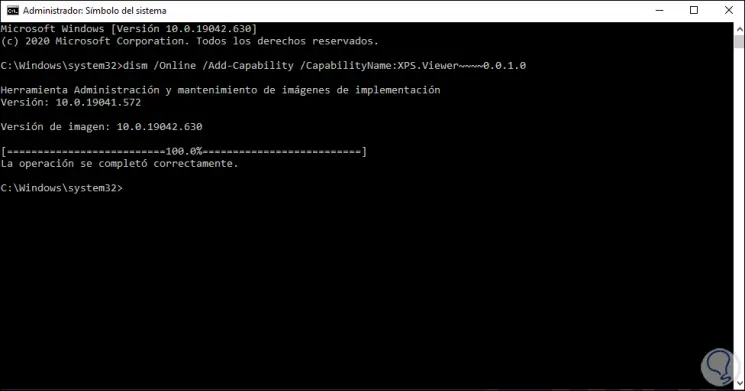
At the end we will see the following:
Step 4
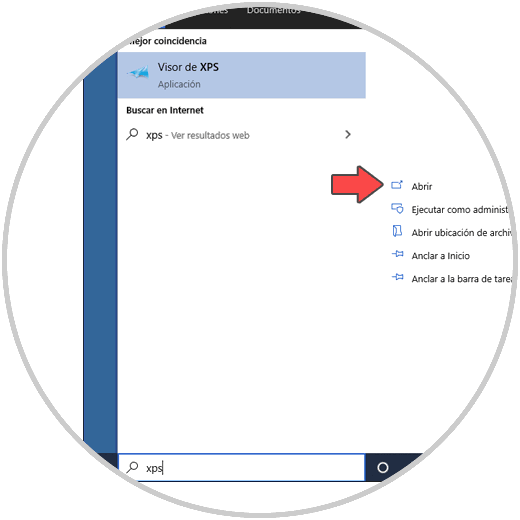
Now we can access the XPS viewer from the Start menu:
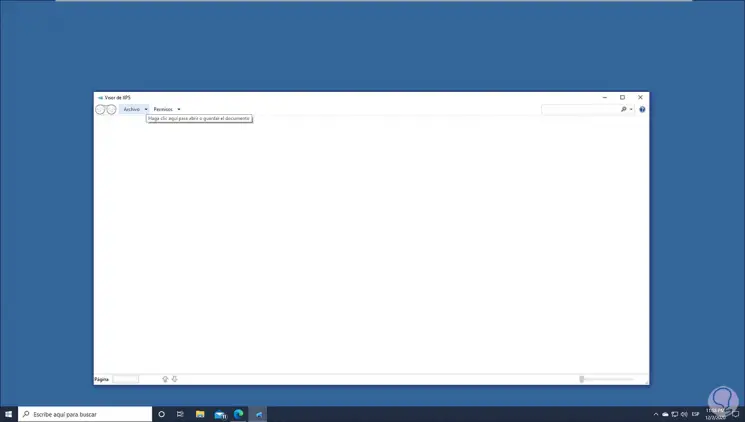
Step 5
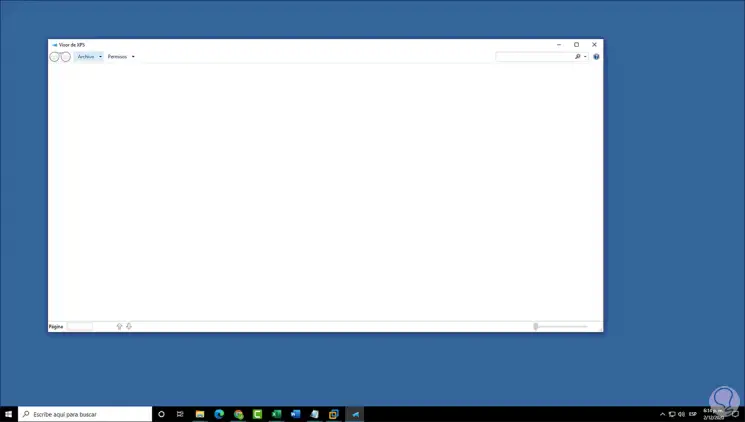
The appearance of this will be as follows:
So it is ideal to install the XPS viewer from CMD..
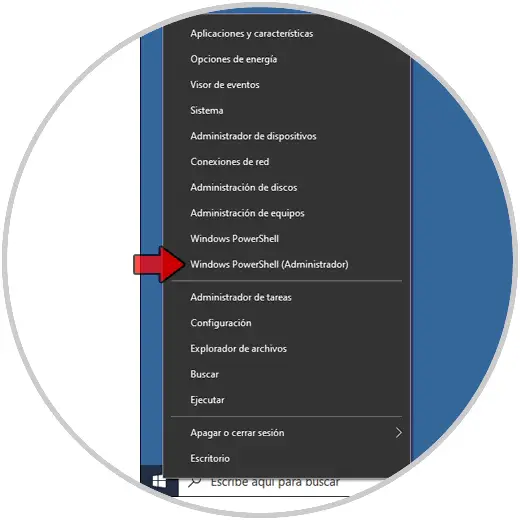
2. How to install the XPS viewer from PowerShell
Step 1
We access PowerShell as administrators:
Step 2
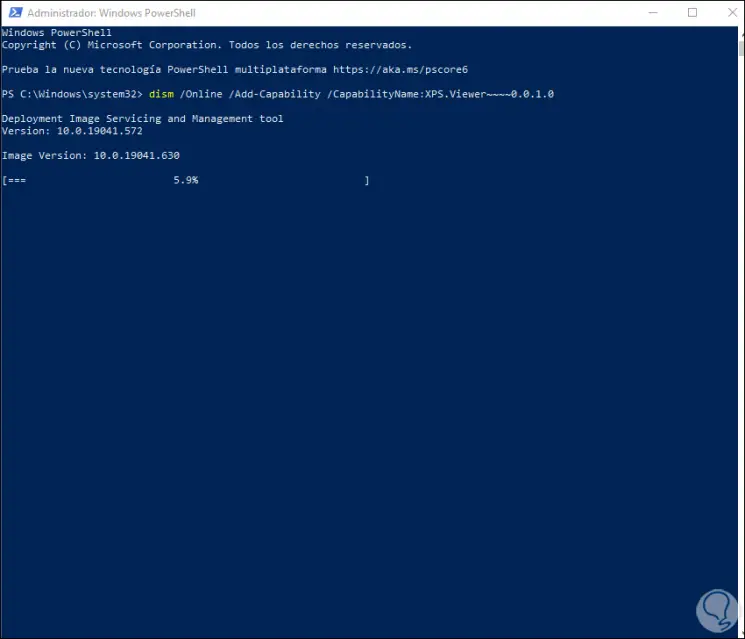
In the PowerShell console we enter:
dism / Online / Add-Capability /CapabilityName:XPS.Viewer~~~~0.0.1.0
We press Enter to start the process:
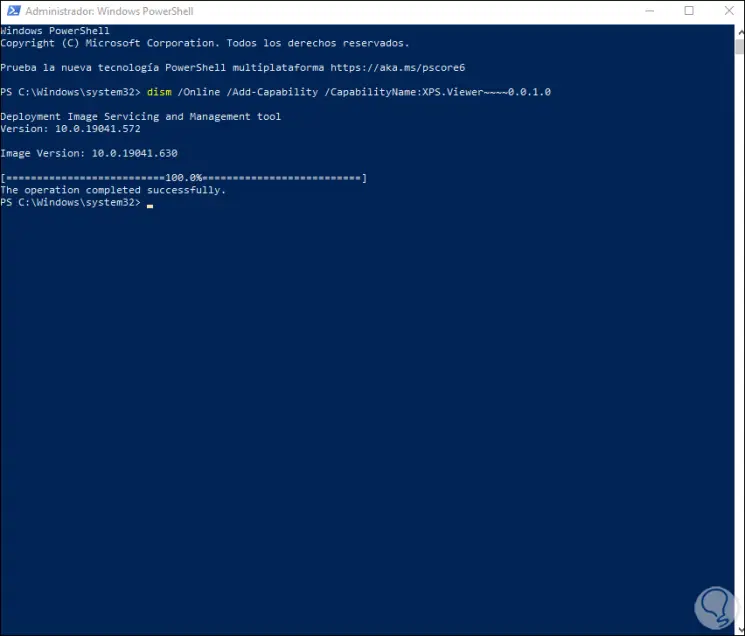
Step 3
At the end we will see this:
Step 4
It will now be possible to access the XPS viewer from Home:
With either of these two methods we can install the XPS viewer in Windows 10.