The network settings on a computer with Ubuntu , in this case Ubuntu 20.04 or 21.04, are essential for the computer to behave as expected for tasks such as:
- Search for processes on the network
- Delivery of services to client computers
- Local communication with other teams
- Use of connection variables and many more
A faulty network will simply cause us to have too many multitasking problems, but network settings involve numerous processes and one of the most traditional is DHCP..
DHCP (Dynamic Host Configuration Protocol) is a protocol that is administered by the IETF (Internet Engineering Task Force) and allows the IP addressing of the computers to be managed in a much more controlled way.
DHCP is based on the client / server model which allows an IP address and various network configuration parameters such as the subnet mask and the gateway to be assigned automatically to a computer in the domain or on the local network. , we can establish a range of addresses in case of requiring some IP for special tasks such as teams with direct assignments in the organization..
When configuring a DHCP server, we must add the group of IP addresses available for the new computers and devices that have to connect to the network, this process allows the DHCO server to assign an IP address to the computer that requests it. This must have DHCP enabled.
Chores
DHCP performs tasks such as:
Delivers valid IP addresses to computers that require connection on the network
- Integrates TCP / IP configuration parameters
- Allows you to reserve IP addresses for special equipment
- Allows you to define how long an IP address will be active before the renewal of the IP lease is activated
How to install and configure DHCP on Ubuntu 20.04 or 21.04
Step 1
We are going to check the version of Ubuntu used, in the terminal we execute:
lsb_release -a

Step 2
Now we are going to install the DHCP server with the following command:
sudo apt install isc-dhcp-server

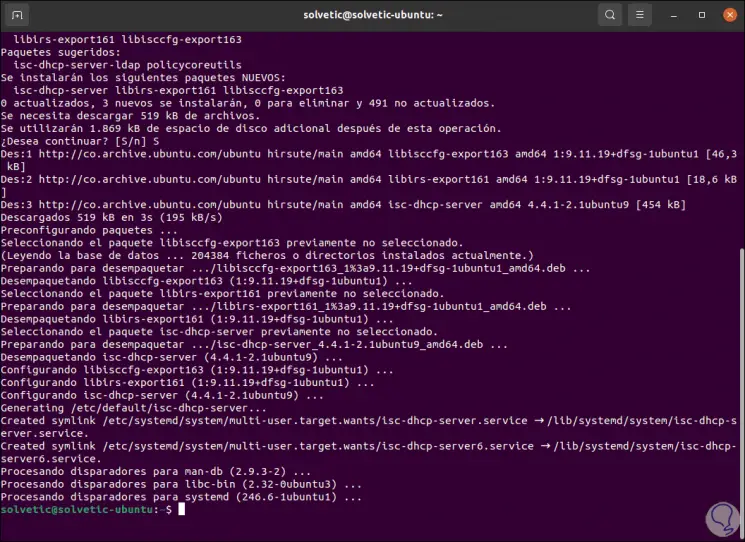
Step 3
We enter the letter S to confirm the download and installation of this:
Step 4
It is time to configure the network card, in this case we must edit the isc-dhcp-server file to define the values associated with the network card and thus offer comprehensively what DHCP offers:
sudo nano / etc / default / isc-dhcp-server
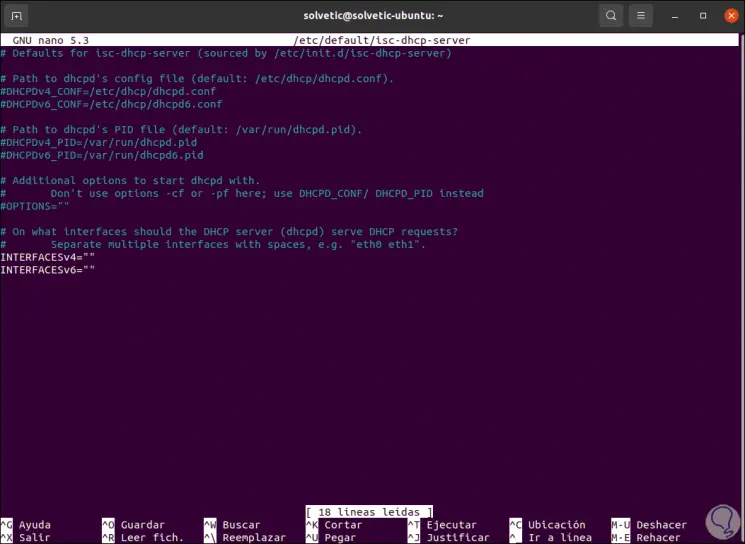
Step 5
These lines that we see are:
NTERFACESv4: configure IPv4 addressing INTERFACESv6: configure IPv6 addressing
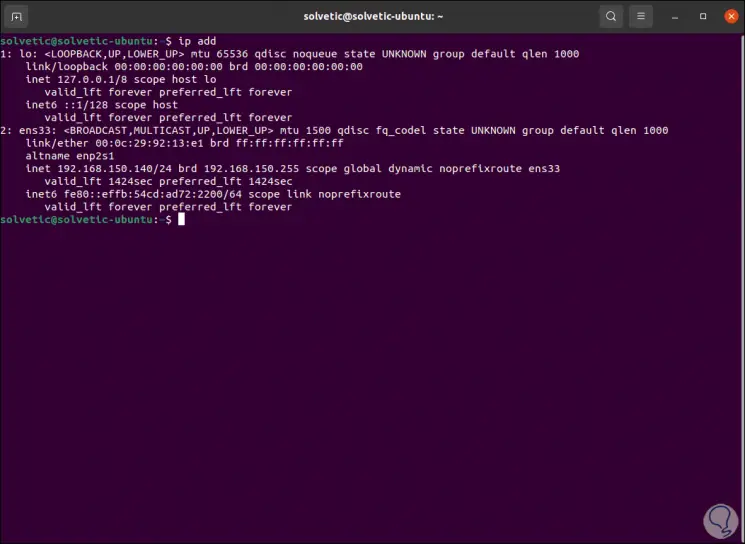
There it is necessary to know the ID of the network card, for this we must execute the following:
ip add
Step 6
In this case it is "ens33", in the INTERFACESv4 section we add this ID:
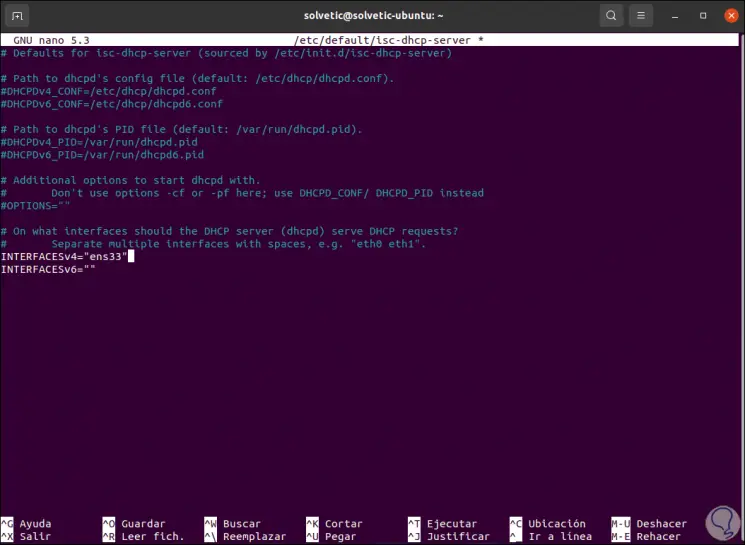
We save the changes with the Ctrl + O keys and exit the editor with the Ctrl + X keys..
Step 7
After this we are going to configure the DHCP role in Ubuntu 20.04 or 21.04, it is possible to configure:
We access the configuration file:
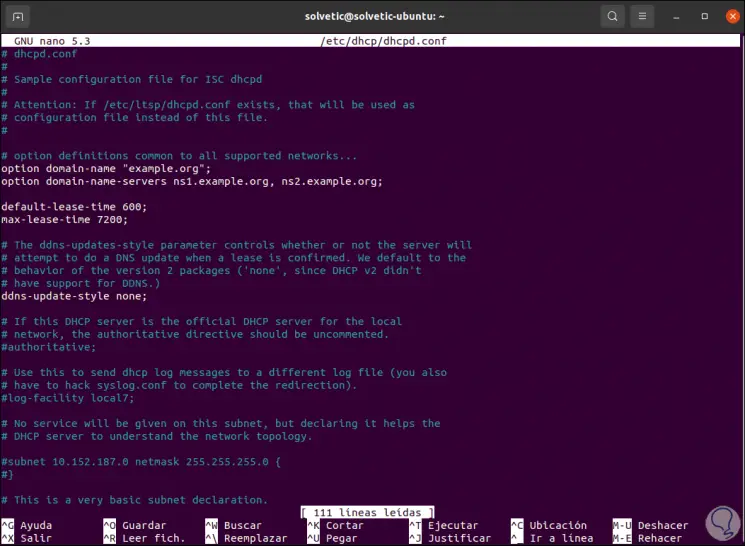
sudo nano /etc/dhcp/dhcpd.conf
Step 8
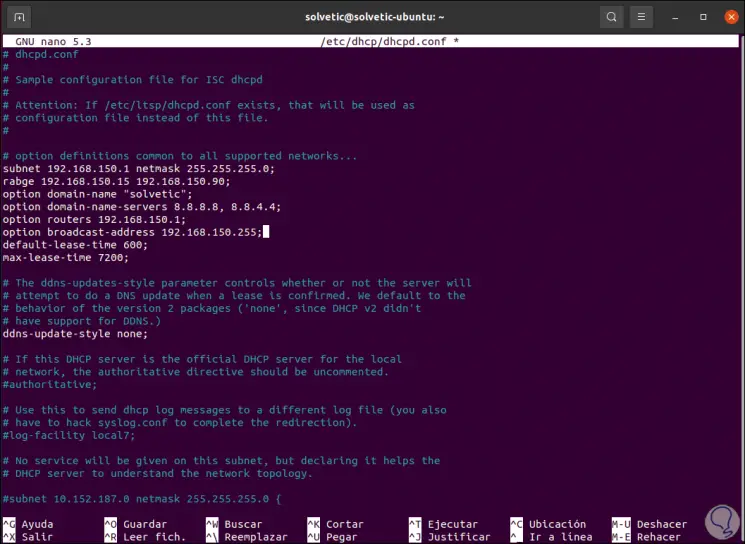
There we are going to add the following lines with the necessary values:
subnet 192.168.xxx.xxx netmask 255.255.255.0 range 192.168.xxx.xxx; option domain-name-servers 8.8.8.8, 4.4.4.4; option domain-name "name"; option routers 192.168.xxx.xxx; option broadcast-address 192.168.xxx.255; default-lease-time 600; max-lease-time 7200;
We save the changes with Ctrl + O and exit with Ctrl + X.
Step 9
In this file we have added the IP address and the network mask of the DHCP server. We have established the range of addresses to deliver, public DNS were configured, we entered the domain name and the broadcast address has been established.
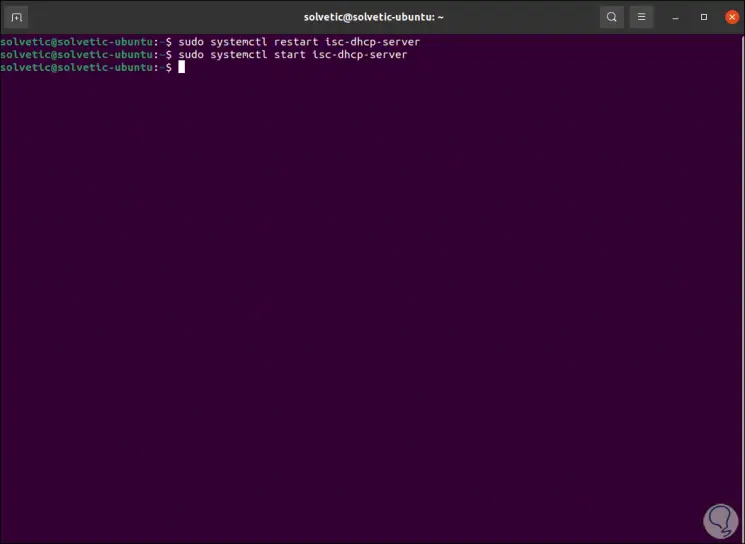
Now we execute the following:
sudo systemctl start isc-dhcp-server (starts DHCP service) sudo systemctl stop isc-dhcp-server (stops DHCP service)
Step 10
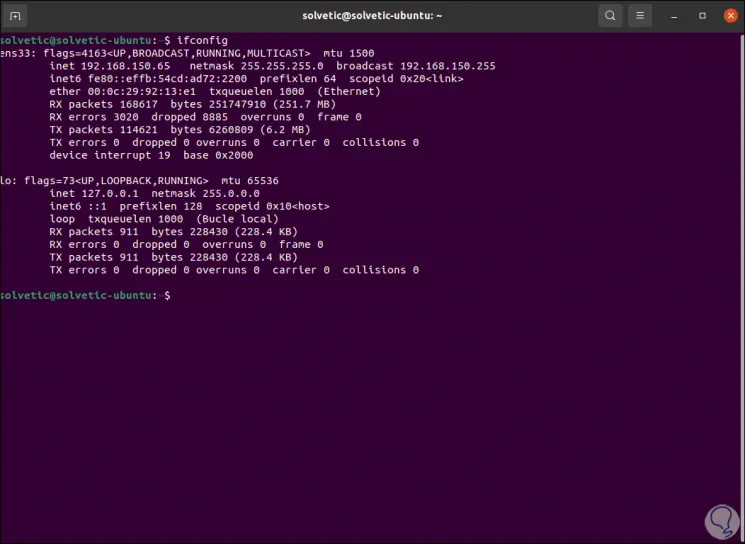
To verify that everything works correctly, on a client computer we validate the data of the network card with the following command:
ip add

Step 11
We access the DHCP configuration file:
sudo nano /etc/dhcp/dhcpd.conf
In this file we enter the following:
Ubuntu localhost host
Ethernet hardware "MAC Address"
fixed-address 192.168.xxx.xxx;
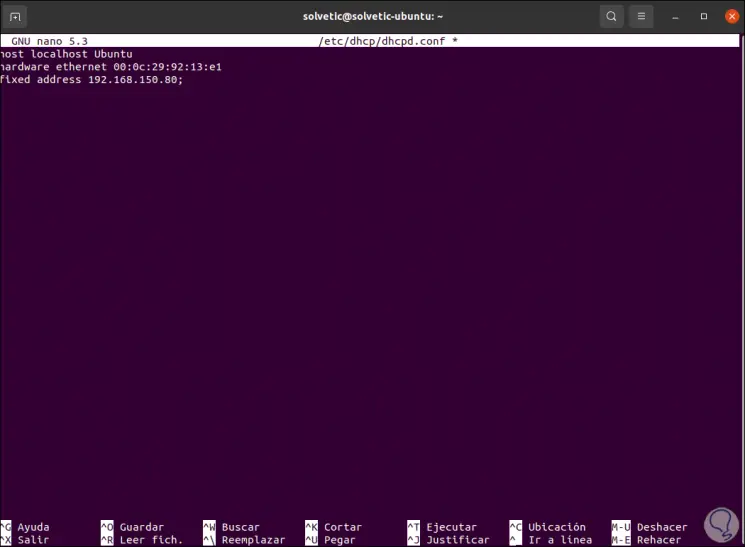
Note
This is an IP reserved for this computer.
Step 12
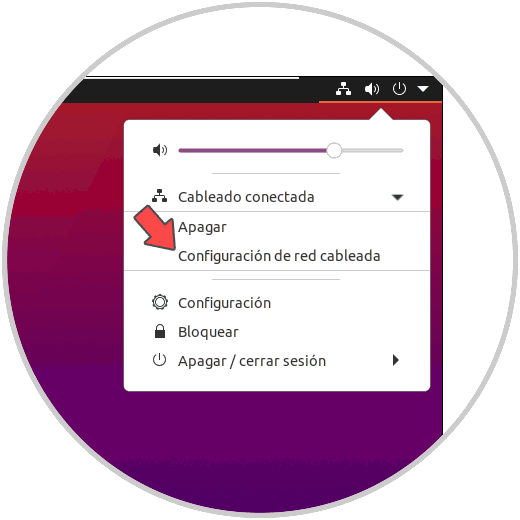
We save the changes in the file, go to the Ubuntu desktop and click on the shutdown icon, there we click on "Wired connected - Wired network configuration":
Step 13
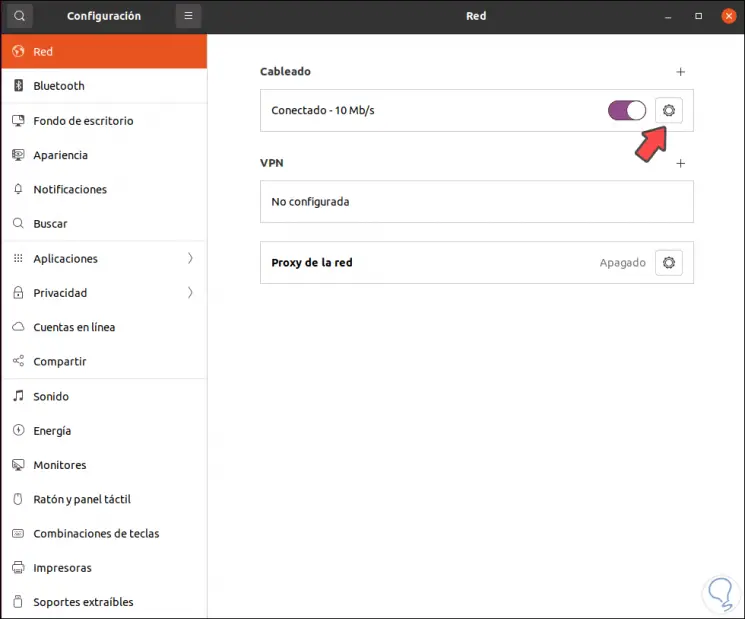
The following will be displayed:
Step 14
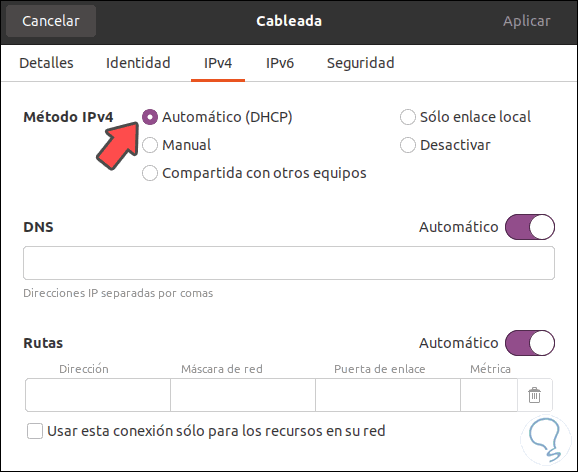
We click on the pinion icon and in the next window we go to IPv4 and validate that it activates the “Automatic (DHCP) box:
Step 15
We apply the changes and with it the team will receive one of the addresses of the assigned range:
DHCP is one of the best options for a comprehensive IP addressing job.