When playing online, many of us worry about the strategies, players, teams or other components of the selected game , but we never stop to think that behind all this there are a series of variables that allow the games to develop smoothly. and one of these components is ping..
What is ping in a game
We know that a ping is used in administration tasks to measure the total time it takes for a source computer to receive a response from a remote computer and that is why in today's games, which require many hardware features, have a low latency or ping, it is something key so that the game is developed without any problem during the total time which can be several hours.
Therefore, if the ping in Windows 10 is very high, getFastAnswer has created this tutorial to help you improve it and thus have fluid games.
To stay up to date, remember to subscribe to our YouTube channel! SUBSCRIBE
1. Improve Ping from the Windows 10 registry editor
Step 1
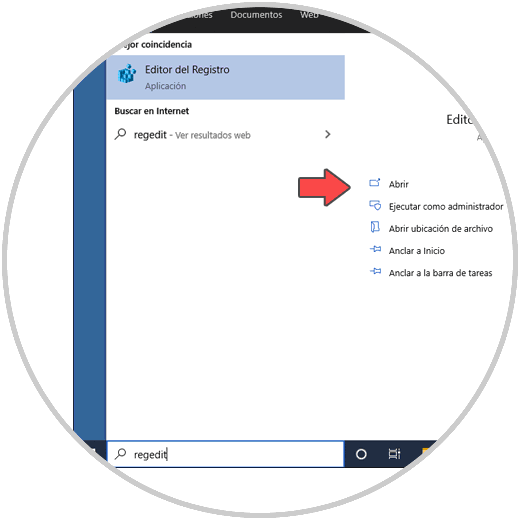
Before any change, it is advisable to create a backup or a restore point for any eventuality, then we access the registry editor from the Start menu:
Step 2
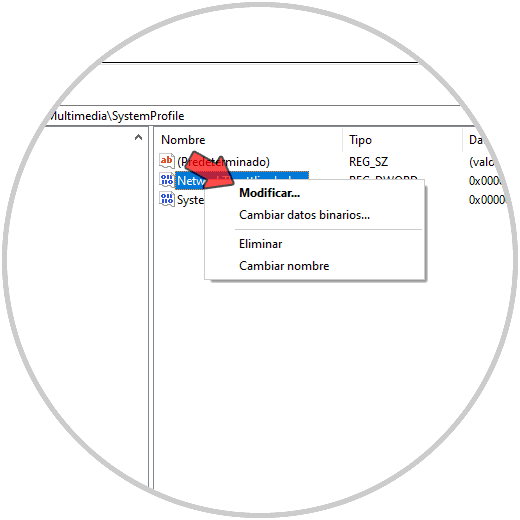
In the editor we will go to the following route:
HKEY_LOCAL_MACHINE \ SOFTWARE \ Microsoft \ Windows NT \ CurrentVersion \ Multimedia \ SystemProfile
There we right click on the value "NetworkThrottlingIndex" and select "Modify":
Step 3
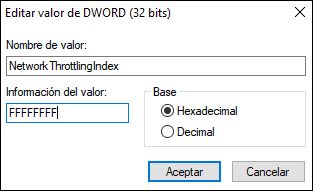
In the displayed window we set the value and apply the changes.
FFFFFFFF
Step 4
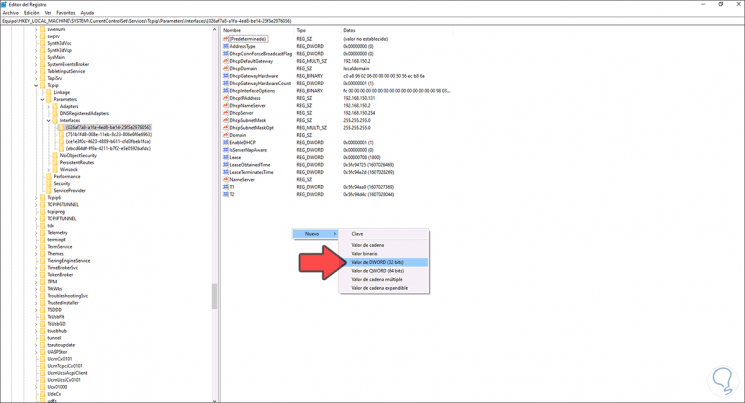
Now we go to the following route:
HKEY_LOCAL_MACHINE \ SYSTEM \ CurrentControlSet \ Services \ Tcpip \ Parameters \ Interfaces
There we select the ID of the appropriate network card, right click somewhere free and select "New - DWORD Value (32 bits)":
Step 5
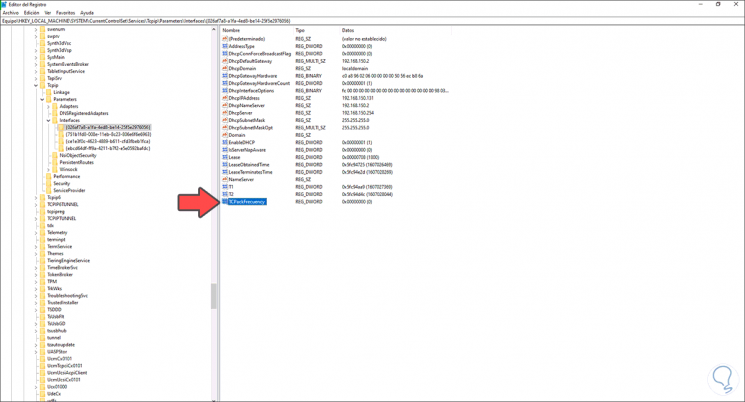
We will call this value "TCPack Frequency":
Step 6
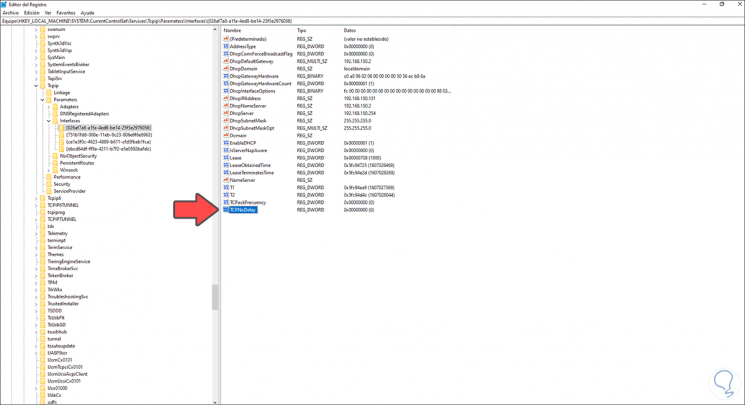
We create another DWORD value and call it "TCPNoDelay":
Step 7
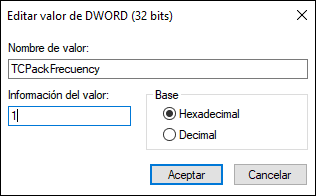
We edit the first value and set its value to 1:
Step 8
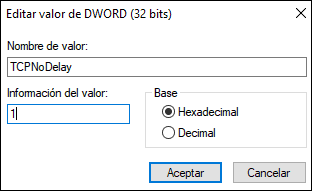
We apply the changes and perform the same process on the other DWORD value:
Step 9
After this we go to the following route:
KEY_LOCAL_MACHINE \ SOFTWARE \ Microsoft
We right click on Microsoft and select "New - Key":
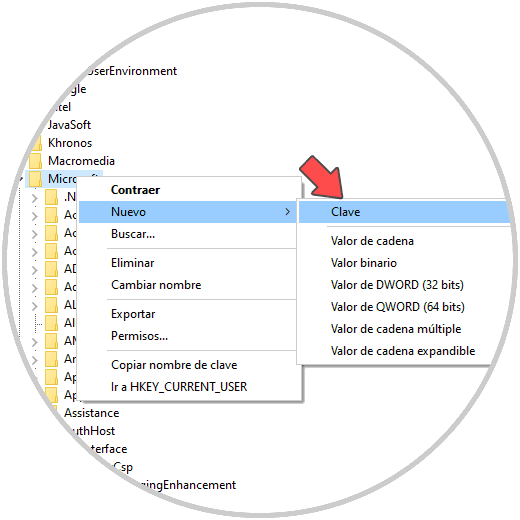
Step 10
We will call this key "MSQM", we right click somewhere free and select "New - DWORD Value (32 bits)":
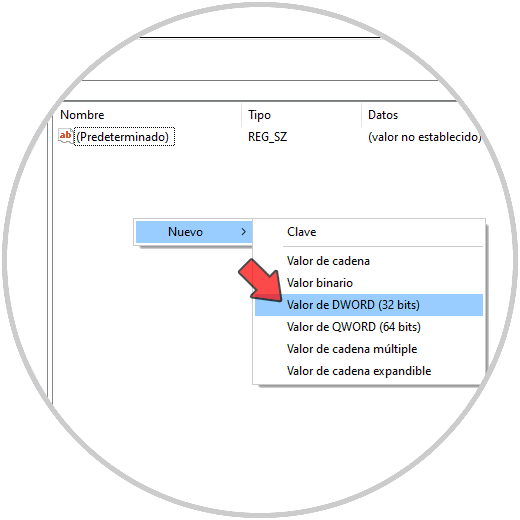
Step 11
This value will be called "TCPNoDelay":
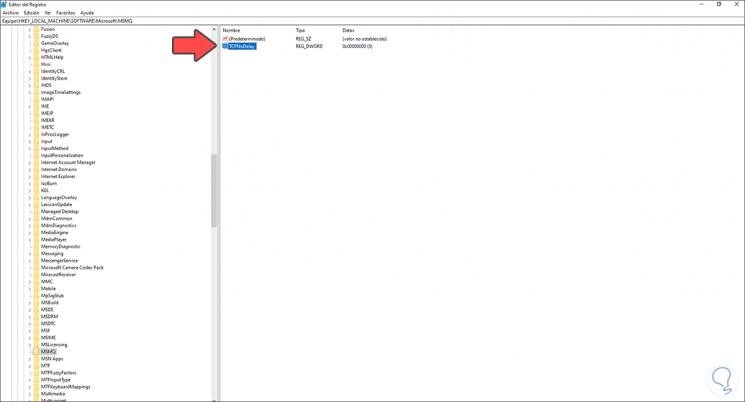
Step 12
We edit its values and set it to 1. We apply the changes.
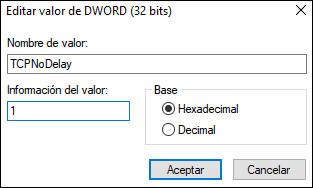
Step 13
Right there we right click and select "New - Key":
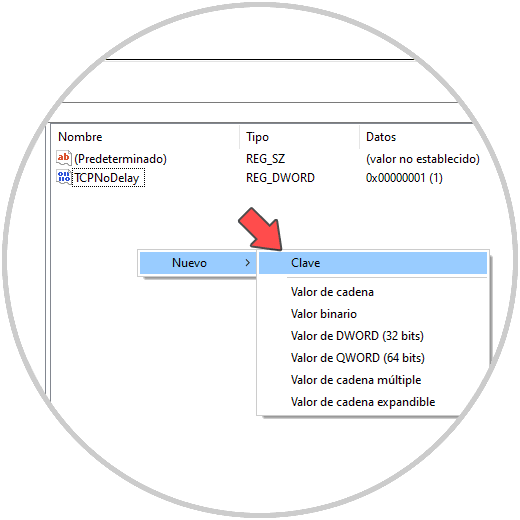
Step 14
We call this key "Parameters":
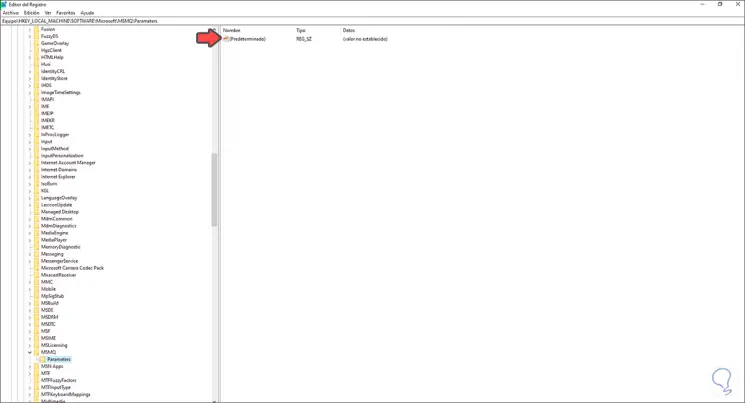
Step 15
In this key we right click and select "New - DWORD Value (32 bits)":
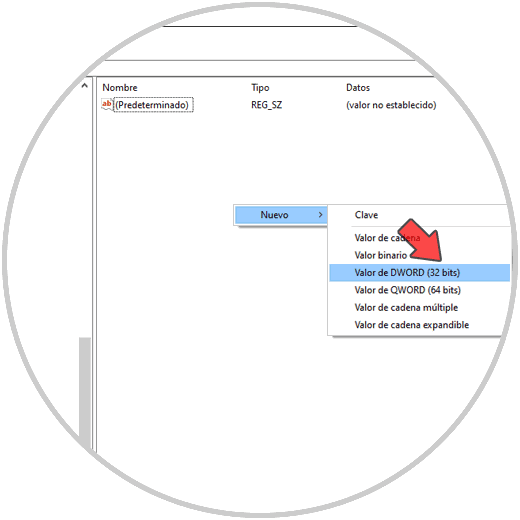
Step 16
We call this DWORD value "TCPNoDelay":
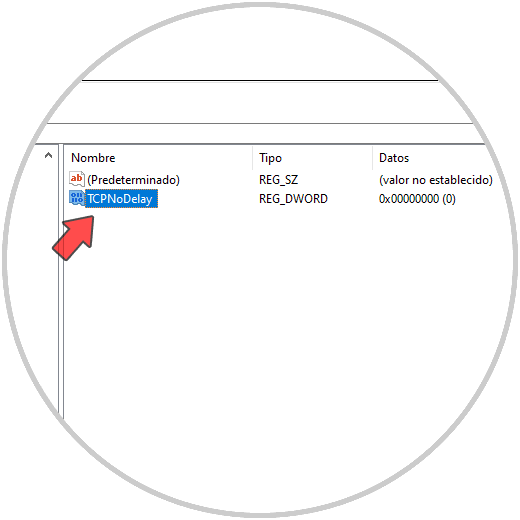
Step 17
We edit this value and set 1 as its value:
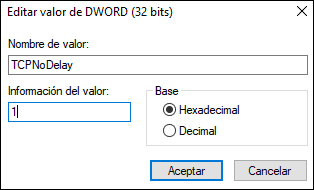
We apply the change.
With this process we will correct the ping from the Windows 10 registry editor..
2. Improve Ping from the Windows 10 graphical menu
Step 1
This option allows us to use the Control Panel to make some adjustments. We will go to the following route:
- Center network and sharing
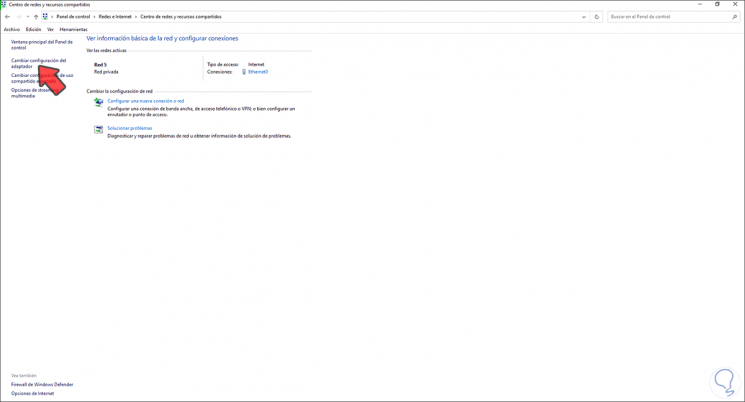
Step 2
We click on "Change adapter settings" and right click on the current adapter and choose Properties:
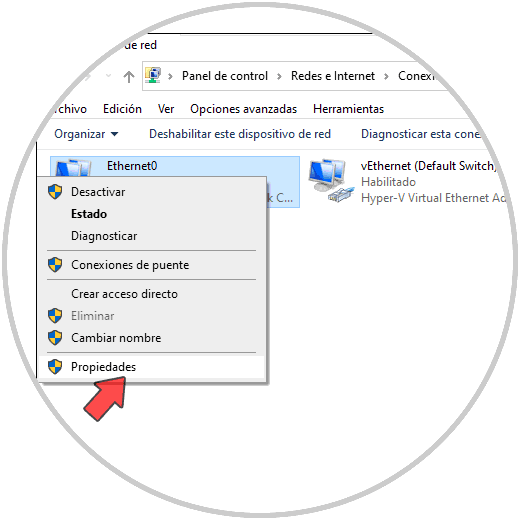
Step 3
In the properties window, first of all we deactivate the IPv6 protocol box:
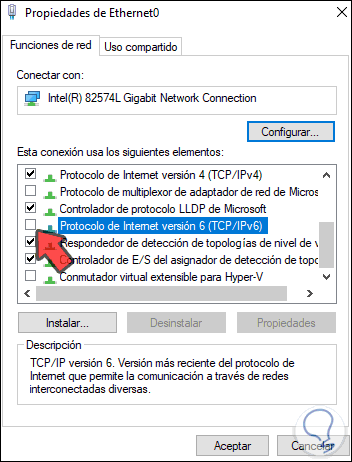
Step 4
Then we select the Pv4 protocol and click on "Configure":
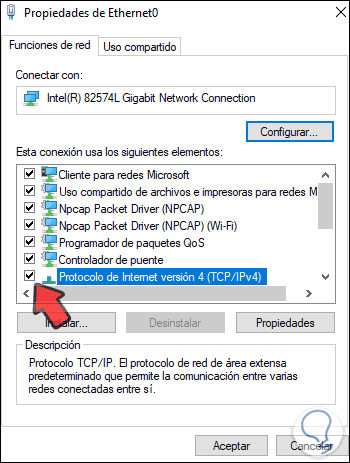
Step 5
The following will be displayed:
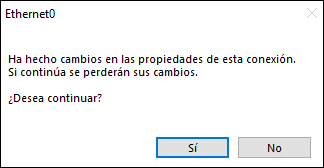
Step 6
We click Yes, in the pop-up window we go to the tab "Power Management" where we will see this:
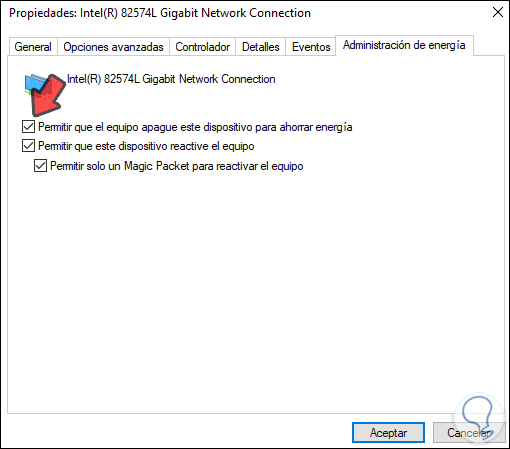
Step 7
We uncheck the box "Allow the computer to turn off this device to save energy":
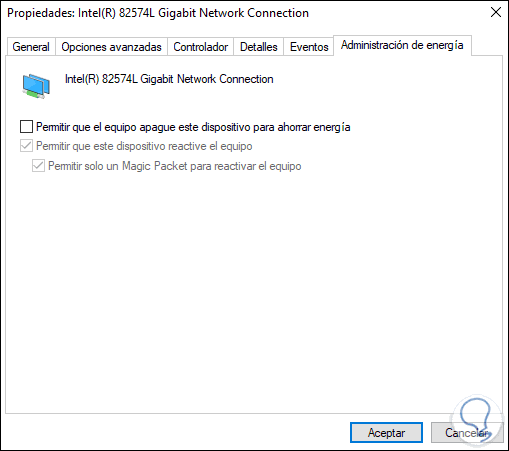
Step 8
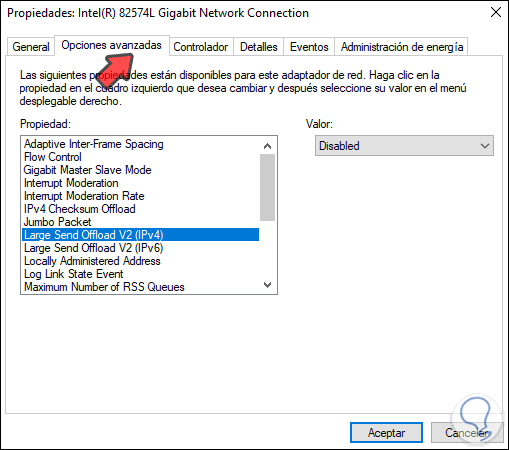
Then we go to the "Advanced options" tab and there we deactivate the various workload options (they vary depending on the type of network adapter). We apply the changes.
With these steps we will improve the ping in Windows 10 for much more dynamic games.