Zoom is the most popular application these days to connect to school, work or family and friends meetings thanks to its integrated security, design, accessibility and global performance functions. Zoom allows us to have up to 40 minutes in its free version or if we need more time we must purchase a paid plan..
We must bear in mind that it is important that both the camera and the microphone are active. This is due to the fact that a large percentage of meetings must be in such a way that we see each other or interact in the talk, which is why these two components are key.
Zoom is available for macOS and if one of these two is failing there, at getFastAnswer we have prepared this tutorial to explain how to activate the camera and microphone for Zoom in macOS..
To stay up to date, remember to subscribe to our YouTube channel! SUBSCRIBE
Activate camera and microphone in Zoom macOS
Step 1
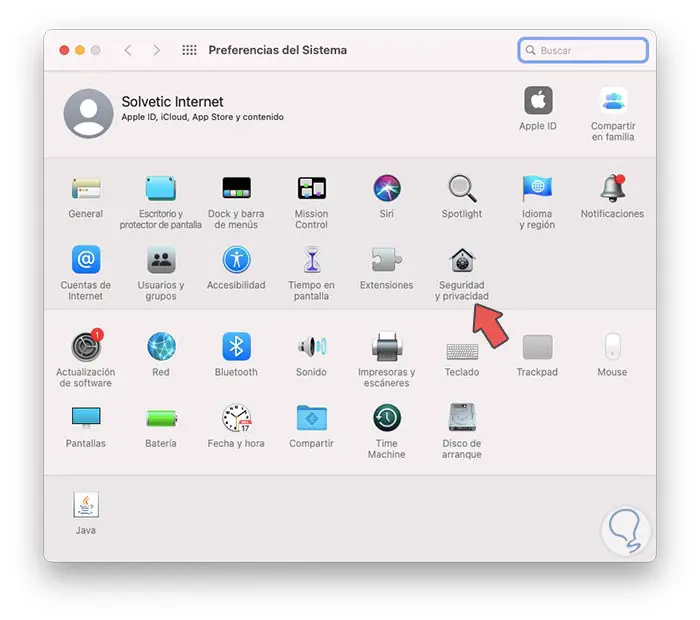
We go to System Preferences using any of the following options:
- Clicking on the icon in the Dock
We will see the following :. There we go to the section "Security and privacy"
Step 2
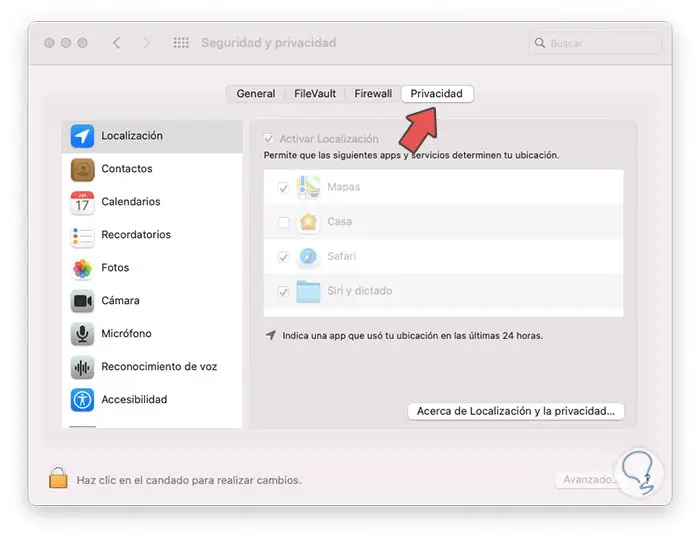
In the next window we go to the "Privacy" tab:
Step 3
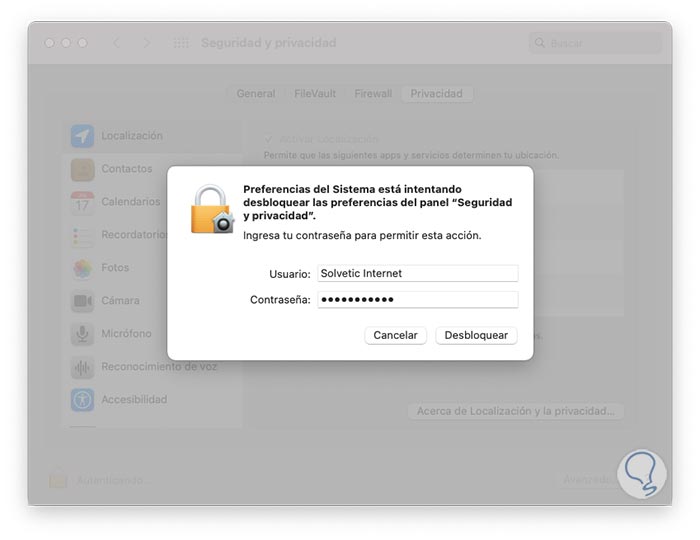
We click on the lock icon to enable the changes and we must enter the administrator password:
Step 4
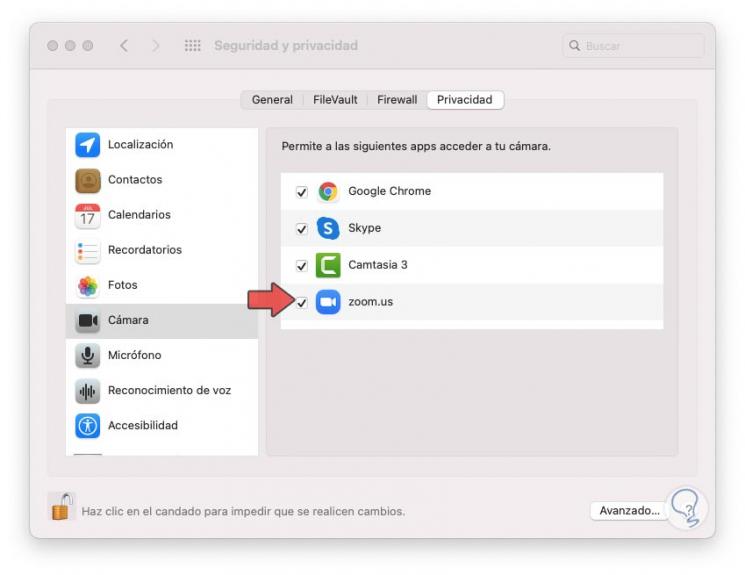
Once the changes are enabled, we go to the Camera section and check that Zoom is enabled (active box):
Step 5
Now we go to the Microphone section and do the same validation with Zoom:
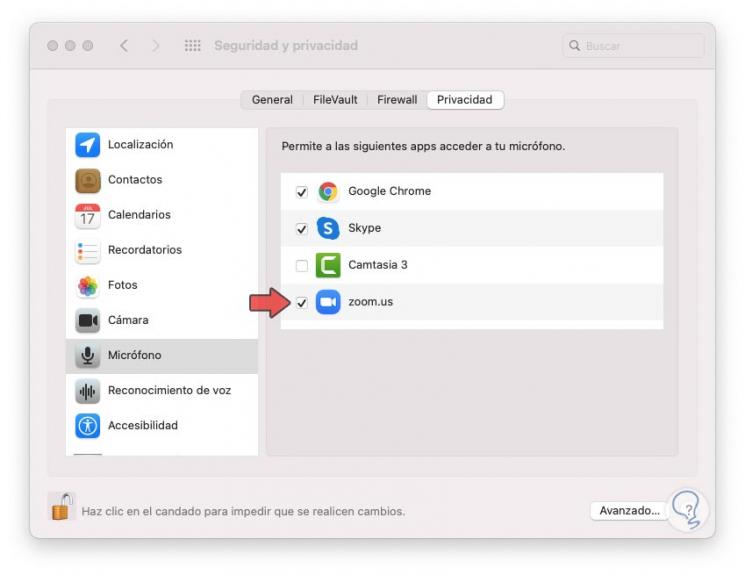
We can close the System Preferences panel.
Step 6
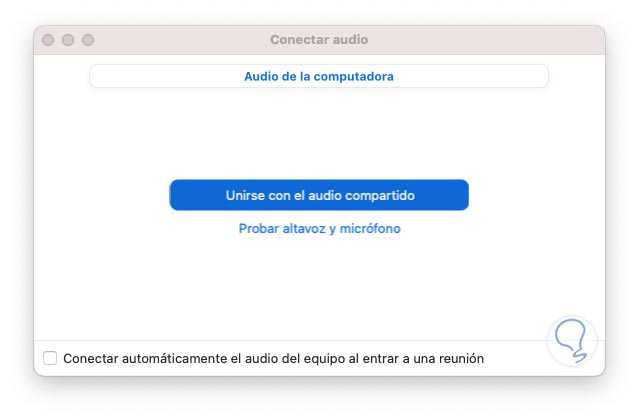
We access Zoom and create a new meeting to test, the following message will be launched. There we click on the button "Join with shared audio" to use the built-in camera and microphone of macOS:
Step 7
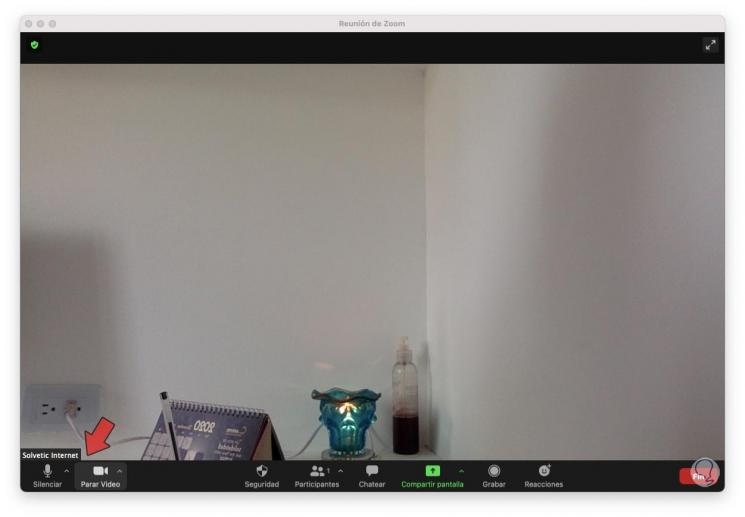
At the bottom of the Zoom screen are the camera and microphone controls, you may see the following at some point:
Step 8
To activate these two elements, we must click on the options "Re-start audio" to activate the microphone and on "Start video" to activate the camera in Zoom:
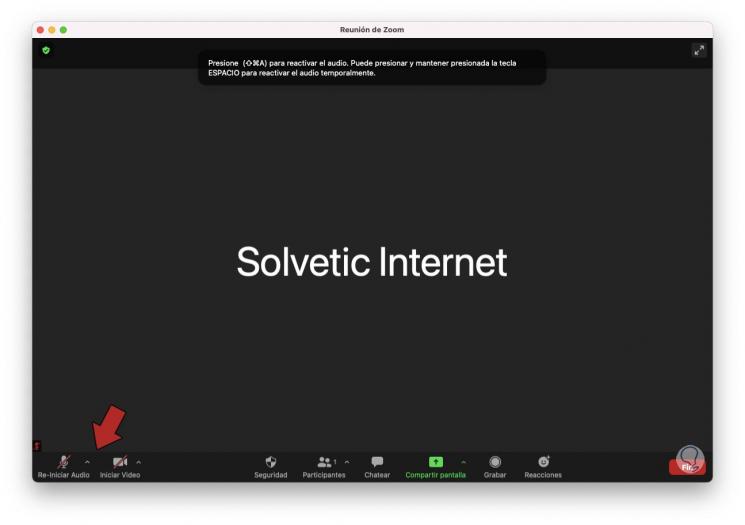
This is the simplest way to activate both the Zoom camera and microphone in macOS..