Windows Defender is integrated into Windows 10 as the complete antivirus solution which has been modernized with more and more new functions and a much broader portfolio of comprehensive solutions to prevent the computer from being attacked..
In each new edition of Windows 10 we find more news that seek to attract the attention of the millions of Windows 10 users , but it is not a secret that antivirus solutions abound on the market and we find various options that are increasingly complete.
This is why many users choose to use other alternatives and not continue with Windows Defender. getFastAnswer will explain various alternatives to disable your Windows Defender antivirus in Windows 10..
To stay up to date, remember to subscribe to our YouTube channel! SUBSCRIBE
1. Disable Windows Defender from Windows Security
Step 1
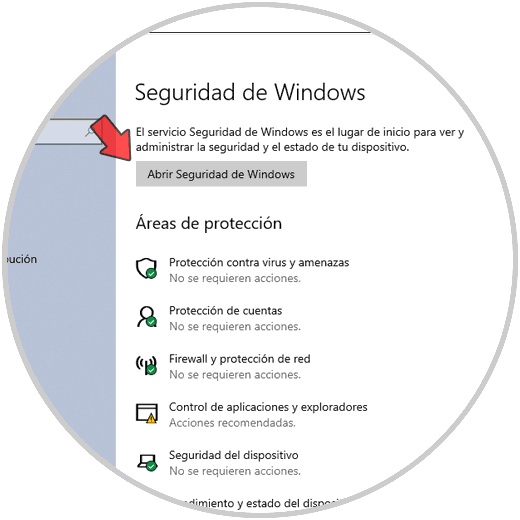
Windows Defender antivirus is integrated into the Windows security suite, to access it we will go to the following route:
There we click on the button "Open Windows Security"
Step 2
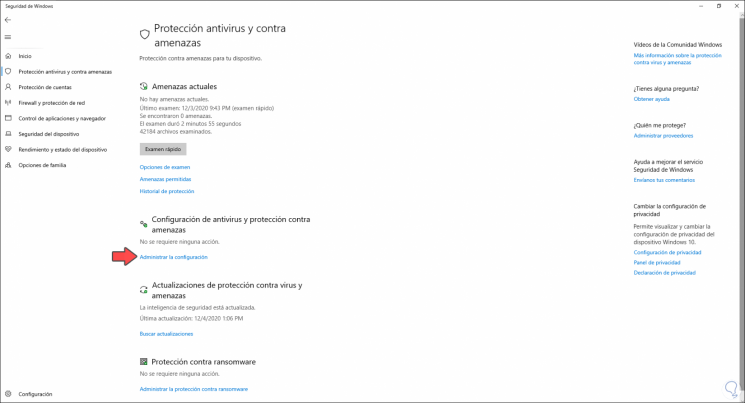
In the new window we go to the section "Antivirus and threat protection", we will see the following options. There we click on the line "Manage settings"
Step 3
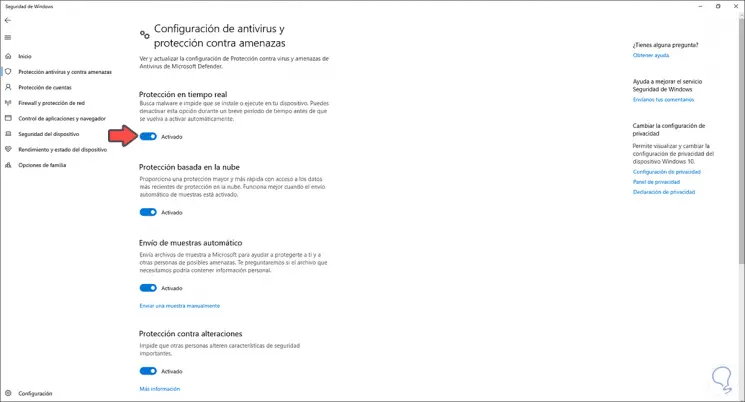
This will be the available scenario. We deactivate the switch "Real-time protection"
Step 4
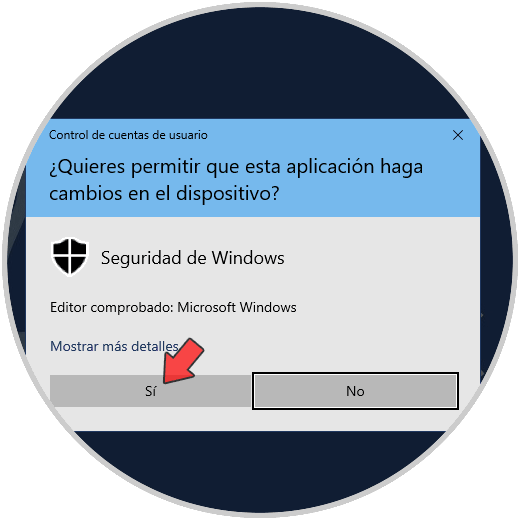
We must accept the Windows 10 UAC conditions:
Step 5
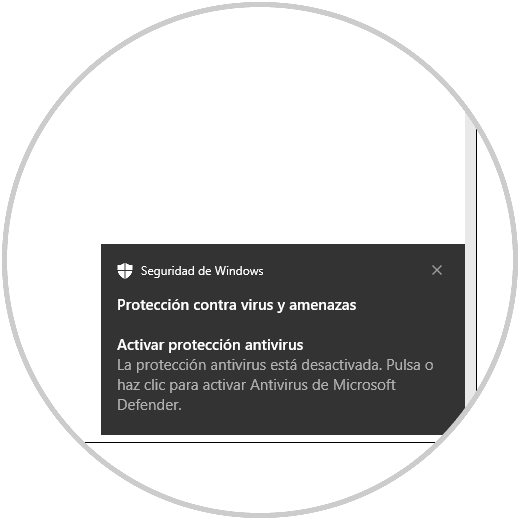
We click Yes and we can see that Windows Defender antivirus has been disabled:
2 . Disable Windows Defender from local system policies
Before using this method it is advisable to create a backup for availability issues in case of an error.
Step 1
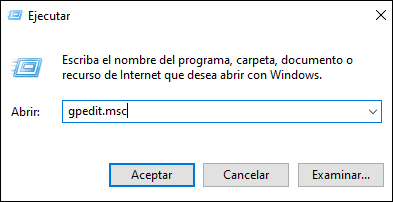
We open Run and enter the following:
gpedit.msc
Step 2
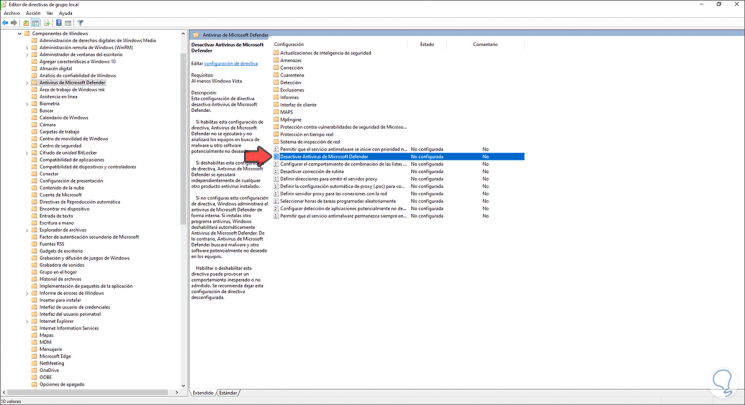
In the policy editor window we will go to the following path.
- Microsoft Defender Antivirus
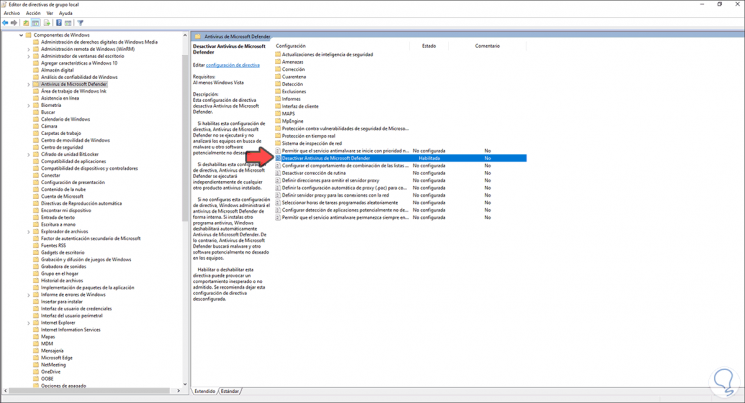
There we locate the policy called "Disable Microsoft Defender Antivirus":
Step 3
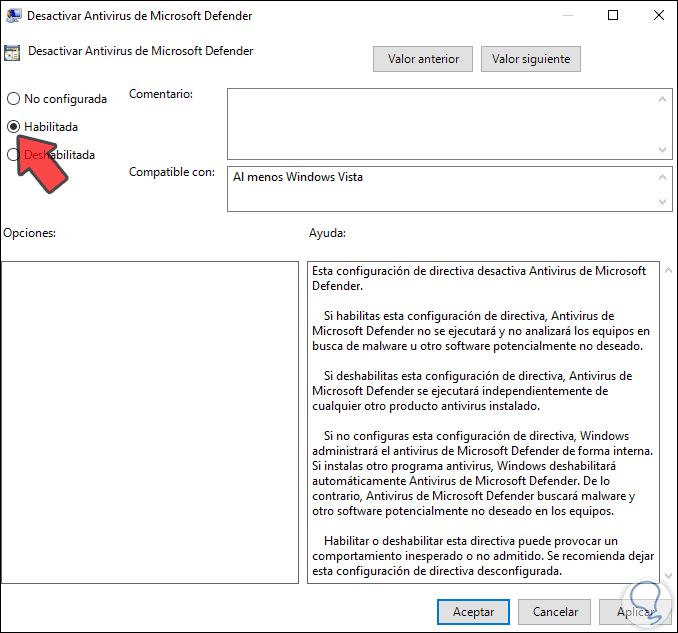
We double click on it and in the pop-up window we activate the "Enabled" box:
Step 4
We apply the changes so that they are stored:
Step 5
After this we restart the system to complete the process.

3. Disable Windows Defender using another antivirus
The next alternative is to install other antivirus software, this will automatically make Windows 10 set this new one as the default.
Step 1
In this case, we will download Avira from the following link:
Avira
Step 2
There we click on the download button to proceed with this:

Step 3
Once downloaded, we double-click on it to open the antivirus installation wizard:

Step 4
In this case the antivirus is installed in the background:

Step 5
At the end of the process we will see the following:

Step 6
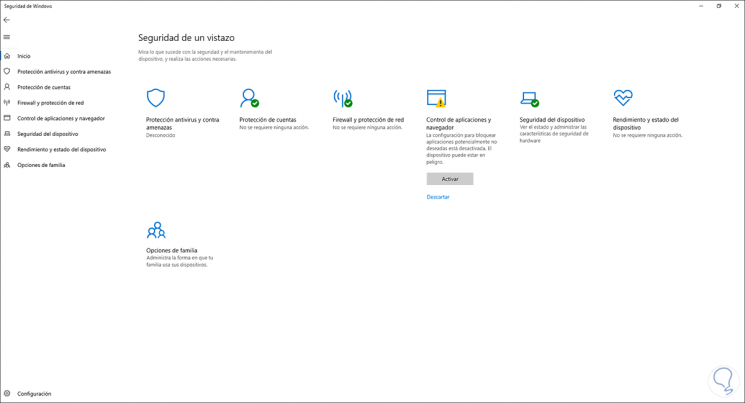
Now we confirm that Windows 10 has established this as the default antivirus, we open Windows Security:
Step 7
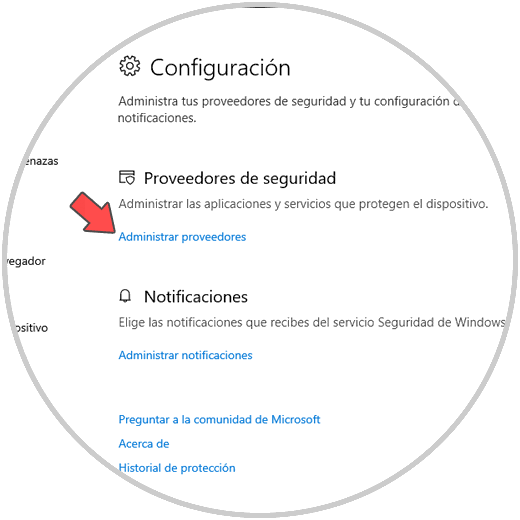
We click on "Settings" and we will see the following. We click on the line "Manage providers"
Step 8
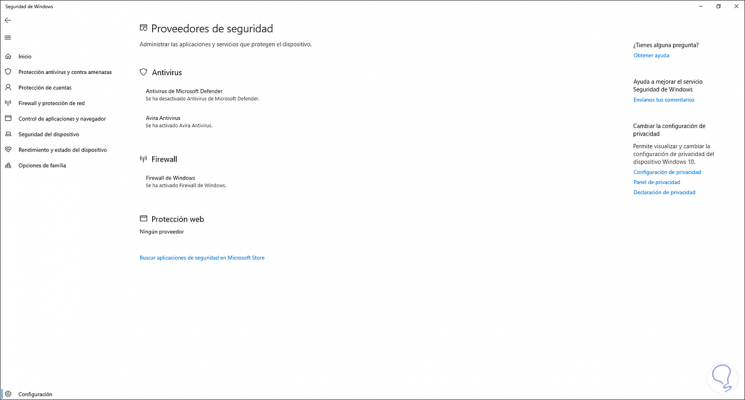
In the section "Security providers" and we can see that Windows Defender is disabled:
With some of the steps that we have explained, it will be possible to completely disable Windows Defender antivirus in Windows 10.