Android has provided for all developers, and those curious about the subject, a platform where it is possible to emulate different devices (tablets, mobiles, etc.) with multiple versions of Android, from 4 to 11, in a safe environment full of functions and we will talk about Android Studio..
Android Studio is an integrated development environment (IDE) for the development of exclusive applications for Android which is based on IntelliJ IDEA.
Features
It is an environment that offers us functions such as:
- It is a flexible build system based on Gradle
- Create a unified environment where it is possible to develop applications for Android devices
- Features a fast, feature-laden emulator
- Integration with GitHub and code templates with which we can compile common application functions
- Integrated compatibility with Google Cloud Platform, this allows integration with Google Cloud Messaging and App Engine
- Instant Run function to apply changes during the execution of the application without having to compile a new APK
- Integration of Lint tools ideal for detecting performance, usability, version compatibility and other application-related parameters
Android Studio projects
The projects in Android Studio are made up of:
- Google App Engine modules
In turn, these modules contain:
- manifests: the AndroidManifest.xml file is located there
- java: this folder contains the Java source files, along with the JUnit test code
- res: we found the resources such as XML layouts, UI strings, and bitmap images for the project
Advantage
Some of the advantages of using Android Studio are:
- Strong and flexible build system
- Analysis with Lintelligence
- Test tools and frameworks to see the final status of the project
- Firebase and Cloud integration
Requirements to install Android Studio Windows 10
To install Android Studio on Windows 10 you need the following:
- A 64-bit edition in which we can use 32-bit apps
- 2GB available disk space, 4GB Recommended (500MB for IDE + 1.5GB for Android SDK and system image emulator)
- Minimum 3 GB of RAM, recommended 8 GB of RAM, the Android emulator consumes 1 GB of RAM
- 1280 x 800 screen resolution
Features
Java JDK 15 is the most recent version of Java which provides functions like:
- Cryptographic signatures based on the Edwards-Curve digital signature algorithm (EdDSA)
- Source code removal and build support for Solaris / SPARC, Solaris / x64, and Linux / SPARC ports
- A second hosting of an external memory access API, this allows programs
- Java securely and efficiently access external memory
- Reimplementation of the legacy DatagramSocket API replacing the underlying implementations of java.net.datagram.Socket
- Integration of ZGC as a scalable low latency garbage collector
- The Nashorn JavaScript engine is removed
- Records (second preview) and more
getFastAnswer is going to explain the step by step to install Android Studio on Windows 10 along with java 15..
To stay up to date, remember to subscribe to our YouTube channel! SUBSCRIBE
Installing Android Studio with Java 15 on Windows 10
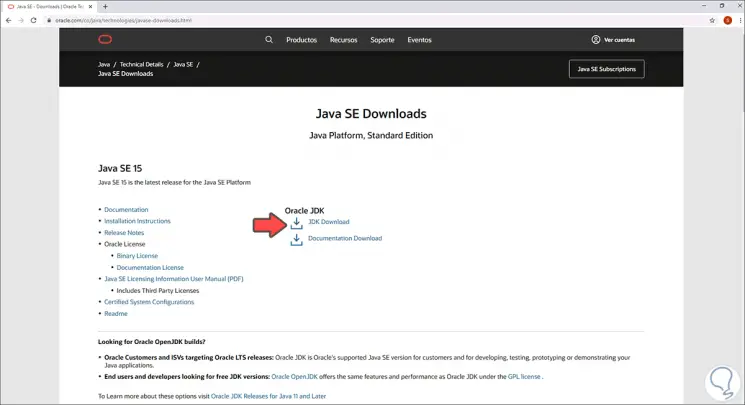
Step 1
We go to the following Oracle link. We click on the line "JDK Download"
Java
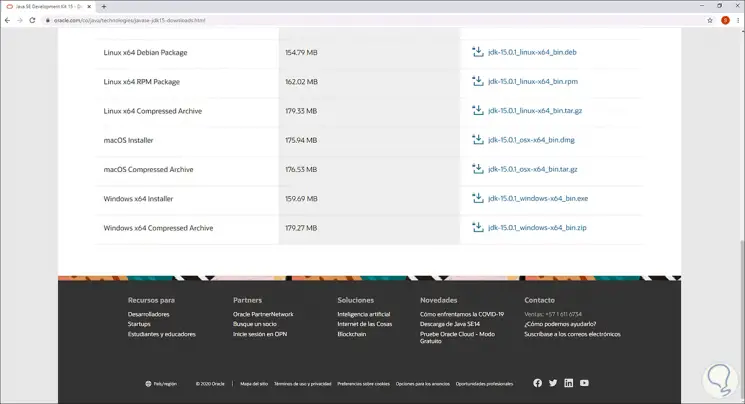
Step 2
We will see the different Java 15 download options:
Step 3
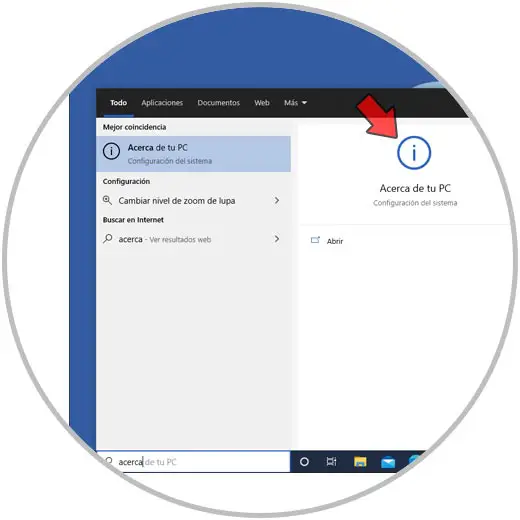
To know exactly the correct version of the equipment, we go to the Windows 10 search engine and enter "about":
Step 4
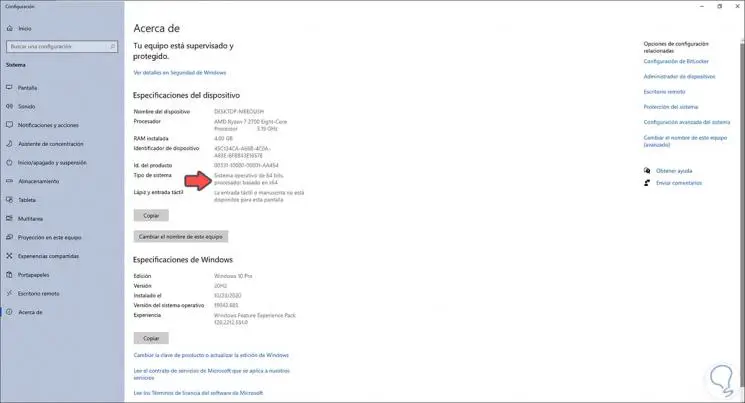
We click on About your PC and in the displayed window we go to the line "System type" and there we find the current architecture:
Step 5
In this case it is 64 bits, we download the Java 15 file in that version:
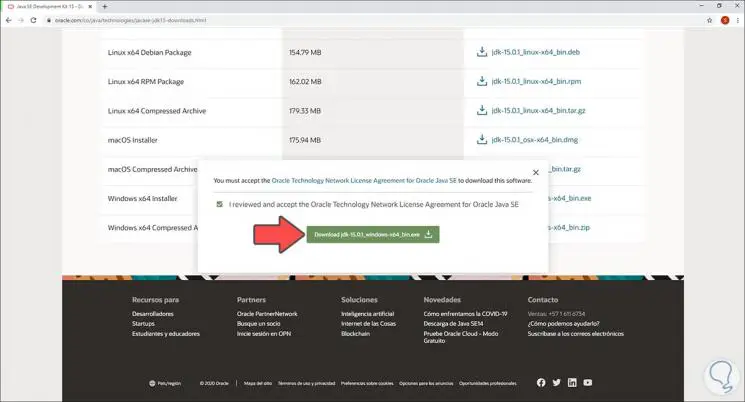
Step 6
We accept the conditions to proceed with the download, once done, we double click on the file to launch the wizard:
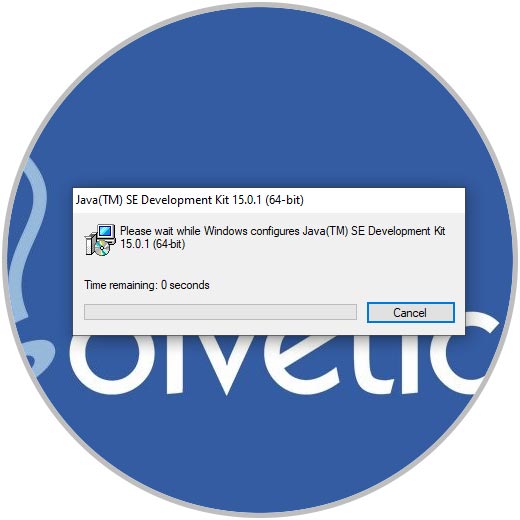
Step 7
After this the Java 15 installation wizard will open:

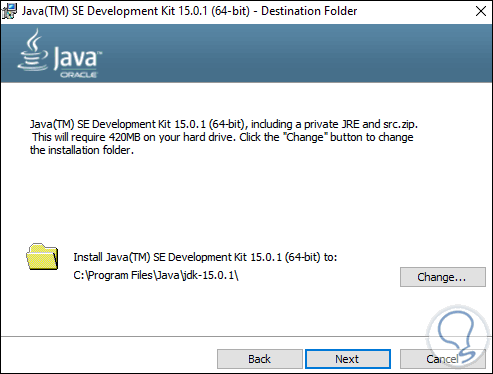
Step 8
We click Next and define the path where it will be installed:
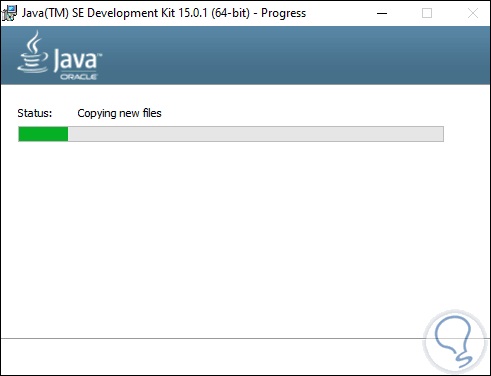
Step 9
Click Next again to start the process:
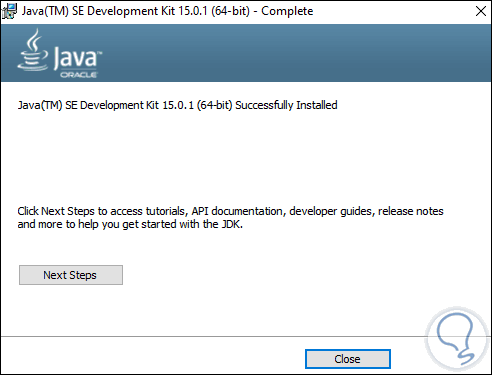
Step 10
At the end we will see the following:
Step 11
After this, we go to the search engine and enter "variables":
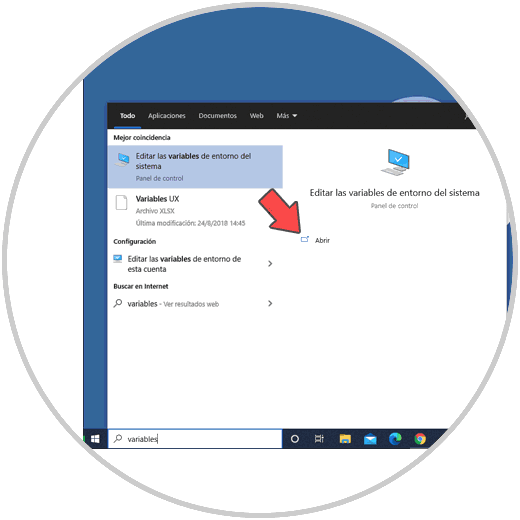
Step 12
We click on "Edit the system environment variables" and the following will be displayed:
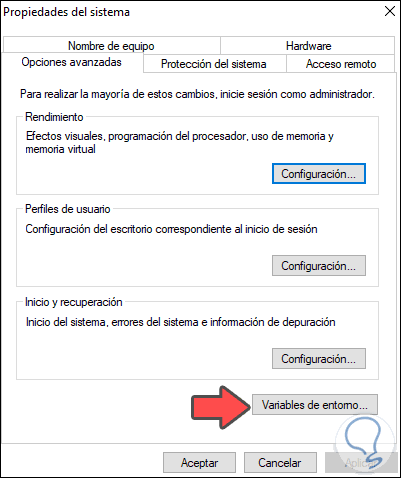
Step 13
We click on "Environment variables" and we will see the following:
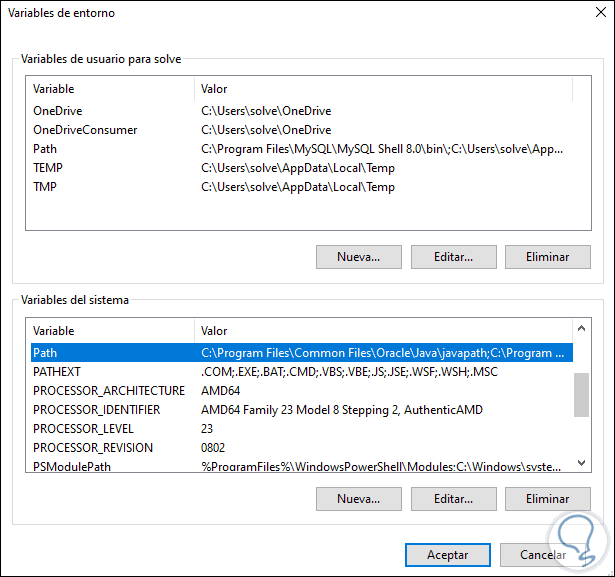
Step 14
Before continuing we will go to the following route:
C: \ Program Files \ Java \ jdk-15.0.1 \ bin
Step 15
We copy this path, in the variables window we select PATH and click on Edit and validate that this path is not there, if it is not, click on New and paste it:
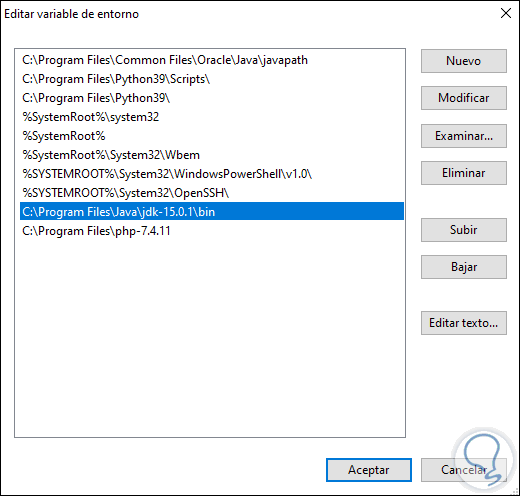
We apply the changes.
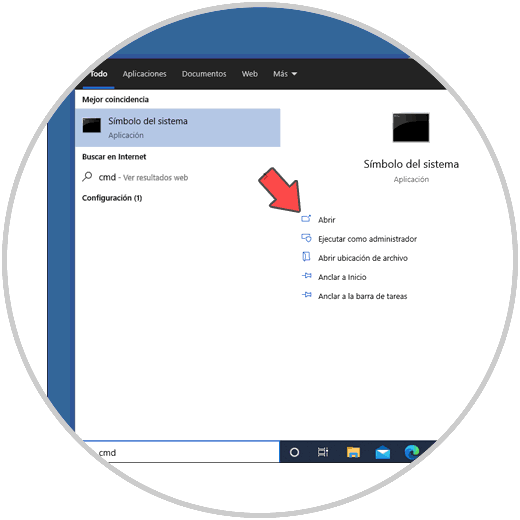
Step 16
We access the command prompt as administrators:
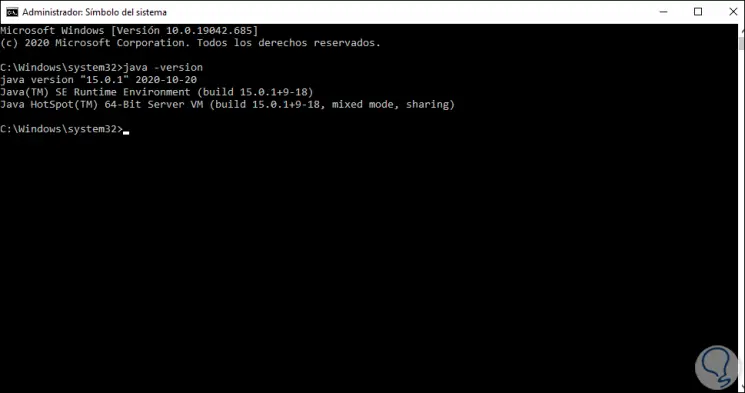
Step 17
There we are going to validate the Java version with the following command:
java -version
Step 18
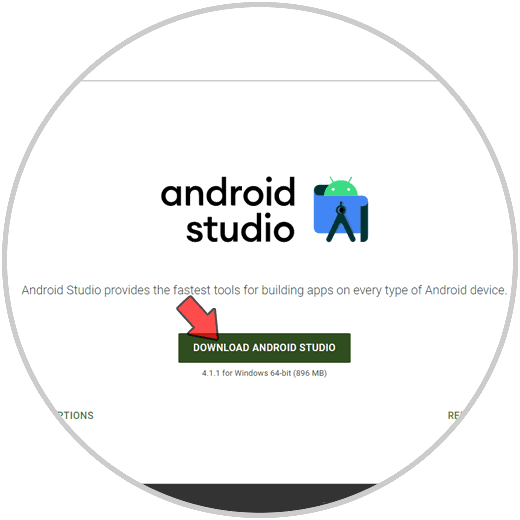
It is time to download Android Studio, for this we go to the following link:
Android Studio
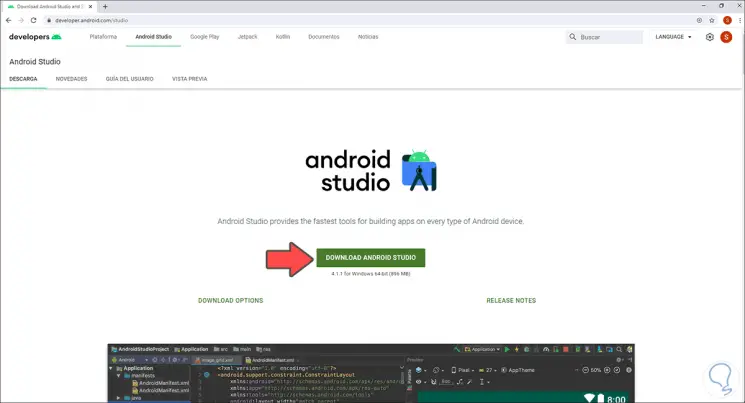
Step 19
We click on the "Download Android Studio" button and in the displayed window we must accept the license conditions:
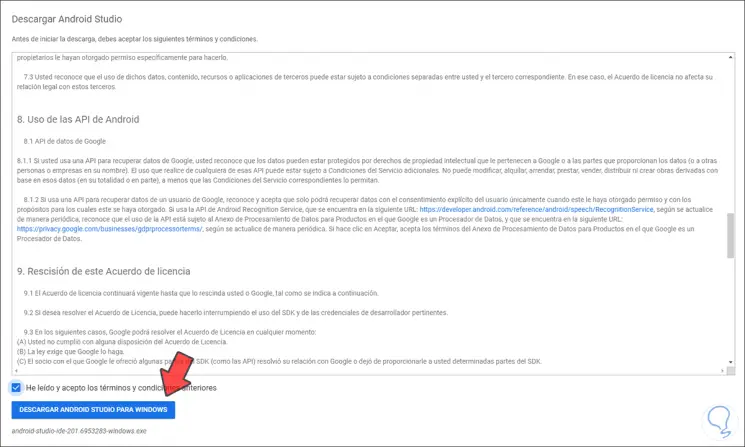
Step 20
We click on the download button to start the download process:
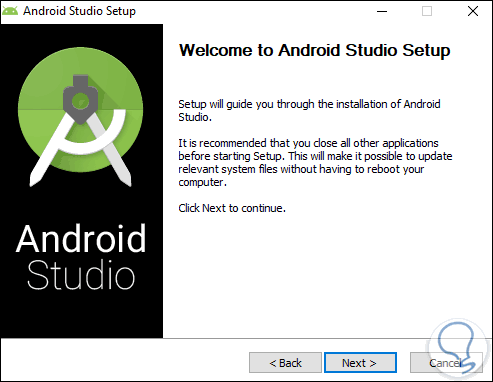
Step 21
Once finished, we execute the file and the following will be displayed:
Step 22
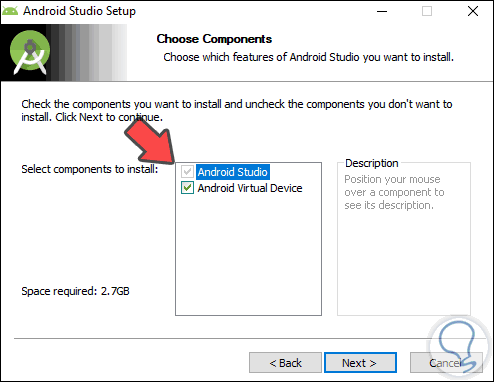
We click Next and we will define which components are to be installed:
Step 23
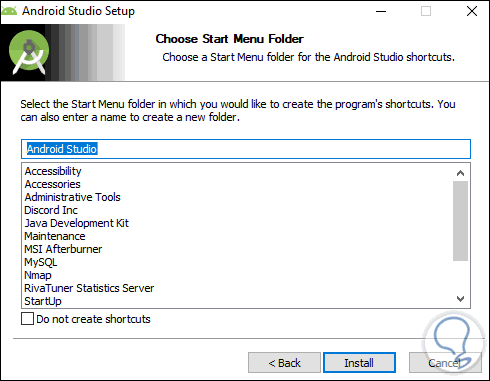
Click on Next and then we define in which part of the Start menu Android Studio will be integrated:
Step 24
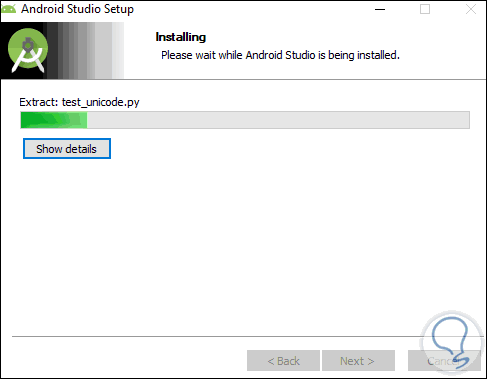
We click on "Install" to start the installation process of Android Studio in Windows 10:
Step 25
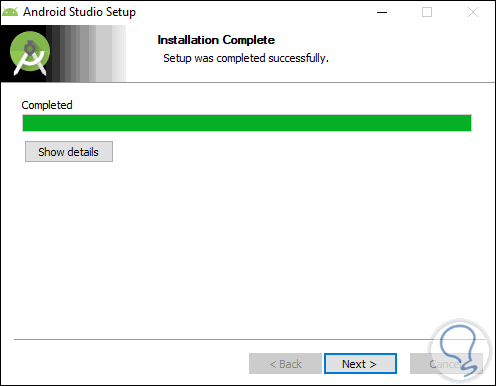
At the end of this installation we will see the following:
Step 26
We click Next and in the following window it will be possible to automatically open Android Studio:
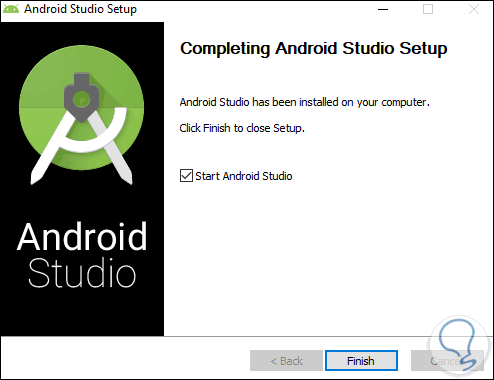
Step 27
We click on Finish and after this we will see the following:
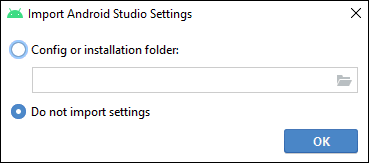
Step 28
In this case, we leave the default value and click OK, the process of opening Android Studio will take place:

Step 29
After this the following will open:
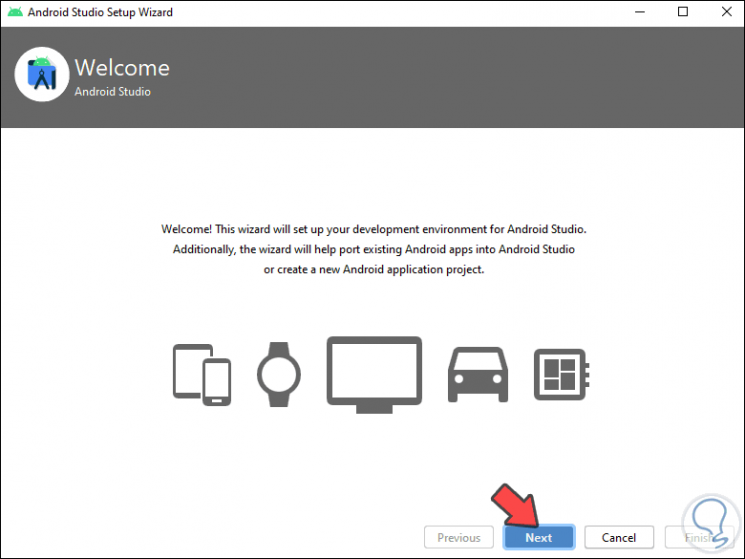
Step 30
We click Next and select the type of installation:
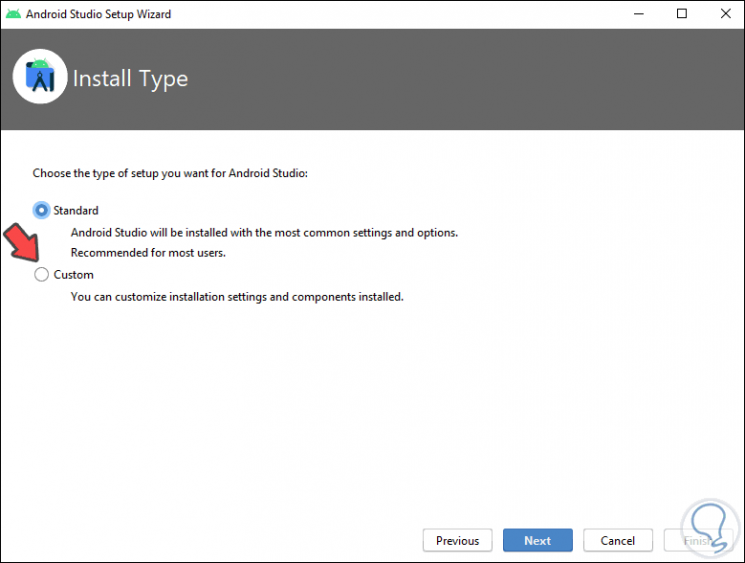
Step 31
We activate the "Custom" box and we will see the following in the next window:
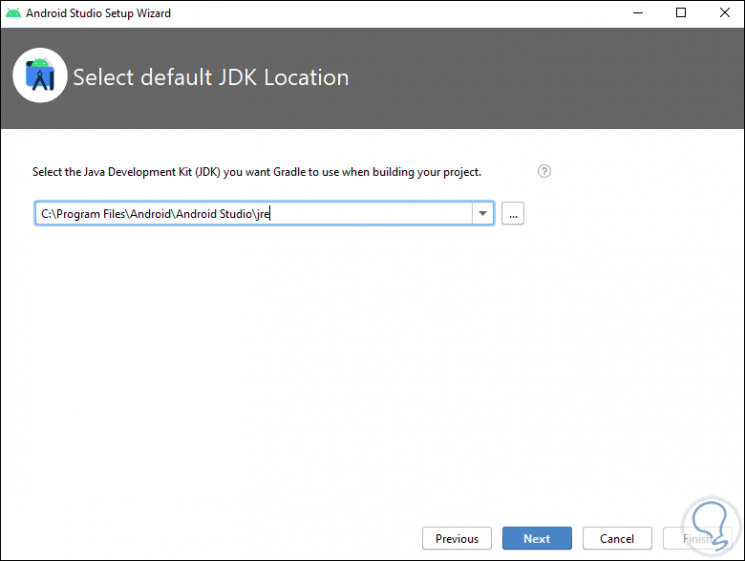
Step 32
There we edit the path where the projects will be hosted and we establish where Java 15 has been installed:
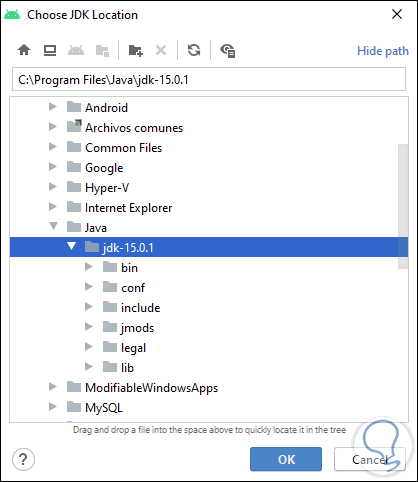
Step 33
We click OK and see it established:
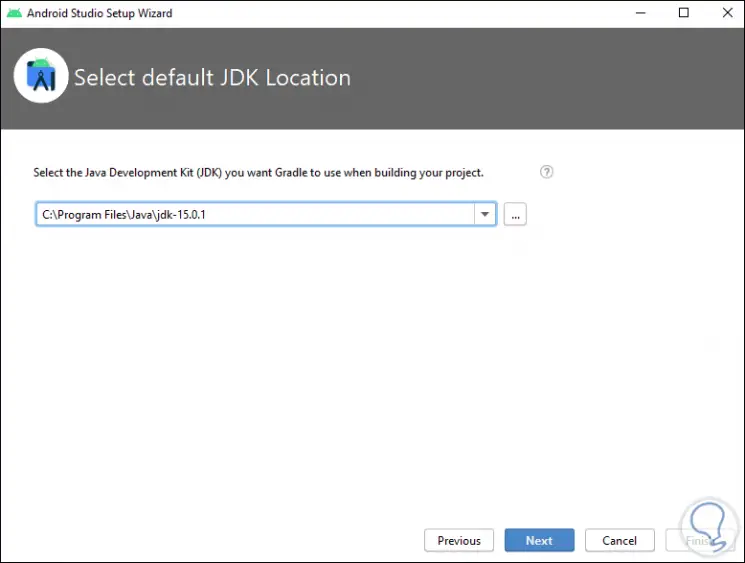
Step 34
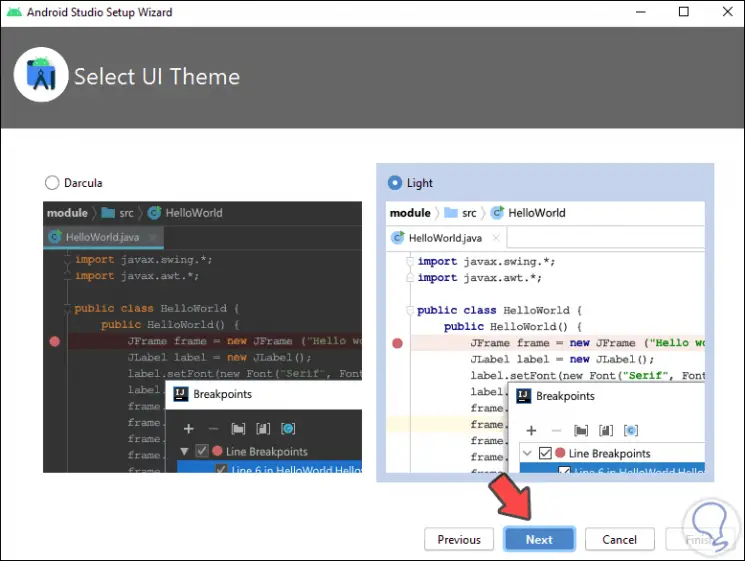
We click Next and now we can define the theme (dark or light) for Android Studio:
Step 35
In the next window we select the components to install Android Studio:
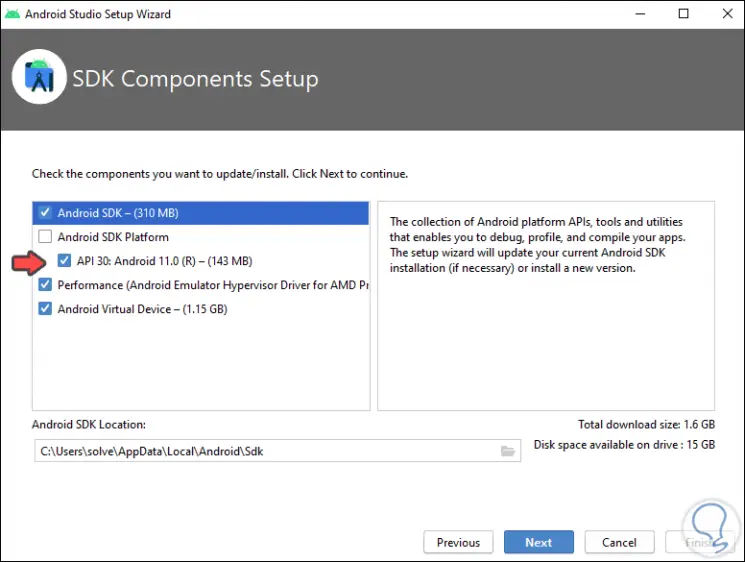
Step 36
Once selected, click Next and we will see this:
Step 37
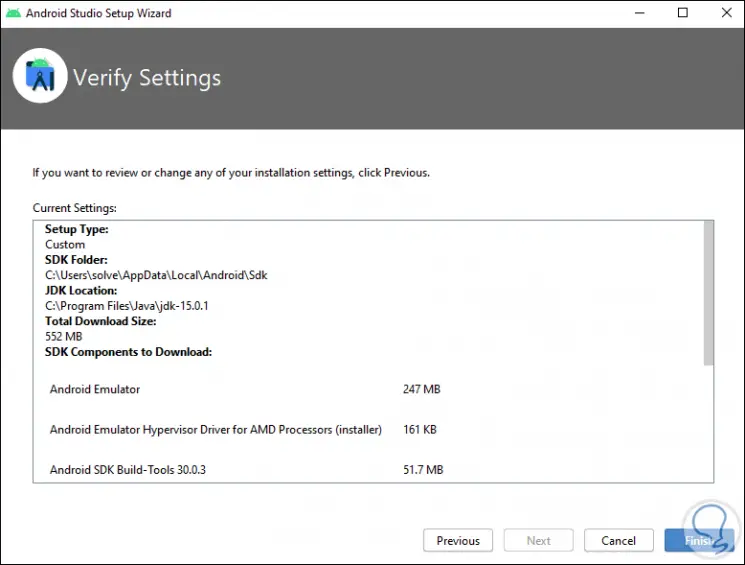
Click Next to see a summary of what has to be installed:
Step 38
Click on Finish to start the configuration process according to the defined criteria:
Step 39
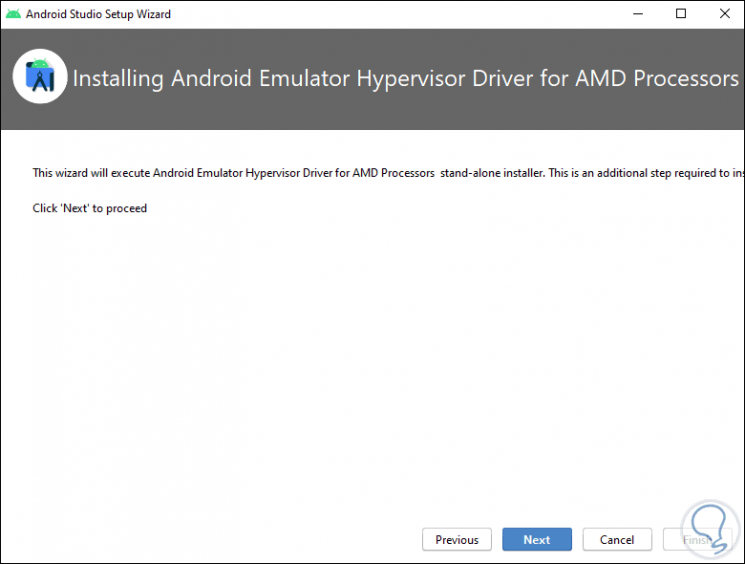
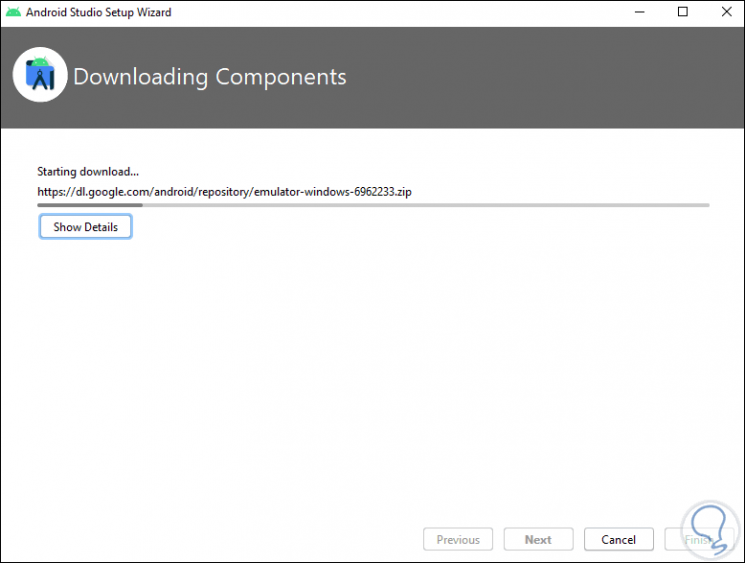
There we can see that the download of each of the components starts, if we wish we click on "Show Details" to see that it is running in real time:
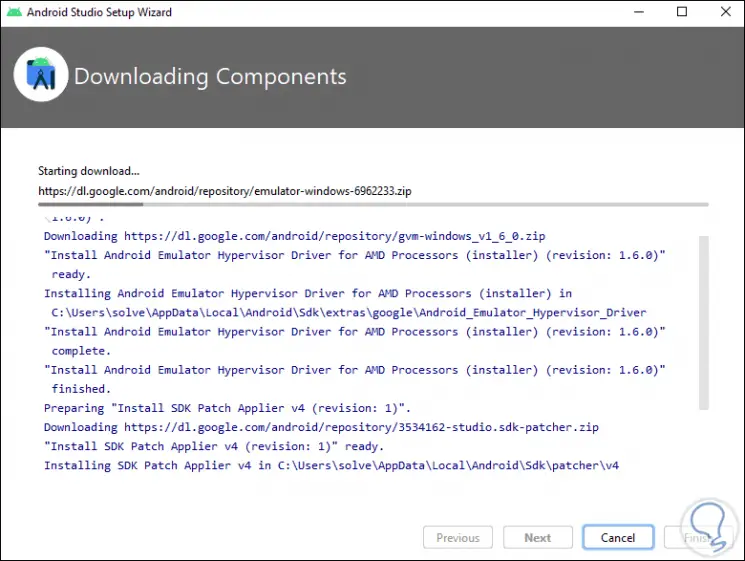
Step 40
When this process ends we will see the following:
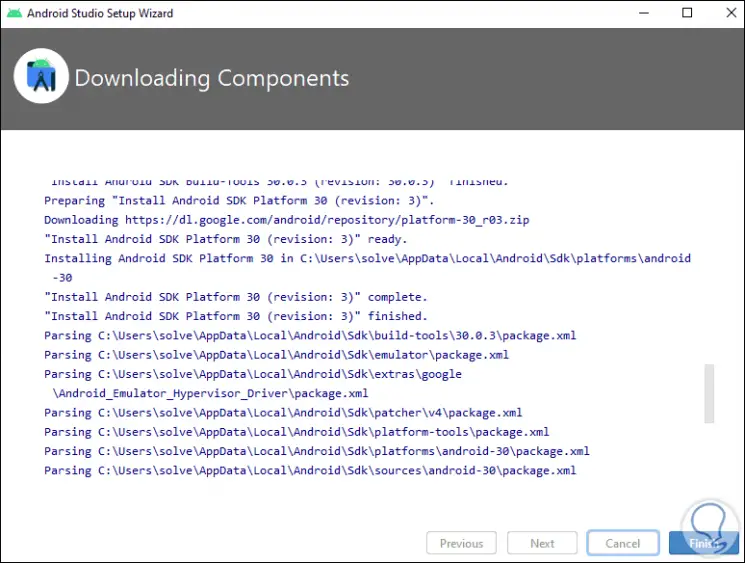
We click on Finish to exit the wizard..
Step 41
The following window will open:
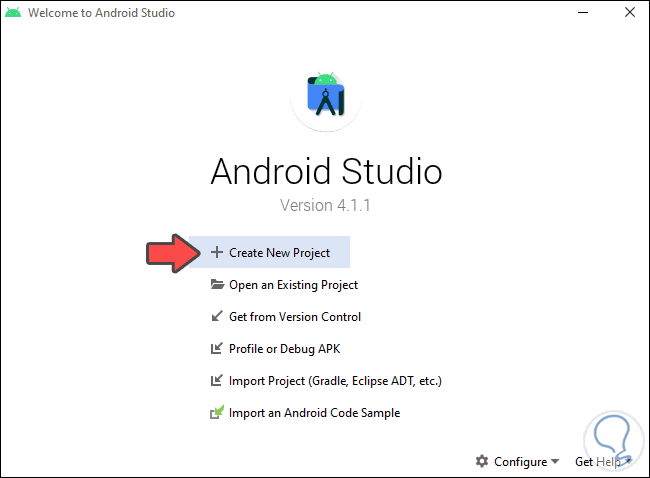
Step 42
We click on "Create New Project" and in the next window we select the desired type of project based on the available devices:
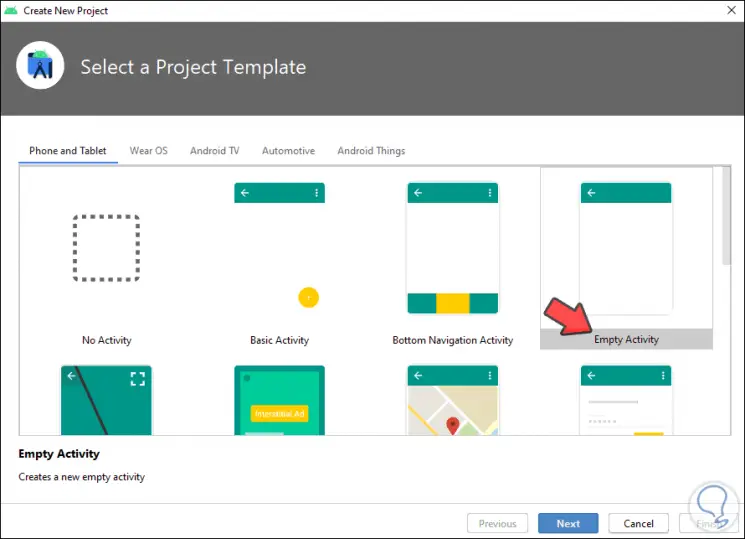
Step 43
In this case we leave the default value (Empty Activity) and click Next and first assign the name of the project:
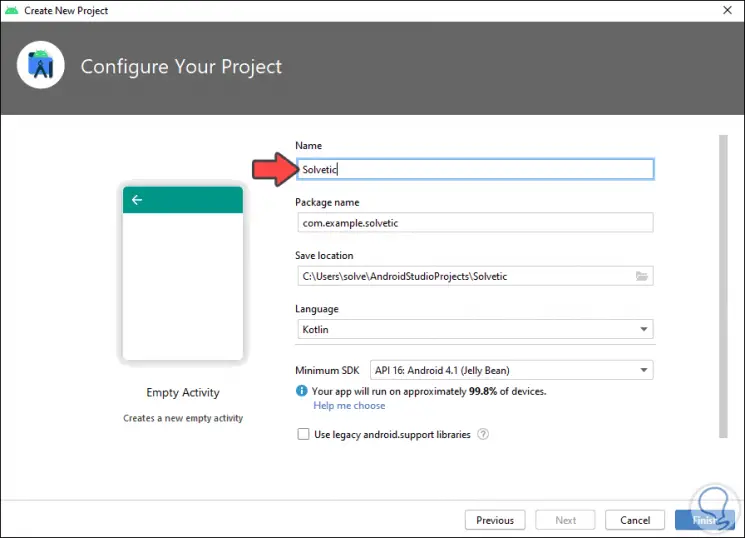
Step 44
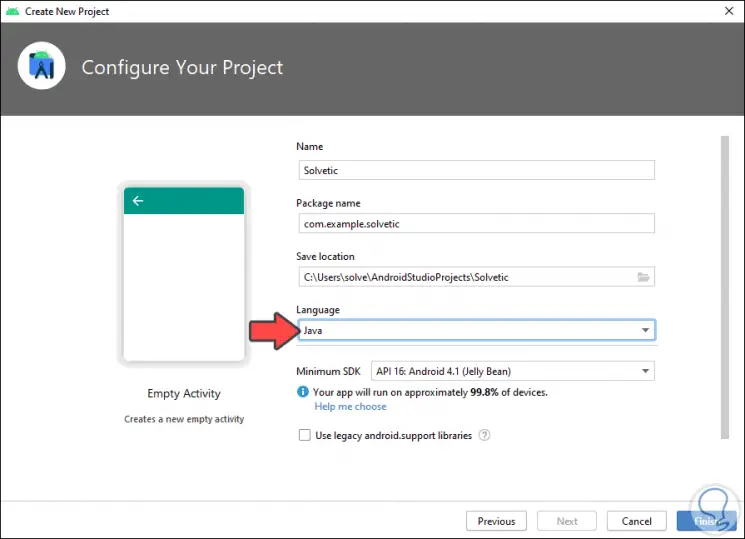
In the "Language" field we establish Java:
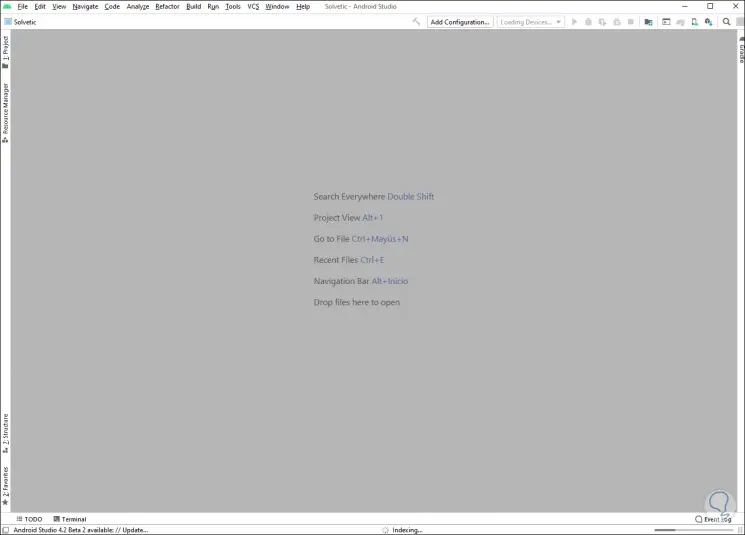
Step 45
We click on Finish and the following will open:
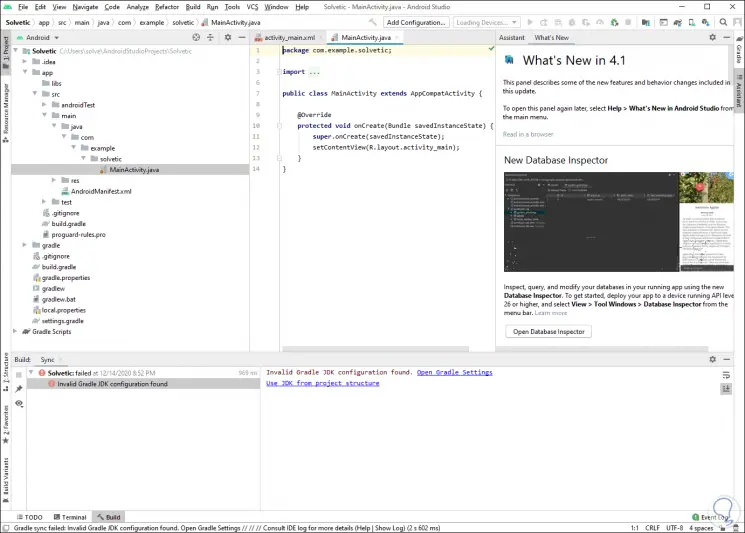
Step 46
There we must wait for all the project values to be loaded:
Step 47
At the top we click on the SDK Manager icon:
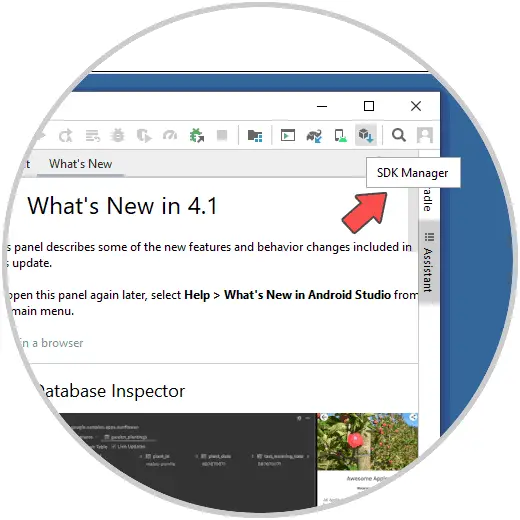
Step 48
This will open the following window:
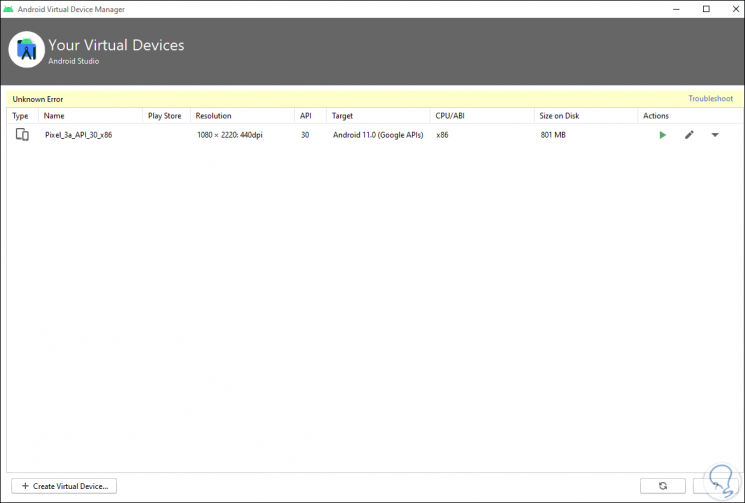
Step 49
We click on "Create Virtual Device" and in the next window we choose which device we are going to emulate:

Step 50
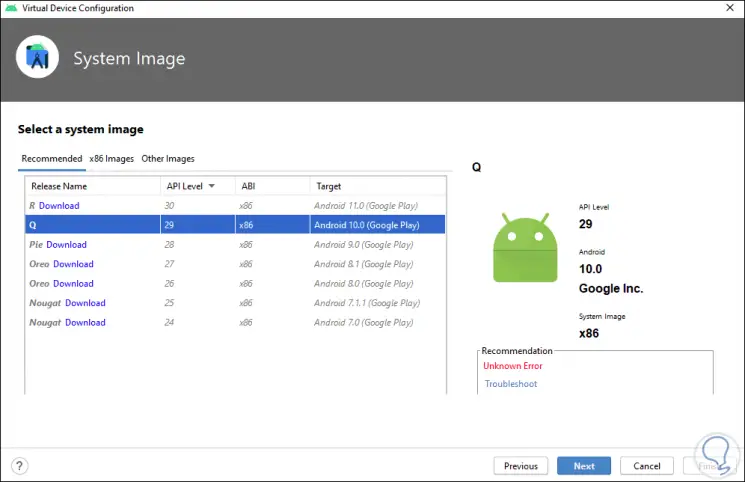
Click on Next and we must select one of the images available for that device:
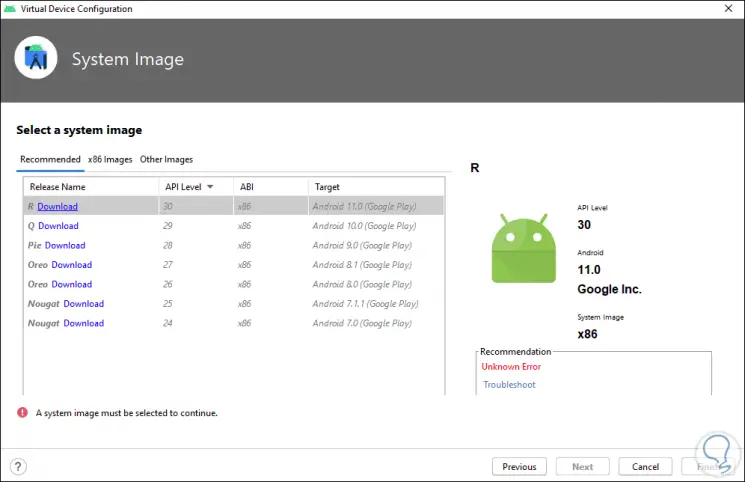
Step 51
We click on "Download" on the desired image and in the next window we accept the license:
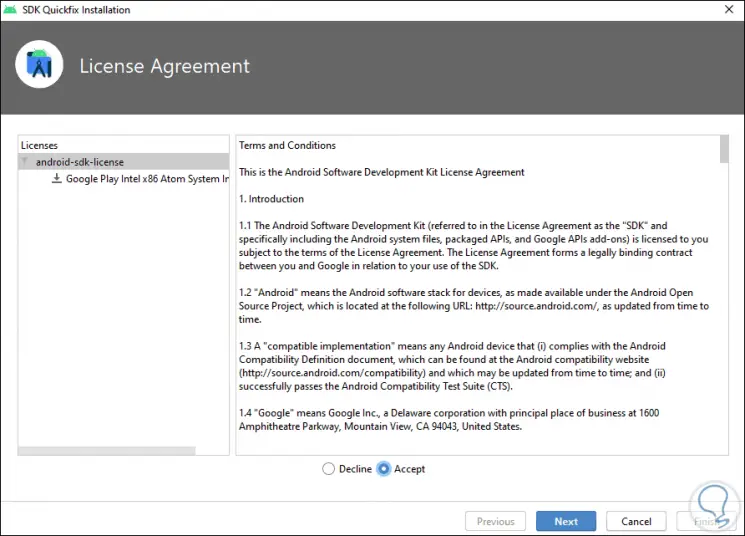
Step 52
We click Next and the download process of this image will begin:
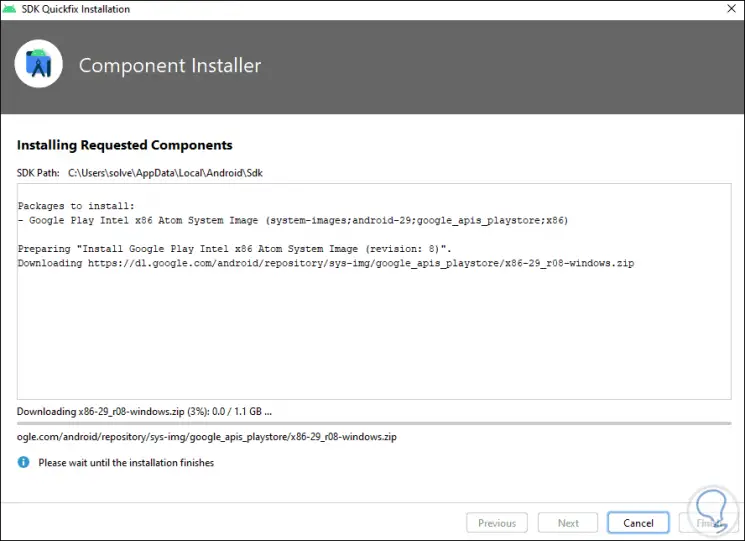
Step 53
At the end we will see:
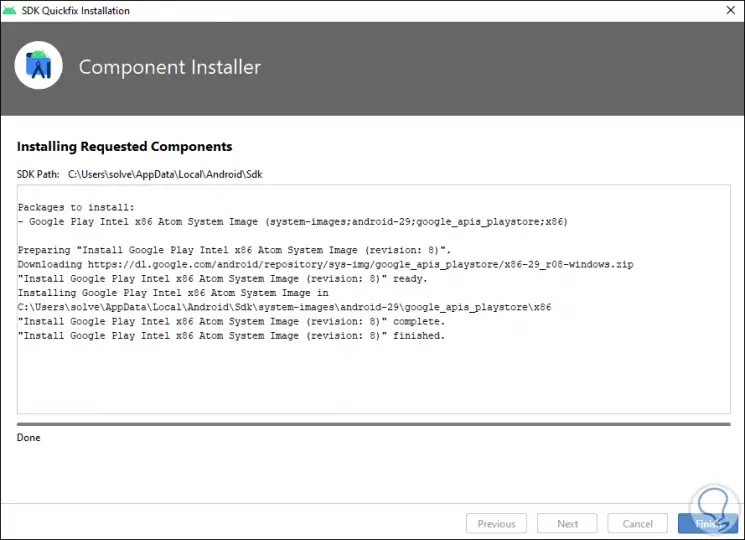
Step 54
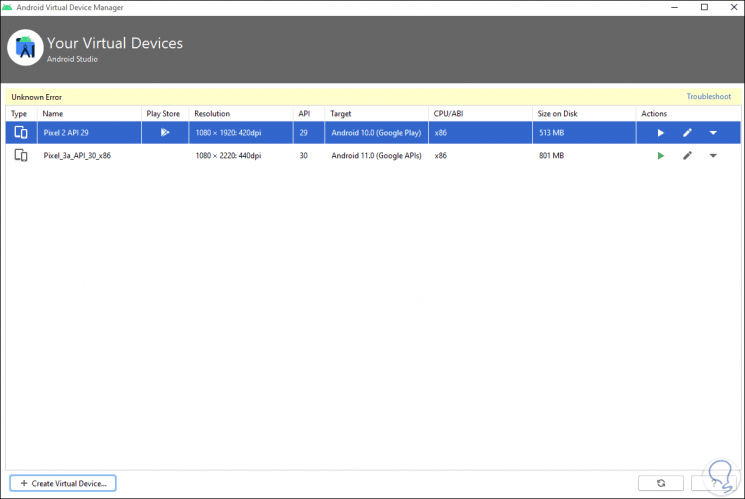
We click on Finish and we will see that the image is ready to be used:
Step 55
We click Next and complete the device configuration as necessary:
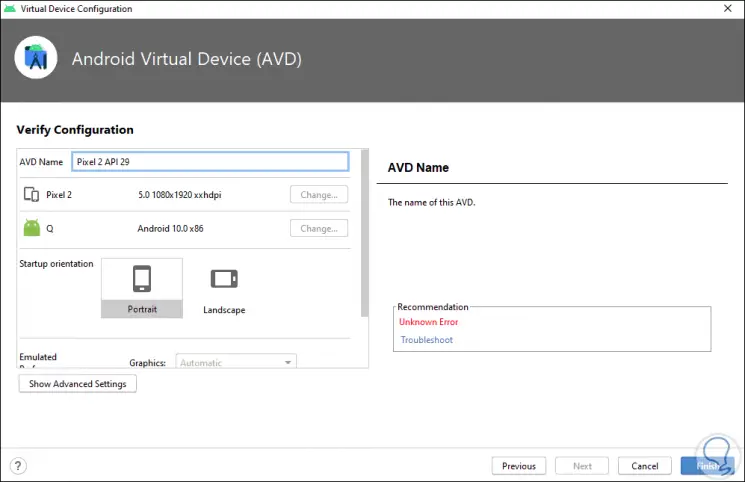
Step 56
We click on Finish and we will see the finished project:
Step 57
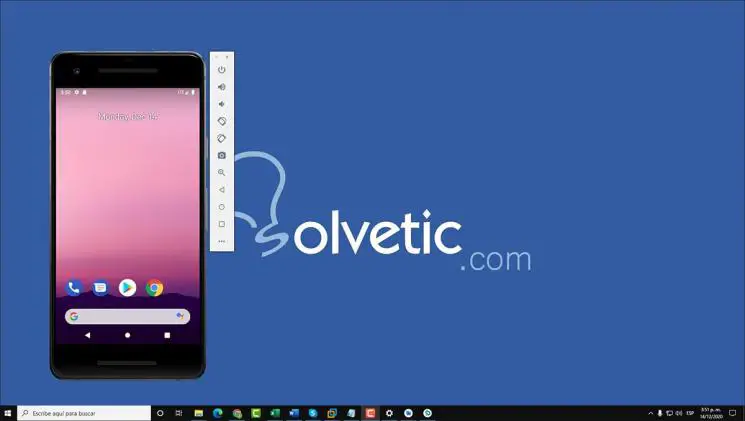
Click on the play button to run the device with the selected image:
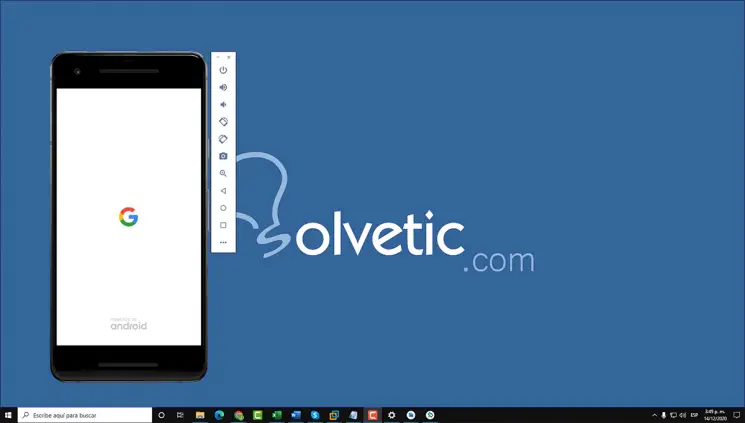
Step 58
This will load the chosen Android version and we can navigate on the mobile as if it were real:
Thanks to Android Studio and java 15 we can explore a world of options on Android and learn about different devices and create new applications for them and test them in real time to see if they are functional or not.