Security when accessing the network is one of the main columns that both developers and users of all operating systems and applications seek to improve every day. This is due to the millions of threat sites that can violate user privacy, steal their data or cause system anomalies..
To prevent this in Windows 10 we have Microsoft Defender SmartScreen, which is a mechanism to protect the computer from phishing or malware websites and applications. This will prevent potentially malicious files from being downloaded that put your computer's integrity at risk.
This is a built-in function by default and Microsoft Defender SmartScreen takes care of analyzing a page for potentially malicious use using methods such as the following..
Methods
- Using the analysis of the visited website to determine if it has any margin of suspicious behavior.
- By conducting a website check against a dynamic list of phishing sites and malware sites that have been reported globally.
features
Among its characteristics we find:
- Reputation-based URL and application protection
- Anti-phishing and anti-malware support
- Windows 10 operating system integration
- Management through group policies and Microsoft Intune
- Improved heuristic and diagnostic data
Although all this is really vital for safe browsing , due to support issues or downloading from reliable sites, SmartScreen classifies it as dangerous and does not allow us to access it, but it is true that we have the possibility of disabling the filter. For this we have different options which we will analyze one by one in getFastAnswer.
To stay up to date, remember to subscribe to our YouTube channel! SUBSCRIBE
1. Disable SmartScreen Windows 10 filter from Internet properties
Step 1
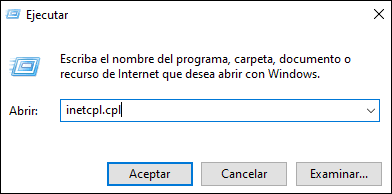
For this method we open Run and there we enter the following:
inetcpl.cpl
Step 2
We click OK and in the displayed window we go to the "Security" tab where we will see the following:
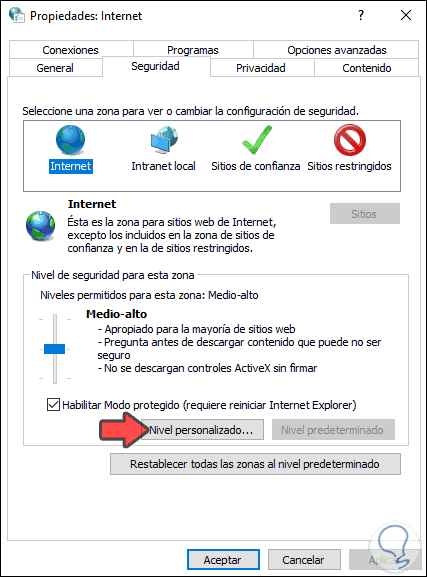
Step 3
There we click on the "Custom level" button and in the displayed window we locate the line "Use Windows Defender SmartScreen" where we will see it active by default:
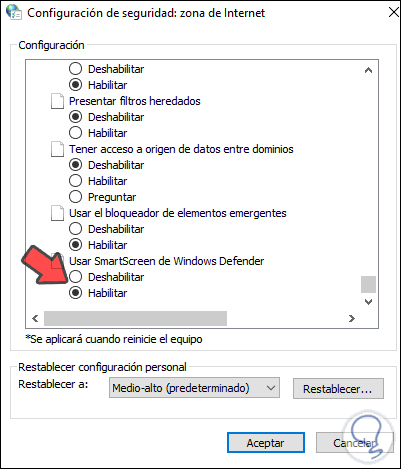
Step 4
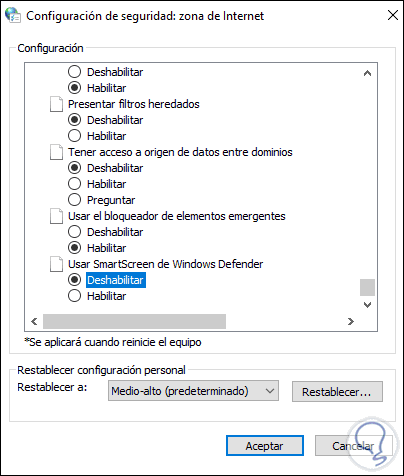
We activate the "Disable" box to disable it:
Step 5
We apply the changes and we will see the following message:
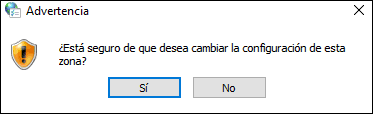
We click Yes to confirm the process of disabling SmartScreen..
2. Disable SmartScreen Windows 10 filter from Settings
Another simple method to disable the SmartScreen filter is from the system settings.
Step 1
For this, we go to the search engine and enter "application control":
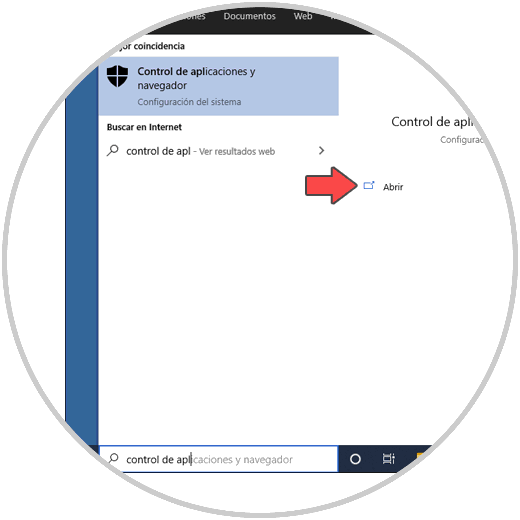
Step 2
We click on "Application and browser control", the following will open:
Step 3
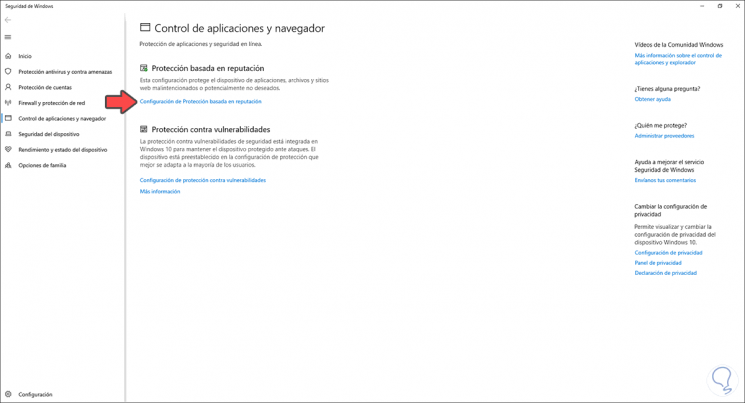
We click on the line "Reputation-based Protection Settings" and we will see the following:
Step 4
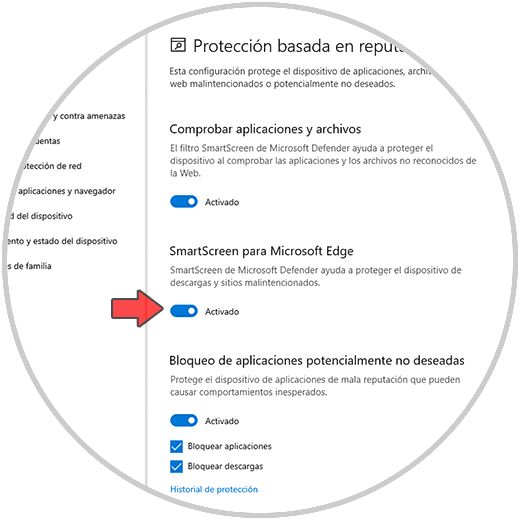
To disable SmartScreen we must click on your SmartScreen switch for Microsoft Edge:

3. Disable SmartScreen Windows 10 filter from group policies
Step 1
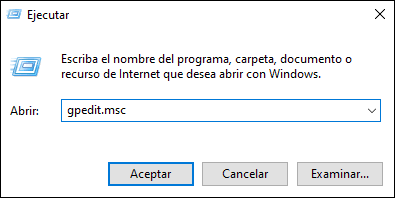
This is an option available for the Pro and Enterprise editions of Windows 10, for this we open Run and enter:
gpedit.msc
Step 2
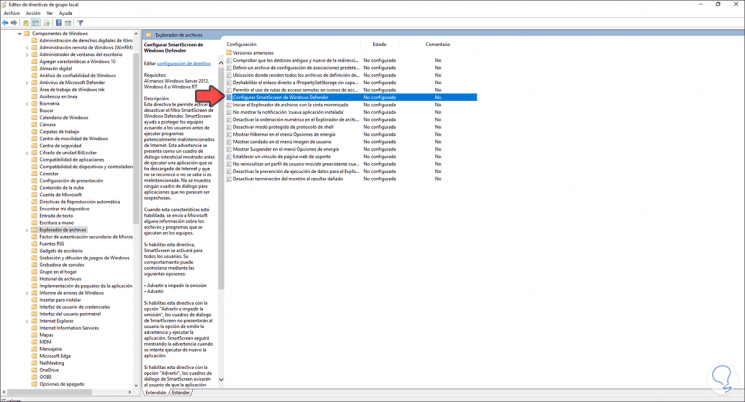
In the policy window we go to the path:
- We locate the policy called "Configure Windows Defender SmartScreen":
Step 3
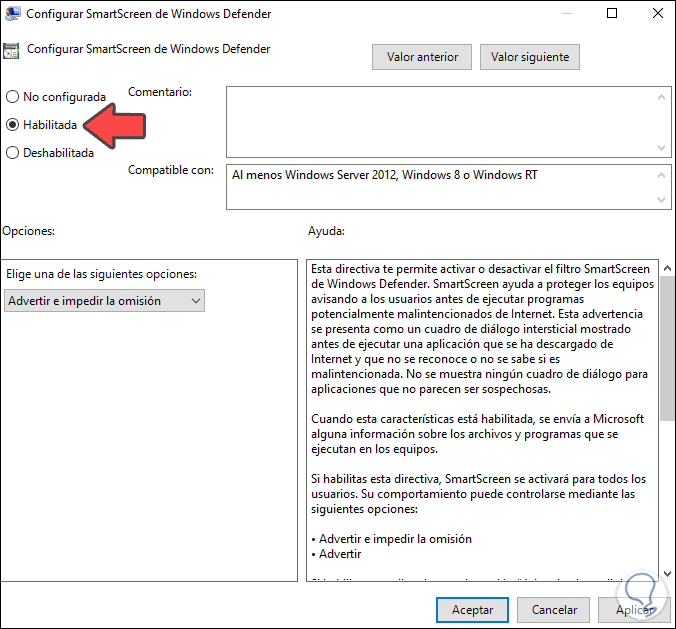
We edit the policy and in the pop-up window we activate the Disabled box:

Step 4
If we wish to enable it, we activate "Enabled" and define its level:
We apply the changes.
4. Disable SmartScreen Windows 10 filter from registry editor
Step 1
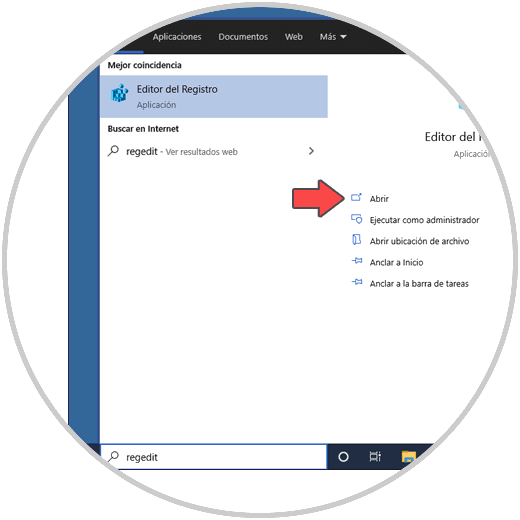
This is an option that we can use in all editions of Windows 10 and we recommend creating a backup, we open regedit:
Step 2
In the editor we go to the following path:
HKEY_LOCAL_MACHINE \ SOFTWARE \ Policies \ Microsoft \ Windows \ System
There we right click and select "New - DWORD value (32 bits)":
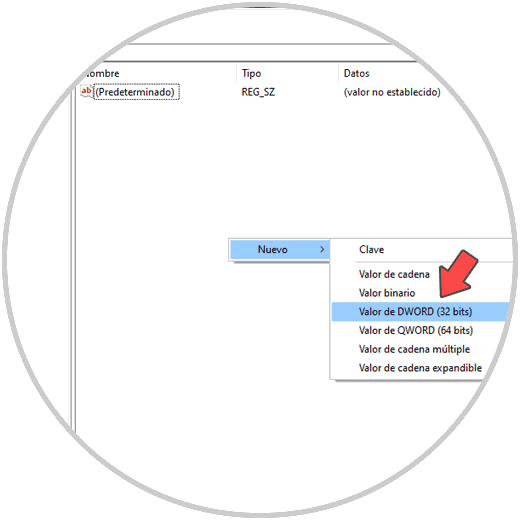
Step 3
We call this value "EnableSmartScreen":
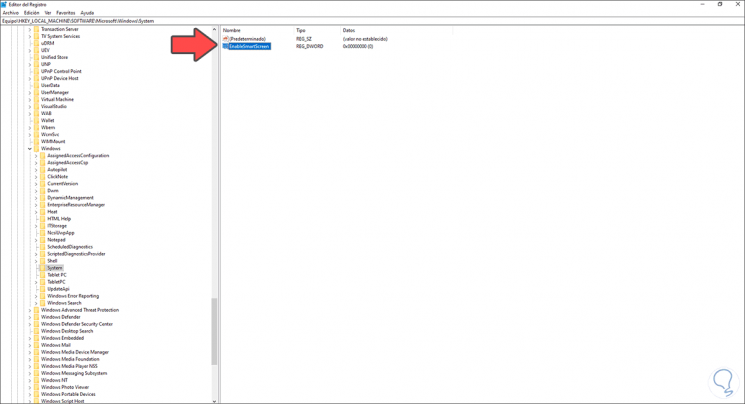
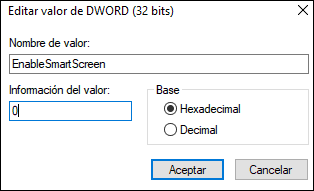
Step 4
We edit its value and leave the default value at 0 to disable SmartScreen (1 enables it):
We apply the changes.
Step 5
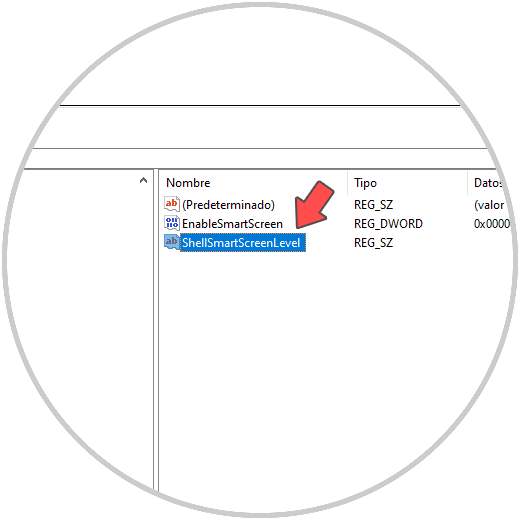
In case of activating the SmartScreen filter from here, we can right click and select "New - String value":
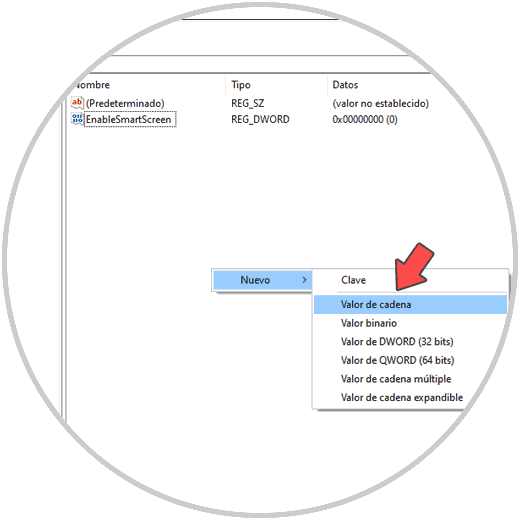
Step 6
We call this value "ShellSmartScreenLevel":
Step 7
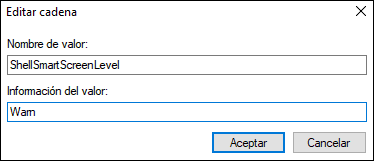
We edit its value with one of these options:
- Warn: displays a warning message, but can be ignored
- Block: displays a warning message and does not allow the application or file to run
With these methods we have the possibility to select the best option to disable SmartScreen in Windows 10.