SQL server 2019 is one of the best platforms for data analysis with various development languages, data types and locations either local or in the cloud as well as compatibility with different operating systems. In addition to this, SQL Server 2019 offers us improvements for the SQL Server database engine, SQL Server Analysis Services, SQL Server Machine Learning Services, SQL Server on Linux and SQL Server Master Data Services..
If with all these functions you find a better solution for data management, getFastAnswer will explain how you should uninstall SQL Server 2019 in Windows 10 .
To stay up to date, remember to subscribe to our YouTube channel! SUBSCRIBE
How to uninstall SQL Server 2019 completely in Windows 10
Step 1
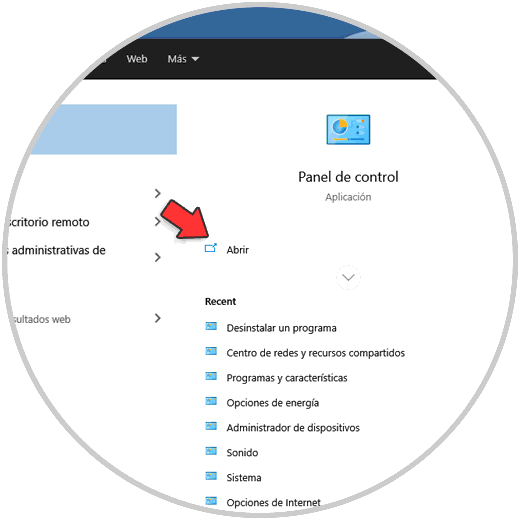
For this we open the Control Panel from the Start menu:
Step 2
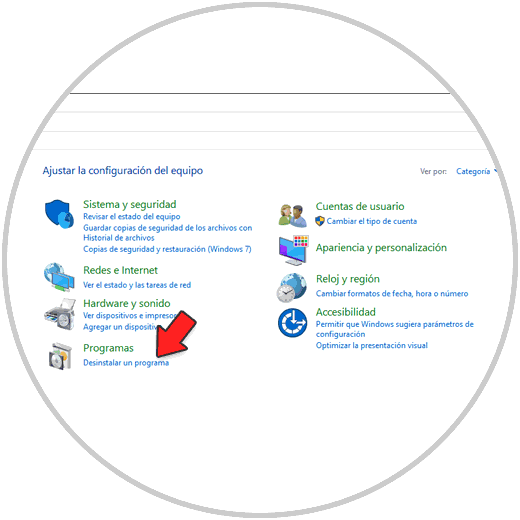
Once we access we will see the following:
Step 3
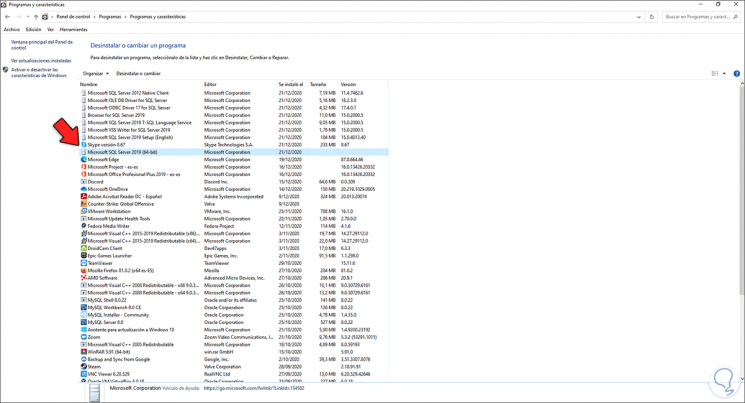
There we click on the line "Uninstall a program" and in the next window we will locate the version of SQL Server 2019:
Step 4
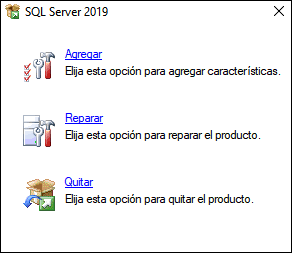
When selecting SQL Server at the top, the Uninstall button is activated, we click on it and we will see the following:
Step 5
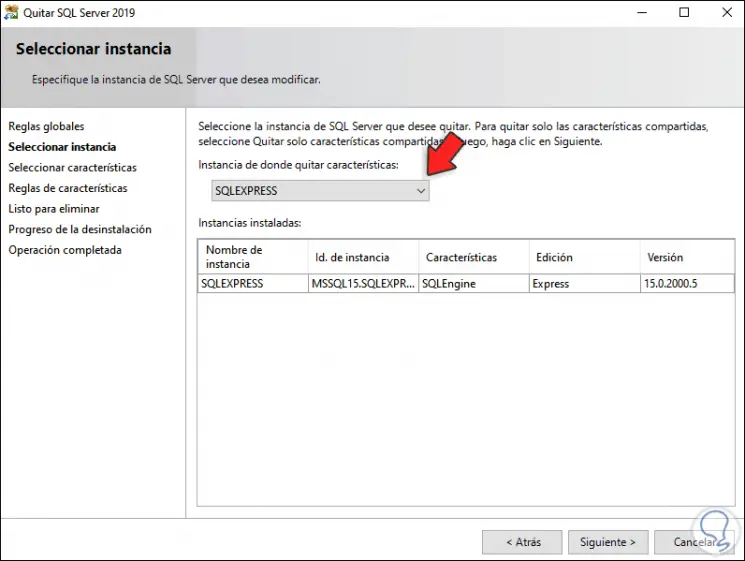
There we click on the "Remove" option and the uninstallation wizard will open, first of all we select the instance to uninstall:
Step 6
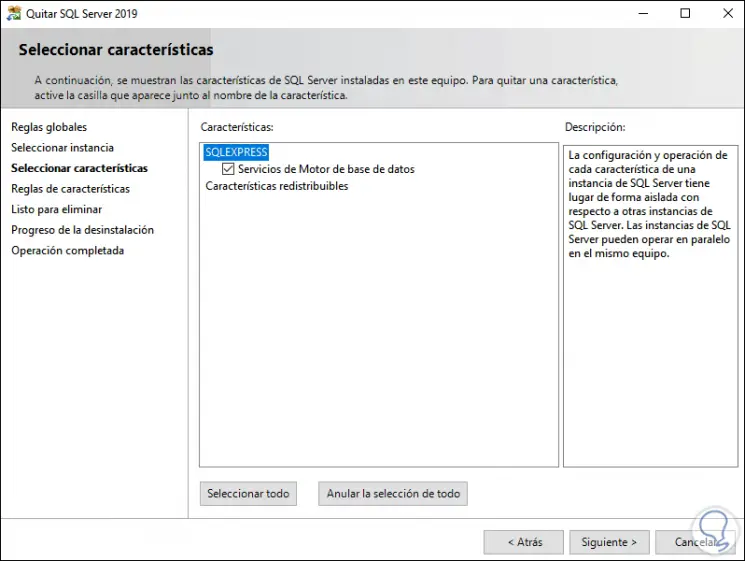
We click Next and now we select the features to remove:
Step 7
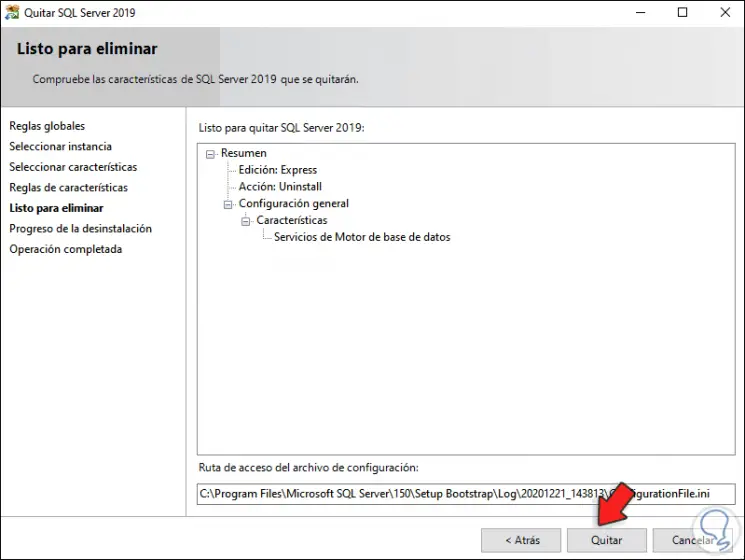
We click Next and we will see a summary of the process:
Step 8
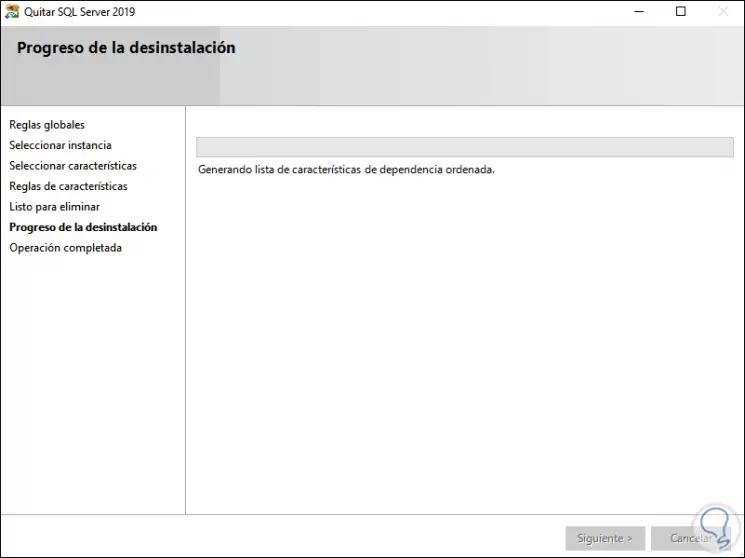
We click on Remove to proceed with the uninstallation:
Step 9
At the end we will see the following. There we see that the uninstallation was successful.
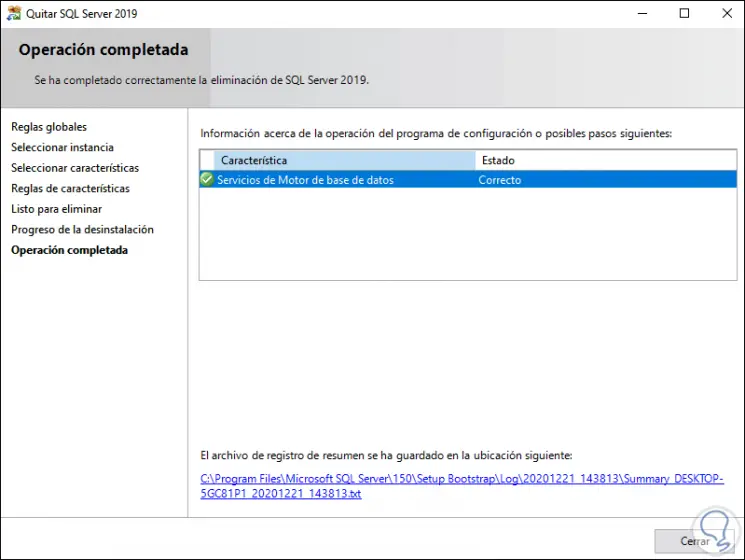
We click Close to exit the wizard and in this way SQL Server has been uninstalled from Windows 10..