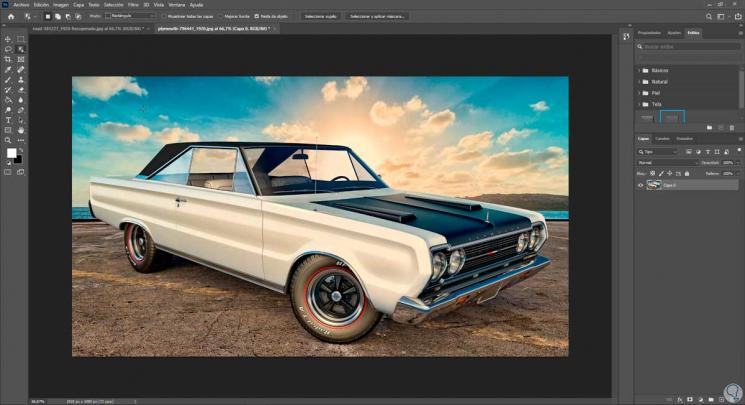
Many times, no matter how hard we try to get the perfect image, different elements can affect the final result and perhaps end up frustrating us. That is why editing in Photoshop opens up a world of possibilities for us to make montages and photographic adjustments that we did not conceive before. A background should not be a problem if you are looking for your perfect photo since here we will show you how to remove or change background in Photoshop CC 2021 OR CC 2020..
Our final result will depend on the time and interest that you show to the editing process since, the more effort, the result will come out much better. Also, you can visit our Photoshop videos and tutorials to learn more editing tricks and thus apply them to your editing processes in Photoshop CC . This time we are going to see two different ways to be able to either remove a background from an image and leave it transparent or change the background to an image in Photoshop CC 2020 or CC 2021 easily.
To stay up to date, remember to subscribe to our YouTube channel! SUBSCRIBE
1. Delete or change Photoshop CC 2021 and CC 2020 background with Selection
Step 1
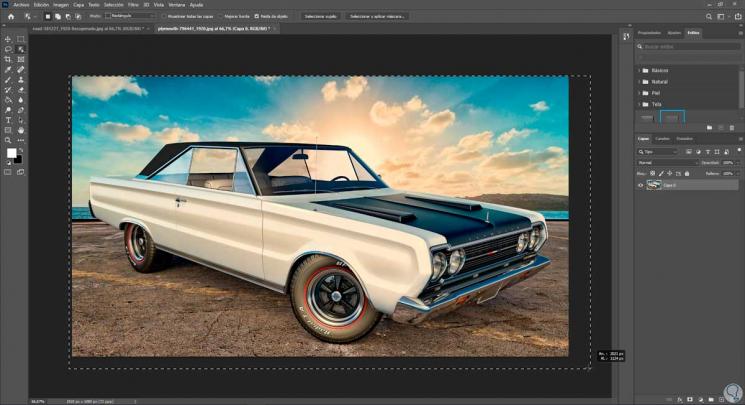
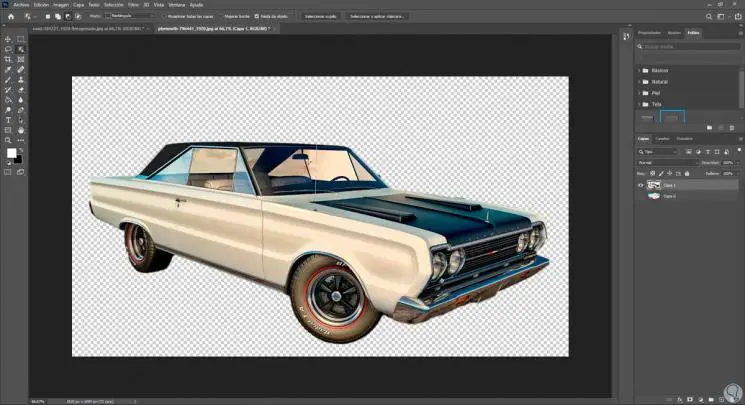
The first thing will be to open our image within Photoshop
Step 2
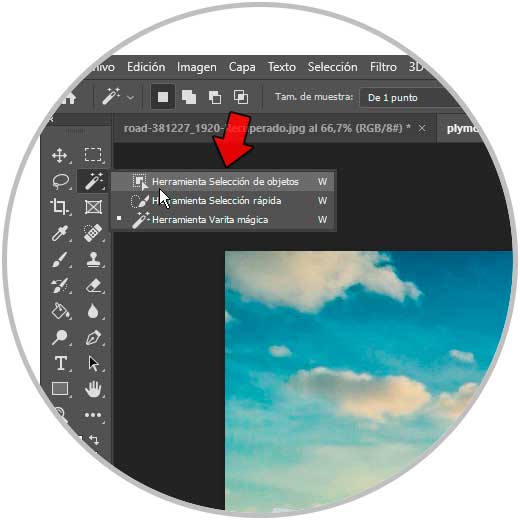
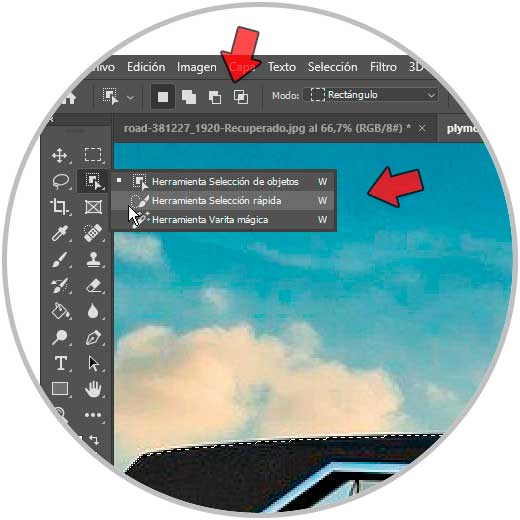
Now, we go to the tools panel and click on the selection options to display them. Here we will see different options:
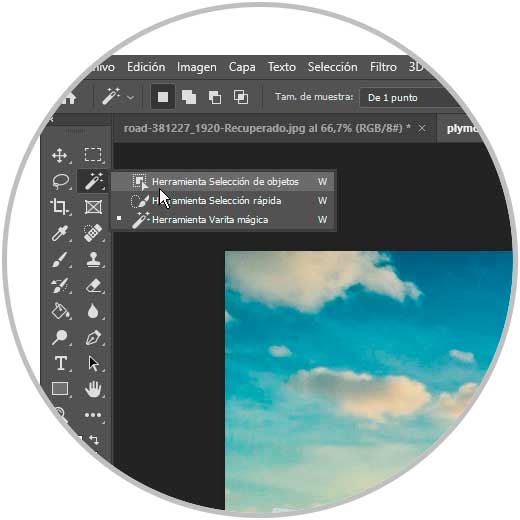
Surely the best known option is the "Magic Wand" but this time we will use the "Object Selection Tool" option as it is one of the latest developments..
Step 4
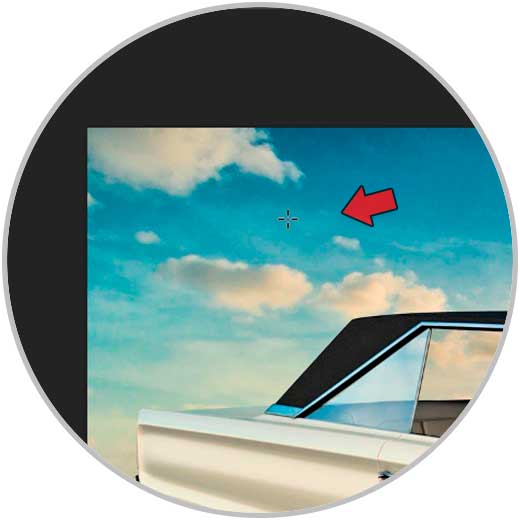
Now the cursor will turn into a selection rectangle.
Step 5
Now, so that you can select the image, you will have to click on one of the image's corners and drag the selection to the opposite corner, thus selecting the image completely.
We will see that the selection of the object is made differing from the background to be removed.

Step 6
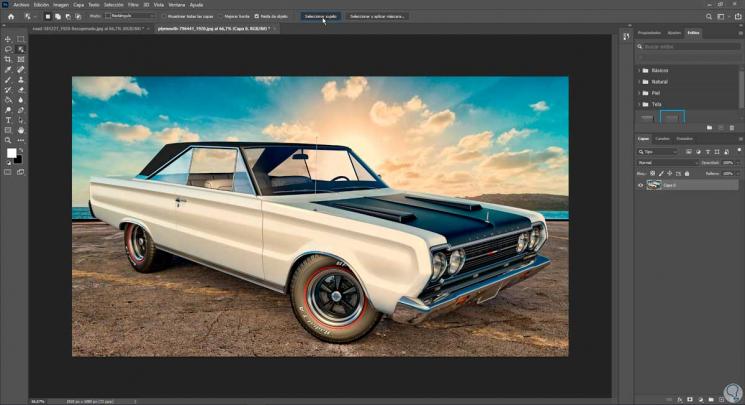
Although we can modify this selection, there is another fast and precise option within the selection of objects to be able to make a selection quickly. This option is named “Select subject”. We will click on it and we will see a much more precise selection that will save us time.
Step 7
If at any time you need to remove or add any part of your selection, you can use one of the 3 selection tools and then switch between the modes of adding or removing selections to correct it.
Step 8
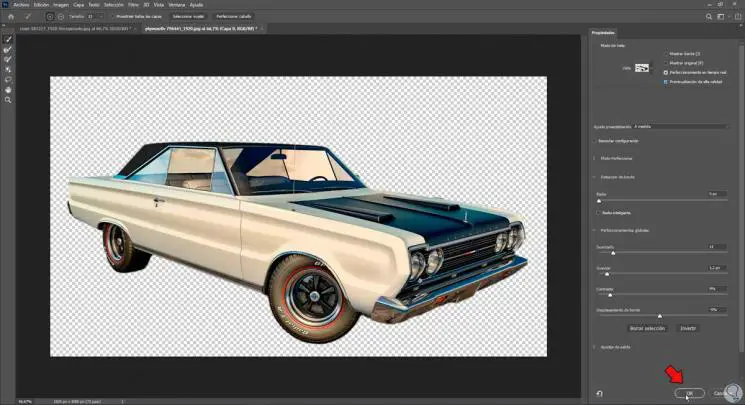
When we already have our selection, we can modify it by clicking on "Select and apply mask".

Step 9
From this window we can adjust our selection with different options such as smoothing. You can go see a preview of the result. To finish, click on "OK"
Step 10
When we have our selection finished, we right click on it and choose "Layer via cut".

Step 11
We can see that the new layer has been created with our selection in transparent mode and without a background. You can delete the original layer or hide it so it doesn't bother you.
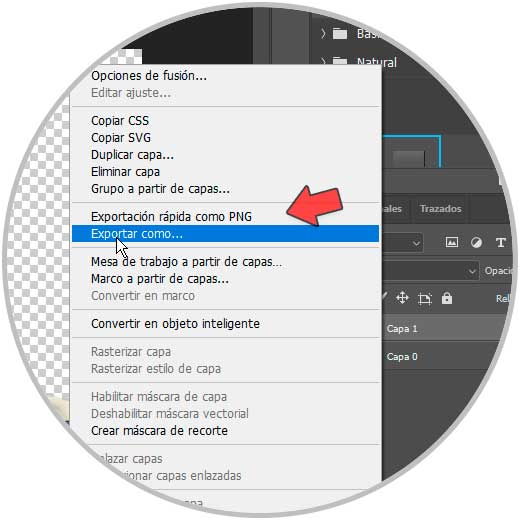
Step 12
To export our image with no background or with a transparent background, we right click on the new final layer and choose "Quick export as PNG" or "Export as".
Step 13
With the option of "Export as" we can configure export options. Remember that you have to choose "PNG" format and activate "Transparency"
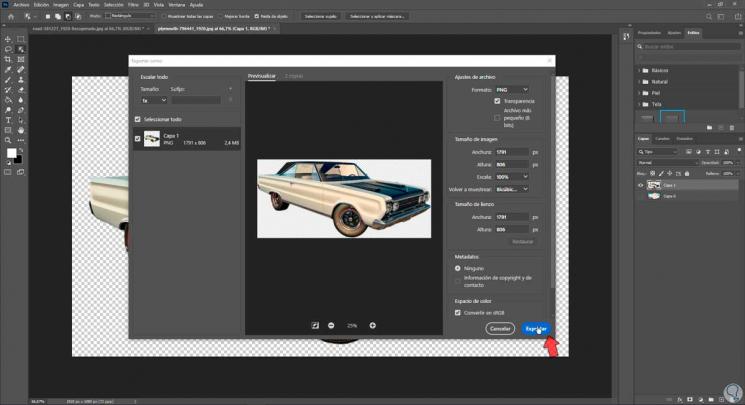
Step 14
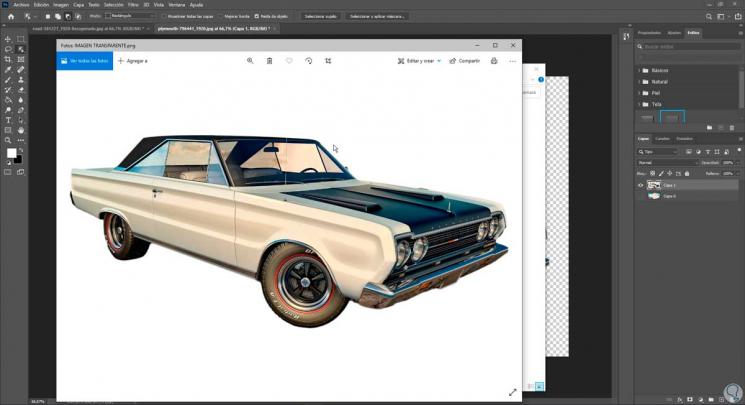
Finish by clicking on "Export" and you will be able to see your final image without a background or with a transparent background
Step 15
If we want to change the background, we will open our New background in Photoshop.
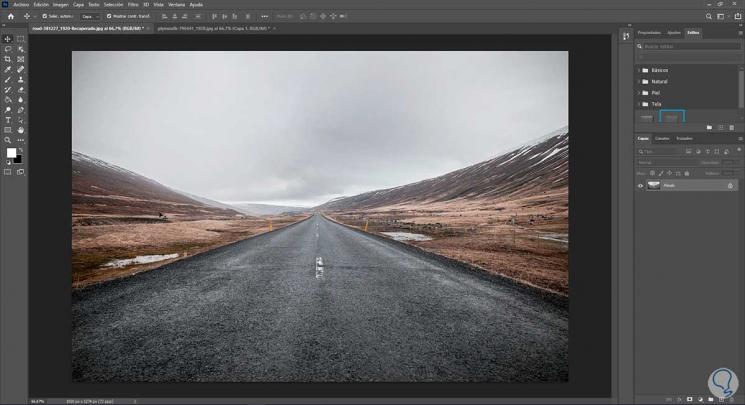
Step 16
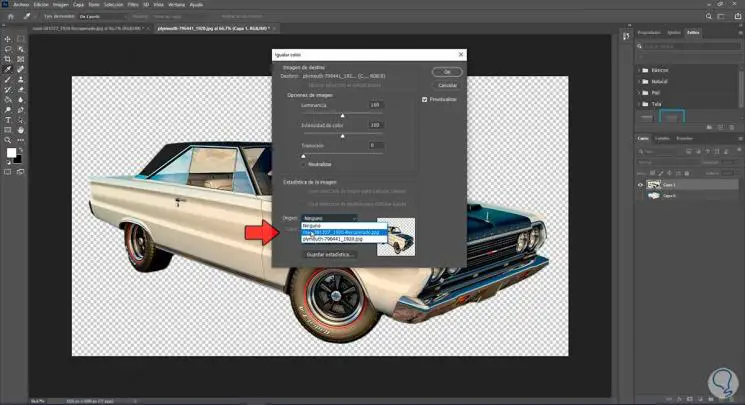
So that the difference in the montage is not noticeable, we are going to match the color of our image without a background with the New background. To do this we go to "Image - Adjustments - Match color".
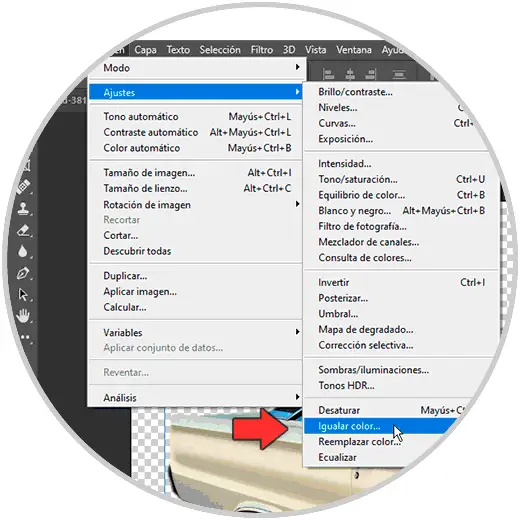
Step 17
In "Origin" select the new background to take the color settings from there and click on "OK". You can modify any image option if you want
Step 18
Now we take the transparent layer to our new background and place it by dragging it.
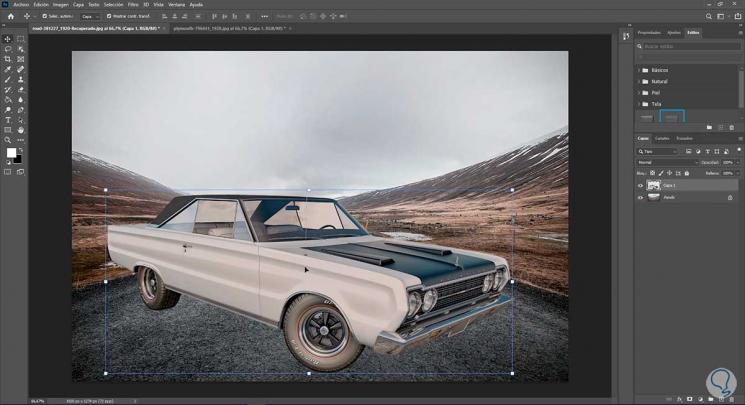
Step 19
After we can adjust our montage as we want, we are going to apply a little lens blur to the background. You can edit the image as you want
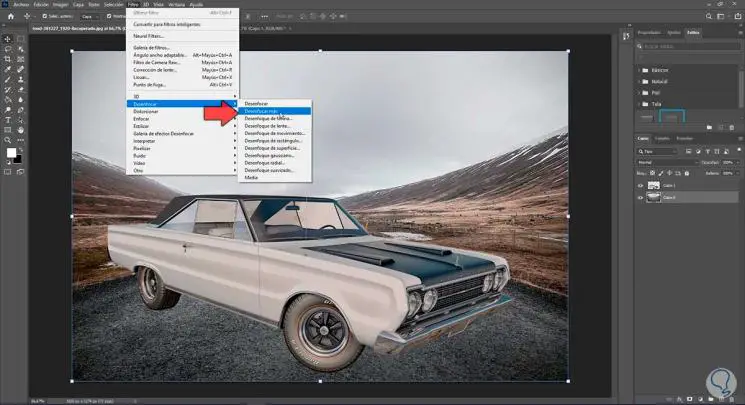
Step 20
To save our image, click on "File - Export - Export as".
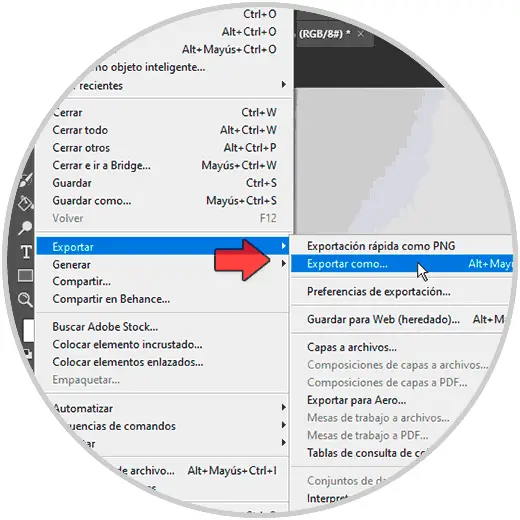
Step 21
We choose the image parameters and click on "Export".
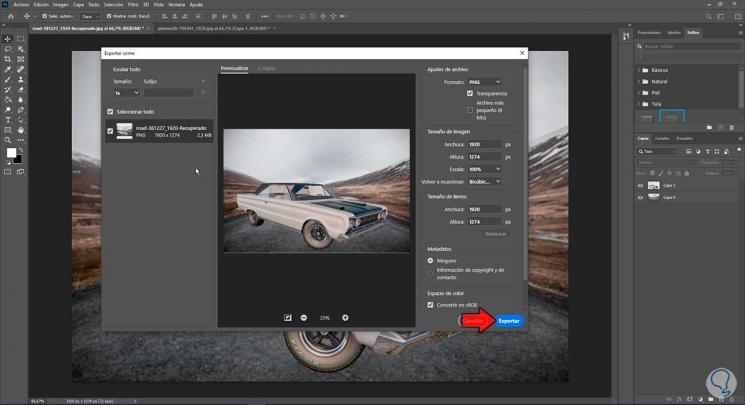
Step 22
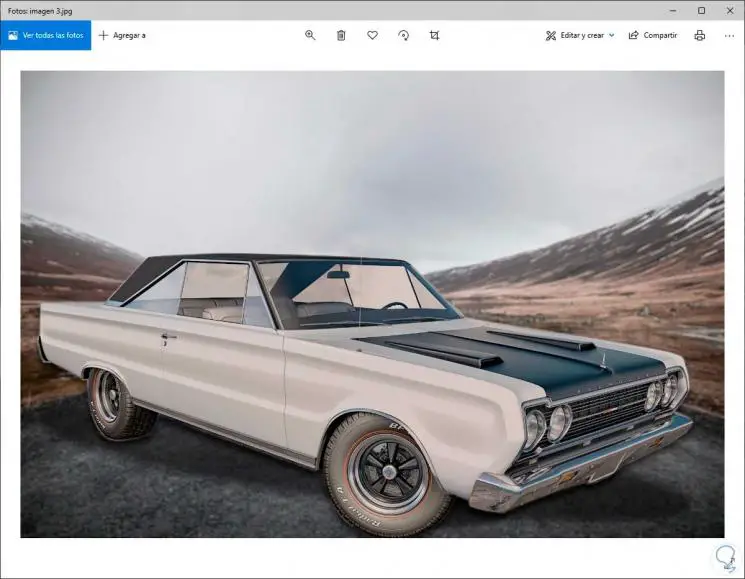
We will have our photo with a new background.
2. Remove or change Photoshop CC 2021 and CC 2020 background with Pen
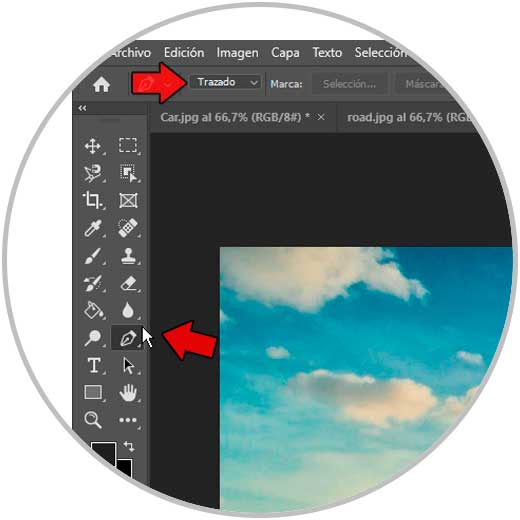
Step 1
We go to the toolbox and click on "Pen" and choose the "Trace" mode
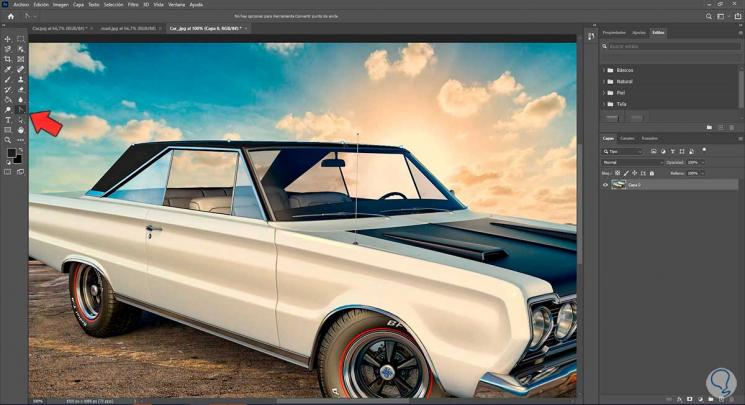
Step 2
Now we will contour our image with the points of the pen, for a better result you should spend more time

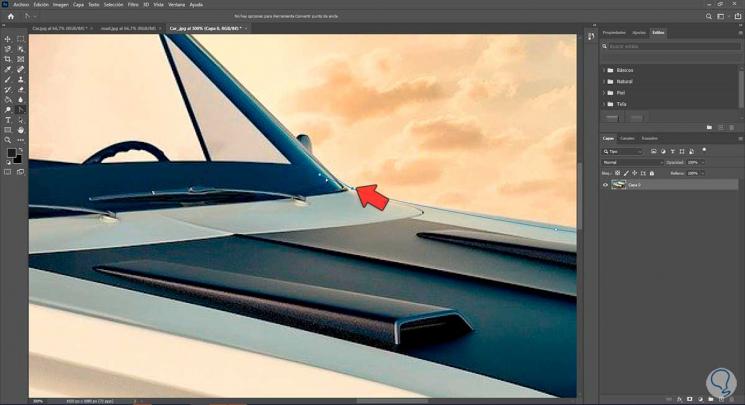
Step 3
Use the "Anchor Point" mode to create curved points in your selection
Click on the point you want to be an anchor point and be able to form a selection with curvature
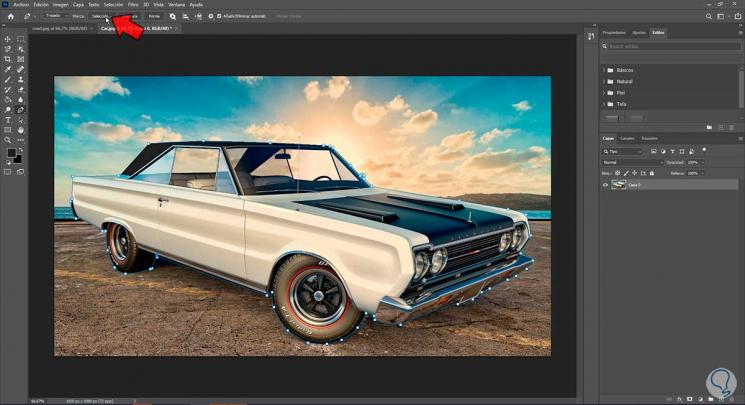
Step 4
Now we will click on "Selection" from the Pen tool.
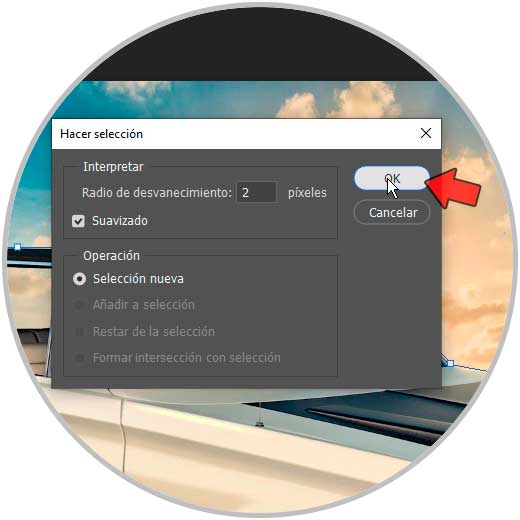
Step 5
Choose an approximate fade of 2 and hit "OK"
Step 6
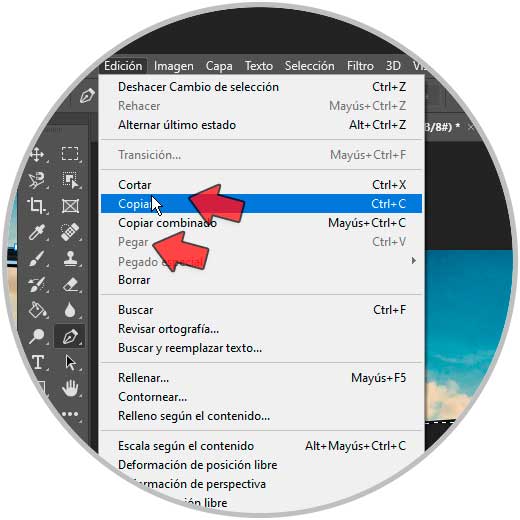
Once our selection is completed, we are going to copy and paste our image from "Edit / Copy / Paste".
Step 7
Now we can save our image as a transparent PNG or change the background. To save our image we will go to "File - Export - Export as".
Step 8
If what we want is to change the background, we will open our new background in Photoshop.
Step 9
To avoid the difference in montage, we are going to match the color of our image without a background with the new background. To do this we go to "Image - Adjustments - Match color".
Step 10
In the "Origin" option select the new background to take the color settings from there and click on "OK". If you want to modify any image option
Step 11
Now take your transparent image to the new background by copying or dragging it.
Step 12
Here you can adjust the mount as you prefer, we are going to apply a little lens blur to the background. You can edit the image as you want by adding other color adjustments, shadows, other cropped images ...
Step 13
In order to save our final image we are going to "File - Export - Export as".
Step 14
We configure the image parameters and click on "Export".
Step 15
We will have our photo with a new background.
In this way we will have been able to change the background to an image in Photoshop or put a transparent background in Photoshop..